Tips For Dry Brush Painting
In this tutorial, learn the best brushes and techniques for a traditional painterly style in digital artwork.
Painterly Brushwork and Canvas Textures
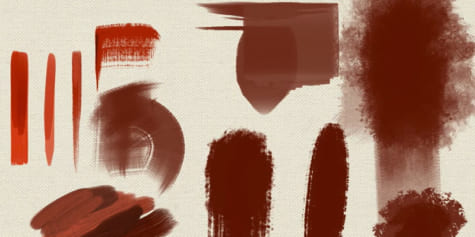
Today I’ll be showing you a small set of Clip Studio Paint brushes I like to use to achieve an oily dry brush effect, like in this painting of a Boston Terrier who desperately wants to be a Dalmatian fire-dog. It has both a lot of syrupy and dry brush edged paint strokes.

First, it’s essential to get into the right mindset when trying to emulate a traditional look with digital tools. We tend to look for one magic brush that does it all, but that doesn’t exist digitally or traditionally. An oil painter uses many different sized brushes, palette knives, or even a rag to achieve a loose painterly style. The goal of this style is to give the impression of detail rather than the direct execution of it.
For digital painting, we want brushes that can create two distinct edges: hard or “found” edges and soft or “lost” edges. The combination of a lost-and-found edge creates a painterly effect and helps guide our eyes to focal points.
In this image, the focal points would be the face or the tip of the paint tube. In these areas, we may have a high concentration of hard or found edges, and in the least important parts, we may have a higher concentration of lost or soft edges. One way to make sure our painting has both lost-and-found edges is to use a handful of brushes that express both well.
I have assembled a shortlist of brushes that I’ve been using recently; three that I’ve purchased and others that I’ve created. The perfect painterly digital brushstroke can easily be controlled and even sculpted into your piece.
Second, for a traditional look, I recommend getting into the habit of painting over a photographic canvas texture. This particular one is from www.fuzzimo.com. They have free high-res canvas textures in addition to a folder of seamless textures.
About Clip Studio Paint
For this tutorial, I’m using Clip Studio Paint, a versatile software for illustration, comics, and animation. It comes with a range of digital art tools and brushes so you can start drawing with it right out of the box. There is also a version available on the iPad.
https://www.clipstudio.net/en/purchase/trial
Brush Introduction
Oil Paint Flat Brush
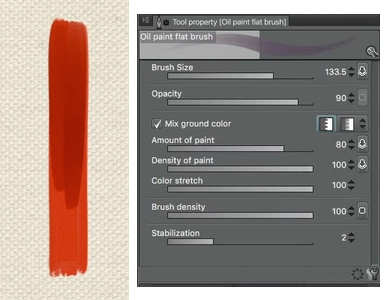
One of the best brushes in Clip Studio is the Oil paint flat brush that comes with the program. It blends nicely right out of the box. I like to use it at around 90% opacity. At 100% it can be completely opaque, but at 90%, you get mid-tone transition colors that you can pick from to paint. You can get a nice transition between hard and soft edges. It also has a great flat chisel shape.
Cat’s Tongue Brush

Next is this Cat’s tongue brush, which is a duplicate of the Oil paint flat brush but has a tapered edge on the front and back end of the stroke. To get this, I set the Oil Paint Flat Brush’s “brush size dynamics” to pen pressure. This setting is in the sub tool details palette. I also reduced the minimum value to about 12% and adjusted this curve a bit to create that tapered look with the paint.
Ink Tapered Raw
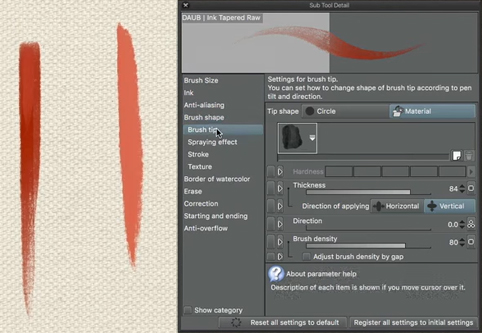
The next brush is from a set I’ve purchased from www.daub-brushes.com. They have an excellent collection of tools for Clip Studio Paint and Manga Studio. I recommend getting the super bundle. However, it can be a little overwhelming to have so many brushes, so I’ve isolated the ones I feel are the best for this particular look. I’ll be using Ink tapered raw and Pigmento 10, which are in the “inks and pigments” folder, and Bristle broom brush, a blender in “dry media.”
Don’t let the name of a brush mislead you into only using it for that application. Ink tapered raw is in the inks and pigments folder, and yet we are using it for a traditional media brush tutorial. Instead, look at the effect that a brush has and use that to your advantage.
I like to use the Ink tapered raw brush at 100%. It is similar to the look of the Cat’s tongue, but it has this nice dry brush texture at the end. It also mixes nicely. Daub created it using scans of natural media combined with watercolor paper. You can always make your own version of this brush, but it’s such a reasonable price that I recommend just buying it.
Flat Ribbon Vertical
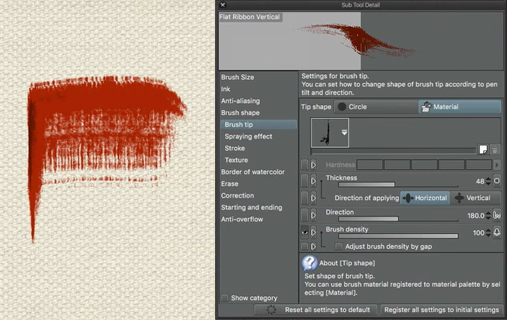
Flat ribbon vertical is a brush I created. It has a vertical chisel and does not follow the direction of your stroke. Instead, when you move across, it gives a nice disrupted feel, almost like a palette knife.
Flat Ribbon
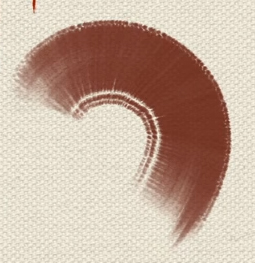
Flat ribbon is pretty much the same as Flat ribbon vertical, but the direction of the brush tip is set to the direction of the line. This means that the texture wraps around and follows the brushstroke.
Flat Ribbon Horizontal
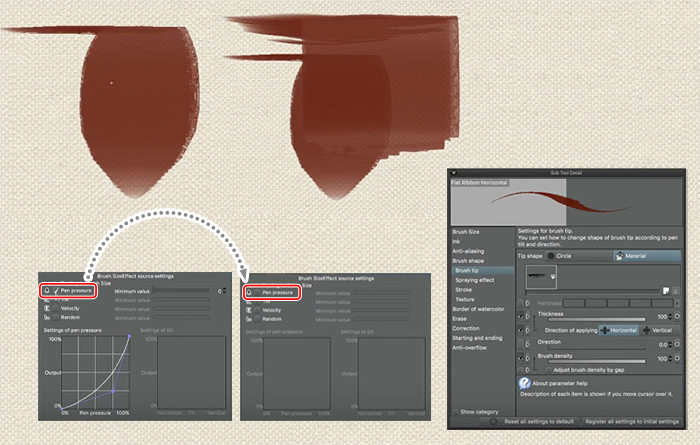
Flat ribbon horizontal is pretty much the same as Flat ribbon vertical except, it creates nice hard edges and has a flat texture upon drawing a downwards stroke. This one also has some brush size settings applied to it that I turn on and off depending on what I’m doing.
Flat Ribbon Soft
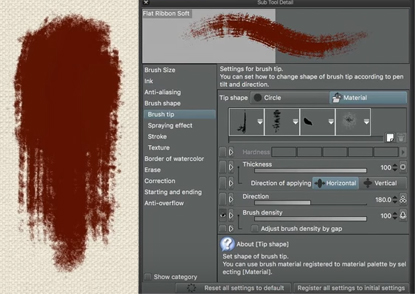
Flat ribbon soft is essentially the same as flat ribbon, except with a few more textures from the Clip Studio materials library. I often look for brushes that are going to give unplanned, spontaneous edges for a dry brush look. If I use my mouse, you can see that Clip Studio is selecting different patterns as I click. It randomly applies as many textures as it was loaded up with. It also presents these interesting terminal shapes that I would have a hard time painting.
Flat Ribbon Soft [S]
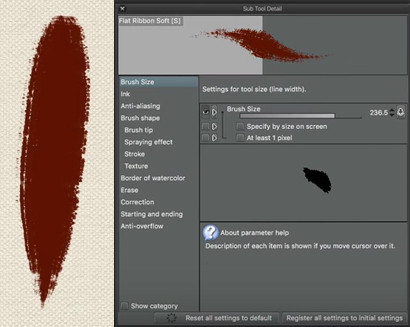
The next brush is Flat ribbon soft [S] which is the same brush as Flat ribbon soft except that the size is affected by pen pressure, so it has a little bit of a taper at the end. By experimenting with the pen pressure and the size or density of textures, you can get a controlled variation with just a handful of brushes as long as you know what they’re doing and how they’re different.
You don’t have to use these brushes. You can create your own with my free Youtube video tutorial on Clip Studio Paint basics, where I explain how to create a brush out of a black and white shape.
Pigmento 10
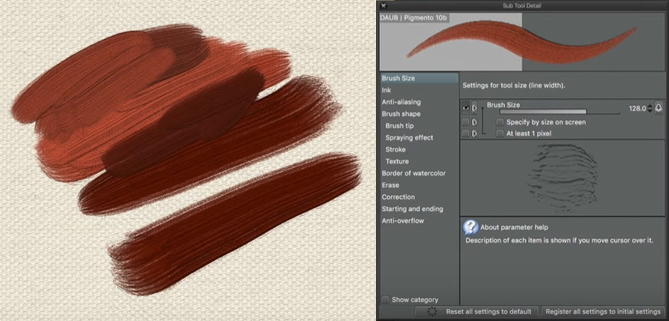
Pigmento 10 is an interesting brush from the Daub set. It forces a shadow into the paint color. It can be tempting to paint directly with this brush, but I find that as I’m color picking intermediate colors, I pick up the black shadow color which makes it hard to keep the color pure and clean. One of the ways I use Pigmento 10 is with a low opacity, around 20%. I pick a color over an existing stroke, paint on top of it and end up getting a shadow color that augments the existing brushstroke.
Brushwork Theory
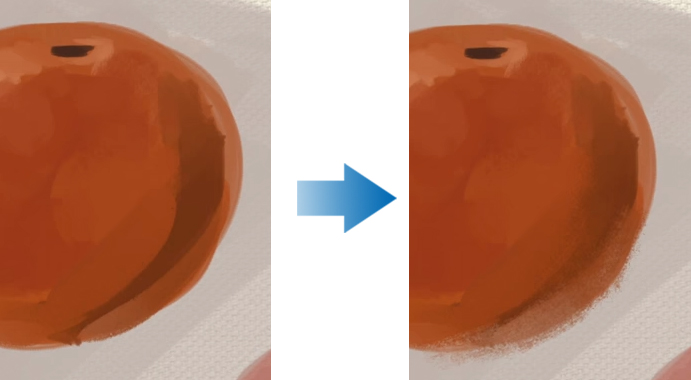
Going to the theory, what we’re looking for in our brushstrokes is the transition between lost and found edges. When I say “lost” and “found,” we also mean soft and hard edges. This is the mindset to keep as we’re building our brushwork.
Found Edge to Lost Edge
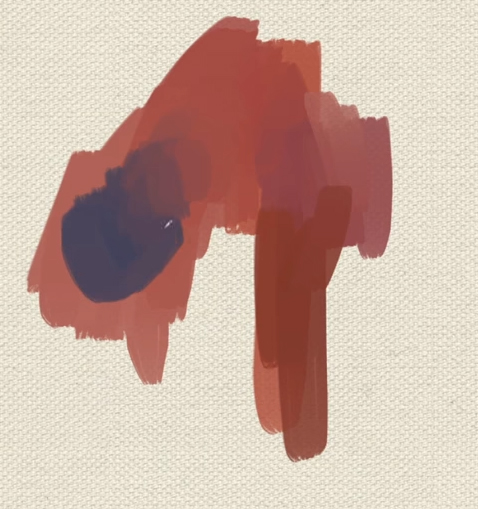
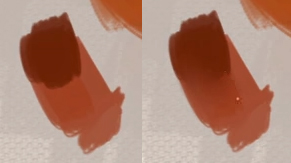
There are different ways to get from one kind of edge to the other. One way is to start with a found edge and move to a lost edge.
Here we have gray undertones at 60% opacity, orange at 90% opacity and shadows laid with the Oil paint flat brush. It has a lot of found or hard-edged brush strokes, without a lot of dry brush lost edges. Then I can go to one of my lost edge brushes and start color picking from the image and start finding those transitions with this Ink tapered raw brush. When you use this brush at these at large sizes, you get a lot of spontaneous edges.
Lost Edge to Found Edge
Another way is to start with a lost edge and move to a found edge.
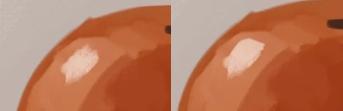
Using the Ink tapered raw, you can make a rough lost edge brush stroke and then come in with the Oil paint flat brush to create a hard edge. I’m looking to create a contrast of shape into a brushstroke that disappears.
No matter which way you start, with a hard/found edge and moving to soft/lost edge, or vice versa, there’s no one right way to do it. I tend to start with a lot of found edged planes so I can understand what the shape of my subject matter is and then I have a lot of fun finding the lost edges.
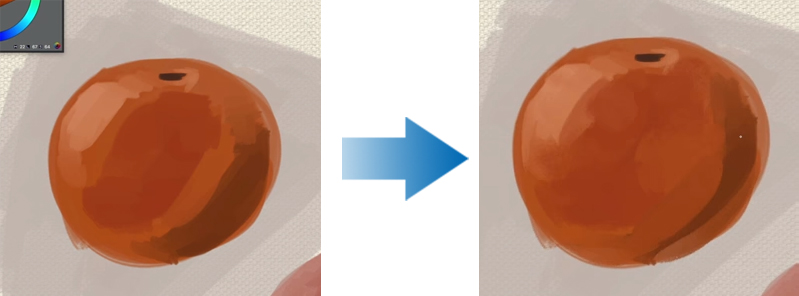
Blending Edges
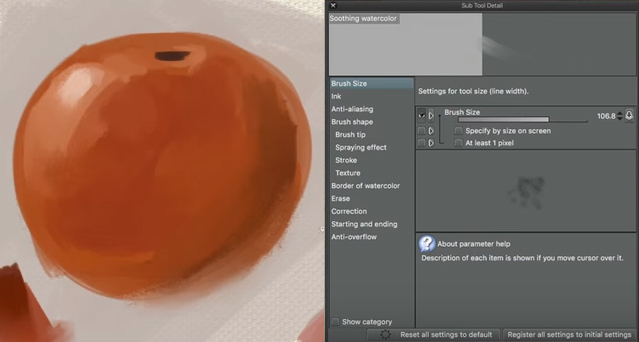
The other option to turn a found edge into a lost edge is with blending tools. Clip Studio Paint comes with a beautiful blender called Soothing watercolor. Again don’t be fooled by the name, because we’re using it for an oil painting look.
The third Daub brush that I like to use is called Bristle broom. Even though it’s in the brush folder, I move it into the blenders folder so that when I hit J, I have access to it as a blender. It does the same thing as Soothing watercolor, except it has a slight tooth to it, so it doesn’t blend as smoothly as Soothing watercolor.
I then finish off with my Daub Pigmento brush. I tend to use this brush at around 10% to 20% because you can easily overwork the edges with it. I use it to blend out some of that sameness that a digital brush can leave.
Finishing Up
So how can you put this into practice? If you head over to Gumroad.com\RubenLara, you can find an instructive tutorial called Simple Dry Brush Technique on the making of this painting Equal-opportunity Fire-dog. It uses only a few brushes, and more importantly, it helps you understand a method and a mindset when going for a traditional look with digital tools. It also shows how to set up a canvas texture using a repeating image tile and includes the brushes I made from this demo.
https://gumroad.com/reubenlara
Please note that the Daub brushes are not included, but you can get them from those awesome folks at Daub.
I hope this was helpful! Remember that good art doesn’t rely on the perfect brush system or painting tool, but rather on your creativity and storytelling!
Reuben Lara is a traditionally trained artist who primarily uses Clip Studio Paint and Adobe Photoshop and provides free training for beginner and intermediate artists through video tutorials. He reviews basic tools that are affordable and accessible and teaches production-proven techniques and methods that he’s been using for over 20 years in the design and illustration industry. He seeks to help artists learn how to enjoy painting in the digital workspace overcome technical hurdles so they can start having fun when creating art.