Pen Settings for Anime Art in Any Style
In this tutorial for beginners, designer/illustrator Sin:cK introduces some recommended pen and brush settings for different art styles, including watercolor, thick paint, anime cel shading, and CG illustrations!
Until you get used to digital painting, you might be wondering how to set up your pen and brush tools for a particular painting style.
I’ll introduce some brush settings that I use for different painting styles.
Pen and brush settings differ depending on the software. In this tutorial, I will use Clip Studio Paint and SAI as an example.
Basic pen settings
Since Clip Studio Paint has so many customizable pen settings, it can take a long time to understand every single feature.
In this tutorial, I’ll introduce some of the most useful features.
Here’s an overview of the different pen settings.
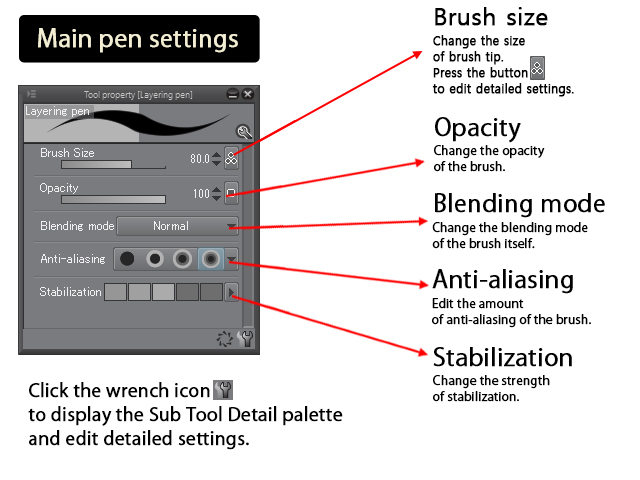
Brush size
Change this value to alter the brush size.
Click the button at the right to edit the pen pressure settings.
Opacity
Changing this value affects the transparency of the brush itself.
Blending mode
Change the brush’s blending mode.
This feature is similar to blending modes for layers, but with some extra settings such as “Delete” and “Background” which are unique to brush settings.
Anti-aliasing
Anti-aliasing smoothens the drawn line to avoid jagged lines. You can choose from four strengths of anti-aliasing.
Stabilization
Change the amount of stabilization.
Now, I will explain various ways of painting and the pen settings I use.
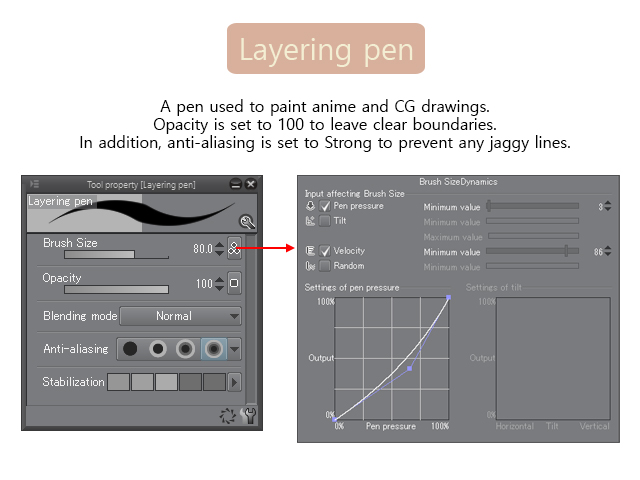
Anime painting

The main feature of anime painting is sharp boundaries.
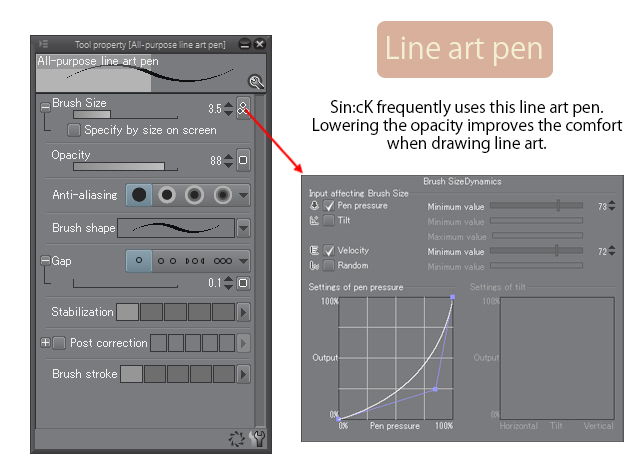
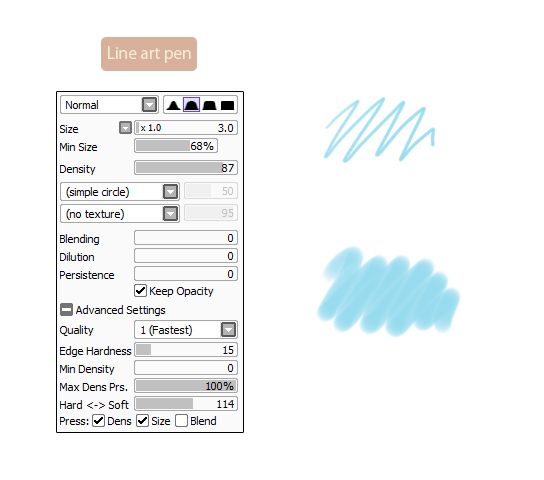
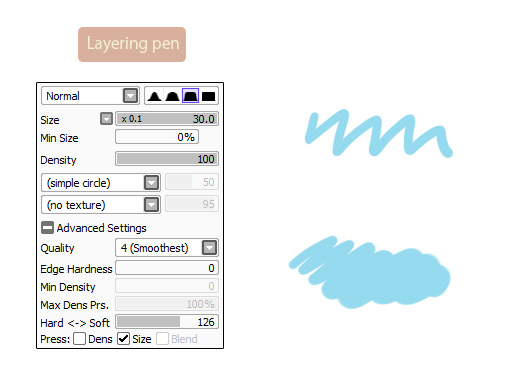
This method mainly uses solid fill, so I will use my customized line art pen and painting pen to create my illustration.
Clip Studio Paint pen/brush settings
SAI pen/brush settings
Painting steps
The steps for anime-style cel shading are as follows:
(1) Fill the line art using the bucket tool.
(2) Create another layer above the base color layer and clip to the fill layer.
(3) On the clipped layer, use the painting pen to paint the shadows. I recommend you to chose a shadow color with the same luminosity as the base color, as it will make the illustration look neater.
CG painting
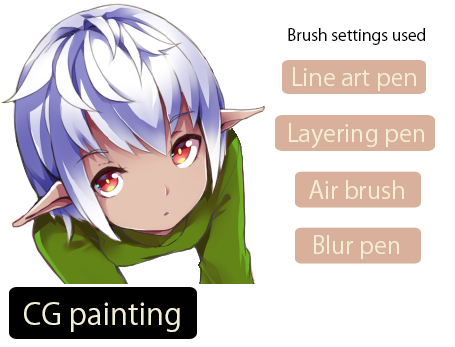
CG painting, also called “2DCG” is a Japanese style of painting that is like a more detailed version of anime-style painting.
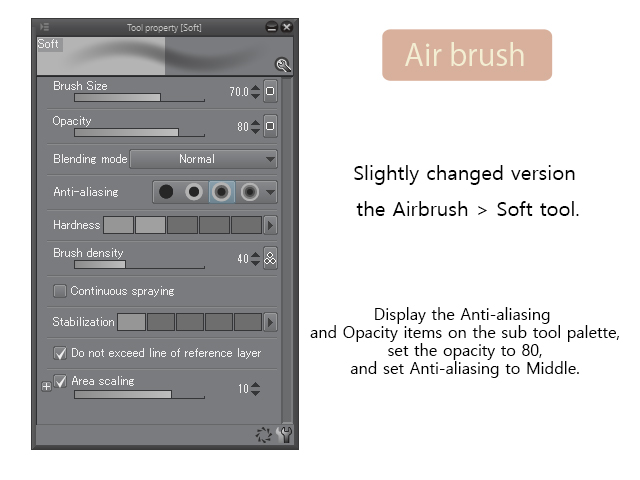
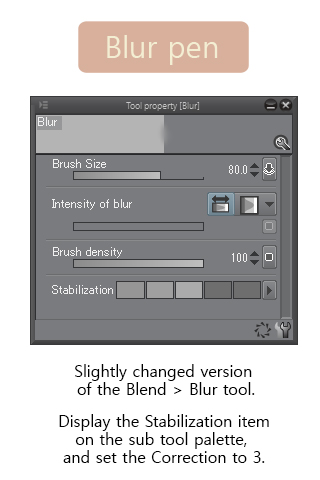
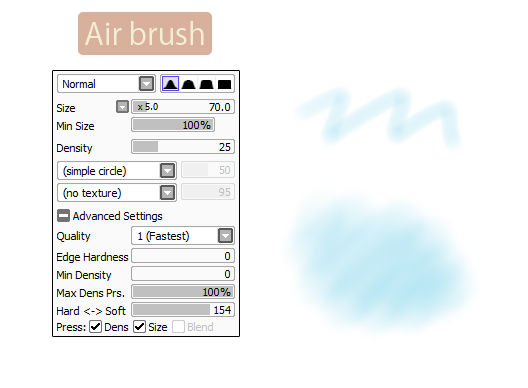
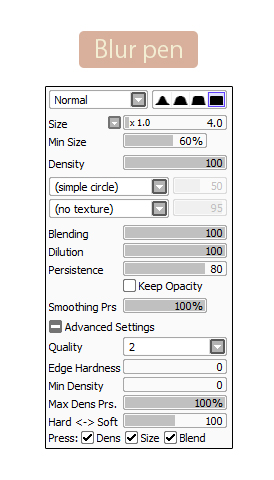
Use tools such as the airbrush and blur pen after anime-style painting to achieve this effect.
I created the above illustration using the line art pen, painting pen, air brush, and blur pen.
Clip Studio Paint brush/pen settings
SAI brush/pen settings
Painting steps
The steps for CG painting are as follows:
(1) Use the same layer structure as anime-style painting. Select the layer with the shadow, and remove the sharp edges of the shadows with the airbrush and blur pen.
(2) Create a multiply layer above, and paint some gradients with the airbrush.
(3) Create another multiply layer above, and paint in darker shadows using the painting pen. Then, continue to smooth out the edges of the shadows.
(4) Create an overlay layer above and adjust the overall color. Use screen layers if necessary.
Watercolor painting
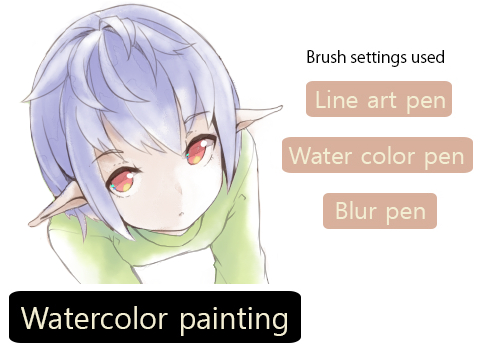
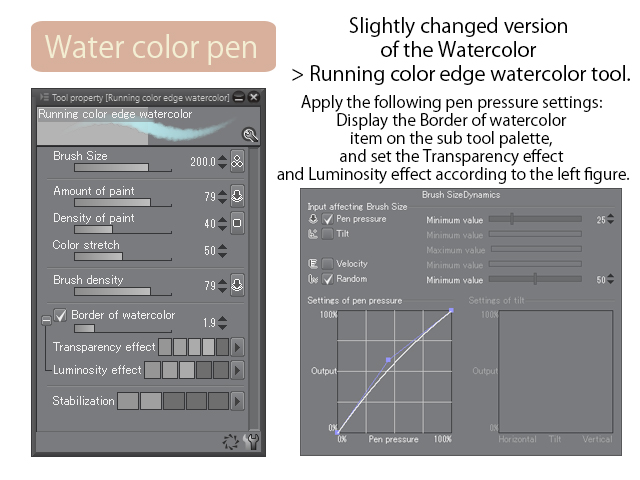
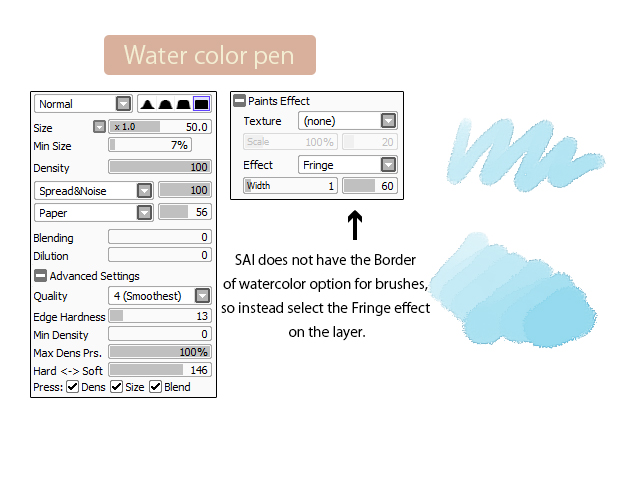
The faint colors of watercolor painting create the effect of traditional painting. In order to create this natural effect, I use brushes with a watercolor border and texture added.
In addition, you can also add a paper-like texture using the Overlay” or Multiply blending modes at the top of the layer palette to add the the traditional effect.
I used the following watercolor pen.
Clip Studio Paint pen/brush settings
SAI pen/brush settings
Painting steps
The steps for watercolor painting are as follows:
(1) Paint roughly using the watercolor pen. Leave some of the white base color to make it look like watercolor painting.
(2) Then, create a layer above and use the airbrush to paint white color. It’s best to avoid painting too much white.
(3) Repeat steps 1 and 2 to adjust the entire illustration. Create an overlay layer above and adjust the saturation.
(4) In order to strengthen the traditional effect, add a layer on top with a texture set to Screen or Overlay.
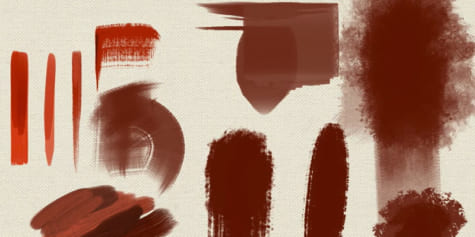
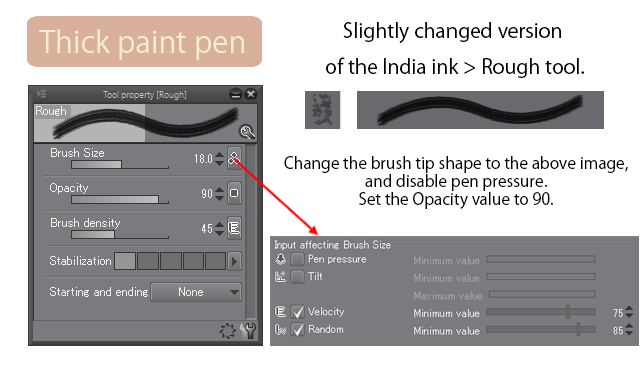
Thick painting
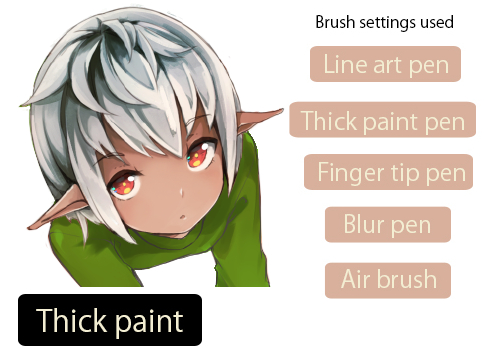
Thick painting creates a three-dimensional effect by painting repeatedly with thick paint brushes and smudging brushes.
This example uses line art, but some painting styles don’t need any line art.
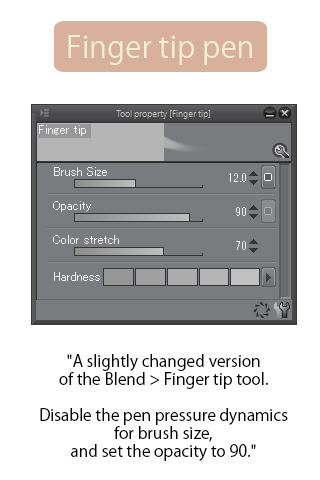
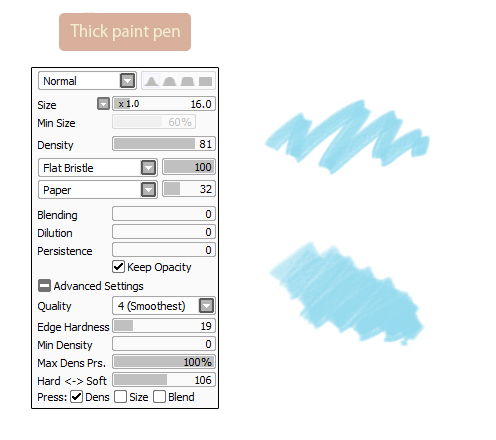
Clip Studio Paint pen/brush settings
SAI pen/brush settings
Painting steps
The steps for thick painting are as follows:
(1) Prepare the line art (if needed).
(2) Use the thick paint pen to paint roughly. In contrast to watercolor painting, avoid leaving any white parts.
(3) On the same layer, use the thick paint pen to paint darker colors.
(4) Then, use the finger tip pen and blur pen to smoothen the boundaries between colors while leaving the drawing marks.
(5) Repeat steps 2 to 4. As a final adjustment, create a multiply layer and overlay layer above, and use the airbrush to create an overall gradient.
Was this tutorial useful?
There is a high degree of freedom with pen settings, so you can change the settings as you like.
I listed some examples of pen settings, but feel free to adjust these settings to create the perfect tools for you!.
Adjusting the pen settings is a good way to find the best tools for your art style.
Arrangement/Words/Illustration: Sin:cK (Homepage → https://sinckbox.wixsite.com/home)