Paint Anime Eyes in 6 Steps
Make your color manga illustrations stand out with brilliant eye colors! Learn how to paint eyes in 6 easy steps, complete with a downloadable image!
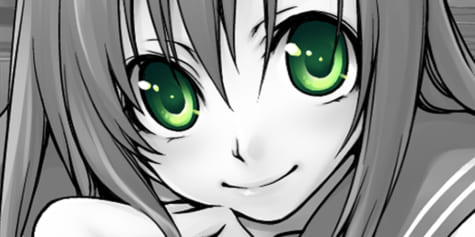
In this lesson, learn how to draw manga eyes digitally!

You can download this manga drawing to follow along with the tutorial as practice! (The image is a PNG with a transparent background.)

How to save the manga line art
- On PC: Right-click the image, select “Save image as… ”, then rename the image and save it to your device.
- On a smartphone or tablet: Long-press the image and save the image from the pop-up menu. The image will be saved to the “Gallery” or “Photos” app on your device.
When opened with the default smartphone app, the image may appear completely black. This is due to the transparent background being displayed as black. Don’t worry! The line art will be correct when opened in a drawing app.
Step 1. Importing line art
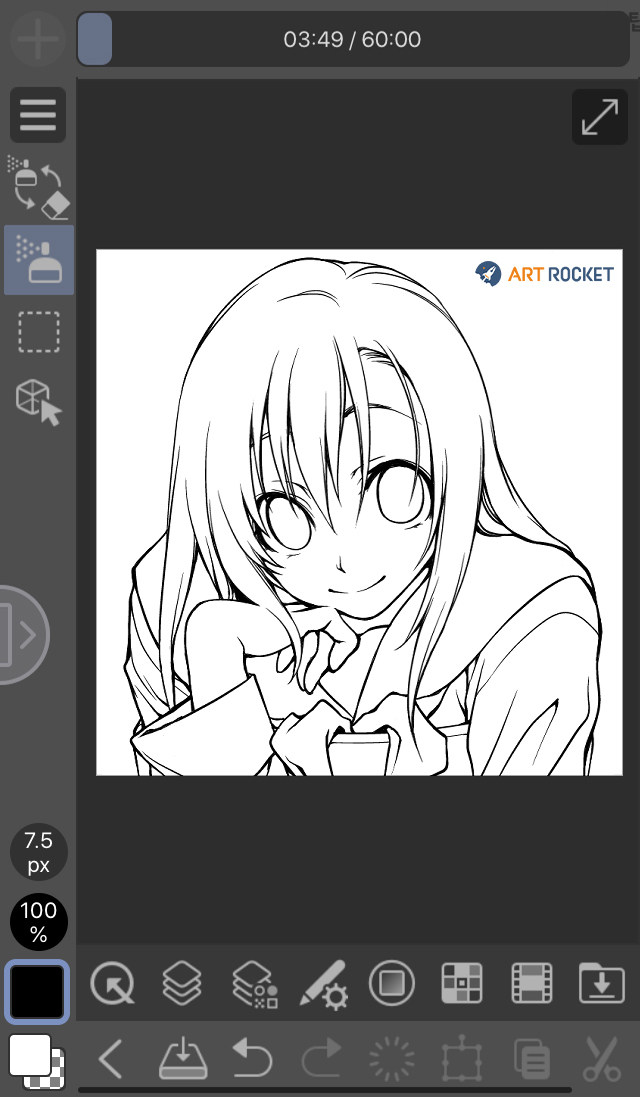
Let’s start by importing the image you just saved to the canvas of your drawing program.
In this tutorial, I used Clip Studio Paint for iPhone.
Download the iPhone version from the AppStore. All functions can be used free of charge for one hour every day and can be used without any time limit with an in-app purchase.
Start Clip Studio Paint, open the Manage works screen, and select the Create new from photo library button at the bottom center of the screen.
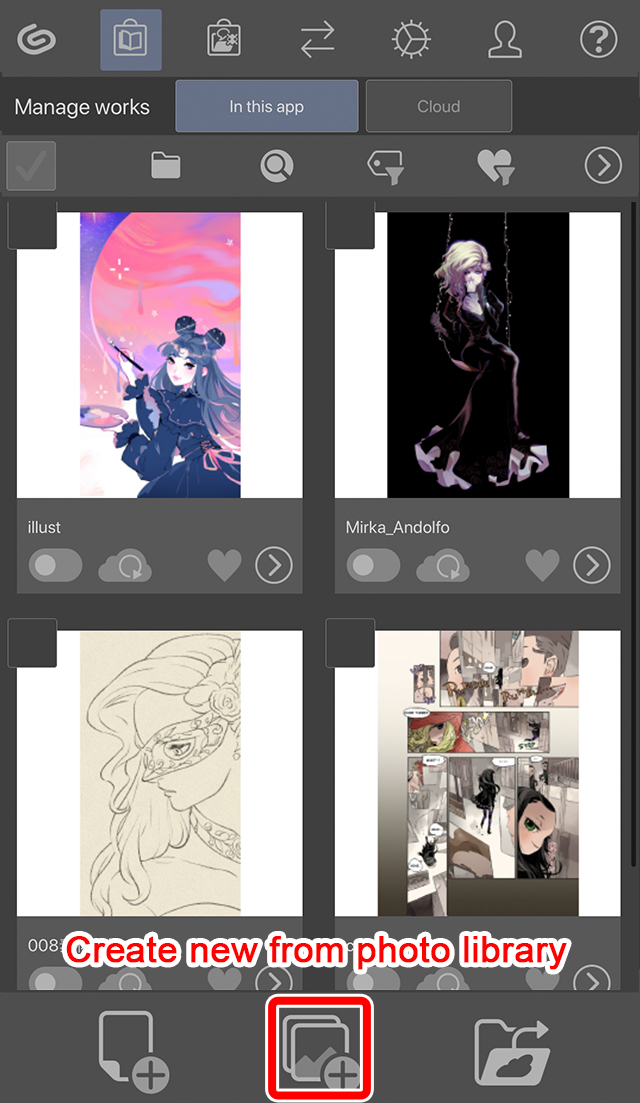
Select and open the downloaded line art of the anime girl from your photos.
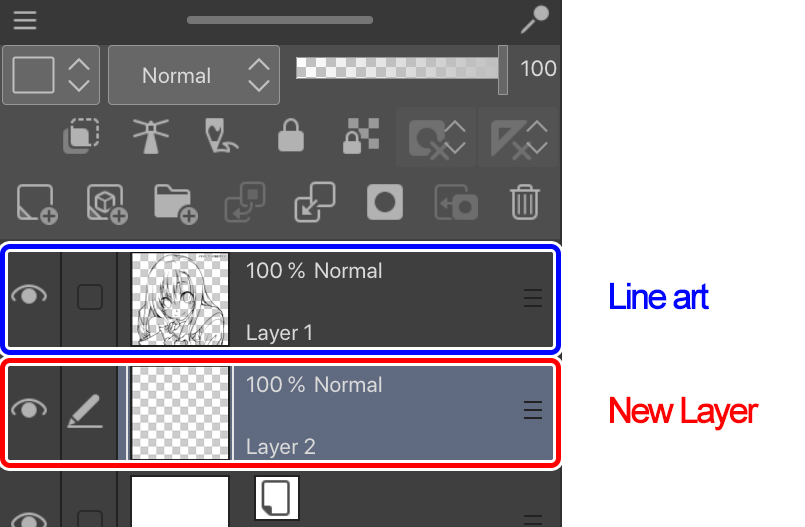
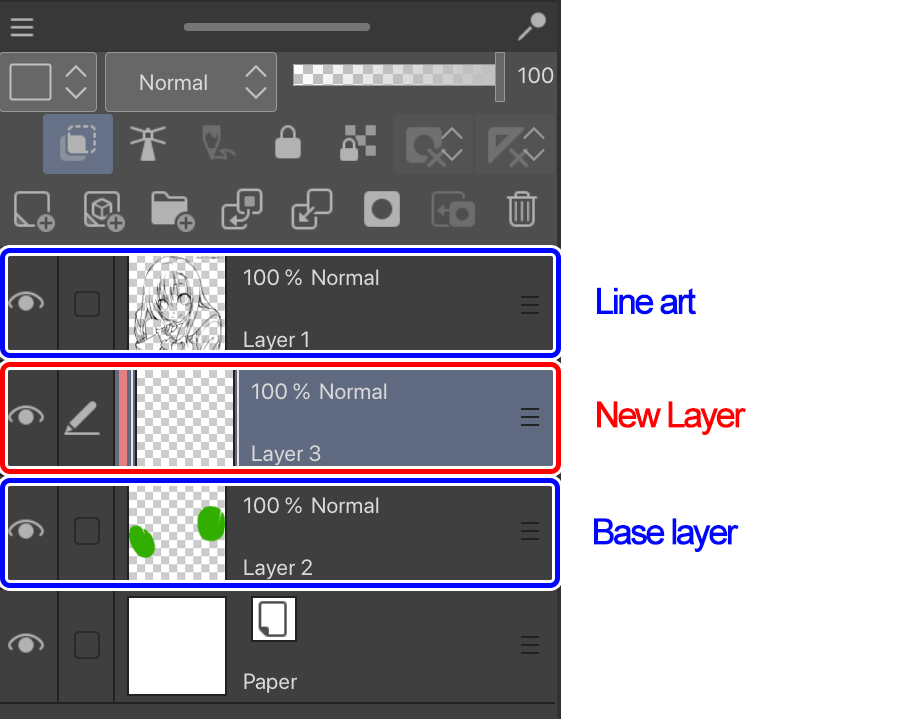
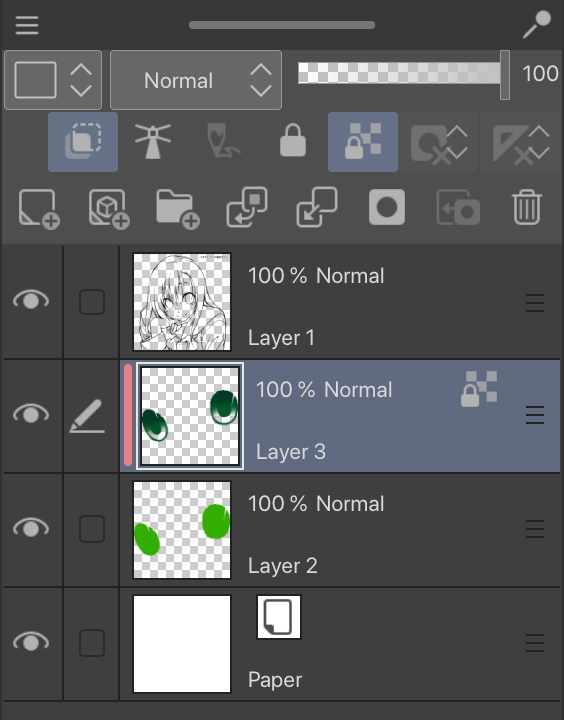
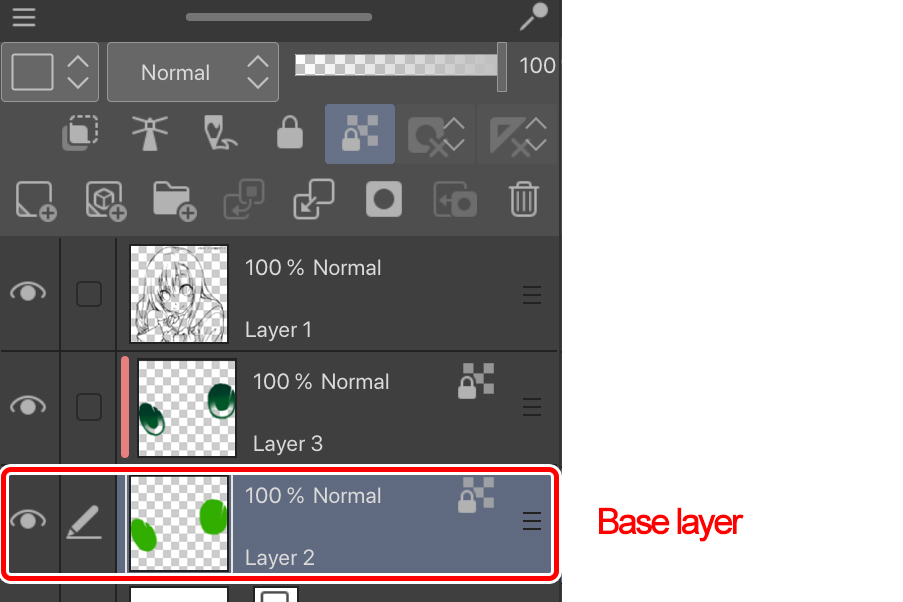
Step 2. Create a base layer
The line artwill appear to be drawn on a transparent film or “Layer.” When coloring, make sure to create a separate layer for you to paint on.
Starting with a base layer, create a new layer under the line art.
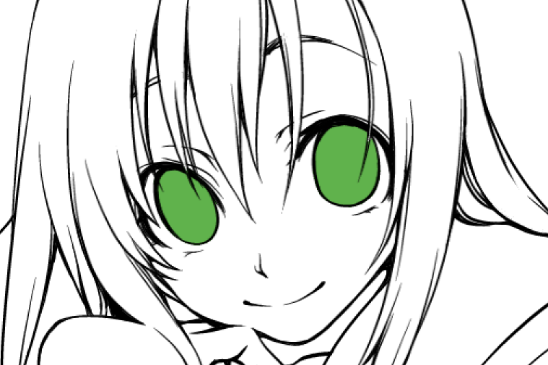
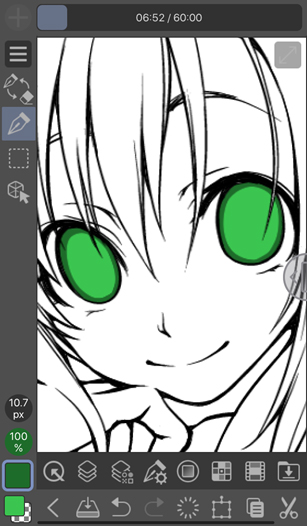
Step 3. Laying down base colors
Using fill tools, fill in the inside of the eye.
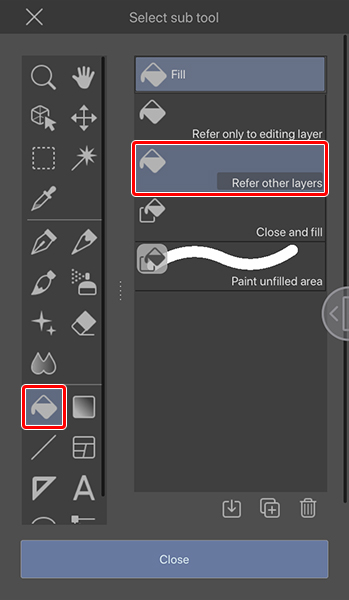
As this is just the base, don’t worry about shades. Focus on making sure that there are no gaps between the line art and the fill color. Use the eraser tool if the paint goes outside the line, and use the pen tool if there are small gaps.
Once you’re done, you’re ready to start making more details.
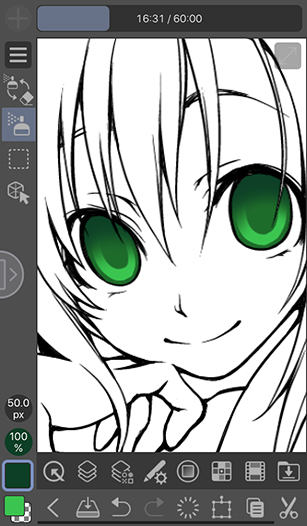
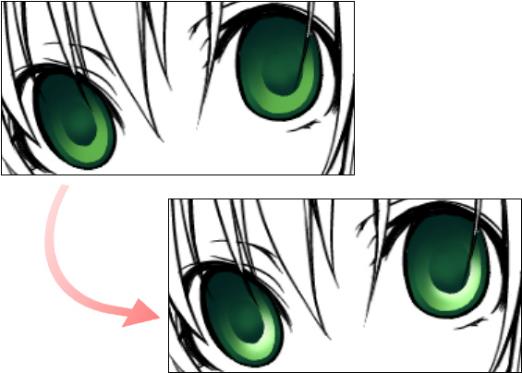
Step 4. Shade the iris
Adding a new layer above the layer we made in step 3, let’s start shading the iris.
Selecting the new layer, tap the Clip to Layer Below button.
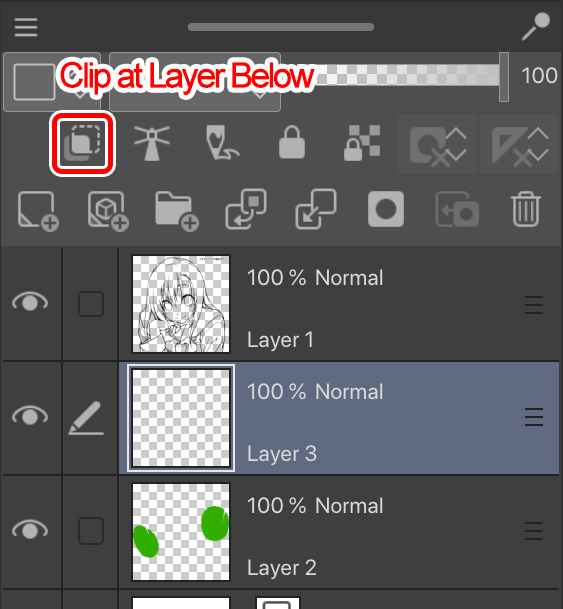
This will clip the new layer to the base layer,
limiting the area that the new layer can paint on to the area painted in the base layer.
When shading, I use two brushes: a hard brush that can draw sharp lines, like a pen or pencil, and a soft brush that can draw soft outlines, like an airbrush.
- Using the pen tool with a slightly darker color than the base, follow the inside of the iris.
2. Using the airbrush tool, color in the upper half of the iris.
3. Draw the pupil in the center of the eye.
Next, we’ll add darker shades to add depth to the eye and blend the line art and eye.
You can save a lot of time at this step if your app has a Lock transparent pixels or Lock alpha function.
With the shading layer selected, select Lock transparent pixels from the layer palette command bar.
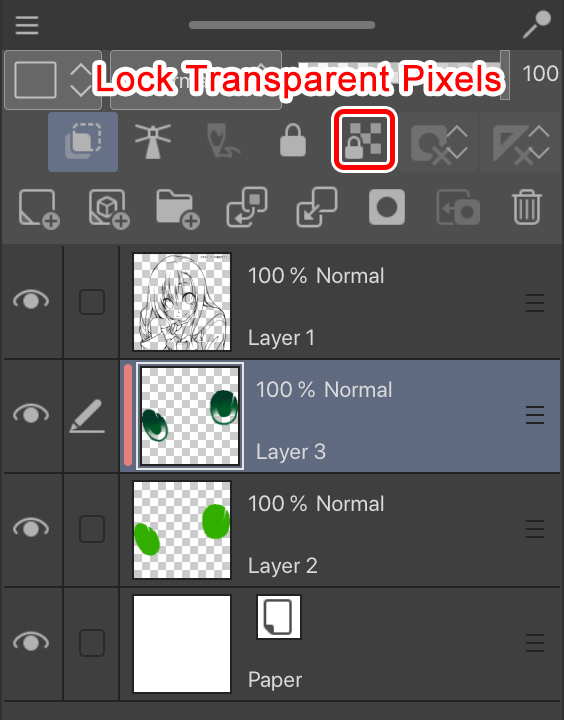
This will lock the transparent pixels
and leave only the opaque pixels editable.
4. Using the airbrush tool, layer colors to blur the border between the iris and the lines of the eyelid.
Make sure to keep the darker shades within the width of the area you added in step 2.
5. Do the same with the bottom half of the iris, and paint over the line art with a darker color.
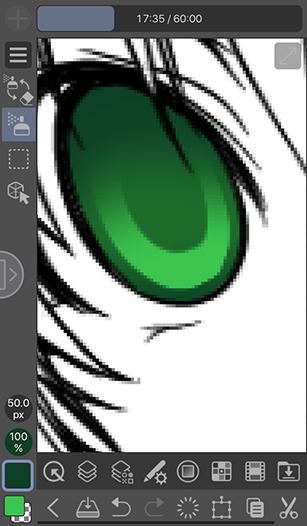
6. Add darker shades to the pupil. I added them to the bottom in the example. In the image below, the lower half is darkened.
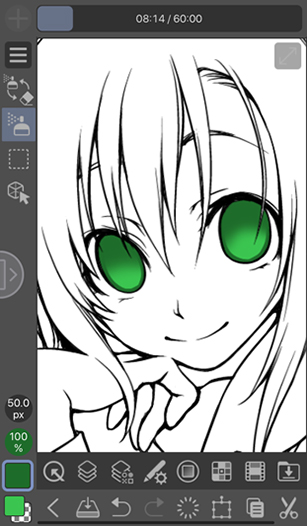
Step 5. Adding lighter shades
Going back to the base layer at the bottom, let’s brighten parts of the base layer to add contrast. The same as before, a Lock transparent pixels function will come in handy here.
Using the airbrush tool, add brighter shades to the bottom right section of the base layer. Make sure to adjust this based on your lighting.
Another thing to be careful about is not to use white as a highlight shade. Using white will make the area too bright or seem a bit rough. Instead, use bright/pale colors that are similar to the base color, environment, or character’s clothes.
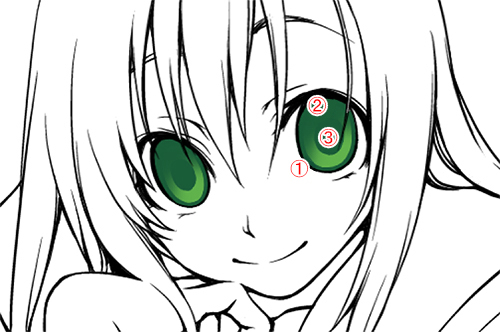
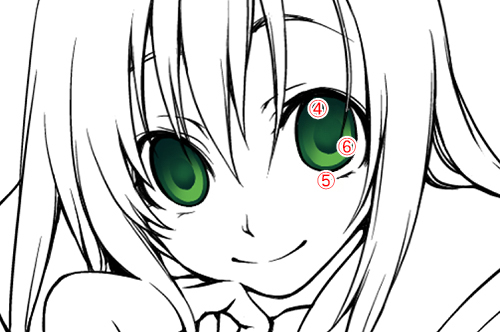
Step 6. Adding highlights and finishing touches
Finally, let’s add highlights. Highlights are essential, as they give eyes a spark of life.
You can also remove highlights to show lifeless eyes.
When adding highlights, add a new layer above the line art. By drawing a highlight over the line art, the entire eye will have more depth.
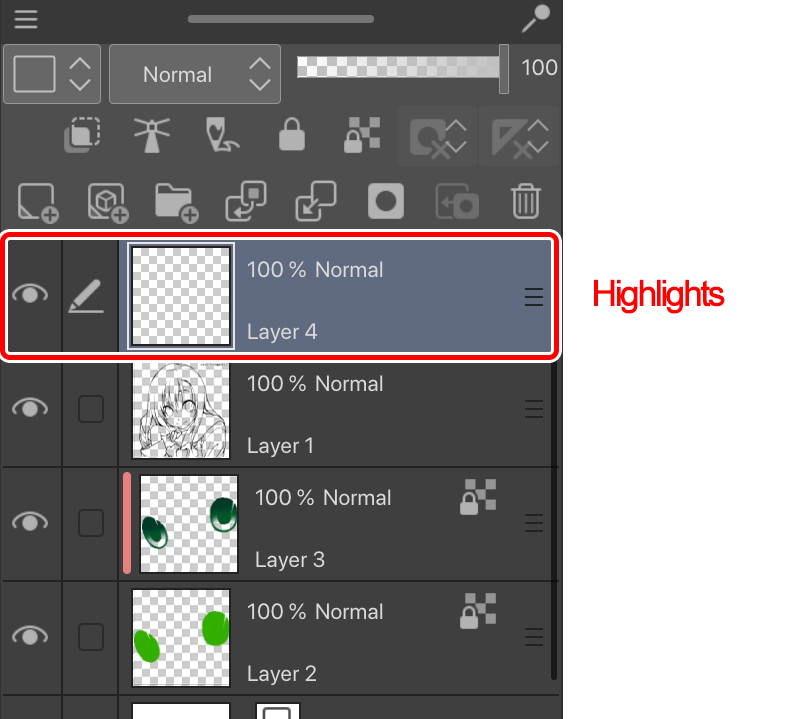
Decide where you want the character to be looking and then add highlights accordingly.
I want her to look up at the viewer so I added highlights to the top left.

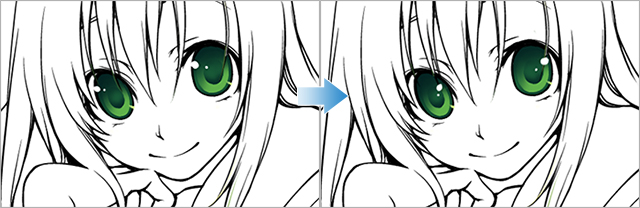
That’s it!
Highlights change depending on the direction of the light in the scene and direction the character is facing. Try out a few angles to see what angle works best for you. This will be important in giving life to your manga character.
Summary
In this lesson, we went through the basic steps of how to paint an iris and pupil for a manga character. There are a lot of variations you can play around with the same concept, such as the size of the iris and highlight, the overall color scheme, and the position of each part. Try experimenting with your anime style characters, and find the combination that works best!
Interested in character art & design or what it takes to become a character designer?
Check out the link below!