2D Animation for Beginners: Ultimate Tutorial and Workflow [Video]
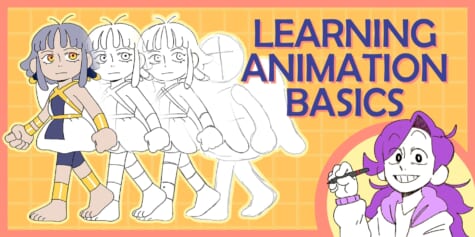
Discover the basics of animation with Omnific. This tutorial covers the key principles of animation and to how to apply them to create your own mini-animation.
Contents
Are you someone who has always admired 2D animation in media, whether it be movies or shows? Inspired to bring your own creations to life, but don’t know where to start? Well, look no further! In this article, we’ll go over the most important basics of animation and how start your animation journey from scratch.
Hello! My name is Omnific, or Omni for short. I enjoy creating art and animation just for fun. I’m no professional, but I love sharing what I’ve learned on my art journey to help you along yours!
I will be using Clip Studio Paint EX to animate due to it having a timeline that is good for managing layers like the animation folders. It also has some great brushes that are customizable to make them look more traditional, which I prefer.
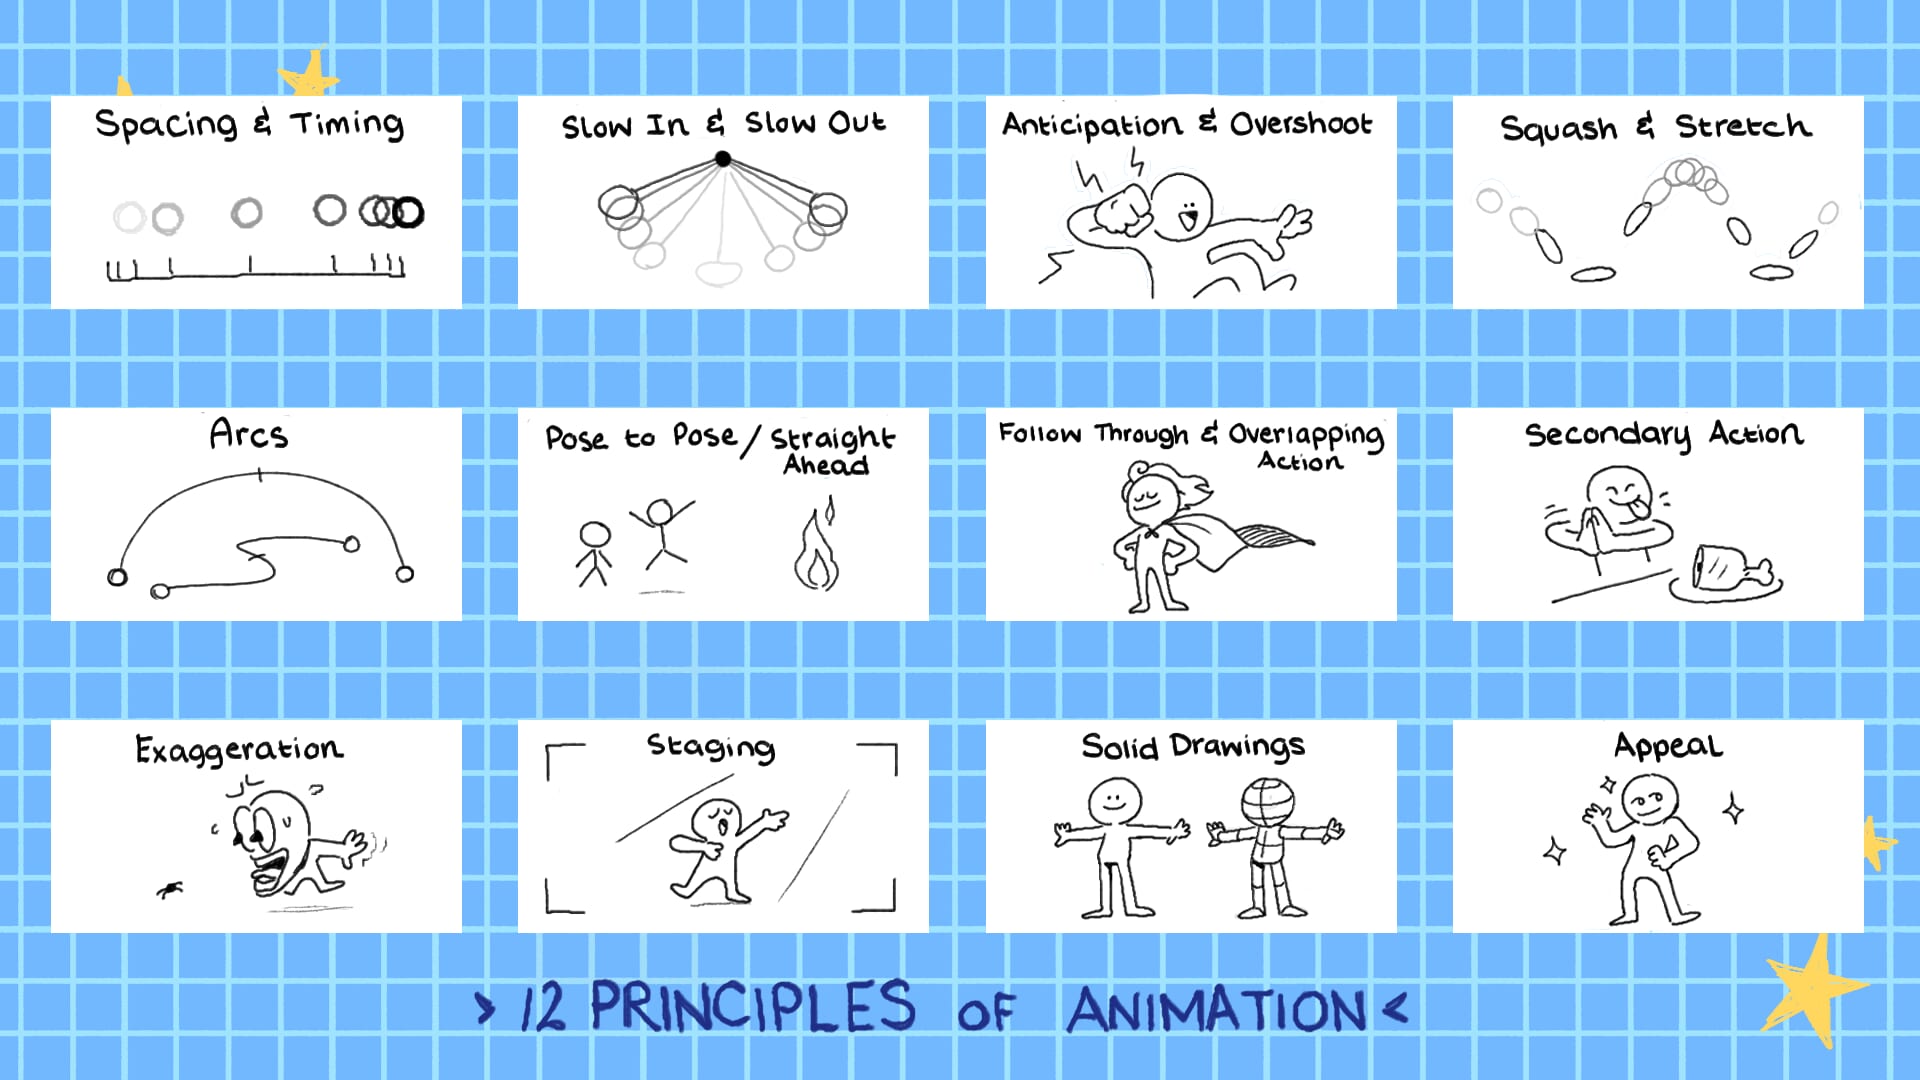
In the world of animation, we have what’s called the 12 Principles of Animation which are essentially the foundation or guidelines of what makes a drawing come to life.
12 Principles of Animation
- Spacing and Timing: Controlling the space and speed of your drawing.
- Slow In and Slow Out: Adjusting how a drawing can accelerate and decelerate.
- Anticipation and Overshoot: Helping viewers visually prepare before an action, and overshooting that action due to momentum.
- Squash and Stretch: Squashing and stretching an object or character to give the illusion of weight.
- Arcs: A curved path to help your animation flow better.
- Pose to Pose and Straight Ahead: The process of keyframes and the process of drawing in continuous sequence.
- Follow Through and Overlapping Action: Loose parts of the body continuing to move and catch up to the main action.
- Secondary Action: A second action to enhance or support the primary action.
- Exaggeration: Intentionally amplifying or pushing certain characteristics to add more impact to the storytelling.
- Staging: Focusing on visual composition in order to enhance the characters emotions or storytelling.
- Solid Drawings: Understanding volume, weight and balance to turn a 2d drawing into feeling 3-dimensional.
- Appeal: Quality of a character or scene that engages the viewers to watch.
However, I will be going over a selective few that I think are the most important to help you get started with some bonus tips included!
Key Principle 1: Spacing and Timing
Timing is more focused on how long a drawing will last on screen and spacing is more focused on where the drawings are being placed. Let’s talk about timing first. You might have heard the term, 12fps (frames per second) and 24fps in animation. This means how many frames will be shown in one second.
Having more frames like 24fps can create smoother animations since it has more drawings in between, but it will take longer to draw everything. Meanwhile, 12fps can look slightly more choppy due to it being half of 24fps, but that’s not necessarily a bad thing! It can still get the job done while also cutting the work and time by half.
It ultimately depends on the artist’s preference or the project, with some working better in 24fps and others in 12fps. Now, let me go a little more in detail on how it works.
Timing
So, if I were to work in 12fps, drawing a ball as the first frame (we can refer this to point A) and skipping 12 frames before drawing the same ball across the screen at the end (point B). It would take 12 frames or one second for it to travel. Now, let’s try to fill each frame with the ball (2-11), still taking 1 second from point A to point B, but making it look like it’s moving across.
Drawing in each frame like this is called animating on ones. Animating on twos means the drawing will last or hold for 2 frames each. Finally, animating on threes means the drawing will last or hold for 3 frames each. The drawings stay on screen for different times but they all still last for 1 second.
It’s pretty common for 24fps to be on twos and 12fps to be on ones. Although, it’s up to the animators to decide when to use 1s, 2s and 3s, usually influenced by weight and movement in their desired animation. 1s are usually used for fast action, 2s and 3s are usually used for normal paced animation. You’re also not limited to sticking to one specifically, your animation can vary and have all 1s, 2s and 3s combined in a single animation. You just have to know when to use them.
Spacing
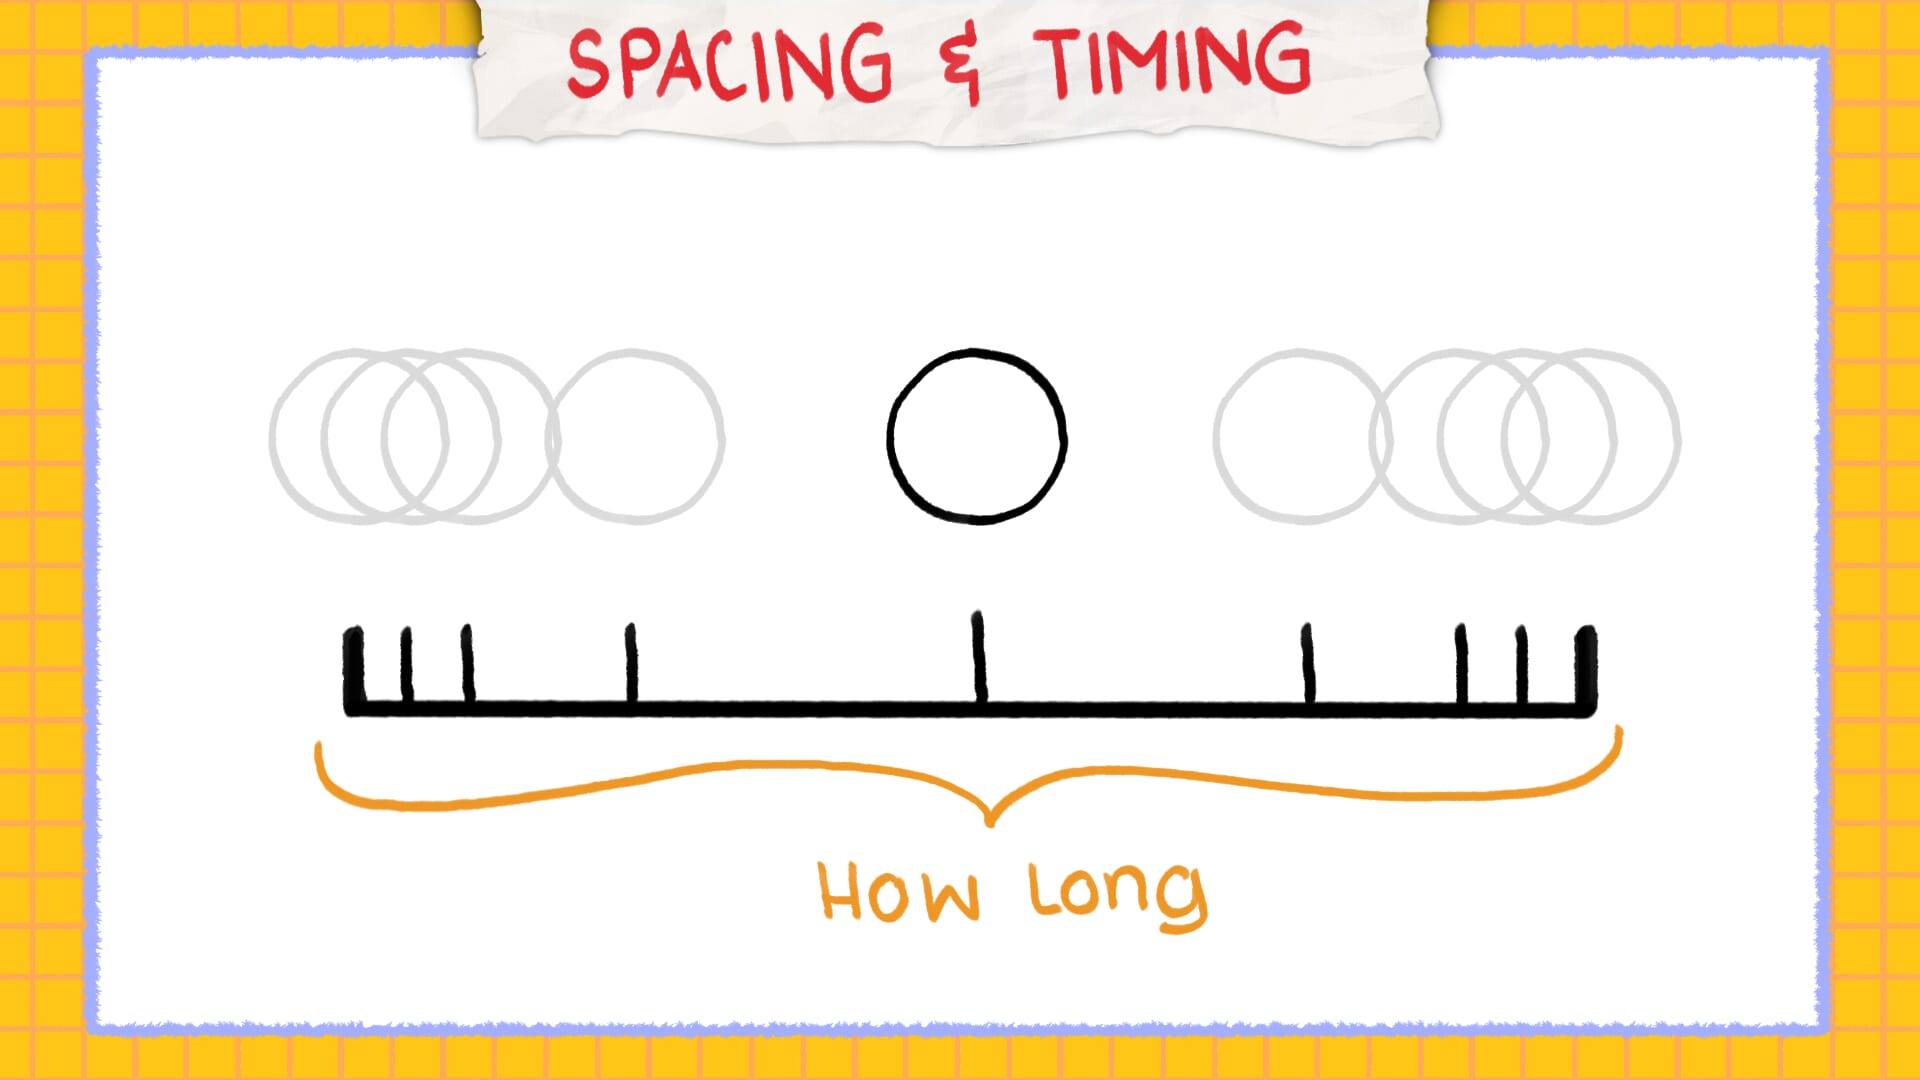
Now for Spacing. As the name suggests, it’s about spacing your drawings. Spacing refers to the distance it takes for the object or character to travel between frames, which sometimes can give the illusion of fast or slow movements.
Back to the ball moving across the 12 frames. If it were spaced equally throughout, it would look too stiff or mechanical. However, if we play around with the spacing, with the drawings spaced closer to each other at the start and end, while also spreading distance towards the middle drawings.


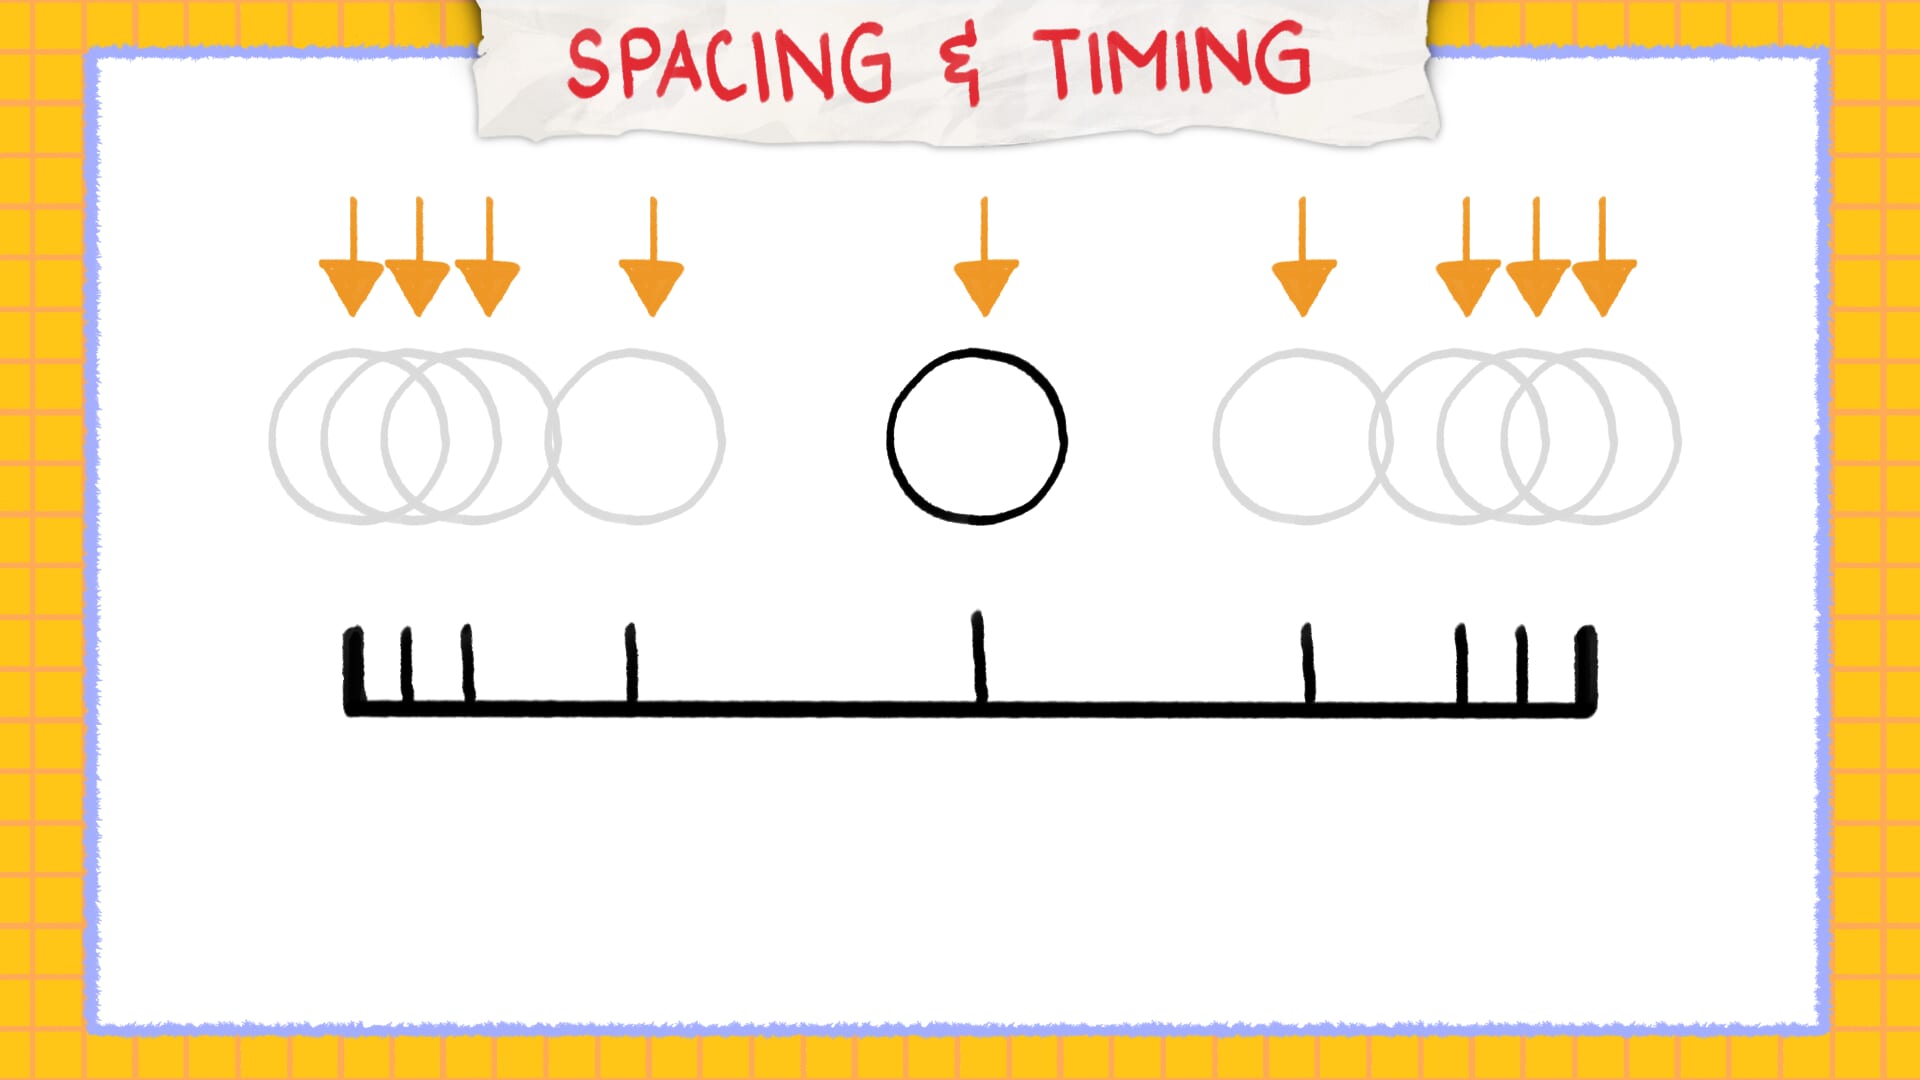
It will give the illusion of the ball accelerating and decelerating, making it look more natural or fluid, while still keeping the same number of drawings and time it takes for it to travel. Remember: tight spacing between drawings makes movement look slower, while wider spacing makes it look faster. Playing with spacing is playing with speed.
Spacing your drawings close together before starting your main action is called Ease in (speed up) and after your action is called Ease out (slow down). It’s natural for an object to gain speed or momentum and slow down before making its full stop.
Bonus Tip: Onion Skin
If you are using an animation software like I am and want to see your previous drawing or your upcoming drawings, you can turn on onion skin! If you are working traditionally, you can flip the papers back and forth too.
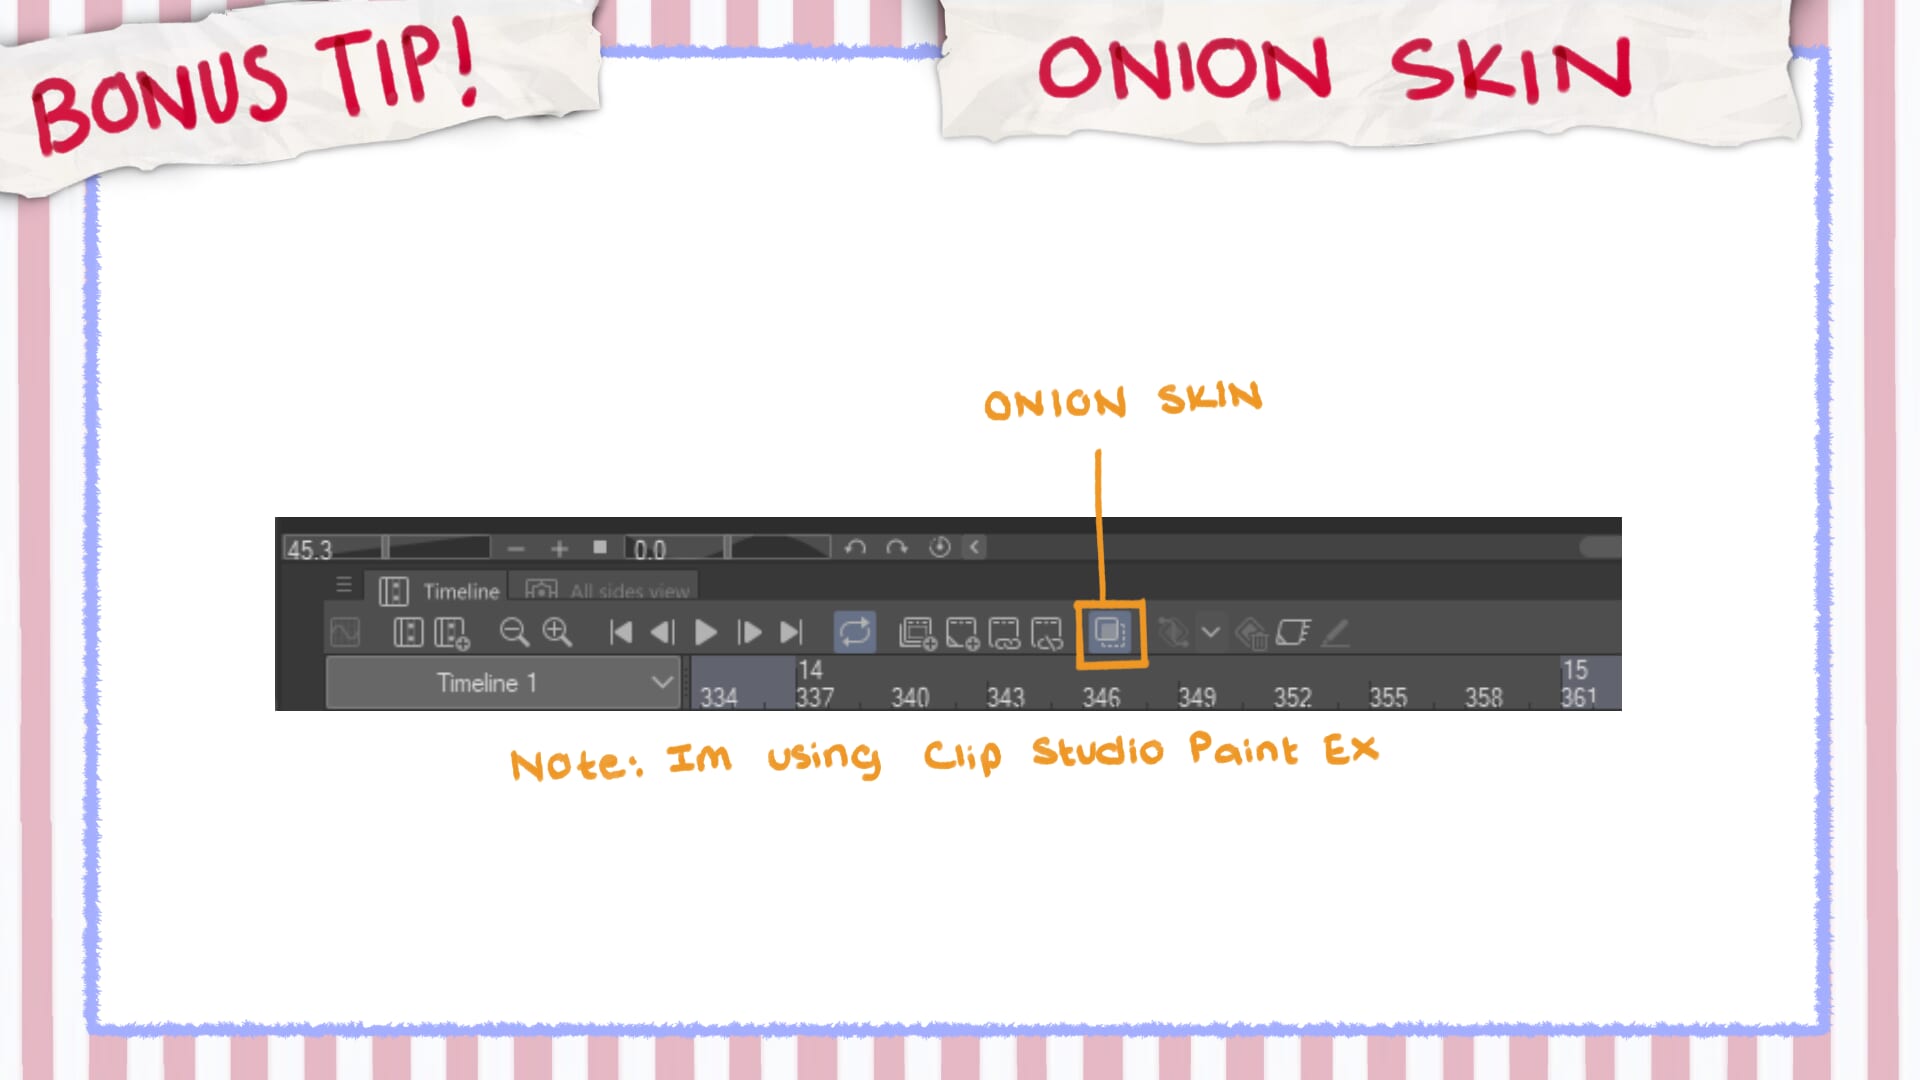
Onion skin can be helpful to determine or visualize how a pose needs to be in between drawings, helping to keep consistency and create a more fluid animation. However, don’t rely on them too much as your main focus should be if the drawing feels right or is moving correctly. Just keep an eye on that spacing!
Key Principle 2: Anticipation and Overshoot
Now, let’s say we have a character who wants to jump across a gap. You will have a stationary pose (standing), the action pose (jumping), and another stationary pose at the end of their jump. If we try to animate them jumping, adding drawings in-between these 3 poses, the result would make it really awkward or stiff.
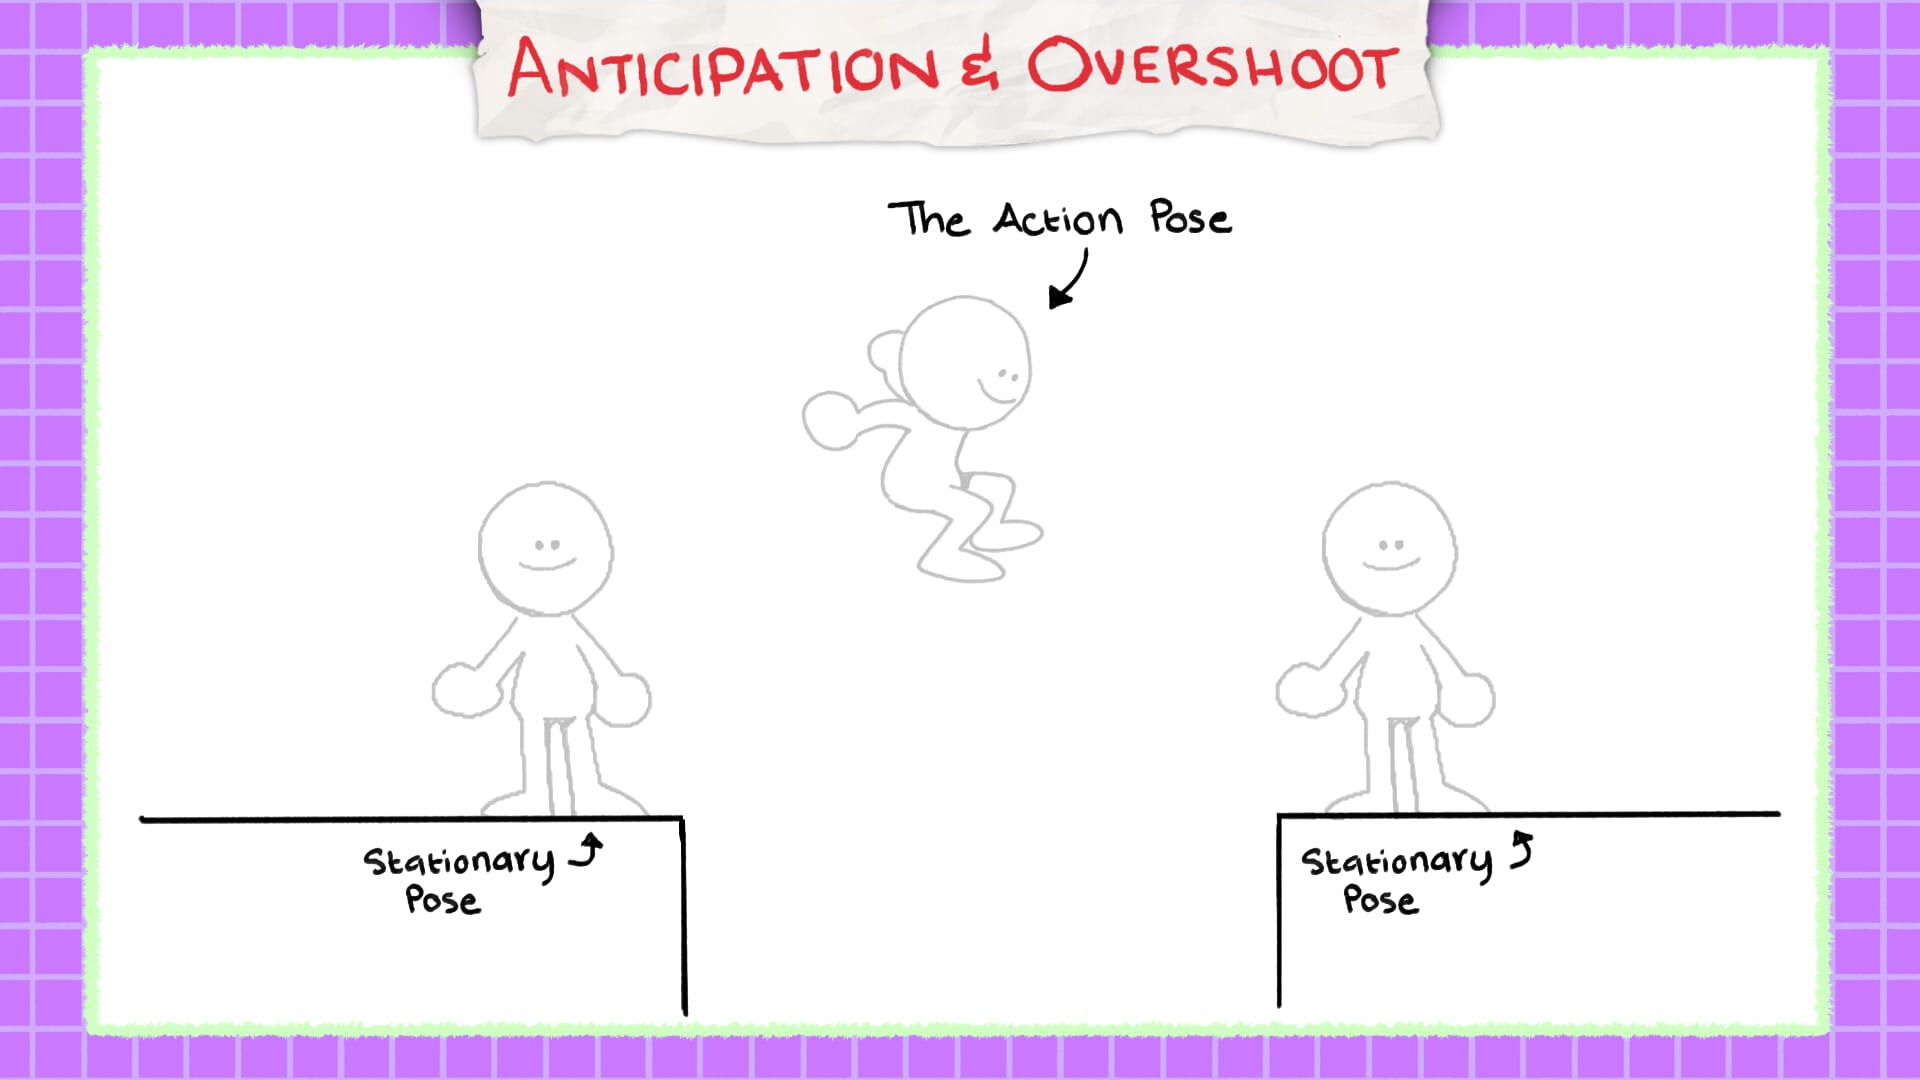
Instead, let’s add an Anticipation pose, where they go down to build up tension like a spring, legs bent and arms raised. Helping viewers anticipate their next action, the character is getting ready to jump.
Then they’ll release that tension with the jump, and when they land, we will add an overshoot pose. Overshooting an animation means the character is still in motion after landing, going past the stationary frame and giving that extra weight. This makes them look more natural in their motion.
Key Principle 3: Squash and Stretch
Demonstrating “squash and stretch” in an object or character is used to emphasize its weight or elasticity. If we imagine a bouncing ball, it usually “squashes” towards the bottom of its action due to weight and momentum pushing it against the floor. Then, you’ll see it “stretch” upwards when bouncing back up fast. Finally, it regains its shape/volume when it reaches its peak during its bounce.
Bear in mind that the ball also does NOT change in volume or shape when doing so. What do I mean by this?
Well, if I had a rubber ball and decided to squash it downwards against the ground, its weight is distributed evenly outwards. And when you stretch it long ways, its weight will be distributed evenly inwards. It still maintains its overall volume; it is just distributed accordingly depending on the action.

Doing squash or stretch to an object or character makes them feel more organic or the illusion that they are made up of different materials. I could have a basketball on one side and a rubber ball on the other, and you can tell which object is more influenced by squash and stretch.
Squash and stretch can also be seen a lot for story time animators here on YouTube. They use it as a way to convey motion when speaking, squishing their characters and stretching when changing expressions. In animation, the more you can exaggerate the gesture, the more lively it will look.
Bonus Tip: Arcs
When animating, keep arcs in mind! Simply, arcs are curved paths. Almost every movement has some sort of arc it follows, helping to make motion flow better and look more natural or organic.
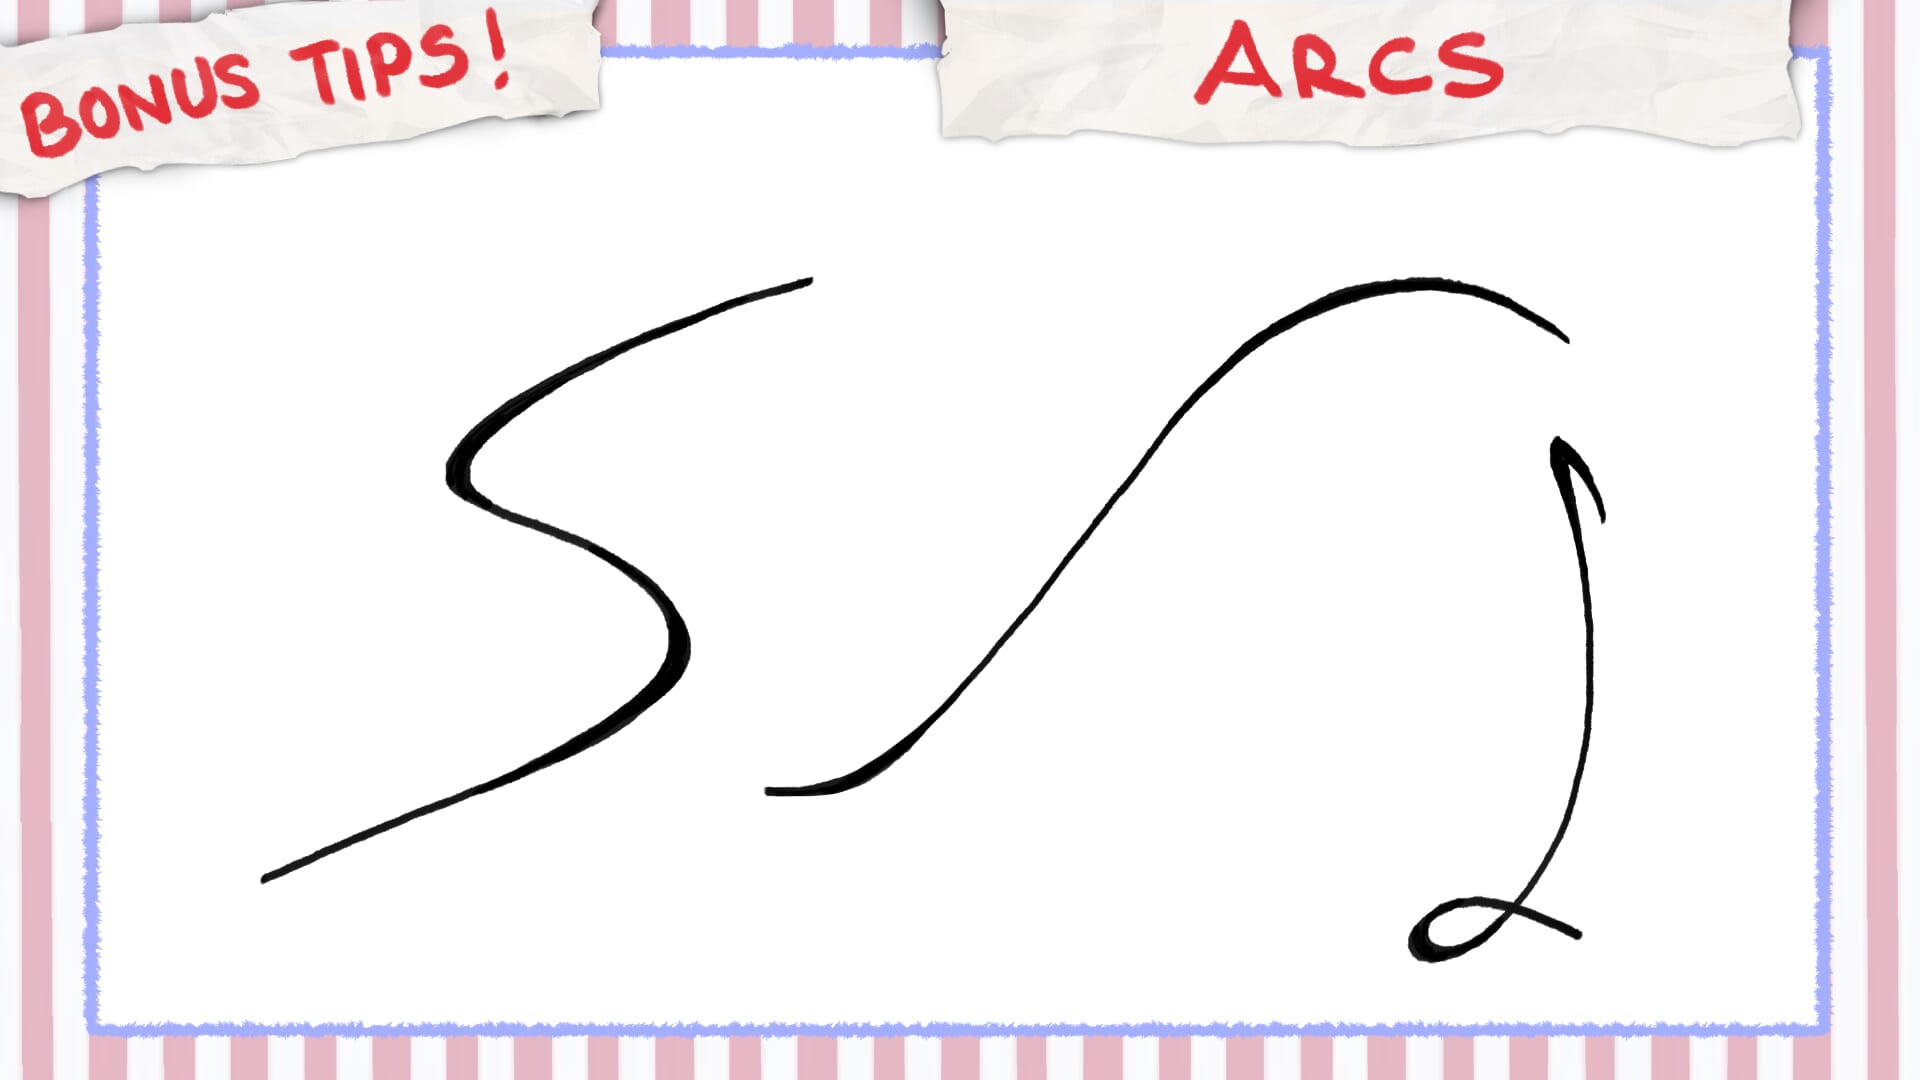
If you create an animation that follows a linear path, more than likely it will be something mechanical like a car or robot. Think on the path your hand follows when reaching your pencil or picking up a book, creating slight arcs. Arcs mimic the way things move in the real world.
Alright! Now that we know the bare basics of animation, we can make something! Usually, you want to start your animation like building a house. You create a blueprint of steps and build from that foundation up.
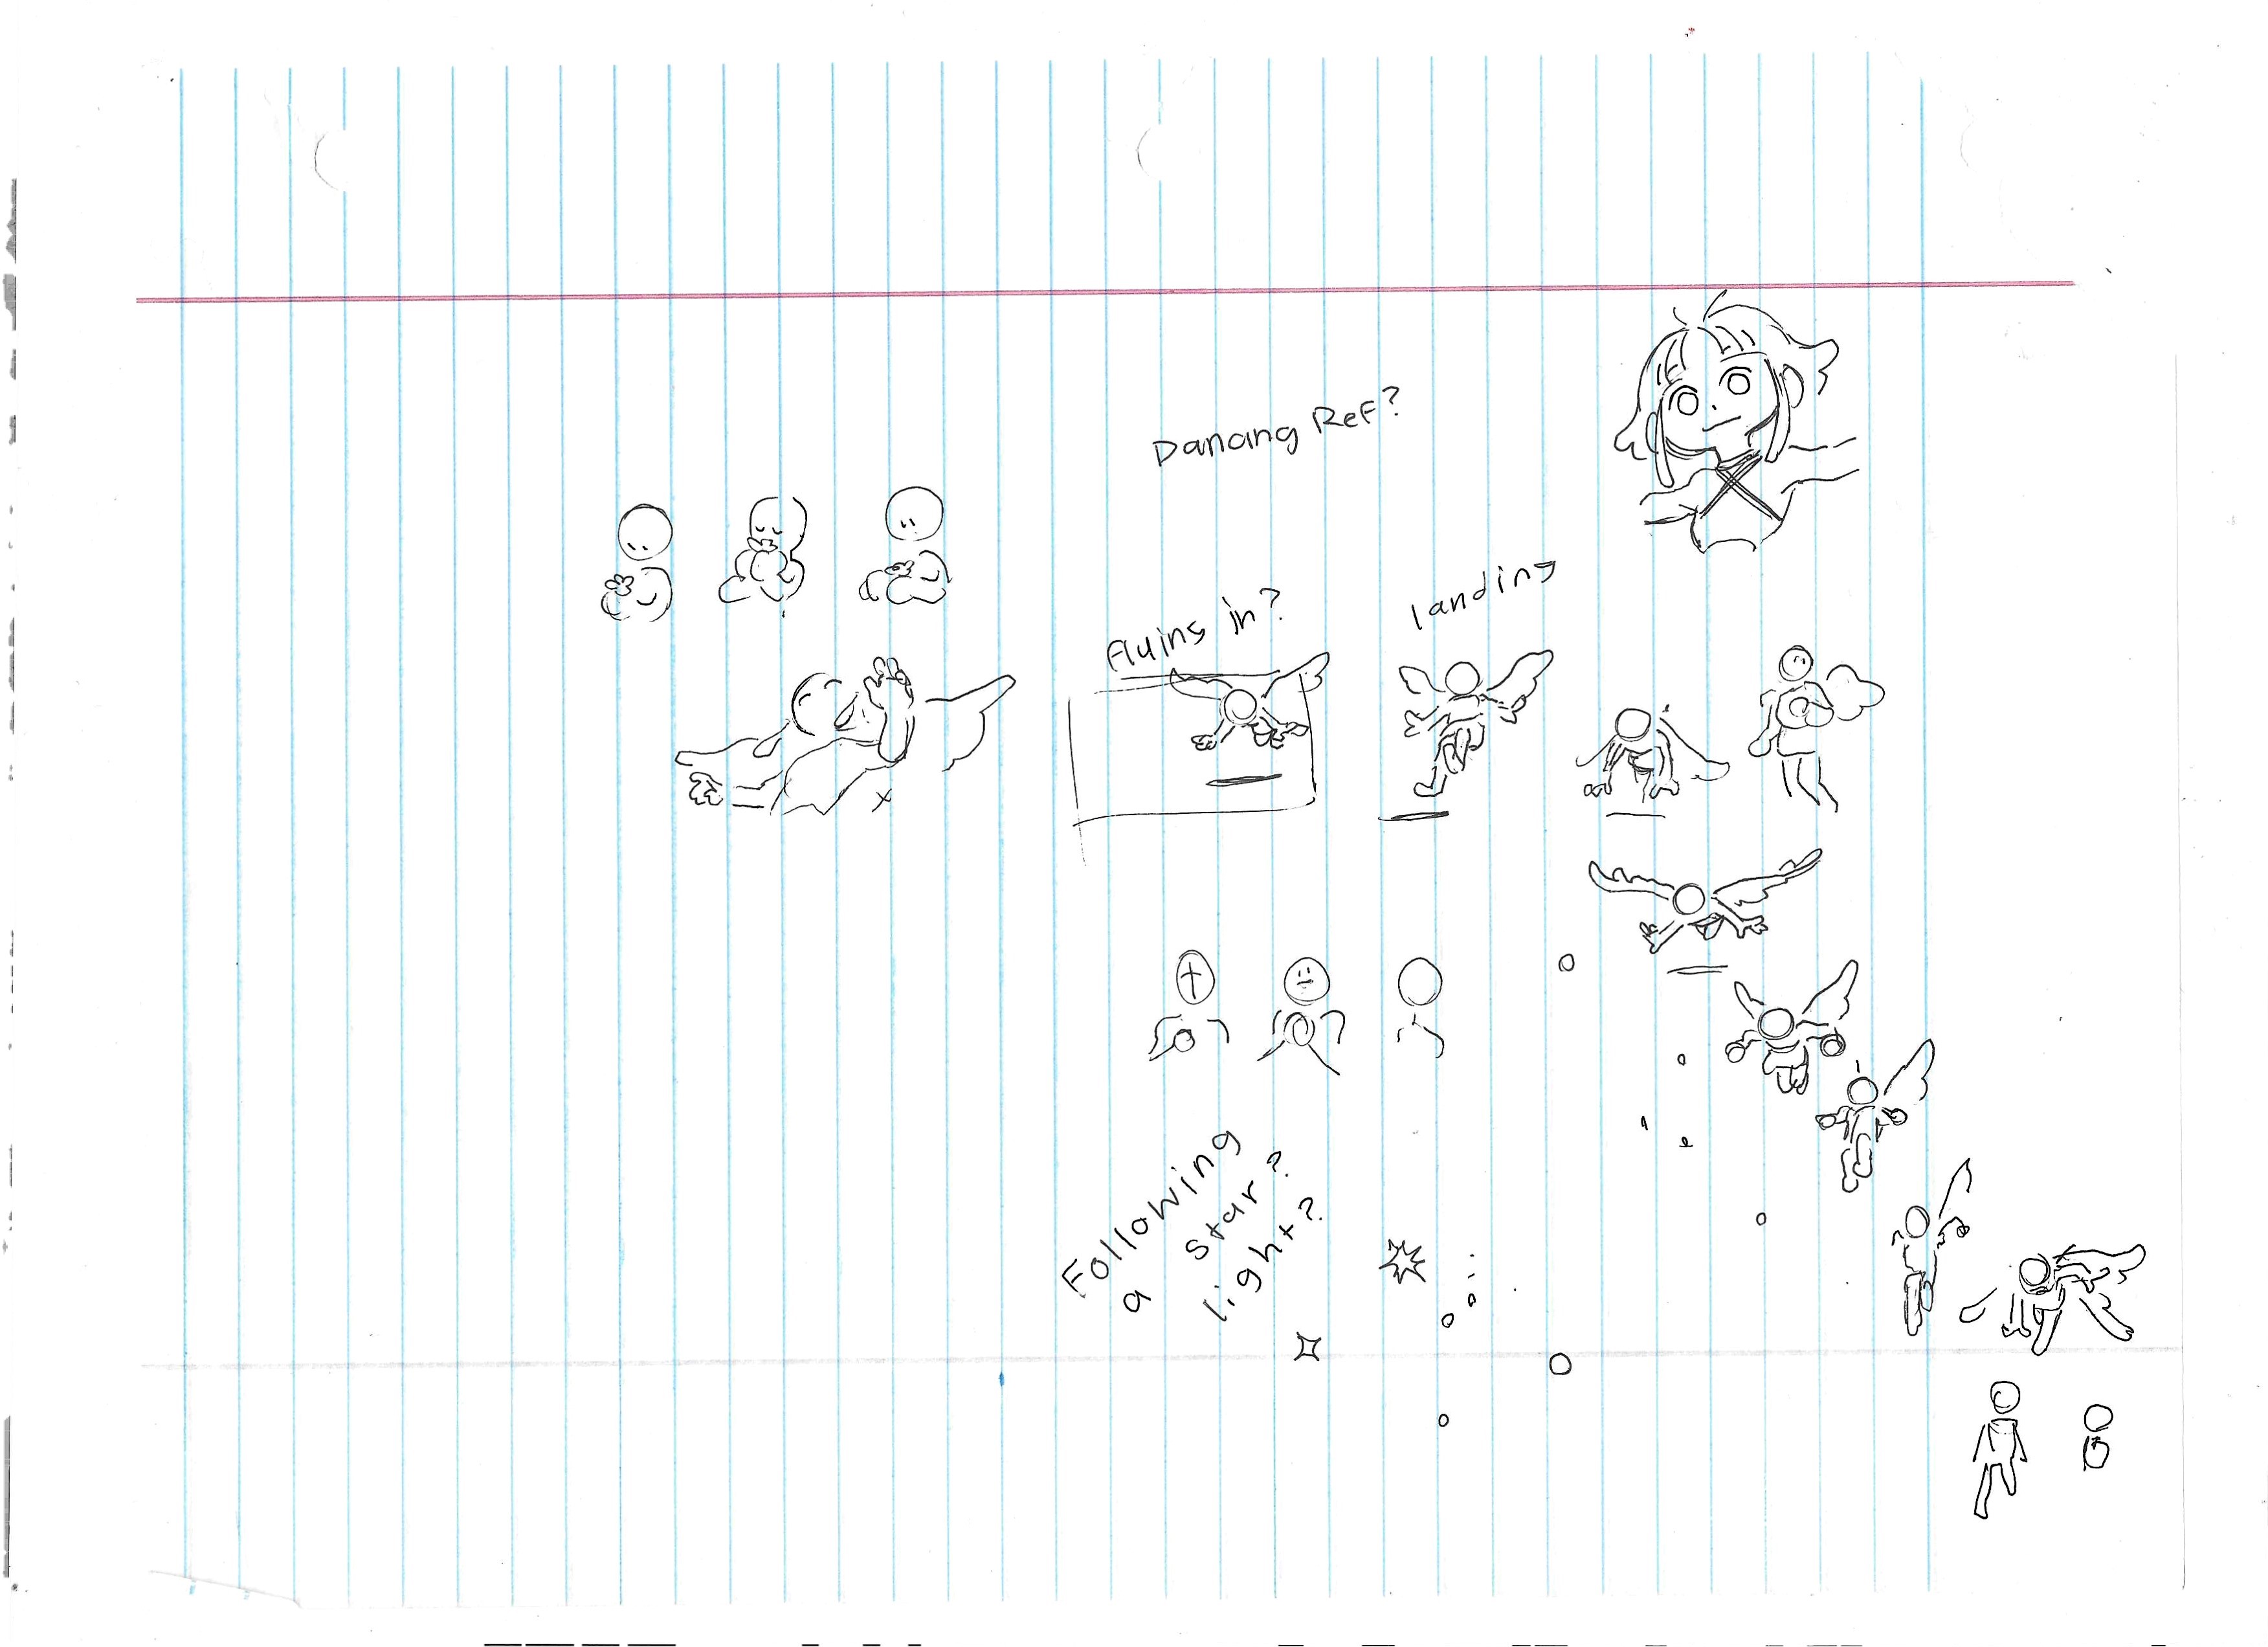
Storyboard
First, you’ll want to make a storyboard! This first step is probably the easiest since all you have to do is just draw your ideas down by making really rough thumbnails.
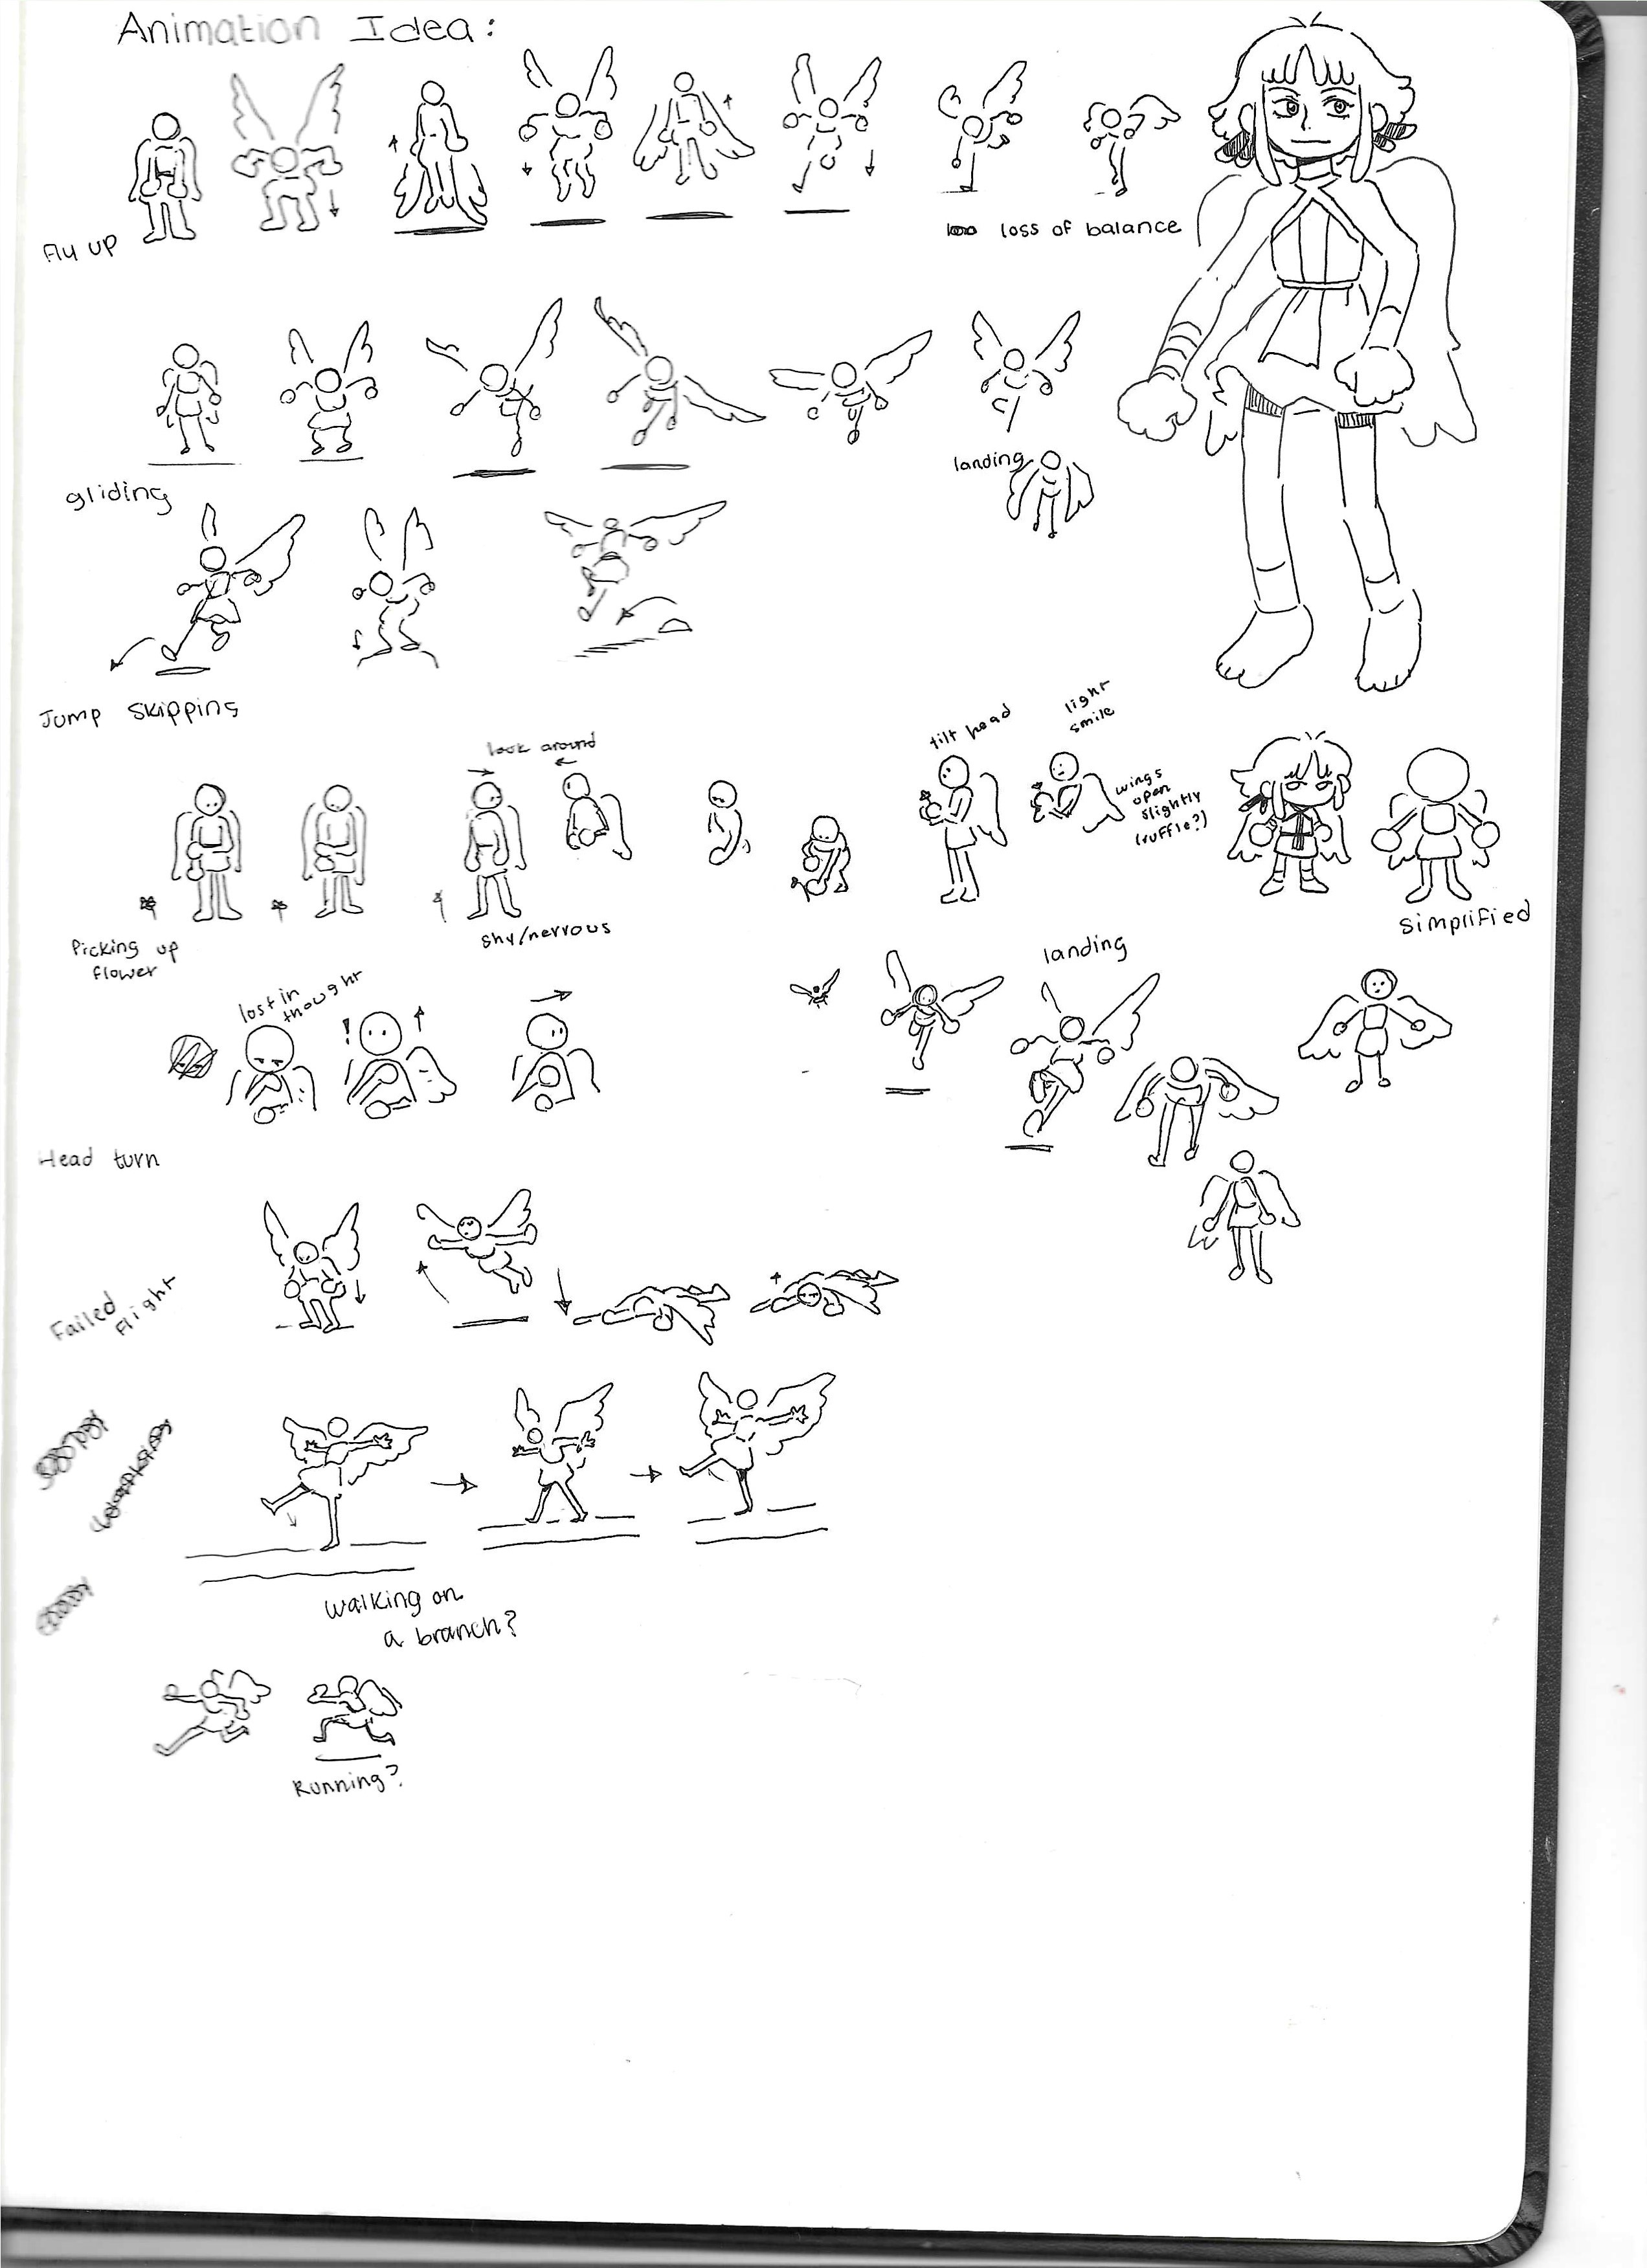
While some artists may want to make them detailed, I highly recommend keeping them very simple and rough enough to get your idea across. Sometimes, these ideas can change, and time in animation is valuable!
Don’t forget to create mood boards to help visualize what you want and start collecting references to help with creating your concept.
Animatic
Next, is making an Animatic! The difference between storyboard and an animatic is that storyboard is a set of drawings like a comic and an animatic is when you gather those sets of drawings and put them together in a video. Essentially, animatics are still very rough and are usually used to time your scenes.
For example, if you plan to have audio or music in your animation, you’ll want to create an animatic to be in sync with that. Animatics are used to help suggest or visualize what is happening in your animation, again, being a blueprint for the next step.
Rough Animation
Next up, we’ve got Rough Animation. In my opinion, this is probably the most vital step when it comes to building our animation. Let’s break it down into 4 parts: Keyframes, Extremes, Breakdown, In-Betweens.
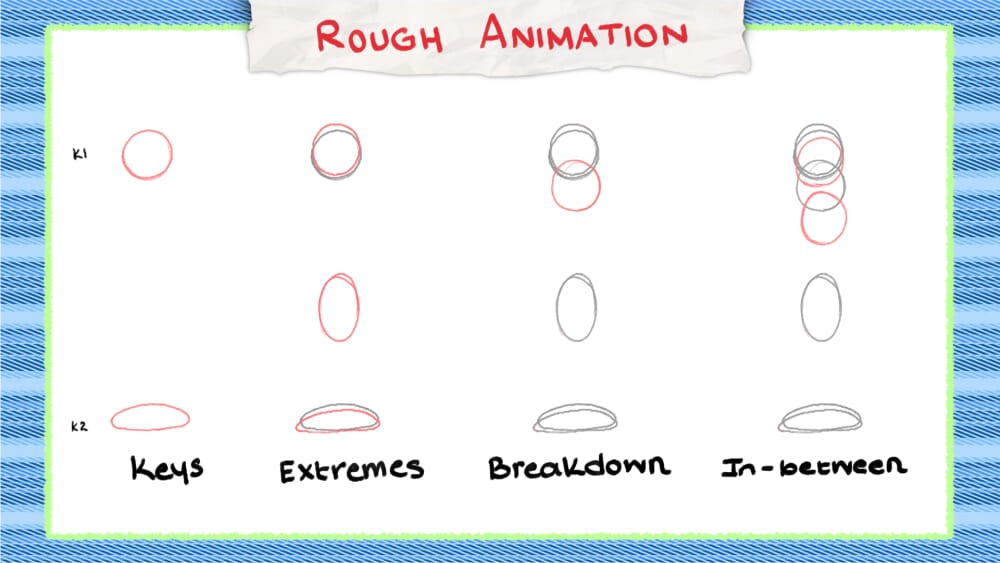
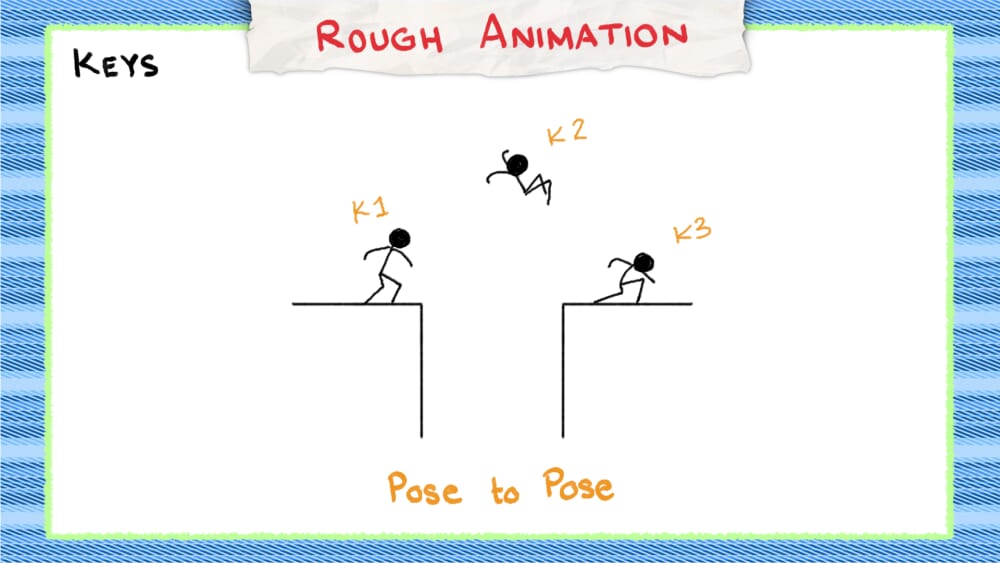
Keyframes
Here, we’re going to focus on creating key frames. Key frames are the most important poses that define our actions; they are your story telling poses.
If I have a figure standing (stationary pose) and then have them jump (action pose), this scene demonstrates 2 key poses, because the viewer understands the main action of what the figure is doing.
When animators focus on drawing only key frames, that is called pose-to-pose. Usually used in animating characters, this helps visualize or map out where the animation will go. On the other hand, if you draw from one frame and then draw the next frame for that and so forth continuously, that is called straight ahead. These are commonly used for animating 2D effects like smoke or fire, objects with organic or unpredictable movement.
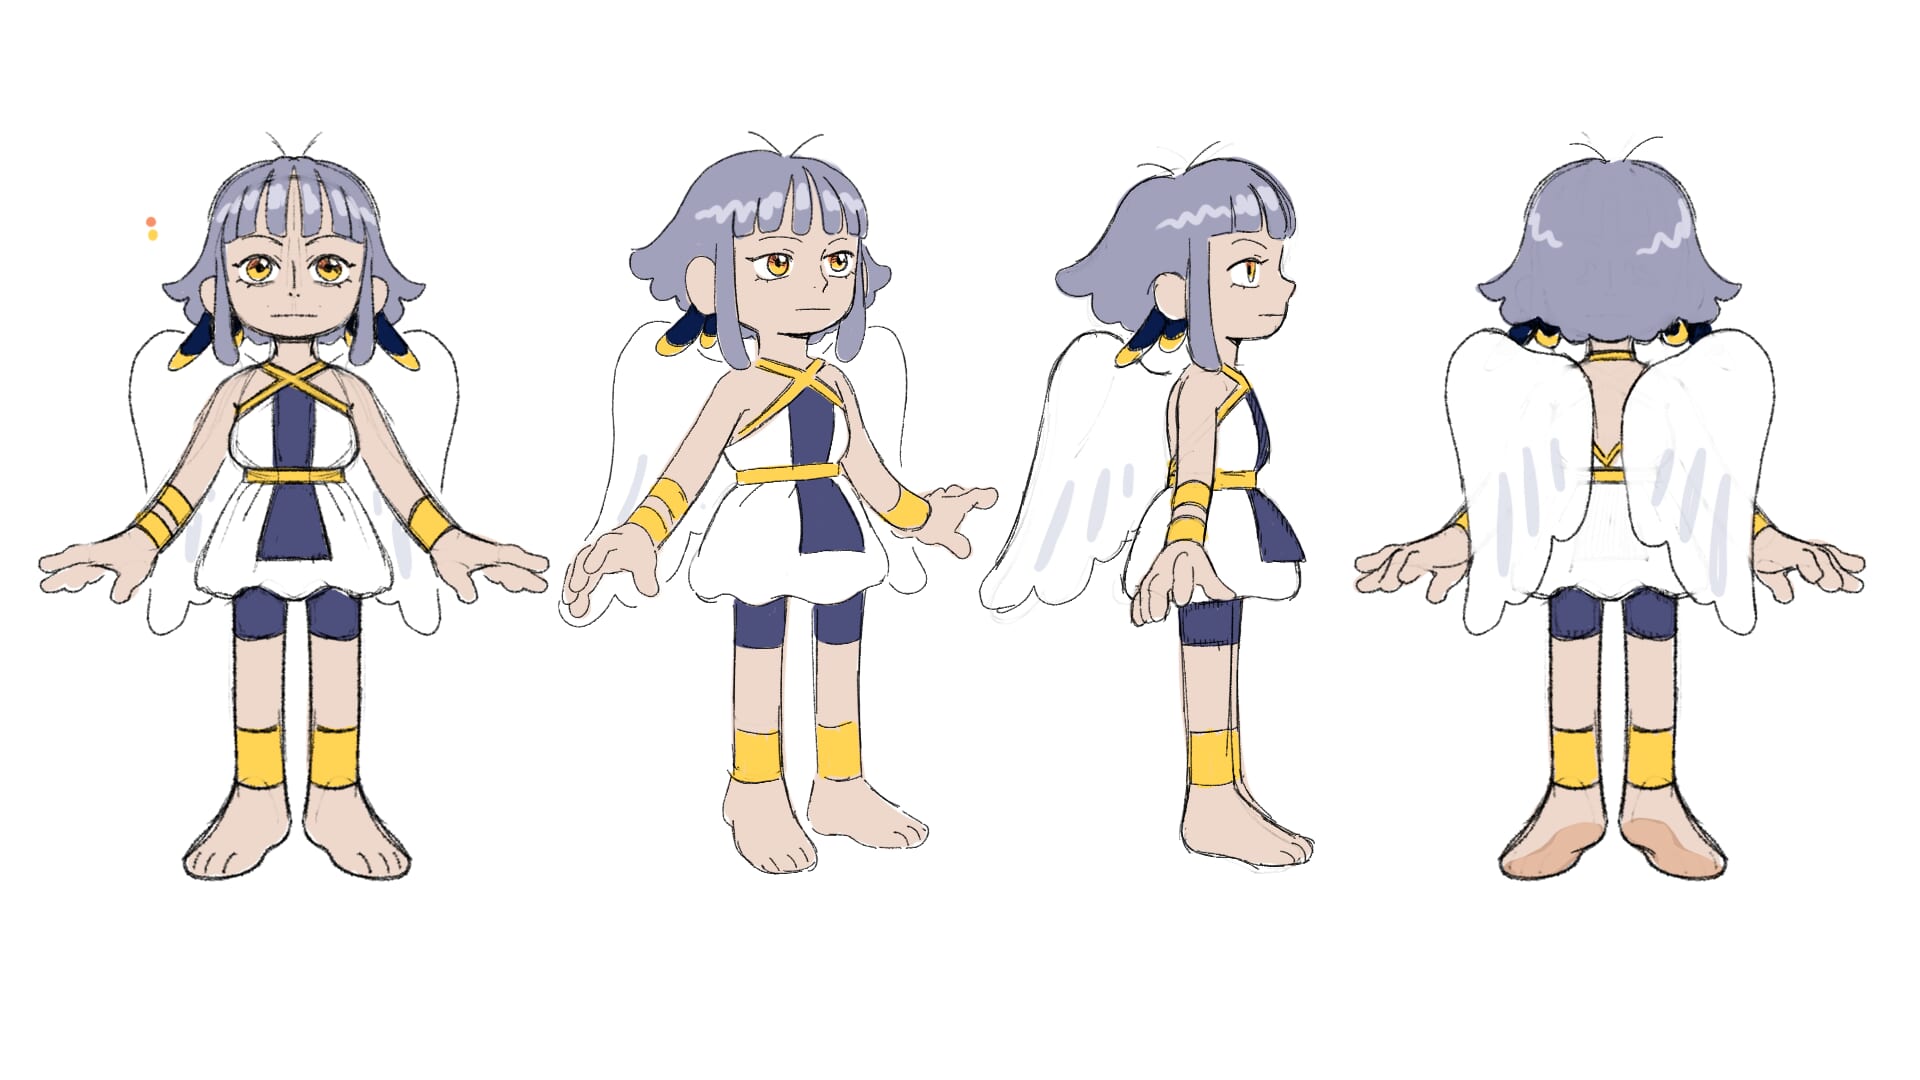
Focusing a bit more on pose-to-pose keyframes, unlike the animatic, you’ll want to get as close as possible to the characters’ likeness, trying to keep proportions consistent and keeping in mind to draw those key poses that will define my action. Personally, I like to turn the characters into basic shapes because it’s easier for me to understand without focusing too much on details.
The main thing I want to concentrate on is getting the movements right. This approach works for me, but other animators with strong observation skills may prefer adding more detail to their keyframes. Ultimately, it comes down to your animation workflow and what helps you create the most natural movement. Also, it’s great to keep a reference sheet of the character you’ll be animating. Character reference sheets often have specific angles already drawn and it’s good to look back on.
Extremes
Next, we will focus on adding our Extremes. Extremes are what we already went over earlier, such as Anticipation, Overshoot, Squash and stretch, or basically poses that change in direction. Sometimes extremes can be exaggerated, such as when you’re adding anticipation, or they can be subtle, like a slight overshoot. When working with extremes, remember to play back your animation frequently to check if the movement feels right to you.
Breakdowns
After adding Extremes, now we have breakdowns. Breakdowns are poses that help transition to the next pose, usually to give extra information or personality. When adding them, keep in mind your spacing using Onion Skin. Not all breakdowns are dead center or in the middle of your previous or following pose.
Remember your spacing and consider where that breakdown pose should be placed. Sometimes a breakdown will favor one frame being closer to another, and other times your animation may use multiple breakdowns to better convey emotion.
In-Betweens
Then, we have In-Between frames! These are drawings made in between your frames to smooth out your animation, unifying it all together. After that, you should have a completed rough animation!

(Key frames > Extremes > Breakdowns > In-between)
Tie Downs
Our next step is to do Tie Downs, still considered rough but we’re going to focus on getting cleaner lines now. Sometimes it’s also called a Rough Pass, but it’s just about adding details like clothing or accessories.
First, you’ll want to go over your frames and refine the lines a bit more. Then, a way to add other details to your rough animation is the same way in how you initially built your rough animation. Add your details on keyframes first, then your extremes, then your breakdowns and finally your in-betweens.

Personally, I like to create a second layer where I am focusing on drawing the clothes or accessories, because sometimes they will have their own separate space and timing animation.
Clean Up
The Clean Up stage is, in my opinion, the most tedious and time-consuming part of animation. There’s not much to say about it other than you go frame by frame and start creating line art, keeping your lines clean throughout.
Coloring
Finally, let’s color your animation. This is also pretty straight forward. Just go frame by frame and fill in the colors for each section with the paint bucket tool. Some advice when coloring: when you’re doing the line art for the clean-up stage, make sure all your lines are closed off or completed. Any gaps will need to be fixed in order to use the paint bucket tool.
Conclusion
And there you have it! To sum it all up, here was the complete animation workflow:
Storyboard > Animatic > Rough Animation > Tie Downs > Clean Up > Coloring
Hopefully this article has provided a helpful and informative overview of the basic process of animation. By following the steps above, you should now have the necessary skills to bring your creations to life!
To get started on your animation journey, I recommend checking out Clip Studio Paint. Not only is it available on multiple devices like PC, tablet, and smartphone, but it also offers a free trial so you can try it out before making any commitments.
Remember, that practice makes perfect, and with patience and a bit of creativity, you can create something truly amazing. Good luck on your animation journey, and don’t forget to have fun along the way!
Artist Profile
Hello! My name is Omnific, I’m a freelance artist and a YouTube creator who enjoys creating art and animation for personal works of mine and for fandoms.
YouTube: Omnific
Instagram: omnific_art
Twitter (X): OmnificArt
Bluesky: Omnific
Cara: Omnific
Threads:omnific_art
Now that you’ve learned the basics of 2D animation, it’s important to keep practicing consistently. For tips on staying creative, see Overcome Art Block in 4 Easy Ways.