Lighting your Painting
Reuben Lara explains the “Add Glow” (or “Linear Dodge”) blending modes, with useful tips on using it in digital paintings and illustrations for effective lighting and highlights.
Today we’re going to be talking about lighting our digital paintings. For this tutorial, I’ll be using Clip Studio Paint on the iPad Pro, but it applies to any software that allows you to assign blending modes to your layers.
Color Studies
The ability to add light to a painting during or at the end of your drawing process is something to celebrate! You can’t do this with traditional media, and it allows you to experiment with and give additional focus within your art during the production phase.
Traditionally, artists would paint thumbnail-sized painting color studies to determine the tone or value range of their painting before diving into a full-sized final piece. With digital art, we can make those decisions on the fly or after we’re done laying down the bulk of the piece.
That said, this doesn’t take the place of planning out a color palette. Aim for a harmonious palette with complementary color saturations that won’t compete with each other and then use the following techniques to throw your images over the top with creative lighting.
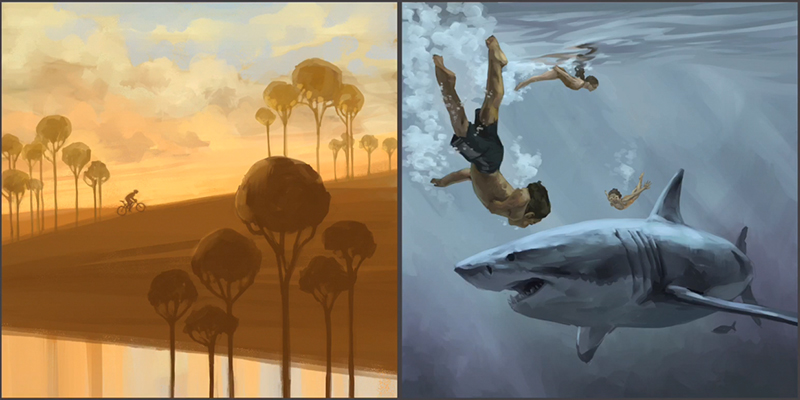
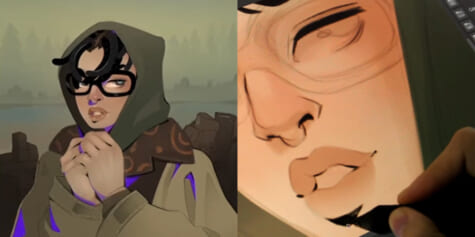
Let’s dive in! I’ll be using two paintings as examples. One is stylized, and the other is more traditional. I chose these because I painted both with a limited gamut, a limited range of color saturation, so they’re not overly contrasting. Once we add lighting effects, the contrast and saturation will increase. Staying within a limited contrast range allows you to maximize the amount of detail retained when ramping up highlights with blending modes. We’ll be using the Add Glow blending mode. In Photoshop, it’s called “linear dodge.” This mode affects the image in similar ways.
Blending Modes: What does Add Glow do?
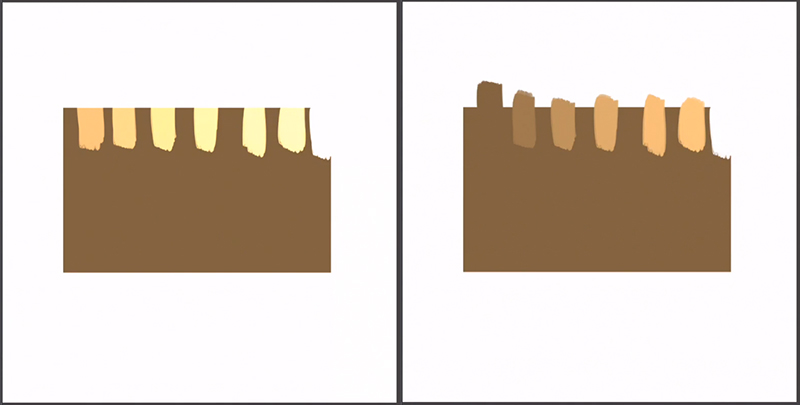
To show what Add Glow does, first I make two layers and fill the lower layer with a brown colored rectangle. On the upper layer, I paint a swatch over it. Since the upper layer set to normal, the swatch I made blends right in with the layer underneath. Setting the layer to Add Glow gives us a result that’s much lighter than the original color.
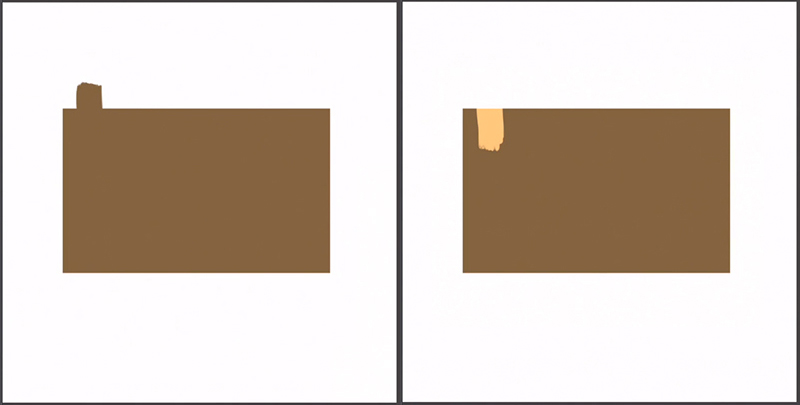
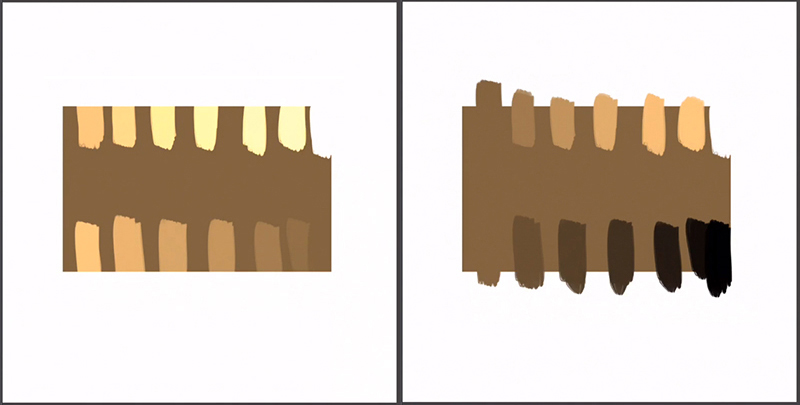
Understanding what’s happening with these colors will help us effectively add and control light in our paintings. I use the eyedropper to hover over each color and see that the saturation of the original color and the resulting color is the same, but the value of the color has greatly increased from 50 to 100. What happens when we add swatches raised in value? As the value of the color we are painting with increases, the blending mode results get brighter. As we approach absolute white, you can see that we can get pretty bright, but there is still a little bit of tint or saturation to the color. That’s because our saturation is still at 50%. As soon as we bring our saturation down to zero, we’ll get absolute white.
The same thing is true as we go down on the color value range and start adding black instead of white. As we approach a completely black value, the effect of the blending mode disappears. Switching the layer to normal shows that we’re painting with black but the result of the blending mode is that it doesn’t have any effect over the layers underneath it.
Why use Blending Modes?
So why use a blending mode instead of the traditional approach of shifting the paint color? The value of blending modes is that, once we have a bunch of marks on our canvas, we can use the same color to affect multiple values and hues underneath it. For example, I make another layer and set it to Add Glow. Then, using the original brown color, I paint over the swatches. Doing this results in varying amounts of light with one color because the blending mode is affecting all of the swatches underneath it.
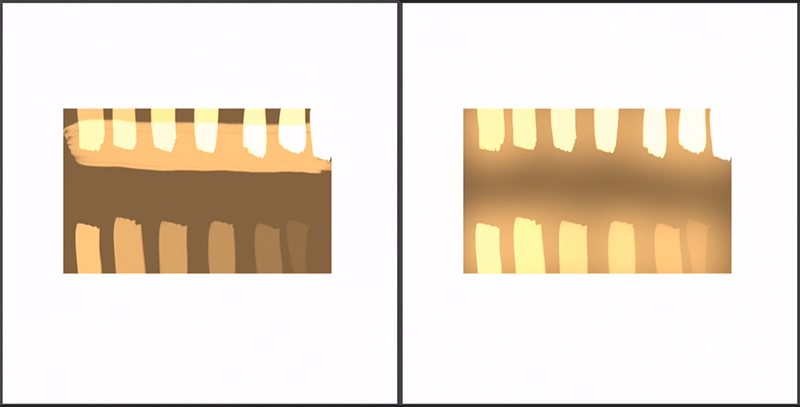
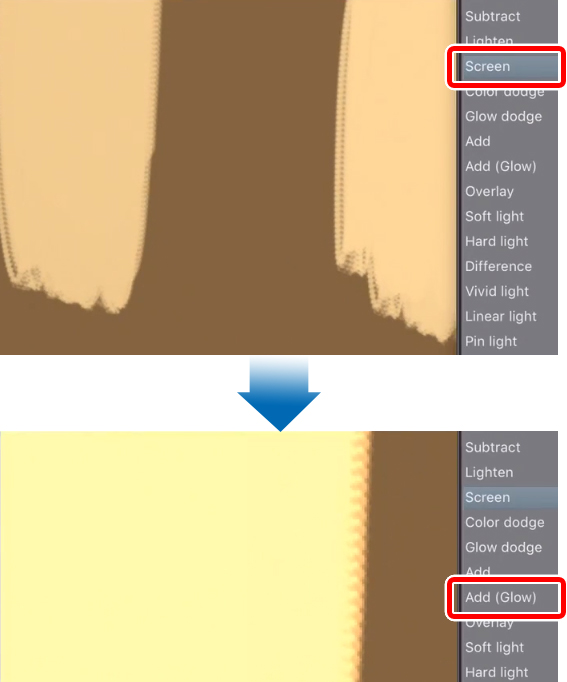
Furthermore, using a soft airbrush creates varying degrees of light or glow; hence, the name of the mode, Add Glow. It’s a little different than another blending mode called Screen. With Screen, we don’t get the saturation that we get with Add Glow/Linear Dodge. You can see in the below image that with Add Glow, specifically around the edges of our paint strokes, there’s a variance between the densest part of the paint and where the brush falls off which makes the strokes seem a little bit more brilliant and lit.
Using Add Glow as a Light Source
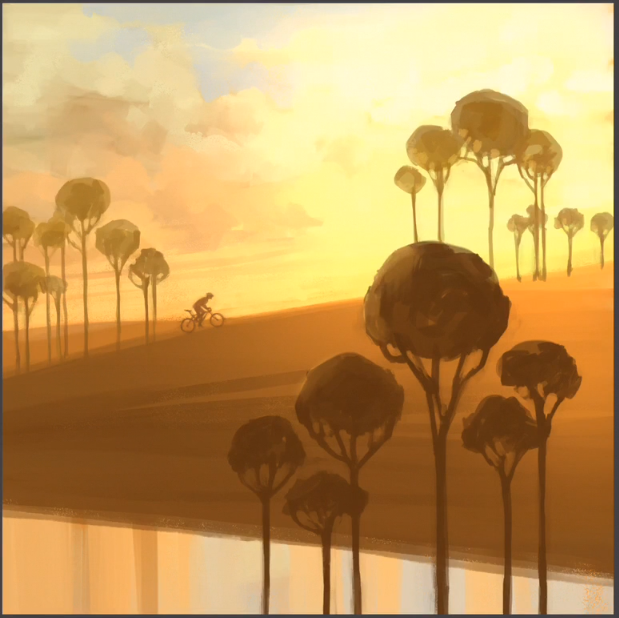
Now that we know what the Add Glow blending mode does let’s add it to one of the example paintings. When I add glow, I think about it as a light source. I consider directional light, such as the light being cast on the trees and surroundings. The layer I’m working on is behind my foreground trees, so anything I add will only affect everything underneath my foreground layer. I set the layer to Add Glow, pick a common color from my mid-ground element, and I lay in some color using the soft airbrush.

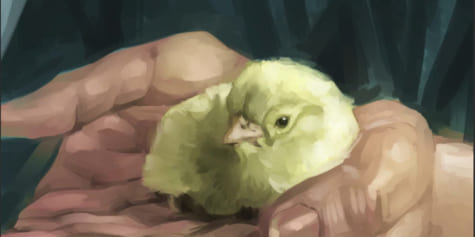
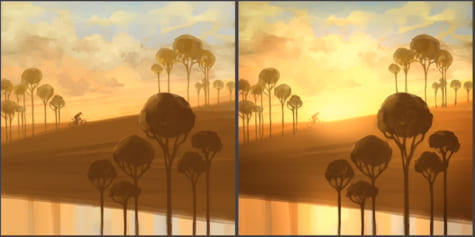
I’m essentially just painting in light around where the focus is going to be. In the above image, I put the sun right in the middle. In the image below, I lit up the right side as if the guy is riding into the sunset. We can change the story in the painting based on our lighting scheme.
Painting a little more, you’ll notice that the image is only going to get so bright because the value of the color that I’m painting with only has a certain amount of whiteness to it which dictates the current value. Also, the more saturated a color is, the less we’re approaching a pure white.
Let’s try with a darker mid-tone color, so we don’t go too bright too soon. I go in with the soft airbrush and paint over the clouds. The nice thing about this airbrush is that we get some color gradation when we paint. To imply the sun, I raise the value just a little bit to desaturate it, so there’s a bright sunset on the horizon. If I find the color getting too milky, I’ll switch from my drawing color to the transparent color and pull a little bit out.
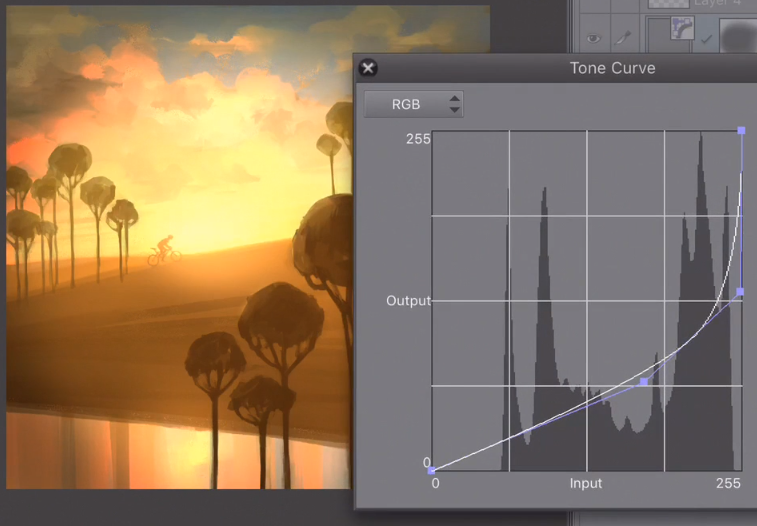
Vignetting with Shadows
Now, let’s add vignetting with some shadow. I like to do this with curves, but there are lots of ways to do it. I add an adjustment layer from the layers palette > new correction layer > tone curve and make a quick adjustment there, darkening the painting so I can get a sense of what’s happening with it. Then l select the white area on the layer palette and clear it so that it’s not affecting anything, select my soft airbrush once more, zoom out, and paint in the little bit around the edges, giving the image a ring around the edge. In the same way that the light is giving us a little focus, little curves can also help accentuate where we want the viewer to look. Playing around with curves can shift the colors dramatically as well.
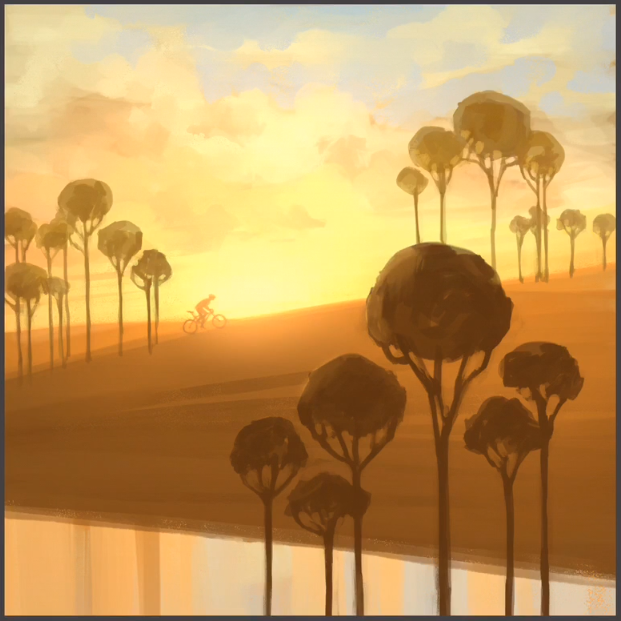
Before and After Blending Modes

Adding in Color
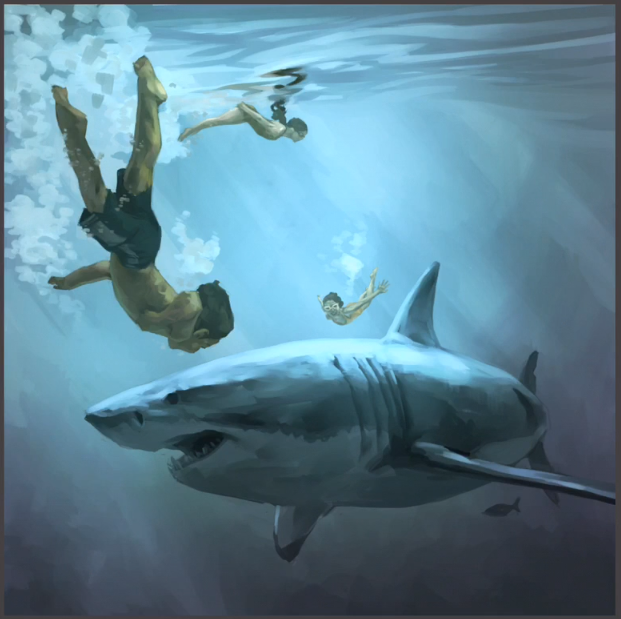
Let’s try one more blending mode technique with this next illustration No Worries. After adding a glow layer and playing with curves like in the previous image, this is the result:
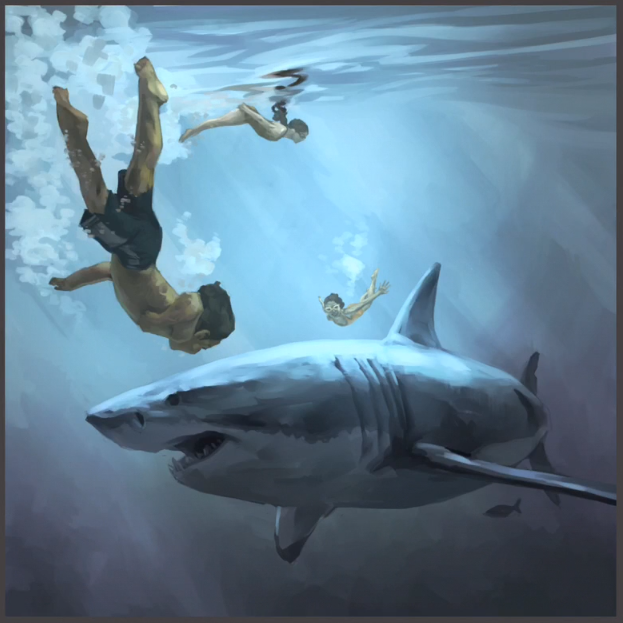
It’s so easy to go overboard when adding glow. One of the beautiful things about this limited color palette is the grays, so I wanted to maintain those. Adding too much of glow, however, will over-saturated the image. In my opinion, this can make it look less elegant.
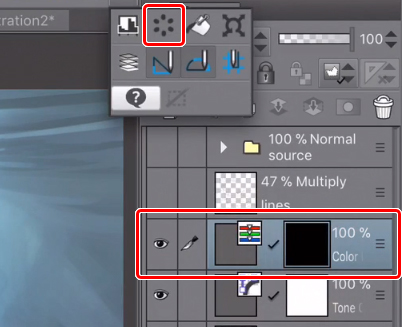
An additional technique is to play around with the color balance and give ourselves some overall gradient shifts. For example, I want to experiment with adding some green, so I grab a color balance layer, adjust it, and clear it.
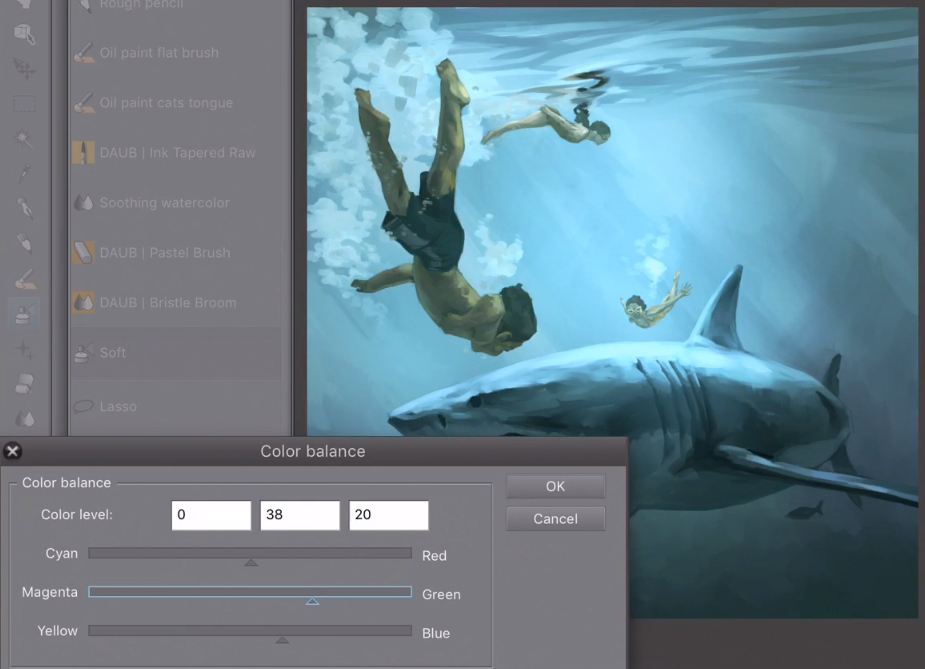
Next, I use the soft airbrush again to paint where I want the green to seep through. I want to try to avoid overly saturating or adding too much contrast in my piece so that I retain the basic original feeling of how I painted it.
So there you have it. I hope you learned a little bit about adding glow to your images in whatever software you use. Just make sure that you maintain control of your decision-making process and most importantly, have fun!
Reuben Lara is a traditionally trained artist who primarily uses Clip Studio Paint and Adobe Photoshop and provides free training for beginner and intermediate artists through video tutorials. He reviews basic tools that are affordable and accessible and teaches production-proven techniques and methods that he’s been using for over 20 years in the design and illustration industry. He seeks to help artists learn how to enjoy painting in the digital workspace overcome technical hurdles so they can start having fun when creating art.