Finding and Correcting Drawing Mistakes
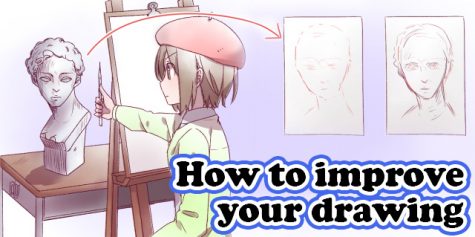
Even experienced manga artists and illustrators often don’t notice the flaws in their drawings. If professional manga artists and illustrators make mistakes, then it only makes sense that beginners will as well. In this article, I will explain various methods to find mistakes in figure drawings and provide exercises to help improve your overall skills.
How to Locate Problems in Your Drawing
Method 1: Check its silhouette
If you are drawing on a digital platform, you can fill its outlines in black and create a silhouette to check your drawing. Details in drawings are emphasized when viewed as a black silhouette. It helps you see flaws in your drawing’s proportions, such as head size or limb length, by squinting or looking at it from a distance.

Method 2: Walk away and check it later
“I liked my sketch yesterday, but now that I look at it today it doesn’t look as good…”
This is the cry of every aspiring illustrator. It’s normal to experience this. It’s normal to make mistakes when drawing! We all tend to forget to maintain the entire balance of an illustration once we delve into the drawing and become hyper-focused on one particular part. It’s challenging to keep many other aspects in mind (character emotion, clothing design, line quality, mood, etc.) when drawing let alone spotting mistakes. So, after working on it a while, take a break and let your drawing sit. Putting the rest of the drawing off for another day allows you to make more objective decisions about it.
Method 3: Flip it horizontally
You may be able to find mistakes in your work by horizontally flipping it. For traditional artists, turning your paper over and holding it up to light lets you see a horizontally flipped version of your work. For digital artists, use your software’s Flip Horizontal feature:
Photoshop
- Image > Rotate Image > Flip Canvas Horizontally
Clip Studio Paint
- View > Rotate/Invert > Flip Horizontal
SAI
- View > Flip Horizontally
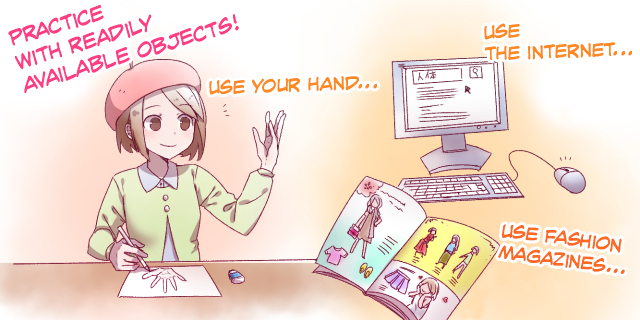
Use Photo References to Practice Drawing
Practice using photo references
It may sound extremely obvious, but the only way to improve is to draw. Drawing skills don’t improve in a day; it takes time. How much time depends on the person. Take your time and develop your skills at your own pace. For daily practice, photo references are the most practical option, as hiring models can prove difficult and expensive.
Photo reference suggestions:
- Online or from magazines – Fashion magazines, in particular, are especially helpful because they have a lot of standing poses to study and learn from.
- Pose collection reference books – These are books with collections of various poses.
- Take reference images using a camera – You can ask your friends and family to pose for you or take pictures of yourself.
These are only some examples of the many things you can do. Pick the method that you feel most comfortable working with, and try to draw from references every day. Even if you only draw one thing a day, the most important thing is to keep on practicing.
Hand references at your fingertips
After the face, the hand is the part that stands out most in an illustration. It can also be one of the most challenging body parts to draw due to its high number of joints. Despite this, it’s one of the easiest body parts to practice via reference. If you’re right-handed, draw your left hand and vice-versa. If you want to draw your other hand, use a mirror and draw your hand’s reflection.
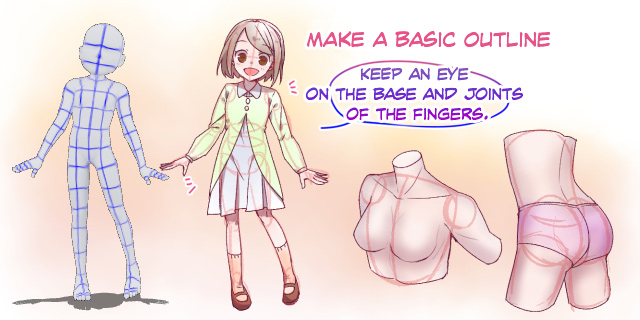
Use Shapes to Outlines for Figure Drawing
Use simple shapes to draw simple outlines
If you are struggling with figure drawing, try using circles and ellipses to form simple outlines. The key here is only to use round shapes to draw the body. For example, use a circle for the face, an ellipse the size of two circles for the body, long thin ellipses for the limbs, and so on. Find the overall shape that best matches your style and go from there.
Even though details like muscle-structure can change depending on the body, All bodies come from this simple structure of shapes. You can use reference photos as practice and fill in the body shapes with circles. Using this kind of simple outline will help you grasp the overall balance of your figures.
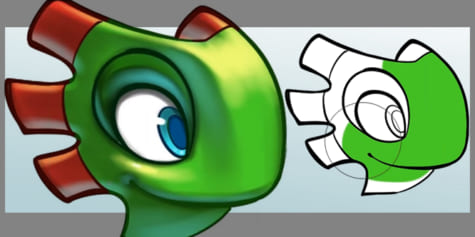
Use drawing figures
It also helps to use drawing models and 3D drawing figures to understand the balance of the body, especially when drawing difficult angles. Old-fashioned wooden drawing models will do, but for digital purposes, 3D figures are also useful. One of them, Design Doll, is free to use and, definitely worth checking out!
Design Doll
Another option is the digital painting software, Clip Studio Paint, which has a built-in 3D drawing figure feature. You can move the drawing figure around and practicing drawing it all within the software.
Clip Studio Paint
Tutorial: Using 3D Drawing Figures: Adjusting the Body Shape
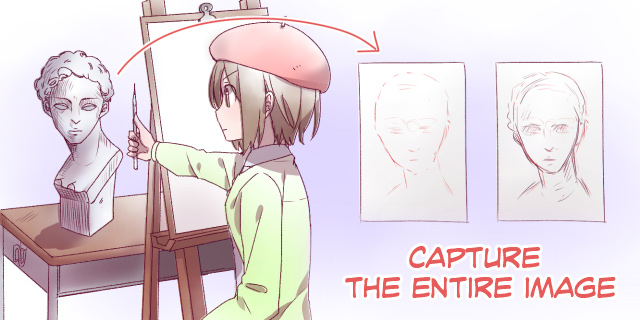
The overall image
You should avoid drawing from the edge of the canvas in. Instead, try to keep all of your main lines within its borders. This will allow you to understand better how all of the pieces of your drawing should fit together. For example, let’s say you are drawing a face, you will want to make sure all of the parts of the face are well proportioned and in the right places. To do this, first lightly sketch out the essential parts. Then, connect these parts to create a general idea of the entire face. Finally, check to see if the basic outline and all of the parts are in the right place. When your overall sketch is complete, you can then lightly sketch even more parts and so on. Continuously check that the overall proportions and positions of the eyes, nose, mouth, and so on, look natural.
Learn Structure to Improve Your Drawing
Observation skills
When drawing, looking at what you are going to draw is more important than moving your hands. Careful observation helps in many ways. Imagine how the cross-section would look like, and overall shape in a 3D fashion. Similarly, learning about what you are going to draw is also important. I always recommend using a human muscle anatomy diagram for reference.
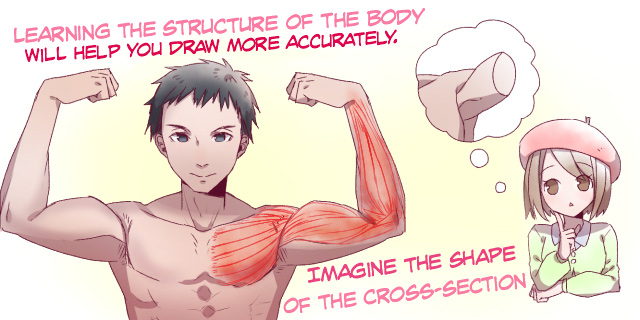
Learning about human muscle anatomy teaches us how bodies move. What kind of muscles are under the skin, and what kind of shape are they? Knowing the answers to these questions allows you to look at the human body as a three-dimensional object. Understanding such structures will lead to an overall improvement in your drawing skills.
The power of figure drawing with real models
When I started drawing illustrations professionally, I used to go to drawing meetings in art schools and galleries with my friend for figure drawing sessions. I usually used two-dimensional references such as illustrations and photos, but drawing from real-life gave me a much stronger impression because it was there in front of me. This also helped me learn about what I wanted to draw. I would highly recommend participating in drawing meetings like this in between your regular practice sessions.
It’s challenging to make flawless drawings, but it’s satisfying to be able to draw the things you want to draw naturally. I hope you enjoy drawing when practicing and that you will be able to create splendid works.
Creator: Sideranch
Writer: Kaisake (界さけ), Collaborator: Yokota Maki (横田まき)
Illustrator: Kaisake