How to Draw Dogs
Everybody loves cute animals. Dogs are especially cute because their body language can be very human-like and expressive. Let's look at how to draw a dog, using a simple combination of shapes in this easy step-by-step drawing tutorial.
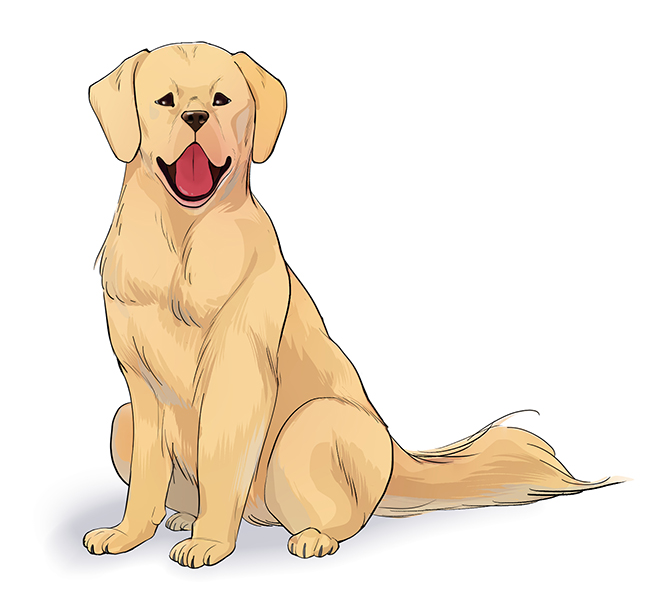
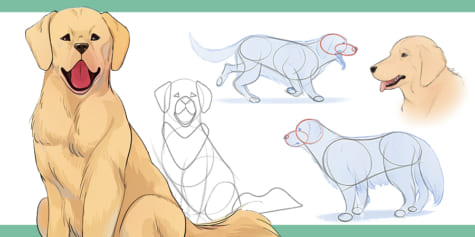
We’ll be using the ever-popular golden retriever for this dog drawing tutorial.
The golden retriever is a popular dog breed due to its large size, gentle nature, and loyalty. They have gentle eyes that make you smile, adorable droopy ears, and a rich coat of fur. Read on for how to draw this dog breed in simple steps!
Combine circles
Before you start to draw the dog’s features in realistic detail, make a sketch to capture the overall shape of the animal. Sketches help to understand the overall drawing, including contours, the direction of the head, and three-dimensional structure, as well as light, shadows, and color. There are many ways to do this, but this time, let’s start by drawing a combination of circles step-by-step.
Replacing a shape with a circle is the simplest and easiest approach for drawing. It’s very useful because it can be applied regardless of your art style.
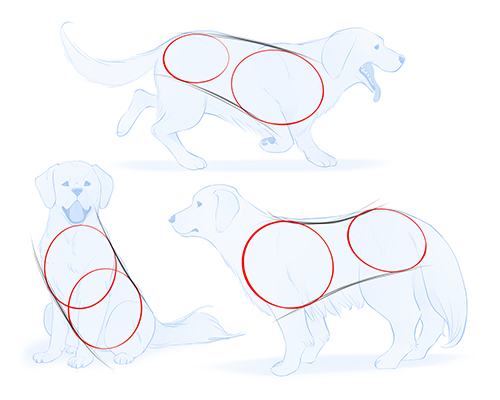
1. Start with drawing the dog’s body
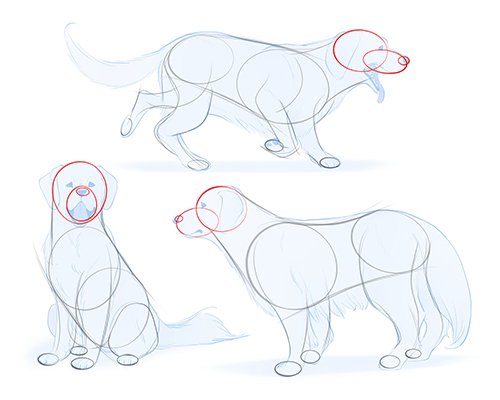
Let’s start with the dog’s torso. When drawing the torso, use two circles to represent the volume around the ribs and the pelvis. Golden retrievers are muscular, so draw the circle for the ribcage (upper body) larger than the circle for the pelvis (lower body). Then, draw lines connecting the two circles to form the basis of the body. Be aware of how the belly dips in as it reaches the pelvis. Rendering this helps express agility when drawing hunting dogs.
The position of the circles and the way they connect expresses the animal’s posture, as in the images below. To get a feel for this, try drawing some different poses: standing, sitting, walking, and rolling over.
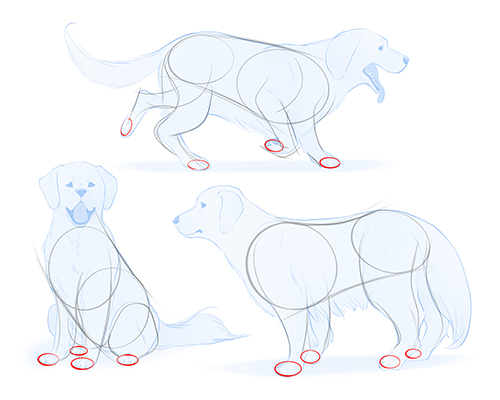
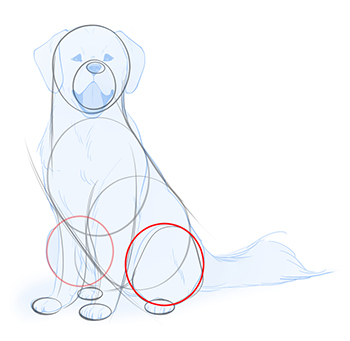
2. Drawing the legs and paws
Draw four little ovals for the paws. You can draw all sorts of poses depending on where you place the paws. When drawing a standing dog, make sure the paws align with the angle of the ground.
After drawing the circles for the paws, connect them to the body. In most four-legged mammals, including dogs, the bone structure of the feet is similar to that of humans. Therefore, the wrists, elbows, and shoulder joints all connect back to the torso. However, instead of focusing on skeletal structure, let’s focus on the overall shapes and how they connect.
In the case of long-haired breeds like golden retrievers or creatures with saggy skin, the joints in the legs may be buried and hidden. Fur and skin also move with the bones, creating a large, cohesive shape. It’s like wearing large, baggy clothes. Drawing based on a skeletal structure is compelling, but drawing based on overall shape is also an effective approach.
Tip
When drawing a sitting dog, the shape of the back legs can be simplified to a circle.
3. Drawing the dog’s head
First, draw a circle. This is the skull. The skull of a hunting dog, like a golden retriever, is oblong. After connecting the head with the torso, draw an oval to create the chin. You can adjust the length of the nose and mouth to draw older dogs or different breeds of dogs. If you know where the dog is looking, you can adjust the position of the jaw, which in turn creates a sense of movement.
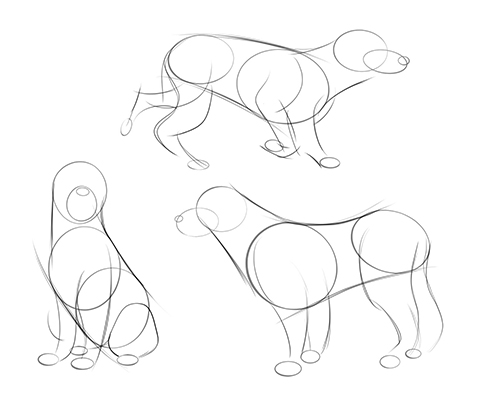
Now we have a sketch of the whole body of a dog by just using circles.
Adding features with simple shapes
Now we will go in and draw the more detailed features of the dog step-by-step. Even the smaller parts of a dog that appear complex can be loosely captured with a combination of shapes and lines. Let’s break down each feature into simple silhouettes while thinking about the end effect.
・Parts of the dog head
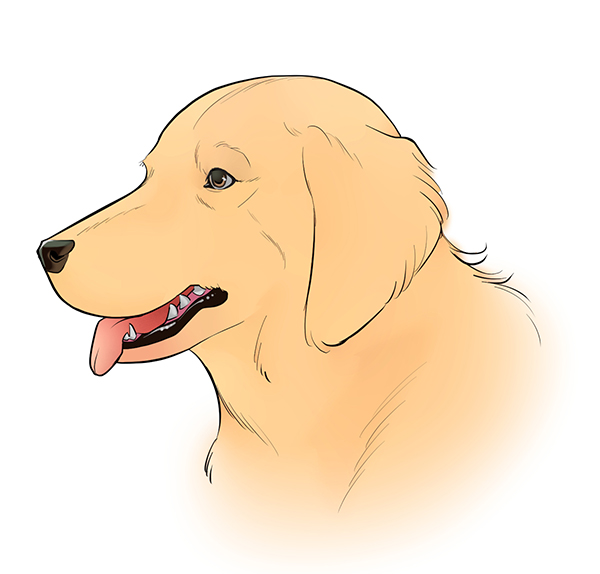
First, capture the shape of the jaw. Draw the dog’s snout roughly in the shape of a skewed rectangle, then add a line to separate the upper and lower parts. A golden retriever’s snout has sagging skin and an upturned mouth that gives the impression of a smile. It also features a sudden drop at the corners of the mouth. When viewed from the side, the snout should be divided by an S-shape in the lower part of the skewed rectangle.
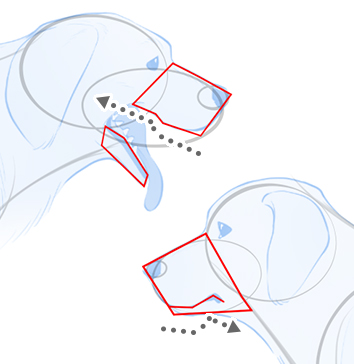
When drawing the snout from the front, draw a gentle W-shaped line. In the middle of the line, draw another line connecting up to the nose. Make sure the corners of the mouth line arch out.
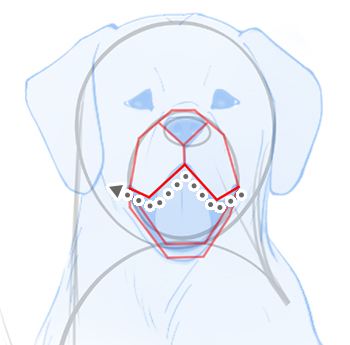
The golden retriever’s eyes are a little droopy, which also makes them look friendly and gentle. Draw the eyes in a triangle so that you can capture the droopy shape.

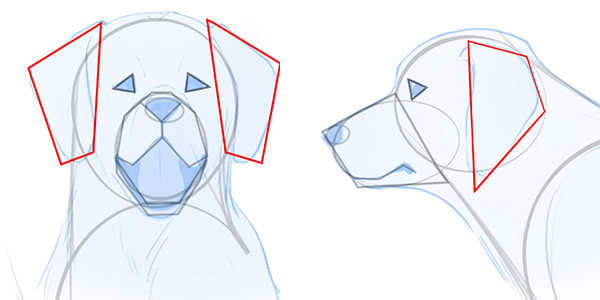
The ears attach to the back of the head and flop down towards the front. Try to capture the sagging appearance of the ears with triangles or squares that cover the sides of the dog’s face.
・Parts of the body
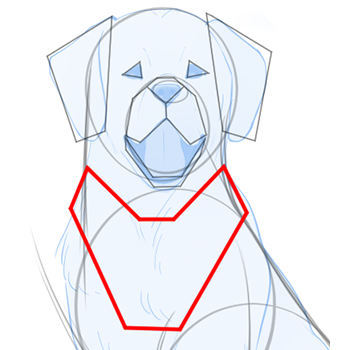
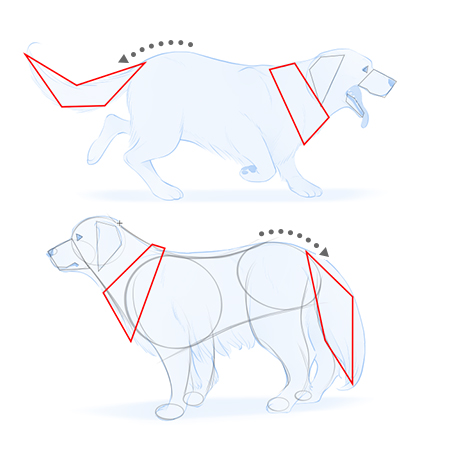
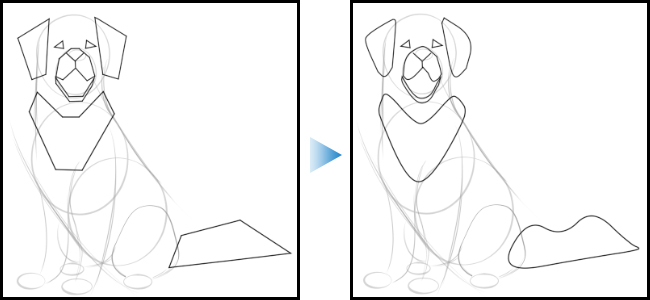
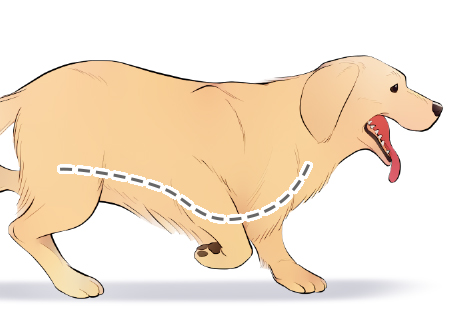
The hair around the dog’s neck is thick and fluffy, so add a fluffy look around the neck to convey this. Create the hair around the neck via a napkin-like shape. Adjust the size to match the amount of fur you want to draw.
Draw the tail along the slope that descends from the rump. In some dog breeds, the length and volume of the tail can add to the personality. The golden retriever has a bushy tail, so it’s a good idea to exaggerate its volume. Drawing to match the tail’s movement to the dog’s pose will make the picture come alive.
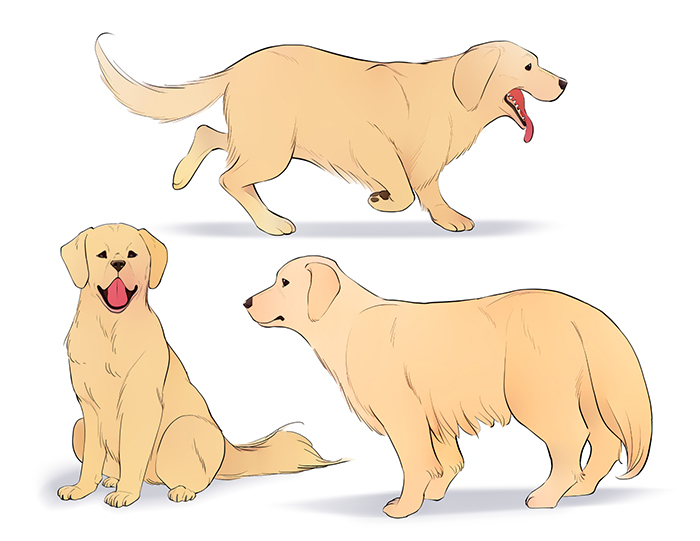
Once all of the body parts are in place, start rounding the straight lines and corners. The lifelike silhouette is now completed.
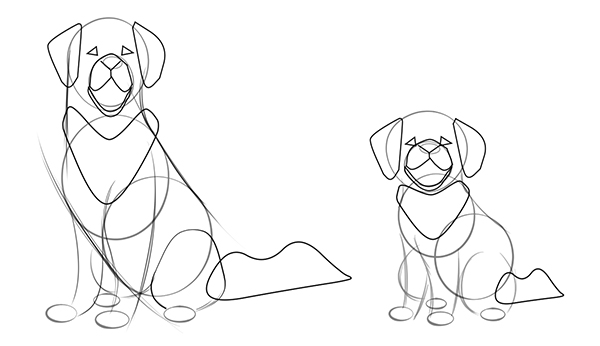
By changing the balance of the shape and size of the dog, you can draw dogs of different ages and breeds. Let’s try it out.
Unique characteristics of dogs and finishing touches
Now that the rough shape is drawn, we can go in and add detailed features. To draw the fur, it’s better to draw it in bunches to achieve the proper shape and expression rather than one hair at a time. Let’s add our finishing touches by thinking about what we want to emphasize in our drawing.
・Face
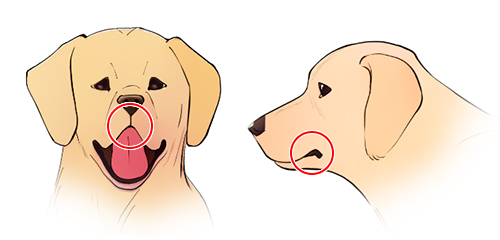
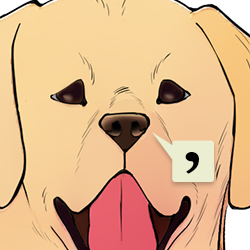
Golden retrievers have black lips noticeable at the crease leading to the nose and at the corners of the mouth. If the dog’s mouth is open, draw the lips along the edge of the lower jaw, as in the image below.
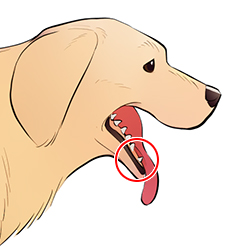
If the tongue is sticking out, it will cover the front teeth of the lower jaw. Having the canine teeth peek out from the sides of the tongue, makes the mouth appear more three-dimensional.
The nostrils look like commas.
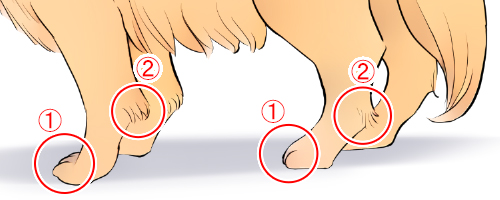
・Legs
A dog’s legs have a characteristic shape. The upper joints in dogs are located close to the torso.
The joints closest to the ground (2) are the heels, and (1) are the toes.
・Fur
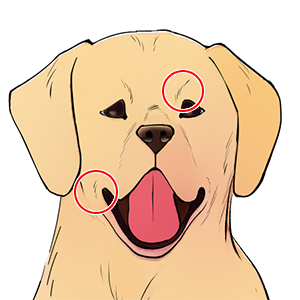
In contrast to the fur on its body, a golden retriever has short, prickly fur on the head. The areas that move a lot have wrinkle lines with noticeable fur. The eyebrow lines, nose muscles, and mouth area add to a dog’s expression.
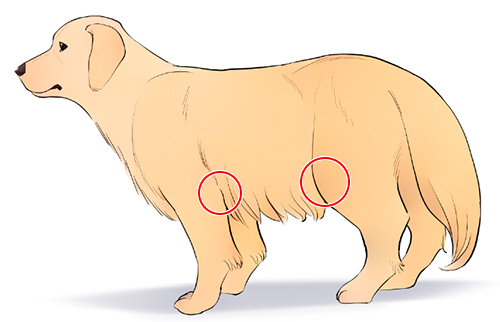
The long fur on the body falls with gravity and adds movement to the pose. Visualize the bumps made on the skin under the fur, the hairline, and the direction in which it grows. In the case of a golden retriever, it has bushy hair around its neck, under its belly and down from its legs. Draw while keeping the dog’s contours in mind.
It’s interesting to see how the shape of a long-haired dog can change as it’s fur grows or is trimmed. It’s easy to distinguish a dog’s features just by being aware of where there is more fur, where there is less fur, and where body lines are more prominent.
Adding finishing touches!
There are a lot of opportunities to draw close-ups of dogs. Damp eyes, nose, mouth, and tongue help create a lively, dog-like expression. Add highlights and reflections to create a glossy finish.
How did it go? In this article, we used the golden retriever as an example to show how to draw a dog, but this approach can easily be applied to other breeds of dogs and other four-legged animals.
I hope this tutorial will help when drawing your own expressive animals!