How to Draw a Rose

Roses are charming flowers you'll want to draw at some point to decorate your illustrations. Here is an easy step-by-step tutorial on how to draw a rose!
In this beginner-friendly tutorial, I will show you how to draw roses in various styles, focusing on expressing delicate petals and other parts that make a rose flower when drawn together, such as the thorns and leaves.
1. The structure and parts of a rose
Even if you can draw a beautiful flower, it’s a good idea to know what the other parts look like underneath, such as the stem, branches, and leaves. First, let’s briefly review the anatomy and parts of a rose.
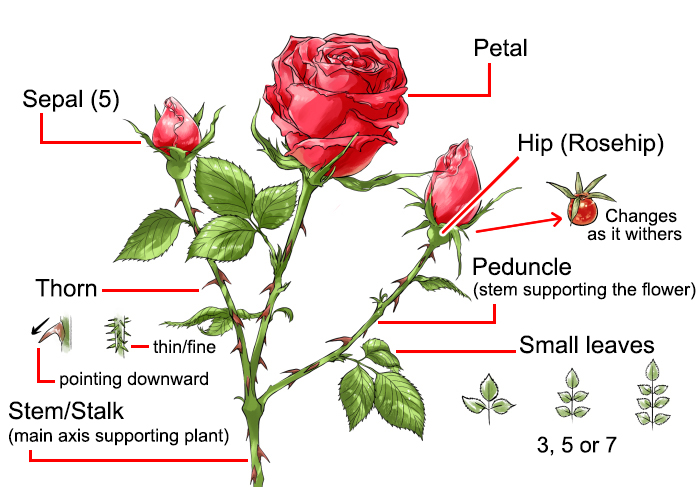
[Example diagram (arranged and simplified)]
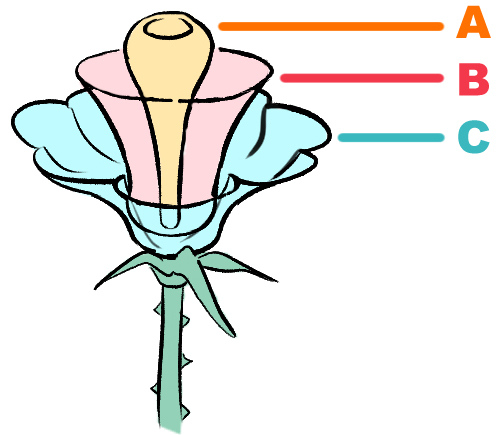
2. How to draw the rose head
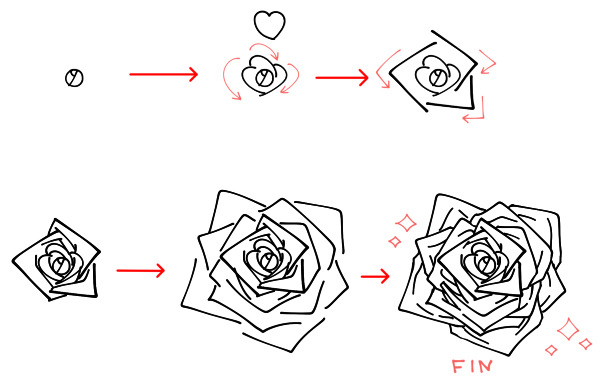
Now that you know the parts of a rose, let’s start drawing the petals. This time, I will draw two roses from two different views: a bird’s eye view from the top and one from an angle.
I divided the rose into the following three parts. Try to picture them as differently shaped cups like in the diagram below.
A. Inside B. Middle C. Outside
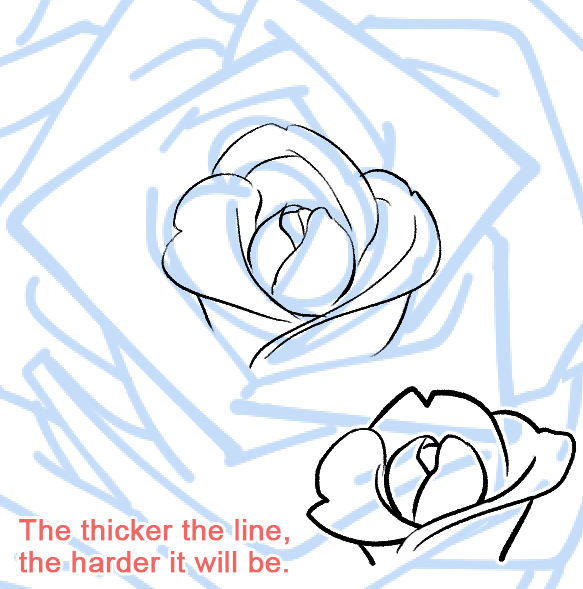
Steps for sketching a rose
Combining these three parts makes drawing roses easy. Next, I will draw a rough draft of the rose, as seen from above. Follow along with my step-by-step guide!
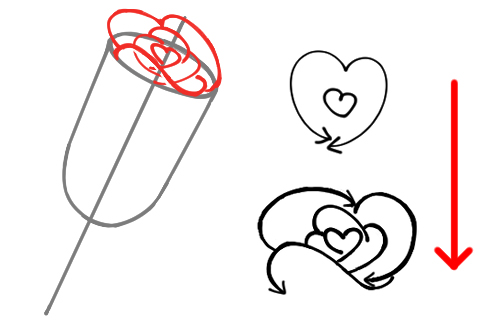
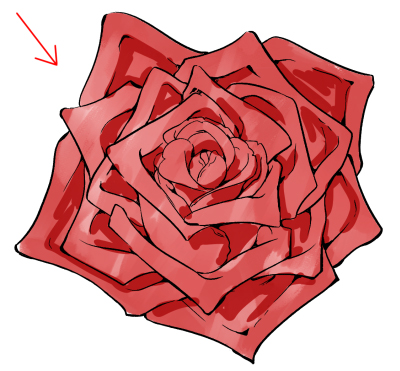
Drawing a rose from a bird’s eye view
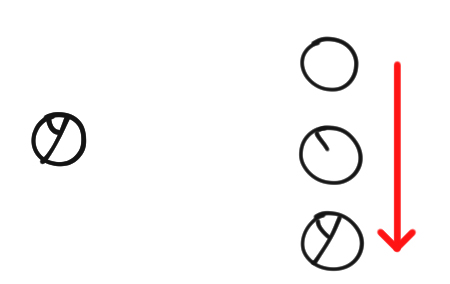
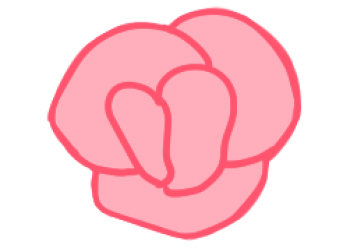
(1) Draw a circle for the center of the rose and then draw two lines to divide the circle into three parts, as seen below. One line should be short and the other long, like the letter Y.
(2) Start drawing a heart from the top of the circle. Once you draw one side, draw the other side. By alternating strokes, you can express overlapping petals. Complete part A by adding a wine-glass shape to the bottom.

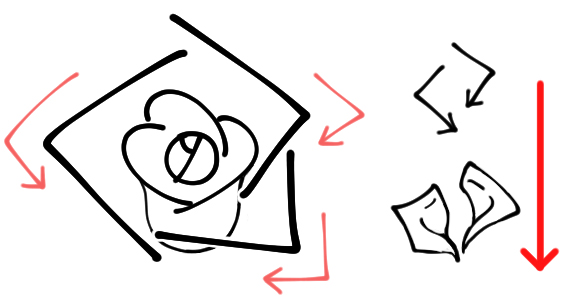
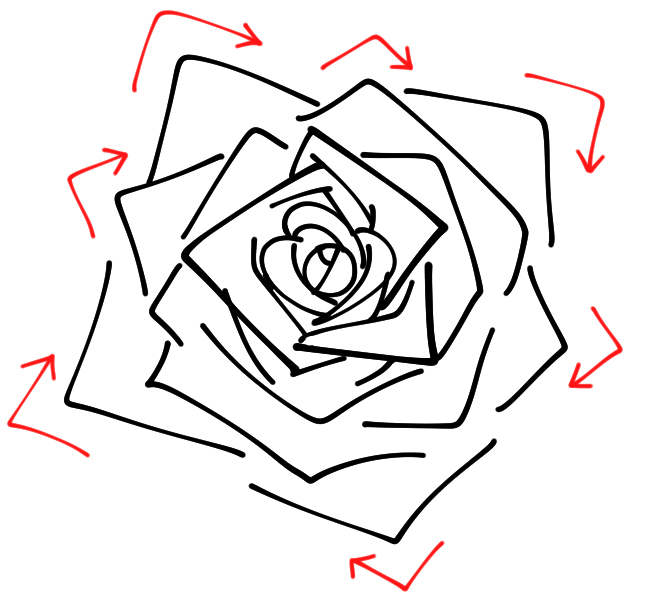
(3) Now, draw bigger, more angular lines surrounding the bud. Stagger the start and endpoints so that they do not overlap.
(4) Add inner folds to the petals drawn with hearts. By adding a fold, you can express the thickness, softness, and gorgeousness of the petals. As with part A, add a wine-glass shape to the bottom to complete part B.
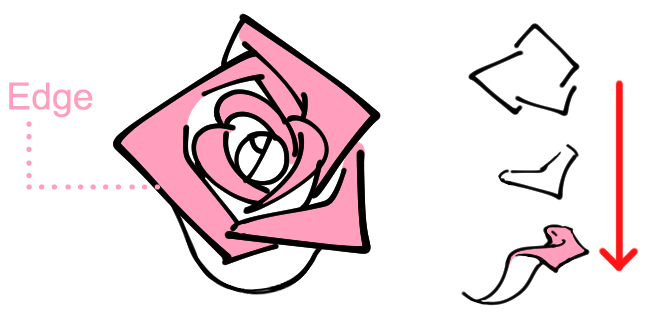
(5) By this point, the wine-glass shape of parts A and B is complete. Now for the final step, we are going to draw the outer petals. Draw petals more dynamically than B. Imagine a triangle or a square as you draw. As before, make sure that the start and endpoints don’t overlap and keep an eye on the overall balance as you draw. Draw the outer petals bigger to make the rose look even more gorgeous.
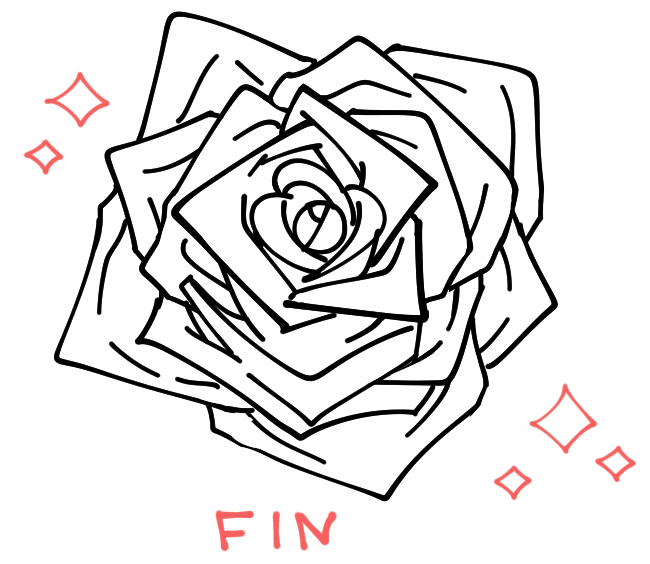
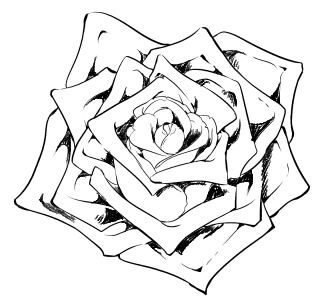
This completes our rose from a bird’s eye view.
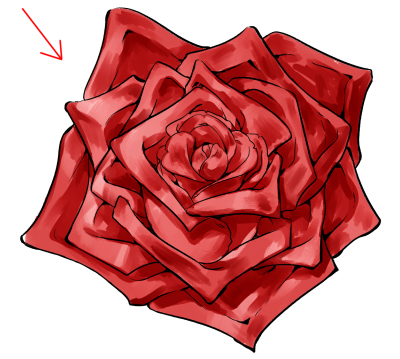
Drawing a rose at an angle
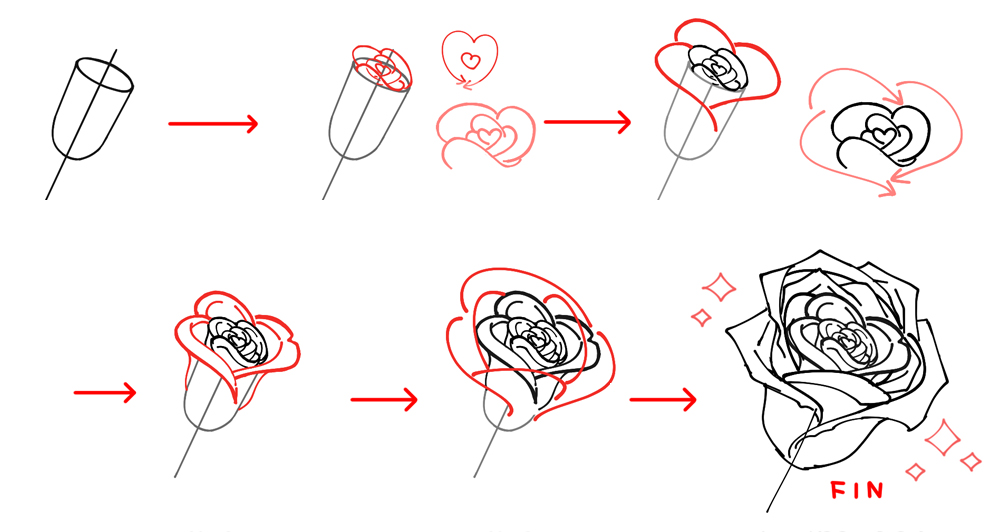
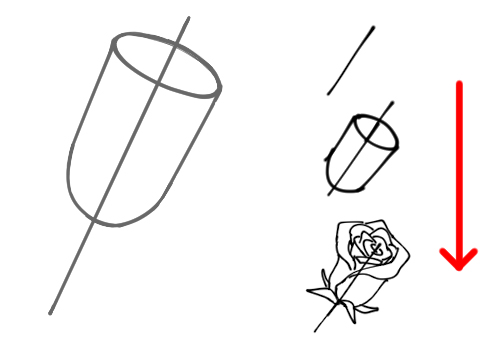
(1) Draw a centerline at the angle you want to draw the rose and then add an ellipse. Finally, draw a wine-glass shape on the bottom of the ellipse.
(2) Draw a heart in the ellipse.
Draw an open heart from the top of the circle. Now divide the heart in half and draw another side of the heart like in the image below. By alternating strokes, you can draw the petals overlapping. Draw so that the inside of the ellipse is balanced and filled in. Part A is now complete.
(3) Draw three large curves around the oval. Again, make sure that the starting and ending points do not overlap.
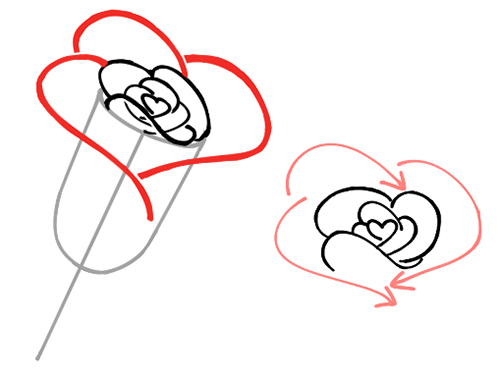
(4) Draw the inner folds of the curves to make petals. By adding an edge, you can convey the thickness, softness, and gorgeousness of the petals.
Part B is now complete.
(5) With parts A & B complete, we will now apply the petals to the outside of the flower. Draw these petals larger than in part B. Imagine them wrapping around the bud to create a three-dimensional effect. As before, make sure that the start and endpoints don’t overlap and keep an eye on the overall balance as you draw. Draw the outer petals bigger to make the rose look even more gorgeous.

This completes our angled rose.
How angular are rose petals?
Rose petal shapes differ depending on the type of rose. Some are pointed, and others are rounded. Furthermore, the flower’s thin, soft petals gradually curl up as it’s blooming. When using roses in illustrations, choose a type that suits the situation. For example, draw curled petals to indicate that a long time has passed since the flower bloomed. Draw pointed petals for a sad, dark scene. Finally, draw dainty, round petals for a happy scene like a wedding.
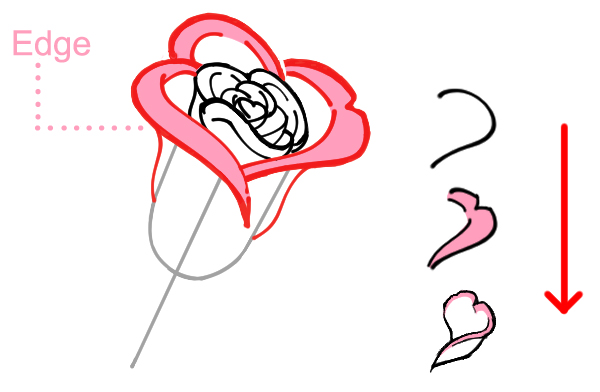
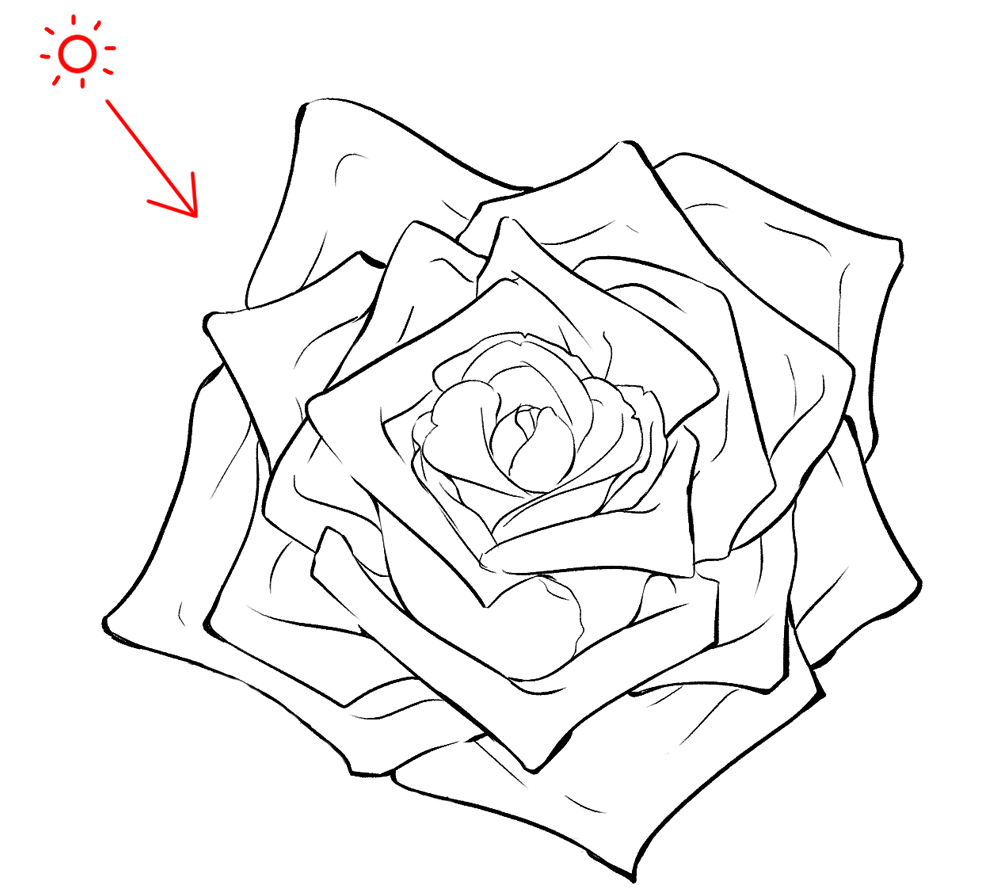
Inking
Now that we have explained that the petals of the rose are curled, it’s time to start our line art. Using the pen tool, I draw from the inside out, focusing on the image of the petals softly wrapped on the inside.
Inking tips
Line weight is very important in drawing soft rose petals. Part A is drawn with thin lines to express the delicate appearance of young petals.
Part B has varying line thickness, creating both a delicate, yet energetic image. Try to draw heavy lines both at the bottom middle of the wine-shaped curve and at the top where it meets other lines. Then, use thinner lines between these places in the middle of the top curves. This makes the petals look more graceful.
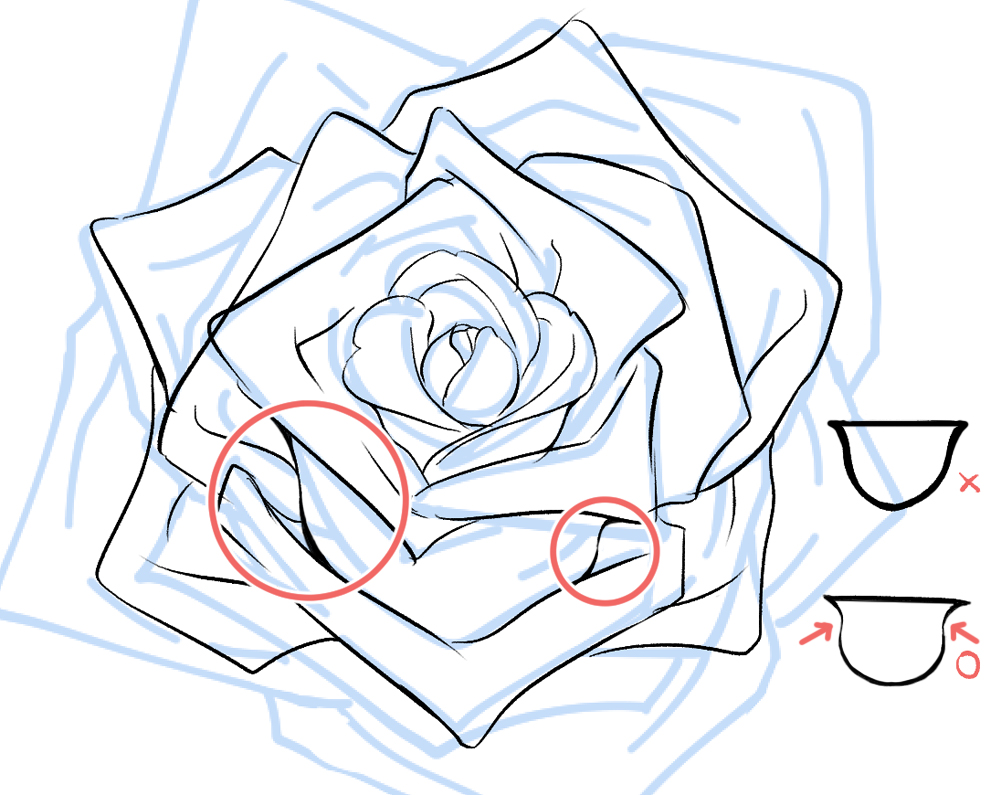
You can be flexible at this step. Draw sharper lines for the petals that are curved back. The sharpness of your line art will vary depending on how far the petals have rolled back and how fresh they are, but it’s not so sharp as to need a ruler.
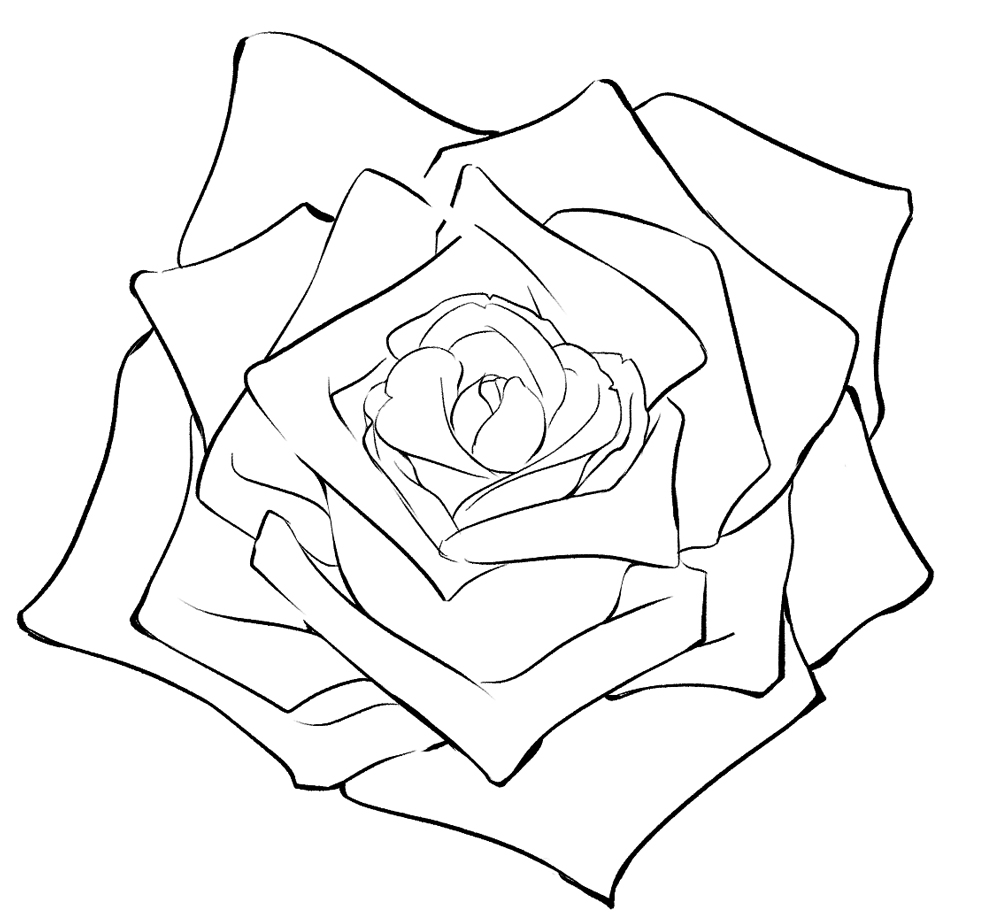
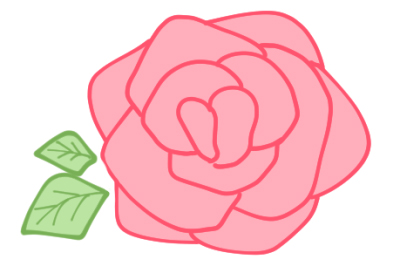
Finishing Touches
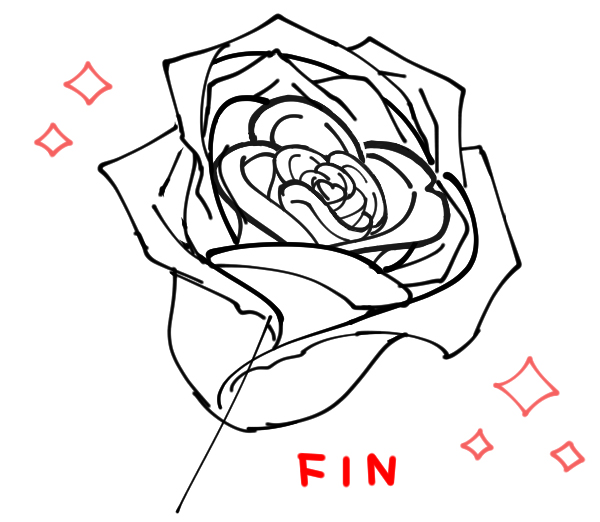
I hope you were able to draw soft and dynamic line art. If your rose feels a little lacking, just add some more detail.
Mature rose petals are raised on the outside, but have a recess in the middle toward the center of the flower. Add lines to show this difference in height to make the flower more three-dimensional.
After this, shade in the inner and overlapping areas to add depth and make the drawing pop out even more. In particular, if you add shade behind the wine-glass shape, it will really start to stand out.
Note: For color illustrations, it may be better to avoid black-fill shading.
The inked rose is now complete. Feel free to play around and arrange the petals into various combinations to find your favorite rose.
How to paint a rose
With the line art complete, it’s time to add color to our rose.
(1) Determine the light source (the direction the light is shining). I set the light source to hit from the top left.
(2) Paint the first coat. Choosing a lighter color than what you envisioned will help the rose not look too heavy when applying the shadows. For this part, I’ll use [Gouache] in the [Brush] tool under [Thick paint].
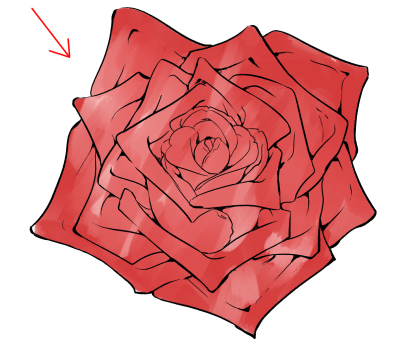
(3) Next, add the first shadow layer with the [Pen] tool > [G-pen]. Choose a slightly darker color than your base layer. Lay in shadows where the light won’t reach, such as the back of the wine-glass shape and dips in the petals. Roses have complex overlapping petals, so keep this in mind when laying down your shadows.
(4) Now we’ll use the [Gouache] brush to blend the shadows.


(5) Then, we’ll use [G-pen] and [Gouache] to add highlights to the area where the light shines, such as the tips and edges of the rose petals.

(6) Paint the stem in the same way, and adjust the overall image as needed. Painting shadows and highlights along the lines of the petals and leaves will give it a more realistic look.
(7) All done! Our painted rose is now complete.

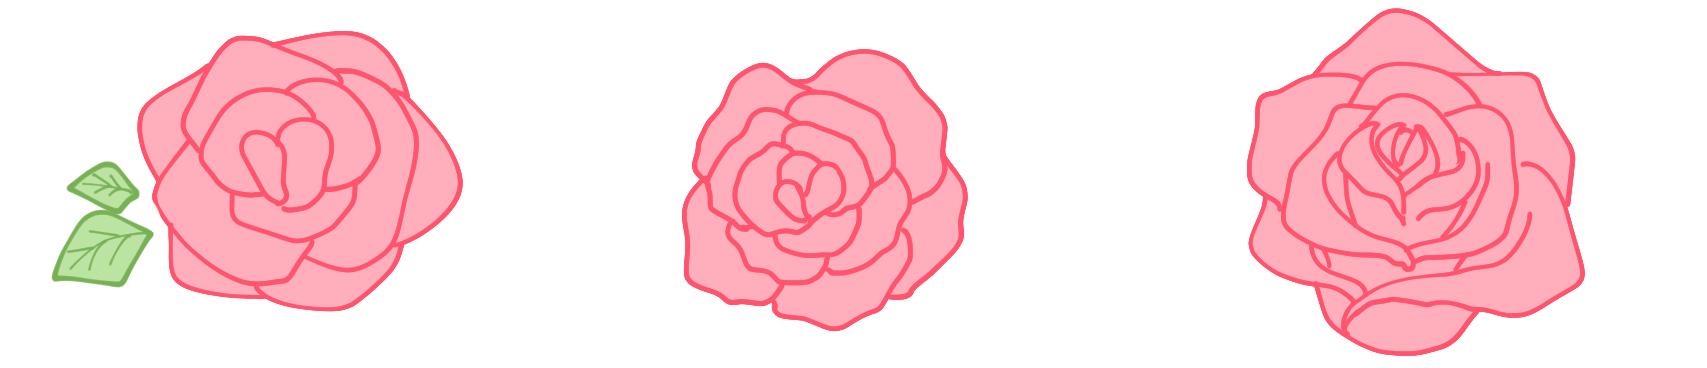
3. How to draw a simplified rose
If you want to draw a stylized rose, here are two easy ways to do this.
Draw triangles
The first method uses triangles to build up a simple rose shape.
(1) Draw two triangles for the center and then surround it with three more triangles. This will be the middle shape of the rose.

(2) Draw more rounded triangles surrounding it.

(3) As you add more triangles, try coloring in the space between each triangle, leaving only a thin line. This makes the triangles look more like petals.
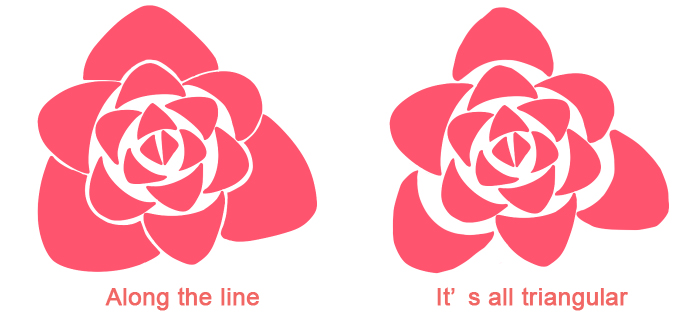
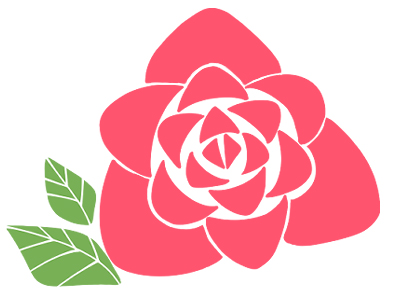
(4) Stop when you reach the desired size. If you draw leaves and ivy around it, it looks even more rose-like. Real rose leaves are jagged, but we’ll remove them in this simplified version so it’s easier to draw them.
Layer soft brushstrokes
The second method is drawing soft petals attached to each other.
(1) Draw a squished ellipse and determine its center; alternatively, you can also draw a circle and divide it into three parts. The simpler, the better.

(2) Draw soft, rounded petals around the center of the flower. Draw petals in numbers of three or five to make it look more rose-like.
(3) Then add some simple leaves around it.
It really looks like a rose, right? Try this method for design work or a hand-drawn touch. Adding variation to this simplified form gives a sense of realism and allows you to enjoy all kinds of rose shapes and flowers.
Final Comments
How was the guide? Roses are complex flowers, but they become easier to draw by breaking them down into parts. This is just one example of a rose. Other roses have different numbers of petals and frilly shapes, so draw all kinds of roses, discover your favorite, and create stunning bouquets!