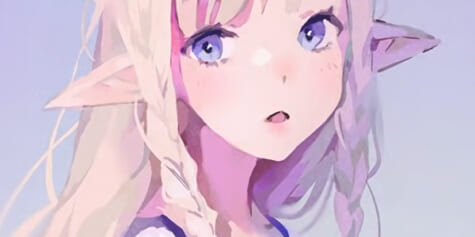
Anime Hair Tutorial for Beginners by Laovaan
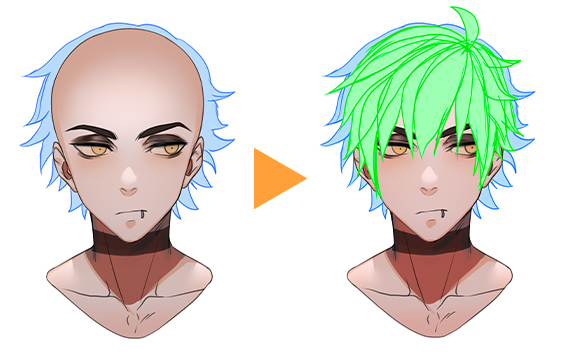
Discover how to draw different anime hairstyles with this tutorial by Laovaan. It guides you through using layers effectively to create interesting hairstyles.
Hey everyone, I am Laovaan.
Today, I will show you how to draw anime hair for your character in a few simple steps.

I’ll be using Clip Studio Paint, but of course, you can use any app or even try achieving the result with traditional media if you like.
Sketching
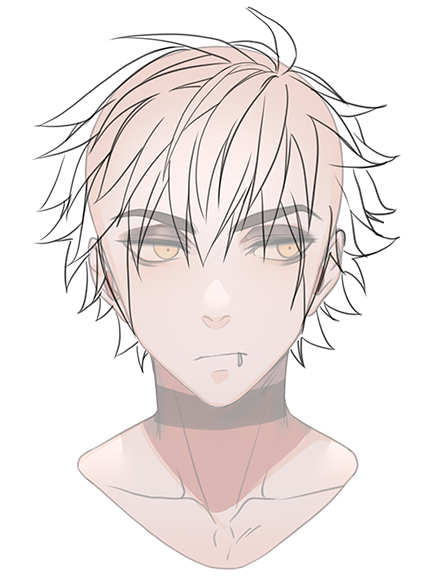
Let’s begin with short hair.
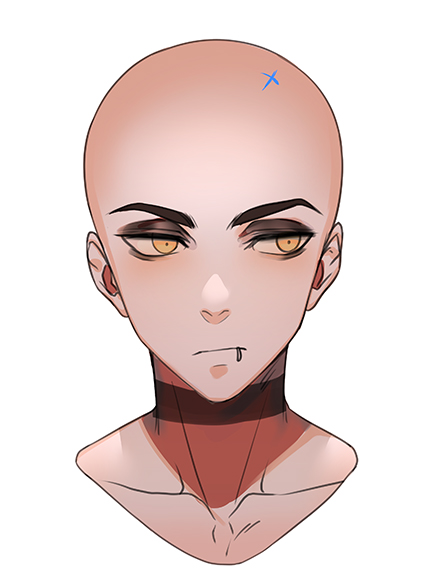
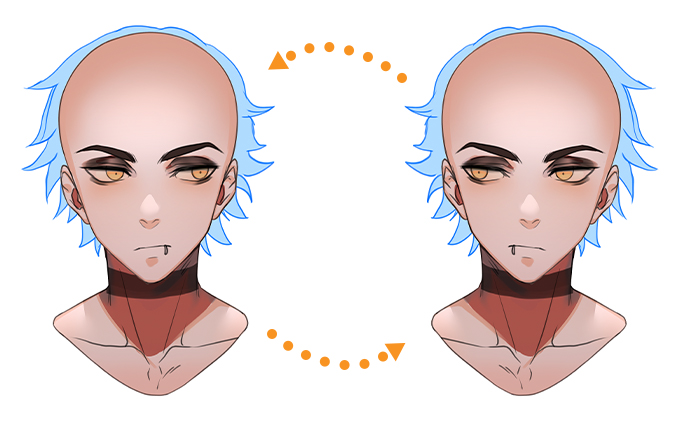
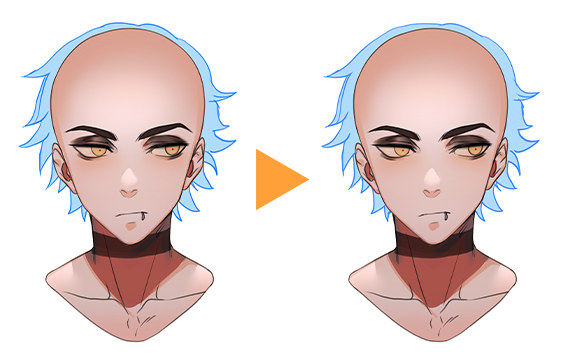
I have prepared this head to show you how to add hair step by step.
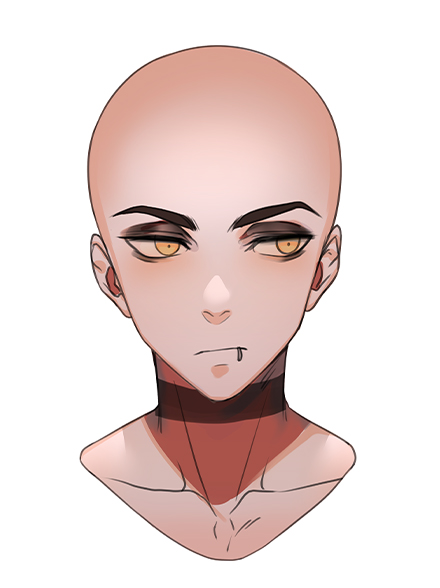
I will be adding one layer behind the head and one in front of it, similar to a sandwich, with the head layer between two hair layers.
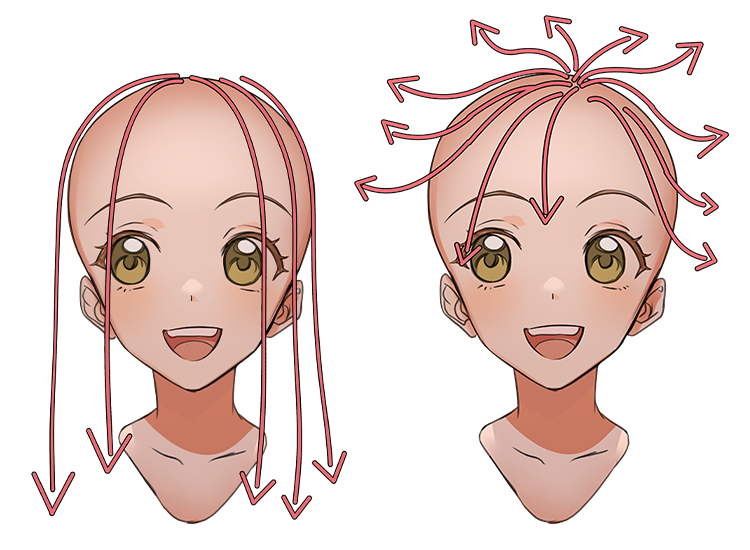
I start by marking a spot on my character’s head.
It’s the spot on your head where the roots are visible, and its location depends on the hairstyle you are going for.
HINT
Depending on the hairstyle, you can place it in the middle or slightly to the sides.
With styles like partings, the spot becomes a line.

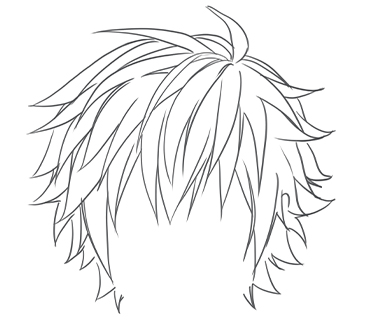
The first layer of hair
Next, I create a silhouette by drawing lines around the head, following its overall shape.
The flow of the lines roughly points back to that spot on the head we marked earlier.
The direction of your lines is important. Try to keep the spot you marked earlier in focus and direct your lines towards it, just like a fountain.
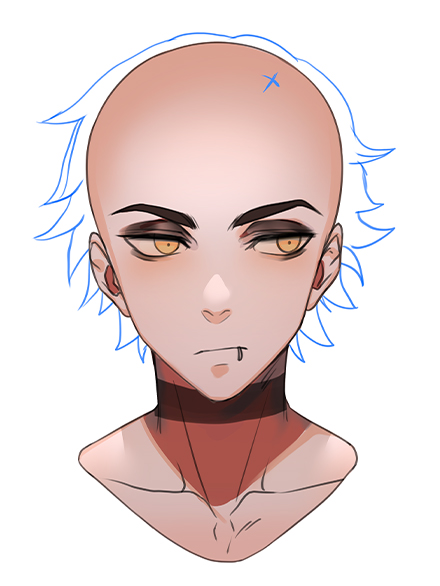
As this layer of hair will end up behind the head, I only need to draw the silhouette.
There is no need for much detail at this step, and you can be quite rough with your linework.
The goal is to create a shape that is nicely balanced against the head. I make sure the hair silhouette stays outside of the head shape, using the sketch underneath as reference, so the bald head does not suddenly pop up behind the hair.
HINT
You also want to have a harmonic variation of thicker and thinner hair strands.
The same goes for how the hair strands are bent.
Of course, it also depends on the hairstyle you want.
With shorter hair, if all the curves you draw go in the same direction, it can quickly look gelled and stiff, so it helps to have a few outliers here and there to keep a more natural look.
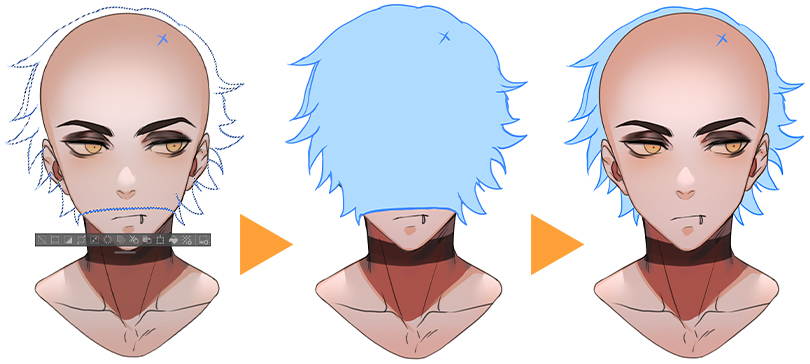
With the silhouette for the hair done, I check whether there are any unbalanced or weird-looking areas. To do this, I fill the shape with color on a new layer, enhancing contrast with the background and making the shape visible.
NOTE
By flipping the drawing regularly, unbalanced areas are easier to spot and fix.
Lastly, try using the Liquify tool to adjust your drawing.
I can’t recommend using the Liquify tool enough because it enables you to fix mistakes without having to erase and redraw your work.
You can directly work on the overall shape, and with just a few tweaks, it will appear more harmonious.
Recommended Article
With Clip Studio Paint’s Liquify tool and both layers selected or merged, I can simply push hair strands around, inflate them, or make them thinner.
Learn more about how to use the Liquify tool in this tutorial:
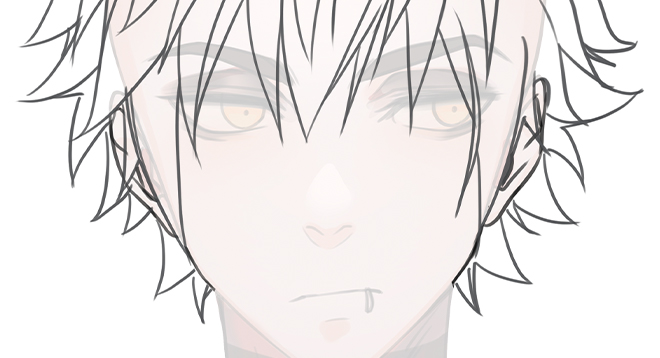
Drawing the second layer
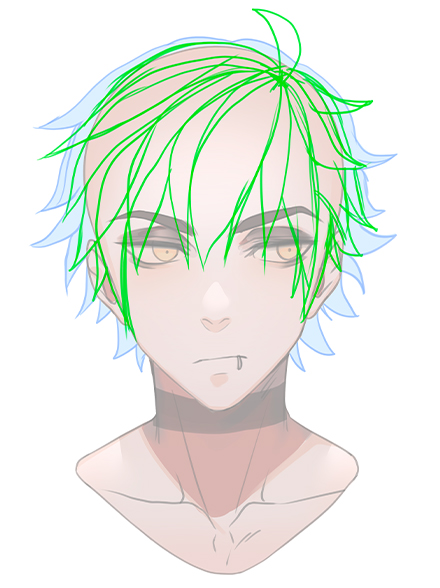
Next, I will draw hair that covers parts of the face.
The overall formula is pretty similar:
Starting from my reference point, I draw a few lines. This time, though, I draw them explicitly going outwards from that marked spot, growing towards the forehead. Unlike the first step, I don’t just draw a flat shape this time; instead, I draw the single strands explicitly.
You want to have a variety of thick and thin strands and a balanced amount of variation, considering their bending.
For this character, the bangs only cover parts of the eyes, and only around the ears do I draw them a bit longer.
HINT
Don’t forget to pay attention to the head shape when adding the second layer.
There can be strands of hair that go beyond the silhouette created in the first step.
Having parts of the silhouette still primarily visible makes the whole layering much more appealing, but we don’t want to overdo it.
As always, it comes down to finding a middle ground to keep it harmonic.
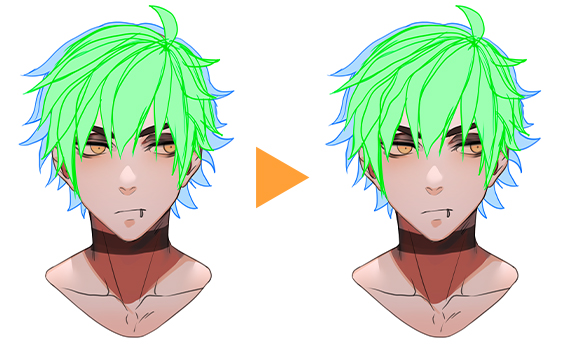
To check whether the new layer of hair matches with the previously drawn layer, I fill this layer with color too.
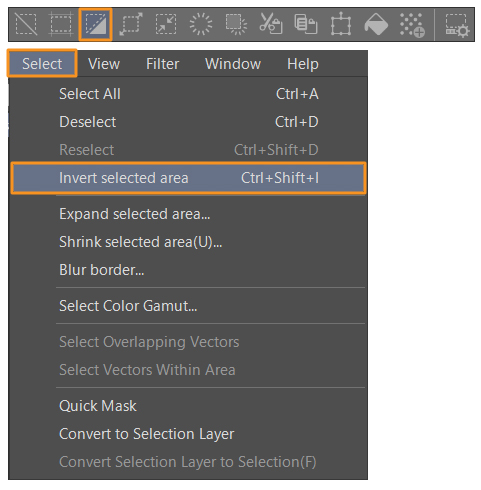
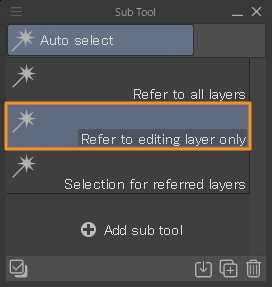
My preferred way of filling this shape is to use the Auto select tool on the Tool palette.
I tap on the area outside the line art layer and then invert the selection.
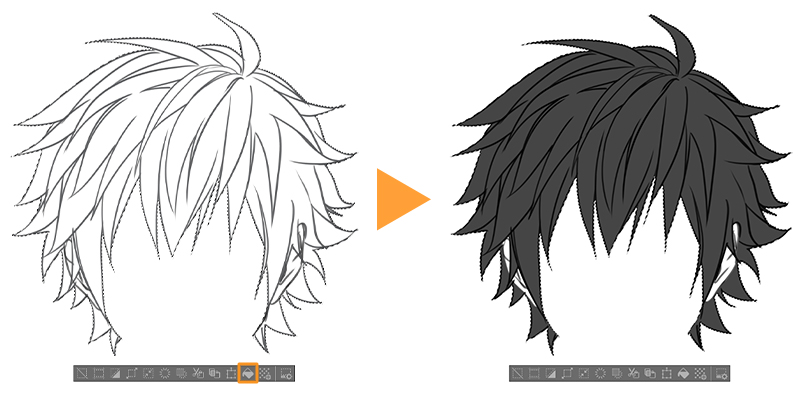
I then create a new layer between the silhouette layer and the line art we just created.
Now, when I use the fill bucket on this new layer, it will fill in the selection.
HINT
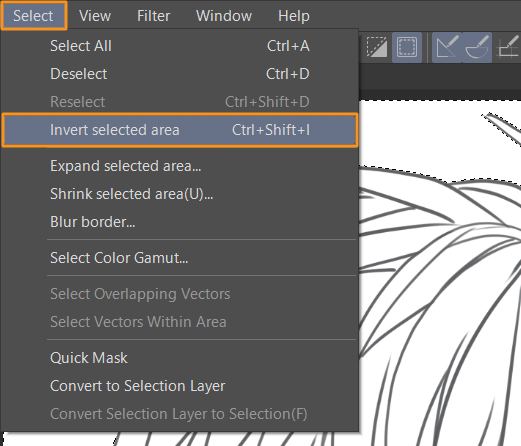
You can invert the selection by either tapping the Invert selected area button on the Selection Launcher that appears below the selected area, or tap Select > Invert selected area from the menu bar.
Liquify to the rescue
Like before, I will make some adjustments to the anime hair using the Liquify tool.
I select both layers, the lineart, and flat color layer, and use the Liquify tool on any irregularities I notice.
I push the strands of hair to more fitting places, bloat strands or pucker them.
HINT
A rule of thumb is that things in the foreground are bigger than things in the background.
So, hair that is closer to the viewer typically looks better when the strands are thicker, and hair on the outer fringe of the head often looks better when they are a bit smaller.
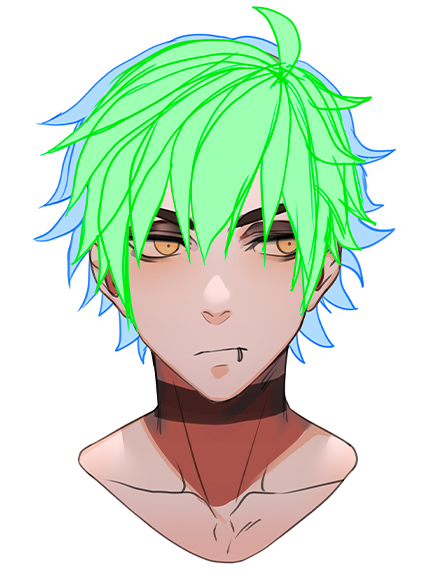
The final layer of hair
Technically, you could call it a day with the second layer of hair, but I would like to go for another round to add just a few more details to the anime hair.
For that, I use the growing point and start drawing even more strands.
This time they are a bit shorter because I don’t want to fully cover up the work I did on the second layer.
Line art Time
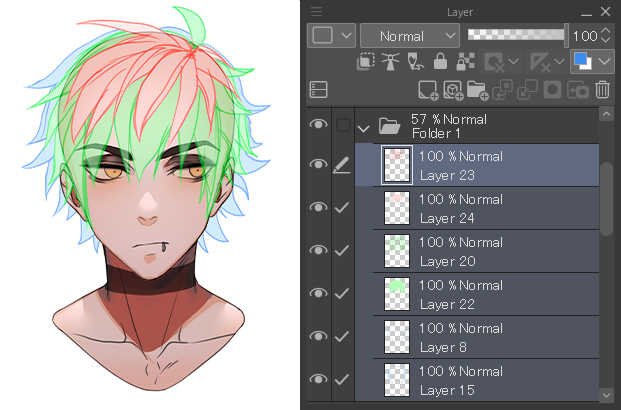
Once I am done with the sketch, I group all the layers and add them to a new folder.
Then, I lower the opacity of the folder.
This way, I can use all three layers as guides for creating my line art.
While tracing the sketch, I do not always follow it down to every single detail, but here and there, I like to add some little extra strands of hair just to give it more life.
I might also extend some strands of hair or make some general changes.
In the end, it comes down to how satisfied you are with the sketch.
If you feel it is good the way it is, you can also simply trace without adding anything new to it.
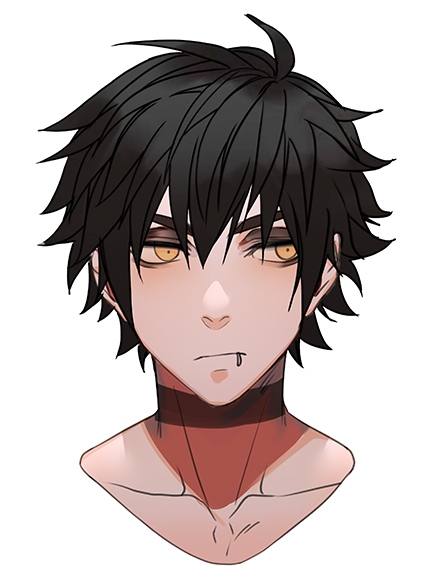
Coloring the hair
Now, it’s finally time to add some color.
First, I fill the hair with a base color.
With the lineart, areas of hair around the neck and ears are typically open in some places.
This means the Auto select tool won’t be able to select all the areas we need, so we have to close those gaps without actually adding anything to the line art.
The trick is to create a separate new layer just for this purpose.
On this “helper” layer, I simply add a few lines to close any gaps I see.
Recommended Article
If your lineart has many smaller gaps, you can also try using the Magnetic Lasso sub-tool, which was added in Ver. 4.0.
Learn more here:
Now, I make every layer invisible except for the line art and the “helper” layer. The Auto select tool will follow the overall shape of both layers.
Once again I tap on the outside, then invert the selection, which will turn it into a selection of the inside of the shape.
Then, I can simply fill it with a flat gray base color.
HINT
Aside from providing the base color of the anime hair, this solid layer has another purpose.
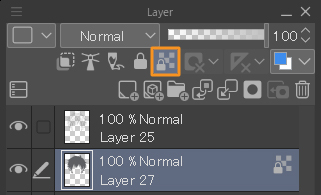
By locking the layer using the Lock transparent pixels button, you will only be able to draw on pixels that are already colored in.
In other words, you don’t have to worry about coloring outside the lines.
Shading
To add shading to the anime hair, I use the Gradient tool to add a gradient with a darker color.
By locking the transparent pixels it will automatically only fill in the shape that we already have.
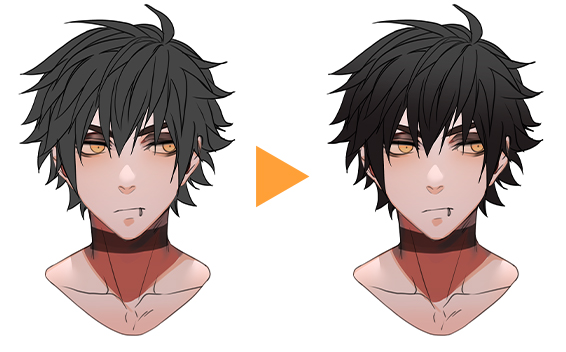
Roughly sketch in some shadows and lights using the colors already there.
To add some basic shadows, I take my paint brush and follow the shape of my gradient roughly, to add some harder shadows. I switch between the base and shadow color by using the Eyedropper tool.
My goal isn’t to work super cleanly, but to create a basic light situation with some distinctive lights and shadows.
With the same paint brush at a smaller size, I paint some even darker tones and add more contrast and structure.
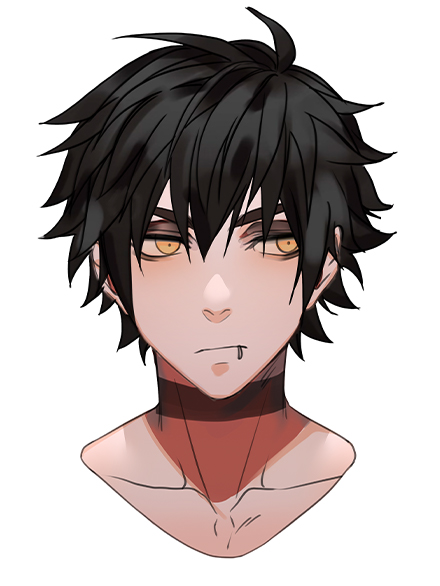
Clean up
With a hard round brush I go in and use the line as an orientation to polish the strands of hair by giving them the flat base color back.
The only thing you want to ensure is that the areas you paint are sharp and pointy, so they make a nice contrast to the soft gradients and smudgy painting style from before.
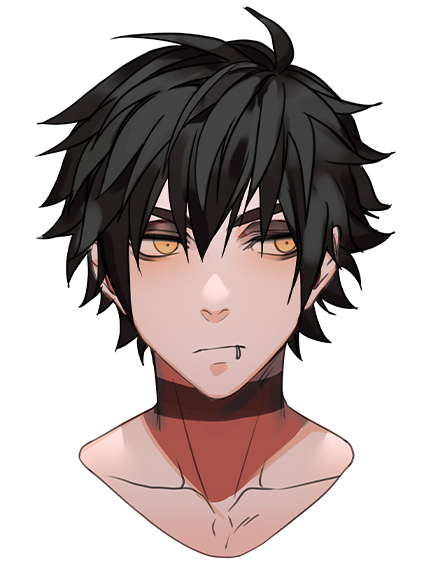
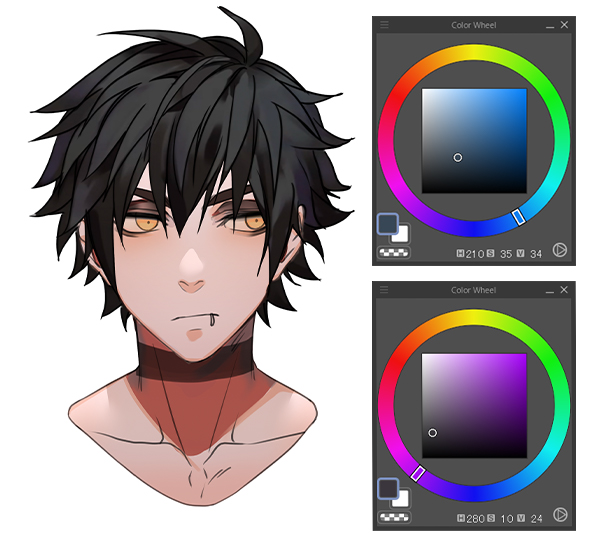
To add some more colors besides a variety of neutral grays, I picked a subtle violet tone and simply painted a few strokes here and there so it looks a bit more interesting but not overall purple.
With a bigger airbrush I also put some light bluish tones into the mix.
For some more texture I go back to the G-pen and draw little triangles onto the lighter areas of the hair.
With this simple method, I create the impression that the hair strands are more detailed and accentuated.
Spread them evenly throughout the whole head, and you get a nice, consistent look that distracts the viewer from the rougher areas.
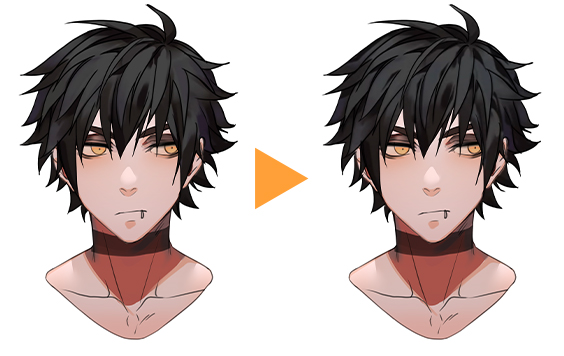
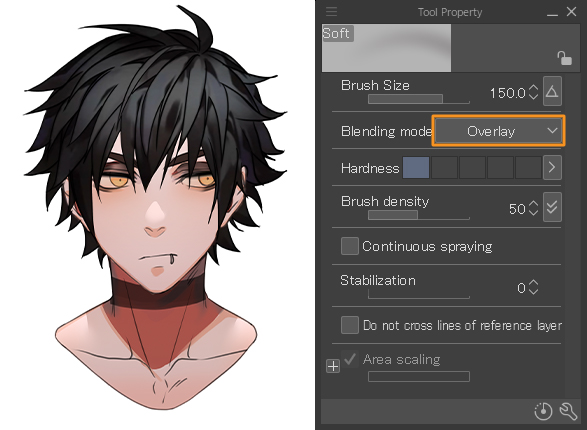
Lastly, to bring the highlights and shadows together some more, I like to use the airbrush on overlay mode and enhance the shadows and highlights by painting over the head with either a lighter or darker color.
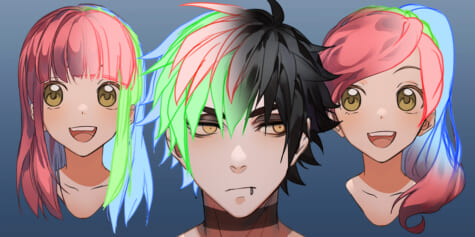
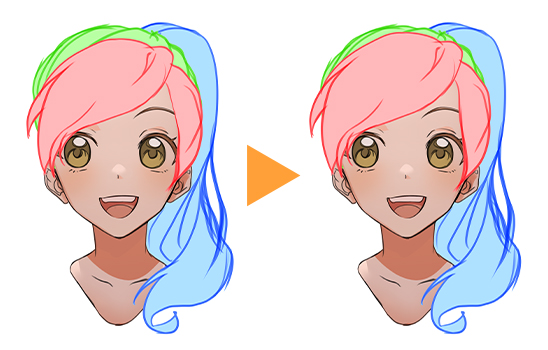
Long hair – Ponytail
You can draw longer anime hair using a similar approach.
This time, though, we have to put even more focus on the overall shape and less on the individual hair strands.
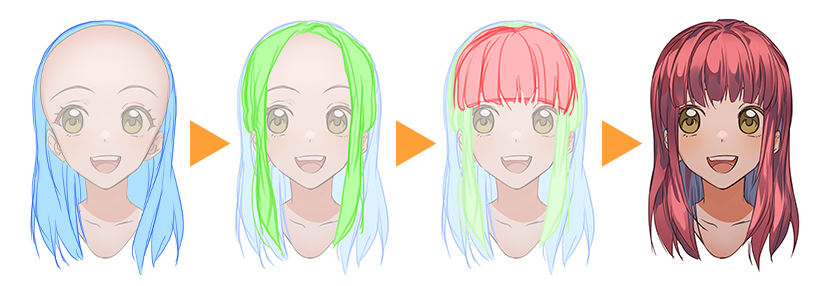
Again I start with the layer that will end up behind the head.
As I want to draw a ponytail hairstyle, I will focus only on the visible hair, specifically on the right side.
With a few strokes, I draw lines flowing out of the spot I marked and stop roughly around the shoulder area to end the ponytail in a little swirl.
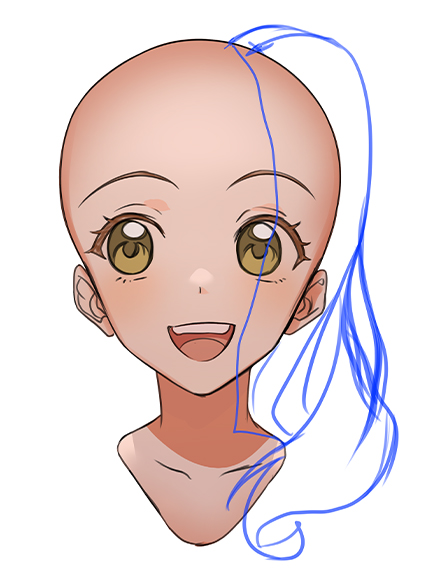
HINT
It might look easier at first because longer hair has more gravity, and there aren‘t as many strands of hair that are outliers and pointing in different directions compared to short hair.
Nevertheless, you’ll want a nice structure, so you still need to pay attention to the shapes and balance.
I close the layer by drawing a line from the neck up to the marked spot so that I can
use the Auto select tool again.
After making the selection I color the hair on a separate layer.
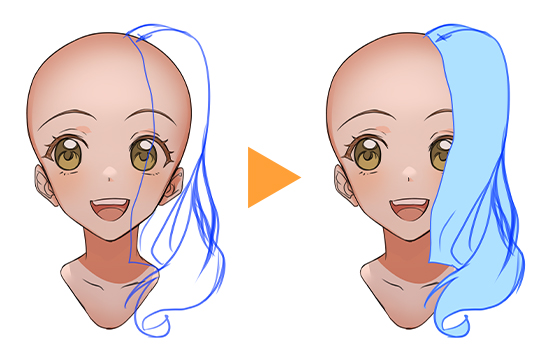
I then erase the part of the hair covering the face by creating a selection of the head and erasing the parts on the hair layers that overlap.

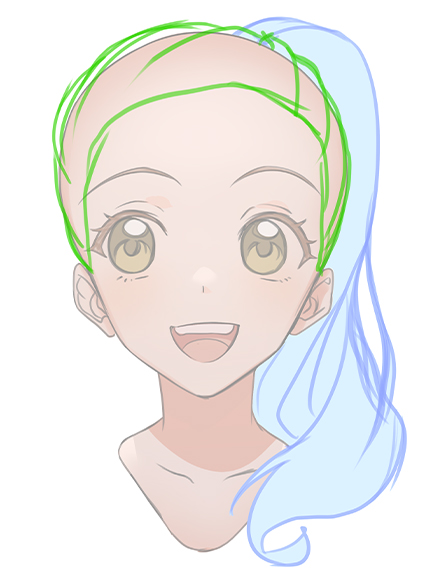
For the second layer of hair, I mark my spot again and draw lines starting from the ears, orbiting around the head directed towards the marked spot.
These lines will be the hair lying flat on the head because they are bound at the location where the ponytail is tied.
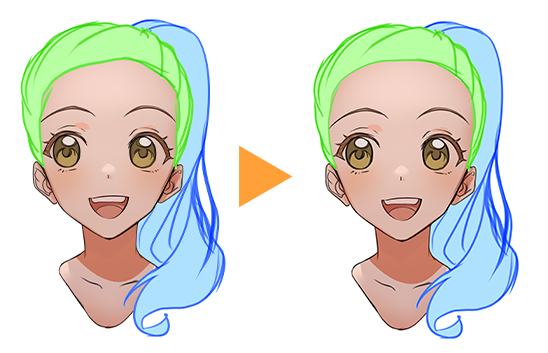
Again, I close the lineart and color it to get a better overview of the shape. With the Liquify tool, it’s easier to figure out any imbalances that need fixing.
Overall though, as this layer is mostly covered by the next one, we don‘t need to be as tidy and clean this time.
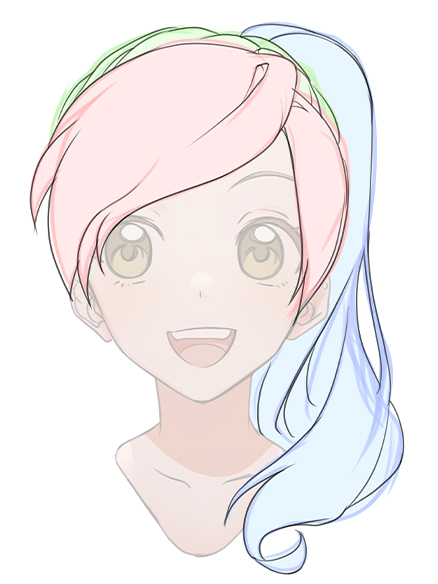
Unlike with the shorter haircut, this time, the third layer of hair covers parts of the face.
I draw a curved line roughly going down from the marked spot towards the left eyelid.
I then add a few little pointy strands of hair for detail, enclosing the ear area with the line, and close the shape using a bigger curve that follows the head shape.
For the other side of the parting I draw a crescent moon that goes straight down to the ears.

All that’s left to do now is to color in the shape and make some adjustments with Liquify as needed.
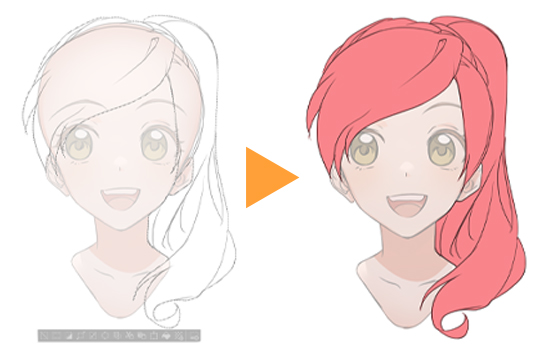
Now, onto the lineart.
Add all the layers to a folder and lower the opacity to make tracing your sketch easier.
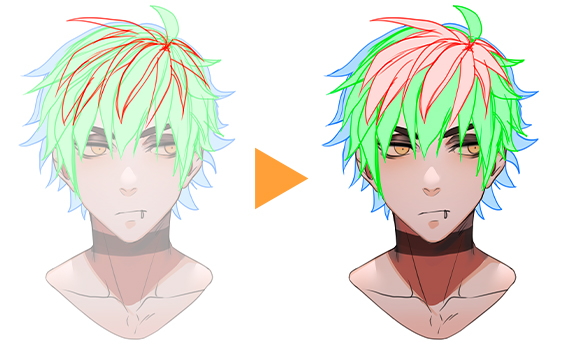
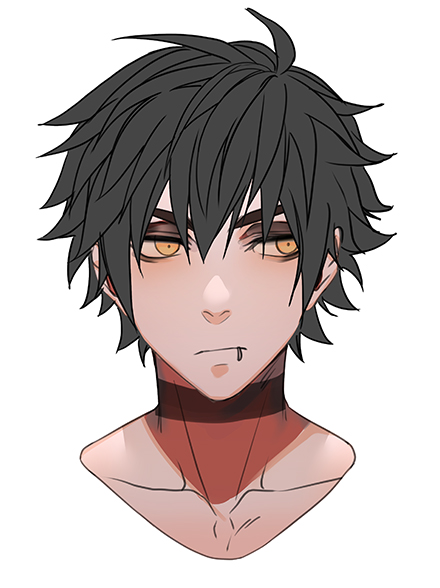
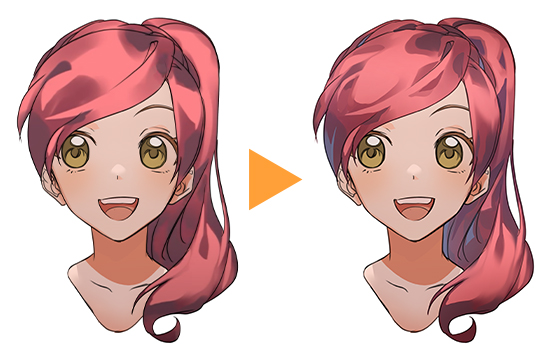
Coloring long hair
The coloring process works much like the first example for short anime hair.
First I create a flat base color layer in the shape of the hair.
Once again, I created a “helper” layer to close the gaps in my lineart so that I can use the Auto select tool to create a selection area and fill in a reddish base color.
Lock the transparent pixels of the layer, create a gradient with a darker color, and add some rough shadows and highlights by switching between the colors using the Eyedropper tool.
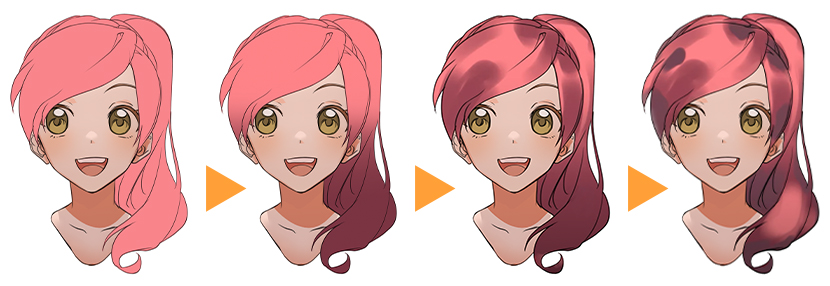
The rest is basically the same as with the shorter hair: adding darker shadows and shifts in hue, refining shapes and details, and bringing everything closer together with a big airbrush.
Of course that also works for other hairstyles.
Just like before, I start with the silhouette and piece the individual parts together layer after layer.
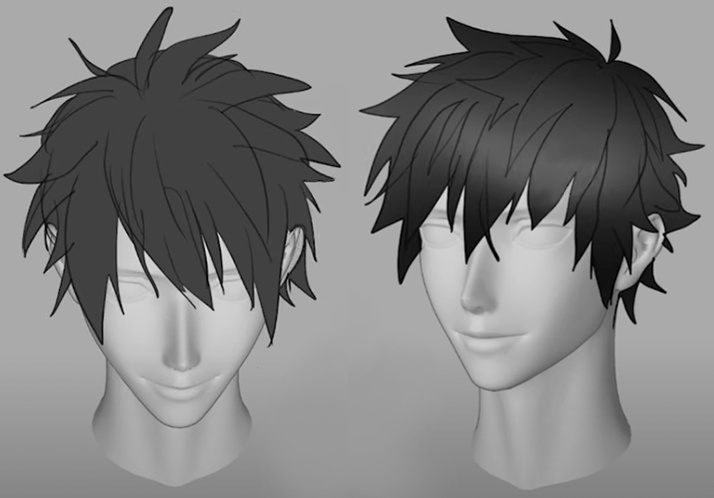
Tip: Try the 3D models
One last tip: Clip Studio Paint also has really great 3D models that make drawing heads easier.
As this tutorial was about drawing anime hair, I didn’t get to explain how I draw faces, so if you struggle with that, you can use these head models as a reference to make things a bit easier!
Learn how to use head models here:
And that’s it.
If you like my art and want to see more, I am also on Instagram and X.
The username is always @Laovaan, the links are below in the artist profile.
I hope this was helpful and I can‘t wait to see your results!
Artist Profile – Laovaan
Laovaan is a German artist who works in both digital and traditional mediums, who occasionally creates comics and shares art tutorials on YouTube.
You can find Laovaan here:
YouTube: youtube.com/@LaovaanArt
Bluesky: laovaan.bsky.social
Instagram: instagram.com/laovaan
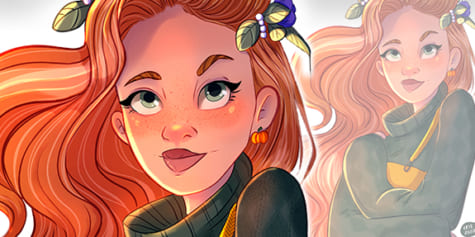
Want to learn more? Check out these tutorials on drawing hair!
This tutorial by Hyanna Natsu is a great inspiration for drawing anime hair, various hairstyles and highlight shapes: https://www.clipstudio.net/how-to-draw/archives/161517
Learn how to draw semi-realistic and manga-style hair in this tutorial by Esseyli: https://www.clipstudio.net/how-to-draw/archives/162964
Learn more about different hair types and layering in this tutorial by Eridey: https://www.clipstudio.net/how-to-draw/archives/159719