How to draw a frilly dress with a full skirt and puffy sleeves!
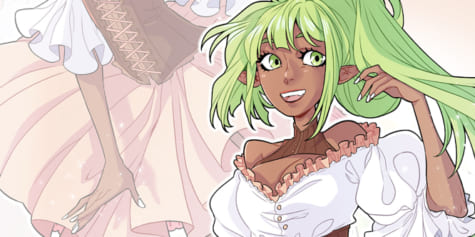
Check out comic artist Mortinfamia's tutorial & video on the basics of drawing frills, and outfits with plenty of fabric, puffy sleeves, & more!
Hello everyone~!
My name’s Martina, but on the internet, I’m known as Mortinfamia 🙂
One of the things I’m most fond of when I think about an illustration is how to dress my characters. I have a thing for frilly clothes, full skirts, puffy sleeves, and any kind of volume: they look very dynamic in art and bring your characters to life!

Today we’ll be making a dress with all these elements, and we’ll see how to draw them easily with a few tricks.
I’m a comic artist and a digital illustrator. For this tutorial, I used Clip Studio Paint because it’s the software I enjoy working with the most (it’s actually my main software). Still, obviously you can replicate it and follow it using any drawing software you are used to!
So, let’s begin! But… where to start?
How to Draw a Basic Frill
The first step is to draw a wavy line, not too sharp, with soft edges. This is the most important line: it’s the base for any kind of frill! Then, we need to draw the external part of the fabric’s fold and mark where the seam is. After that, we’re almost done! To make them look prettier and more realistic, we need to sketch a few folds in the flattest parts to mimic real fabric.
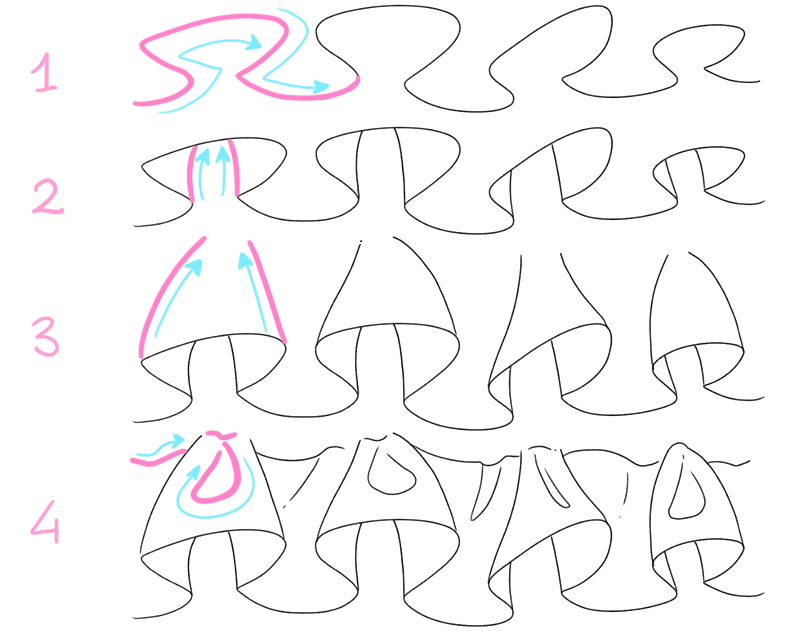
This is the basis for every ruche, pleat, or gather, and you can apply the very same steps to frills as well. You might make them smaller to decorate lapels or blouses, or bigger for skirts.
The best part of this element is that it can be part of the dress or be a simple decoration for clothes you think of as too plain. It’s all a matter of the ruches’ or the frills’ size!
Dress your character
-
Drawing a skirt and some frills
Now, the most important thing: how can we apply these rules to create a real outfit?
First, we have to draft our character. This might sound trivial, but it’s actually essential: sketching the pose we want before the dress makes it easier to accurately draw the physics of the fabric and fix what we think is off (proportions, physics of clothing, etc.). If we draw the dress blindly without a model to wear, we might leave too much room for anatomical mistakes, which might be hard to fix later.
Feel free to ink the draft as I did, but it isn’t necessary.
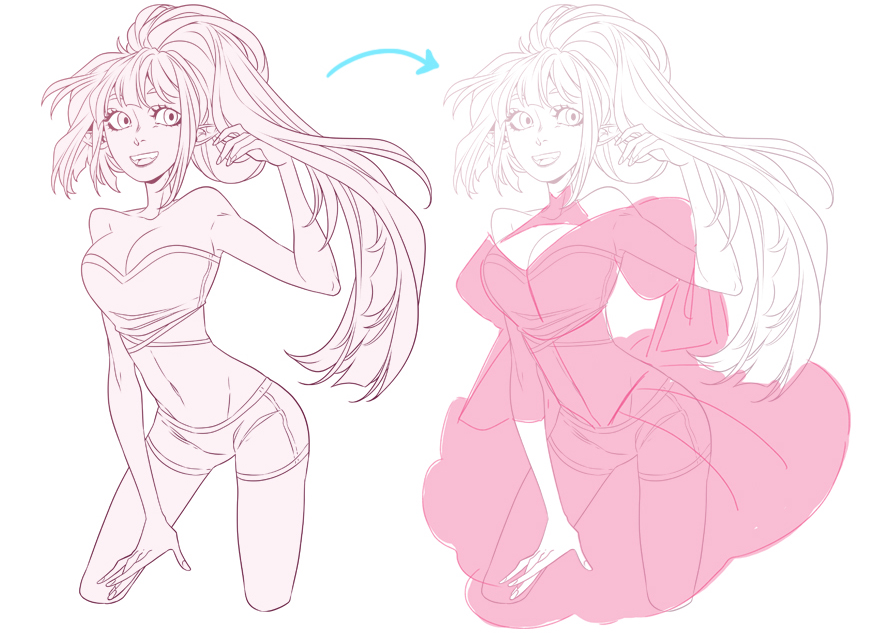
First, let’s sketch the dress on our character to find a silhouette we like! Once we’re done, we can add all the details we have in mind.
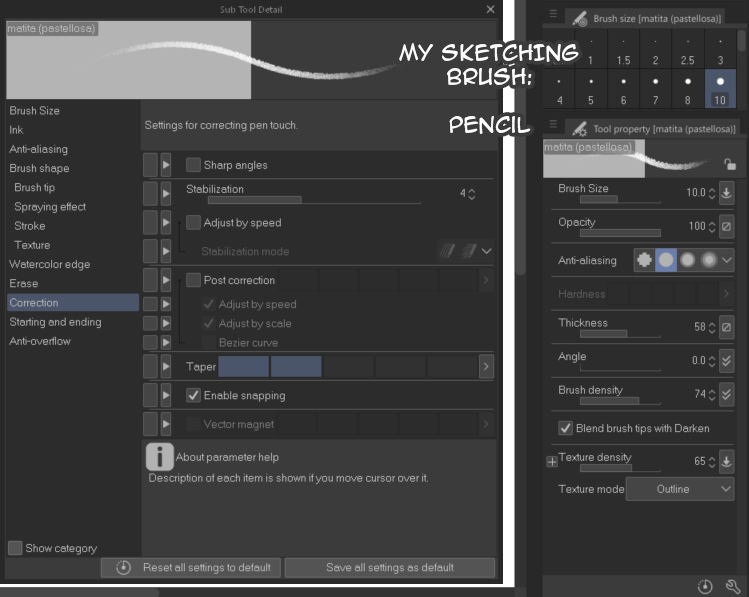
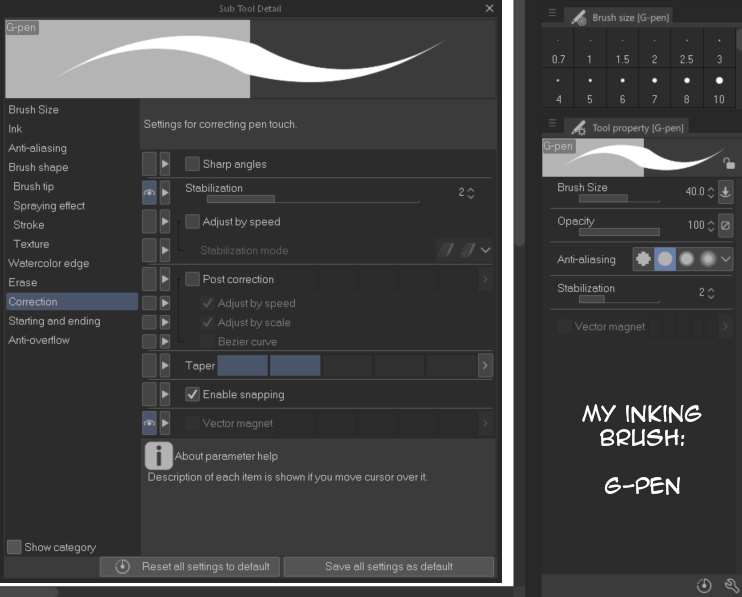
For all this planning part, I use my favorite sketching pencil! I use it with a point 4 in stabilization, and with a grade in antialiasing! You can see the settings I use right here :>
Let’s start with a blouse and apply what we just learned—let’s decorate the neckline with some frills (1). I imagined my character with a tight waistline, so I think a corset over her blouse would suit her well, and I’ll add some folds under her chest to make the dress look a bit more realistic (2).
If we want to draw puffy sleeves, here’s a tip! Imagine a wrapped piece of candy. Okay, now picture the paper around the candy still folded, but without the piece of candy inside: we would have two tighter parts and a puffier one! That’s what puffy sleeves should look like 🙂 (3)
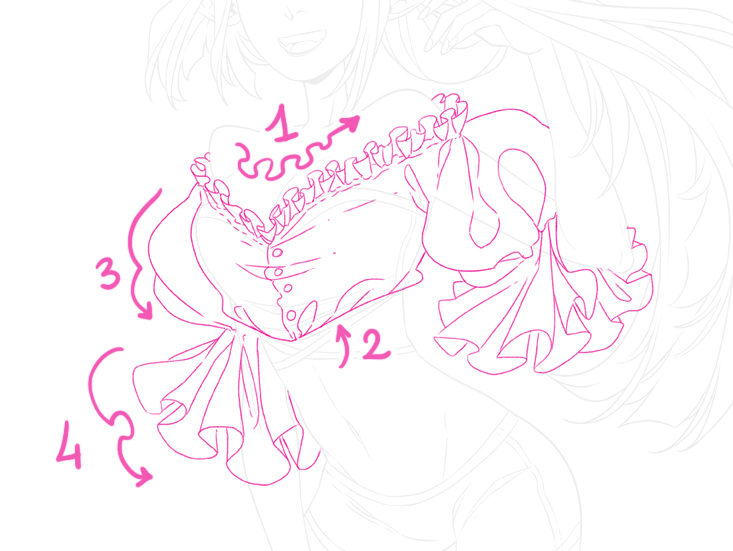
Let’s now start with the bottom part of the sleeve! (4) Pay attention to the fabrics’ physics: remember that the wavy line of the sleeve’s folds should go around the arm. You can draw them quite large if you want a soft and voluminous fabric. Let’s apply this same technique to the other sleeve.
Now the corset: we just need to follow the bustline down to the hips and leave the front a little open! (1) After that, we only need to tie the front together and add some seam details. (2) Note: There are a lot of different types of corsets, but this type is the simplest and fastest to draw. You can change the type by shifting the corset’s opening to the back, adding some lace, or making it an underbust corset, which would make it end above the navel! I strongly suggest you browse the internet to take inspiration from some references! Websites like Pinterest offer a lot of them.

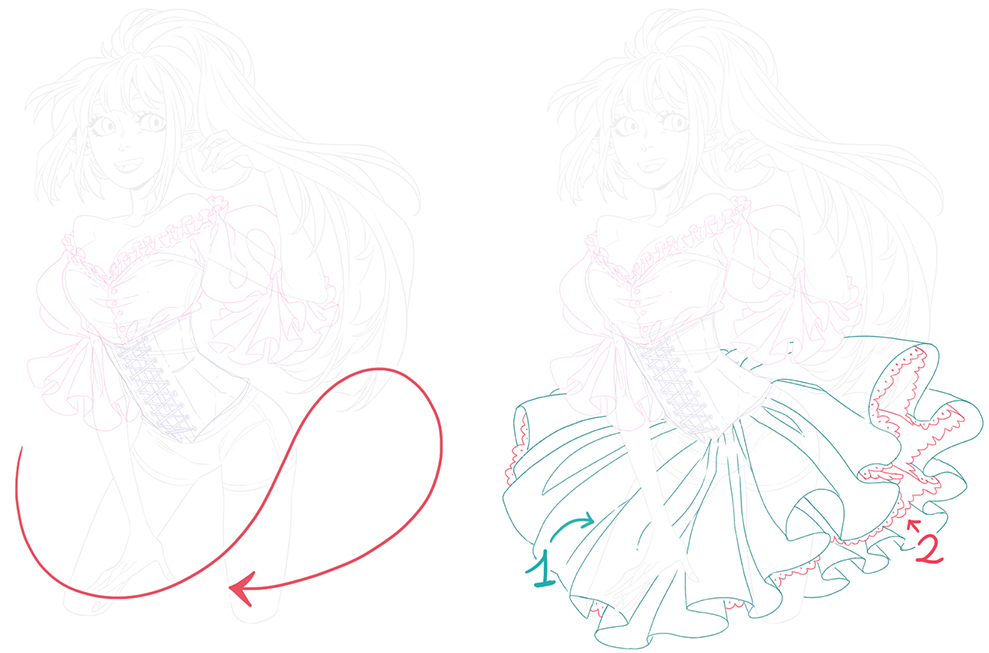
To draw the skirt, we can essentially resize the sleeves’ frills and make them bigger! The most useful thing you can do to understand how the big folds should move is to draw a couple of guide arrows—they will show us how the skirt “flaps.” (red line) Now, we just need to draw the folds along them, to make it look natural!
Since I wanted the skirt to be plain and textureless, let’s draw a petticoat (2) under some folds to make the illustration a bit more dynamic and detailed: you can make a simple pattern, but feel free to choose more complex ones if you like! As I already said, taking inspiration from references is always a great idea.
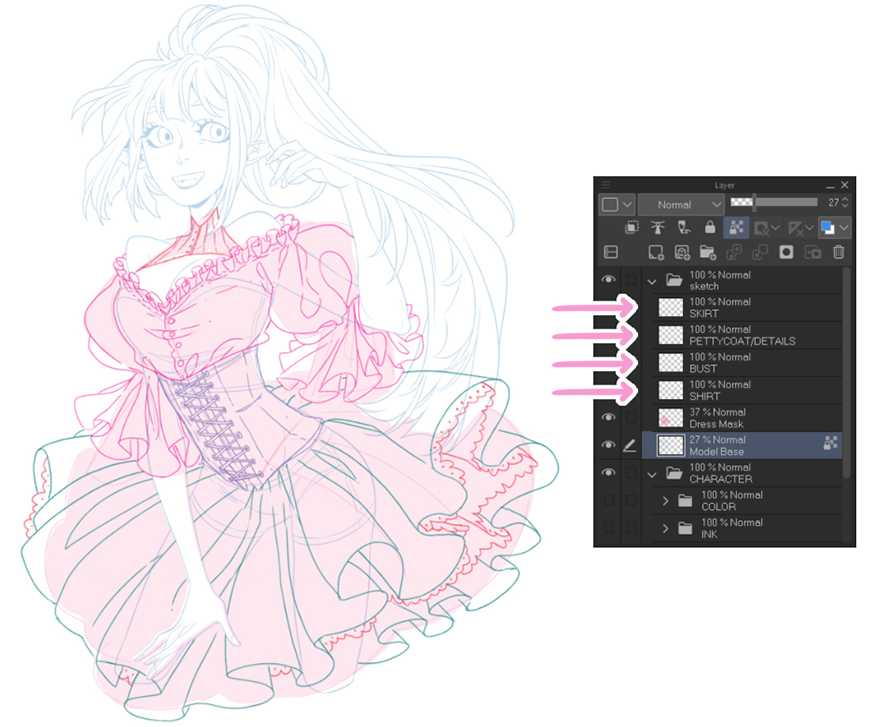
I’m usually very precise while working on an illustration. I always organize all the elements of my drawings in separate layers: it’s something I do with complex illustration, but with simple character design sheets as well. It helps me to know at first glance at what level the things are that I need to add or delete, and it gives me the chance to edit things without touching the other elements of the drawing.
My layers are named accordingly: SKIRT, PETTYCOAT/DETAIL, BUST, and SHIRT.
Our outfit is done!
-
Adding color
Now that our character is fully dressed, it’s time to ink and color the illustration as we like. Let’s bring our character to life!
This is the brush I always use to ink, the G-pen! It’s super smooth and precise, and it’s perfect for clean line art (my favorite type!)
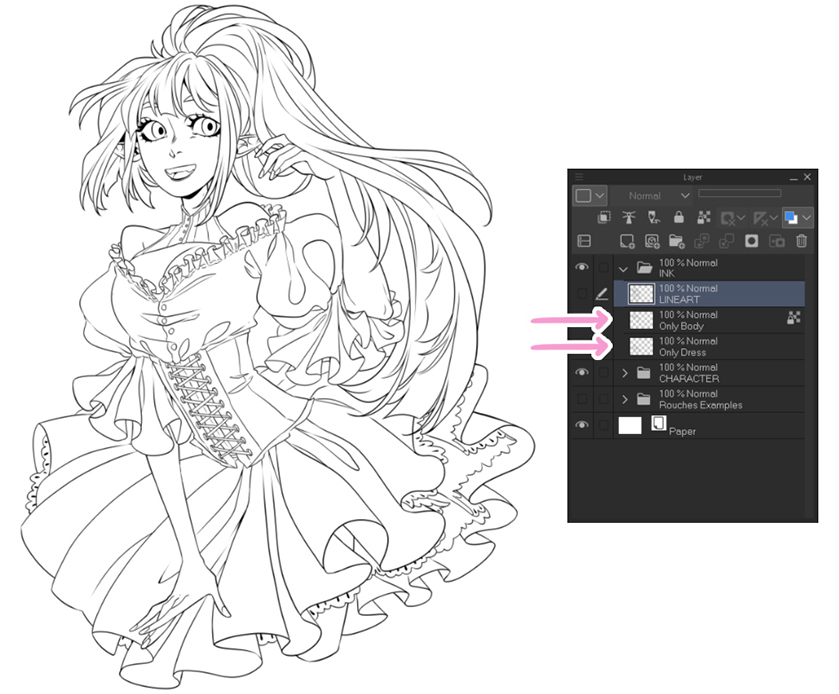
I had the line art of the body already done, so I took the line art of her body to one layer, and I inked her outfit on another one, leaving the first one on a low opacity. My layers are named accordingly: LINEART, Only Body, Only Dress.
Once the character is completely inked, I go with the shadows: I decide which way the light will hit my character, and draw the shadows on the other side of her body.
Studying real objects, how shadows, and light work on real things, really helps you learn how to properly shade your illustration! As a matter of fact, there are so many things to consider when you shade your character: cast shadows, shades, clothes thickness, etc. Shading theory is really fascinating, and surely super useful for creating credible illustrations.
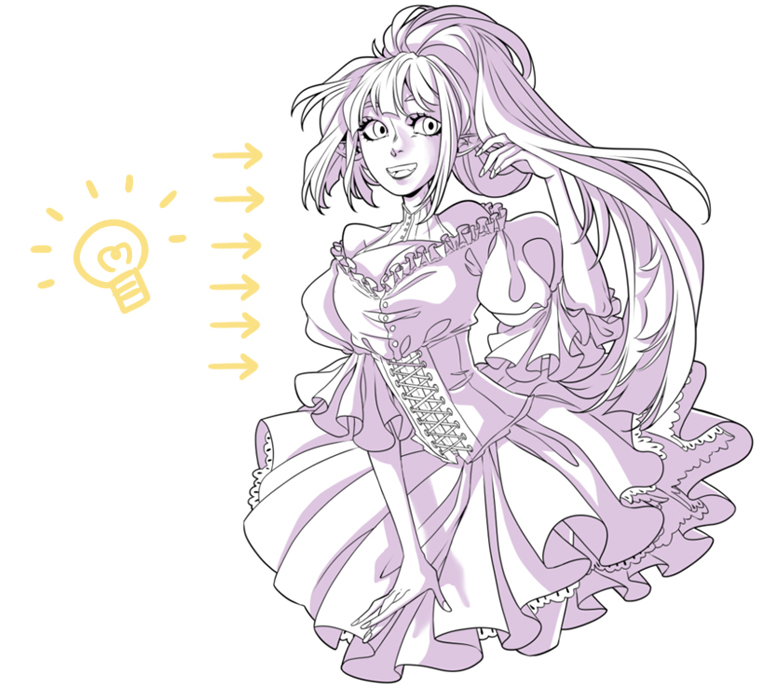
Once you have decided the direction of your source light (here it’s on our left), I finish my shadows, and then I apply the flat colors of my choice.
The shadow level will be on top of the flat colors that I apply, and you can just set the shadow layer to multiply! This way, it will perfectly blend with all the other colors underneath.
I would discourage you from using a plain gray or low-opacity black for your shadows: use a light color, like a cute lilac, a warm pink, or a light blue. It adds more dynamism and personality to your illustration.
We are almost done!
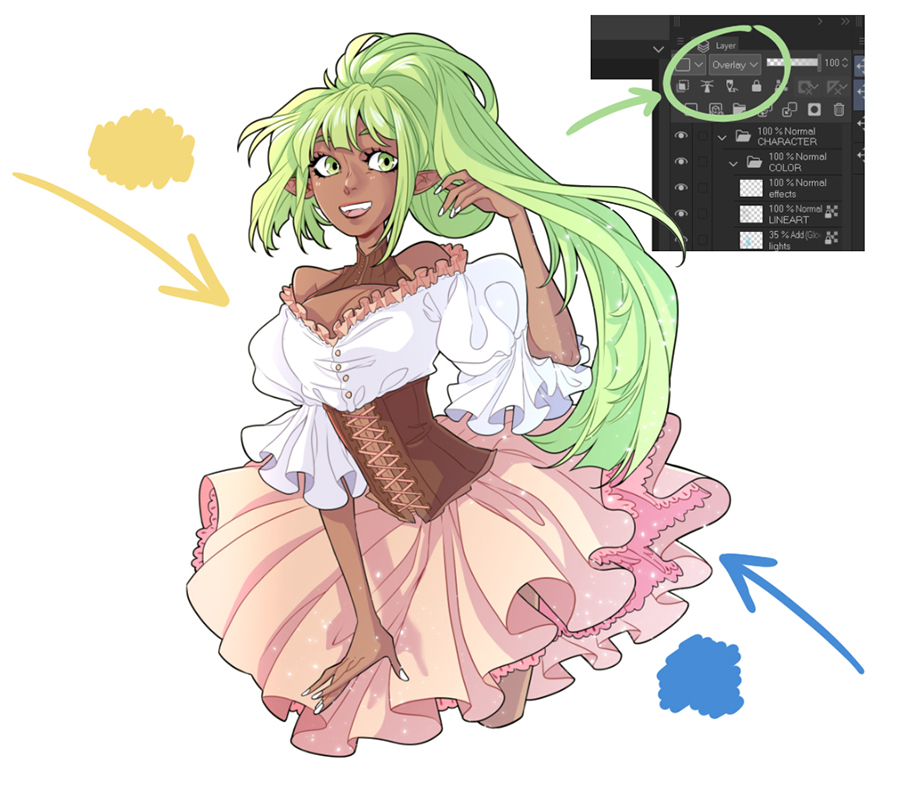
At this point, I usually add some light reflections on hair, eyes, and skin: I love these kinds of details, it gives a nice “shining” effect to the character’s face and figure!
You can decide to leave this layer in normal mode, but I usually set it to Overlay. This helps to blend these details with all the whole of the drawing, and with the colors below.

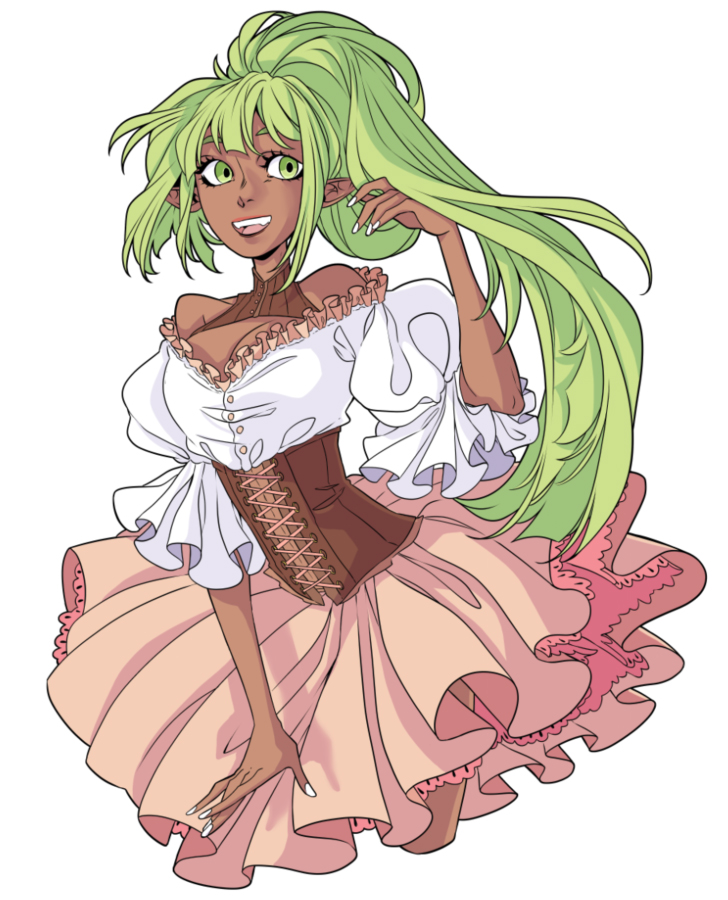
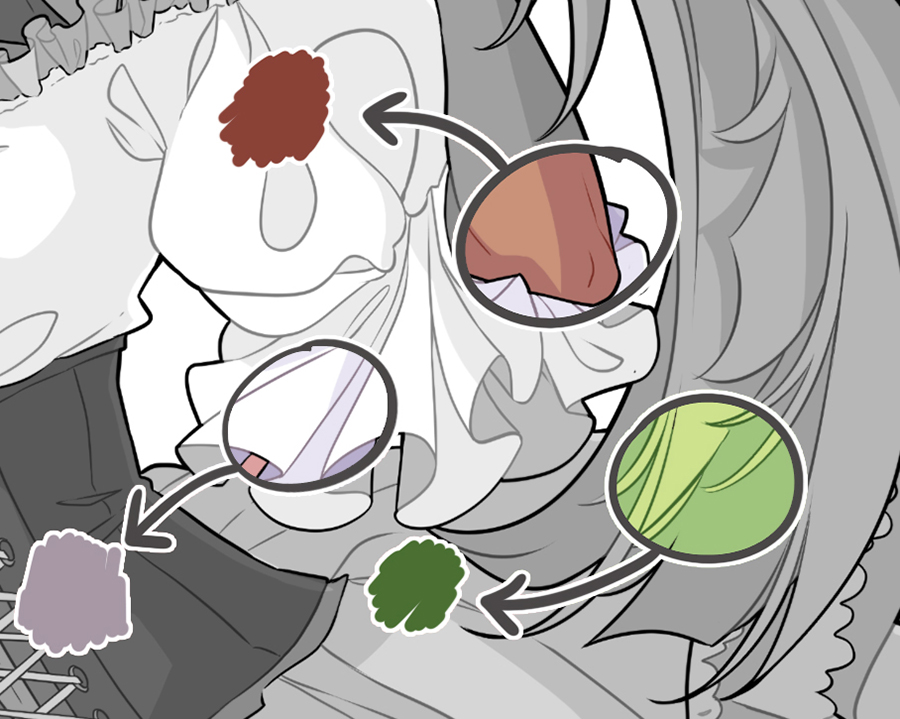
The final touches I give to my drawings are line art coloring and lighting. This is something I personally do since I started drawing digitally: I don’t like my line art to be black and static, so I paint them with a darker tone of the color they sit on.
For example, my character’s hair is green, so I used a darker green for the line art on her hair. Same for her skin and clothing.
I really love the effect of this technique, and I can’t live without my colored line art!
As for the lighting, I just add some final overall atmospheric touches with an overlay layer: I usually use two different colors (I personally combine a warm and a cool color) and put them as a gradient over the character. The first one, usually the warm color, from the direction I decided the light is coming, and the cold color from the exact opposite direction.
This passage helps give more complexity to the atmosphere and the character’s colors… and with really little effort!
And now, our illustration is finally complete!

It goes without saying that if you’re reading this tutorial as someone who just started drawing, it might be hard to create complex dresses and realistic frills right away, but these steps will surely help you make them in the future too! Once you get the first steps right, you will slowly figure out your own way to apply them to your drawing style. If it doesn’t turn out as you wanted, don’t give up—keep drawing! No one was born a genius; we all need a lot of practice and the will to learn and improve!
Perseverance—that’s the key to improve as an artist!
I hope you liked this tutorial and had fun following it!
Thank you for reading!
Mortinfamia ~
About the Artist
My name is Martina (AKA MortinfamiART), and I was born in Florence, Italy.
I went to an art high school for five years in my hometown, and I earned a diploma in Visual Arts: after that, I moved to another city, Bologna, to study at the Academy of Fine Arts, and after three years I got a Degree in “Comics and Illustration.” I then returned to Florence and got a diploma in “Comics” after two years in the International School of Comics.
I’ve worked a lot with digital commissions using social networks (Deviantart, Tumblr, and Facebook) since I was in high school. From 2014, I worked for several Italian publishing houses too.
From 2018 to 2020 I published my very own comic trilogy “DEVA – A Tale of Gods” with an Italian publishing house, and from this year I started publishing my webcomic “Kamille” on Webtoon, while I’m planning the next one that will start around the end of this year.
Links:
My webtoon:
https://www.webtoons.com/en/challenge/kamille/list?title_no=402565
My social pages:
- Instagram: instagram.com/mortinfamiart
- Twitter: twitter.com/mortinfamiart
- Facebook: facebook.com/mortinfamiart
- Youtube channel: https://www.youtube.com/channel/UCShvjnPfFvITJxpYgxKkOzA?
Interested in character art & design or what it takes to become a character designer?
Check out the link below!