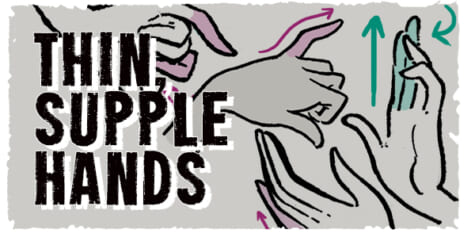
How to Draw Hands and Feet
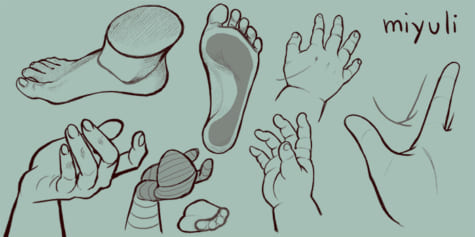
Break down complex parts like hands and feet into simple forms to easily and accurately capture a variety of poses! Illustrator Miyuli explains tips for drawing hands and feet right down to important details like finger positioning, knuckles, and fingernails.
Basic Proportions (Hand)
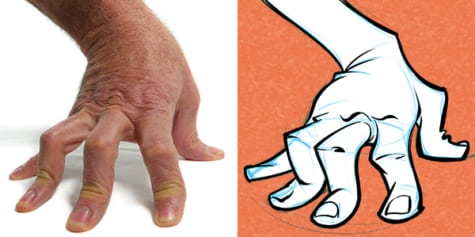
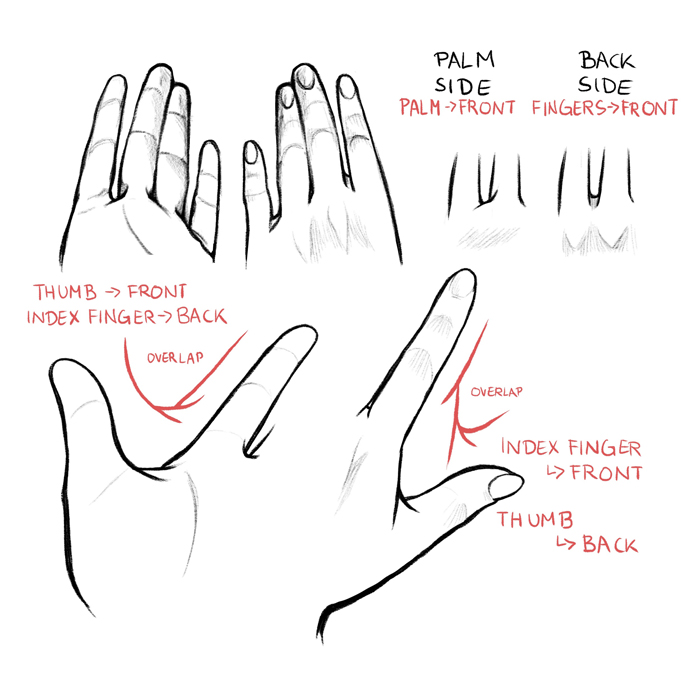
The basic shapes of a hand are not perfectly square or parallel so it is easy to get them wrong. When spread, the fingers all point in different directions.
Because the fingers’ points of origin and lengths are different, the joints do not line up in a straight line.
Note that the thumb moves in a different direction than the rest of the fingers.

To make bending possible, the skin is relatively loose and thin at the joints.
The bending marks on the palm side do not necessarily line up with the joints.
These lines might not be visible in simple drawing styles, but knowing where they are and where the skin overlaps can help when drawing the fingers bent.
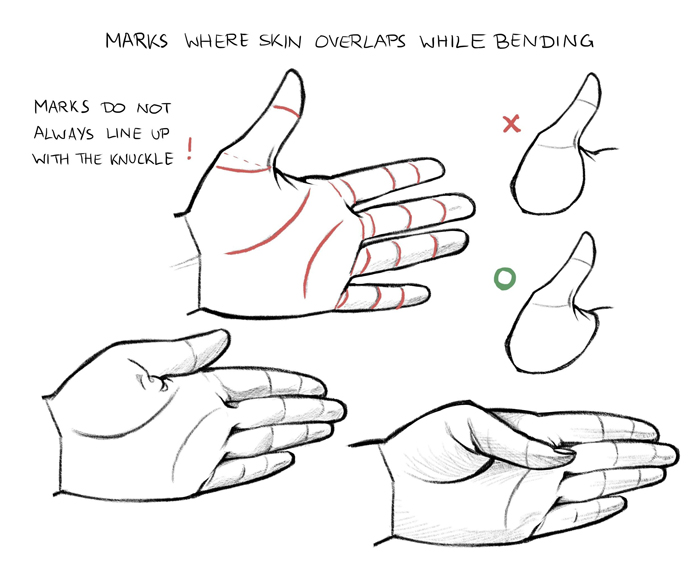
The skin can be treated a little like drapery. Add more folds if you want to add more details.
These folds are more visible on older people so don’t use them too much on young hands.
Children’s Hands
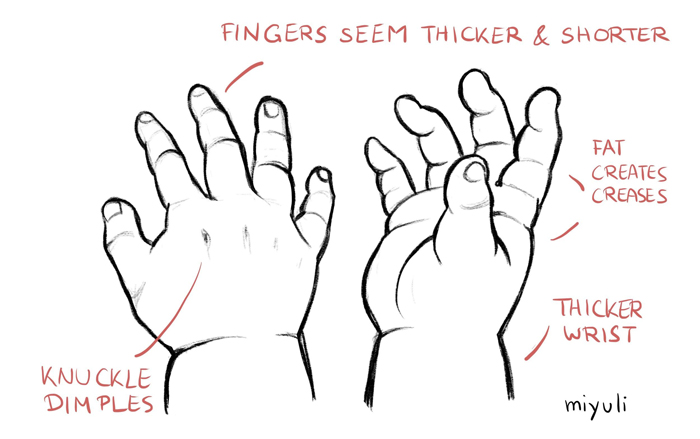
Children’s hands are proportionally a little different, which leads to the fingers seeming thicker and shorter and the wrist wider.
All the baby fat creates creases around knuckles and joints.
The knuckles on the back of the hand show dimples that disappear with age, while the knuckle bones become more prominent.
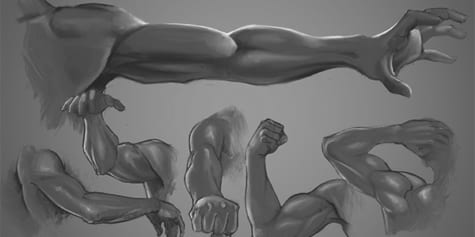
Straight Lines vs Curves
The outside of the hand is usually straighter and harder so that hands can be used for combat and self-defense, while the inside of the hand is soft in order to hold tools and touch things.
Summarising the shapes of the hand with bold straight and curved lines can make hand movements more dynamic and expressive.
The more you see the palm side of the hand the softer the shapes become.
Sometimes it can vary depending on the angle and hand shape.

Nails
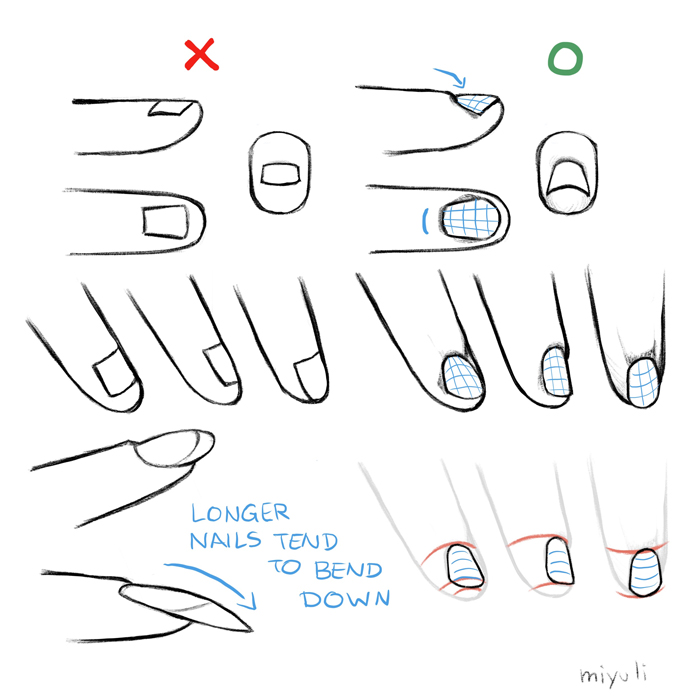
The nails are not flat. They wrap around the finger‘s shape.
Be careful of the way they fit into the skin. It might slightly differ from person to person.
Longer nails don’t grow in a straight line but curve down a little the longer they get.
Step by Step
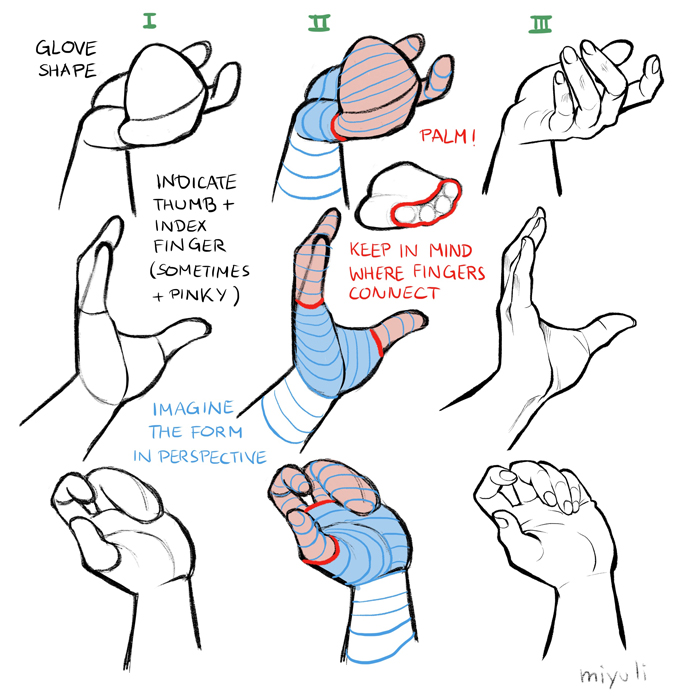
When sketching hands it is easier to start with a very simple glove form you can imagine well in perspective.
You can easily get lost in the details of all the different hand components but save that for later.
Regardless of what style you are going for, it is better to start simple.
That way you can create a stronger silhouette and expression of the hand without getting distracted.
From that point on you can apply perspective and anatomical knowledge and look for reference.
The best reference is looking at your own hands using a mirror or a camera.
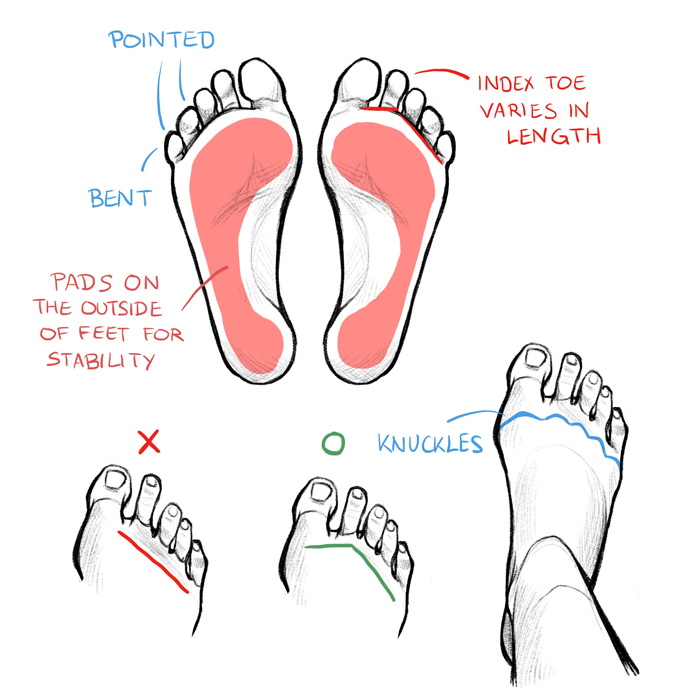
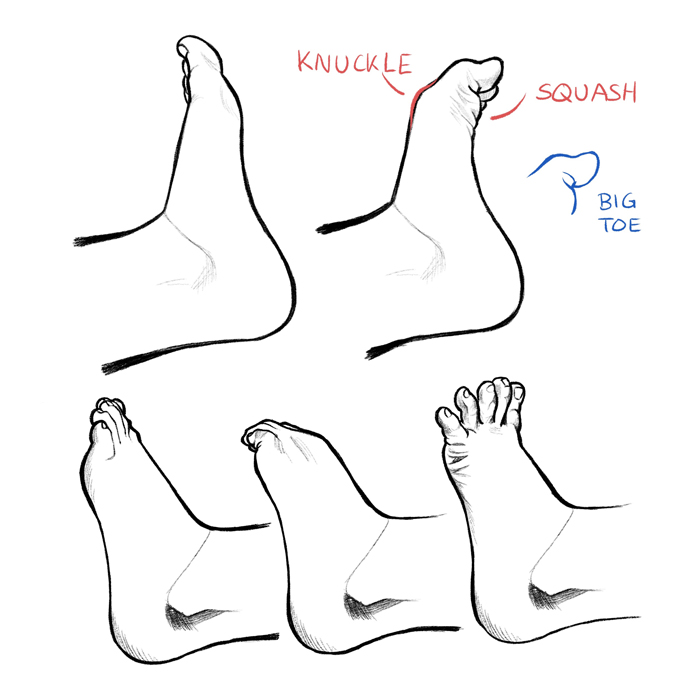
Basic Proportions (Foot)
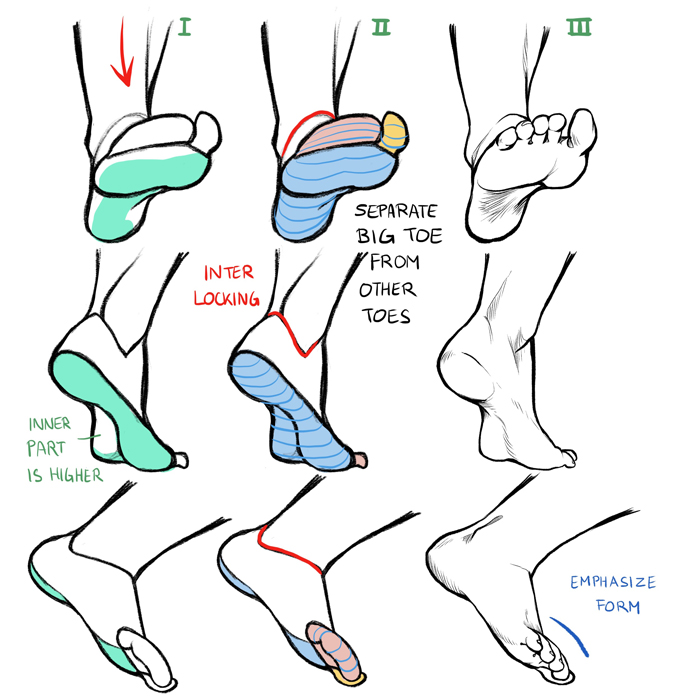
The soft pads under the feet (and toes) are located on the outside of the sole for better stability when walking.
That side is lower than the inner part of the foot and leaves footprints when walking barefoot.
The toes are not arranged in a straight line. The index toe is located a little higher.
The ring and little toe tend to have a more pointed shape and are bent a little more than the rest.
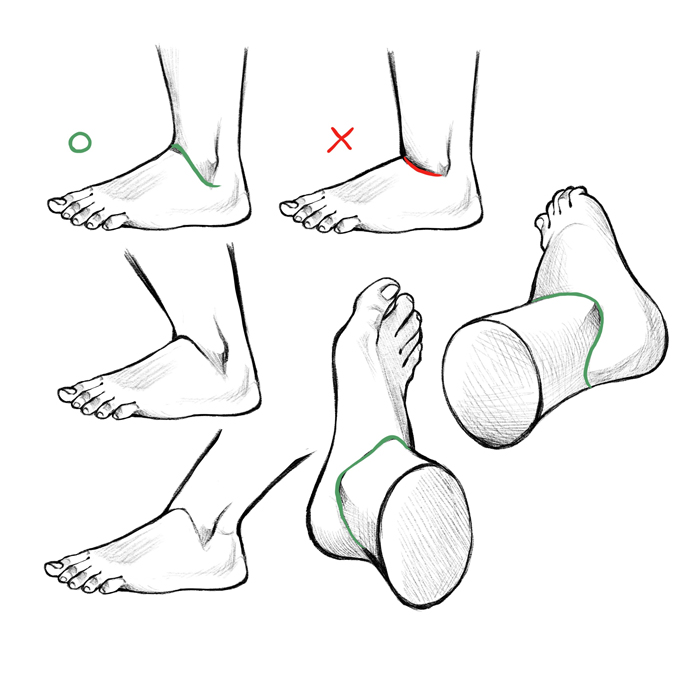
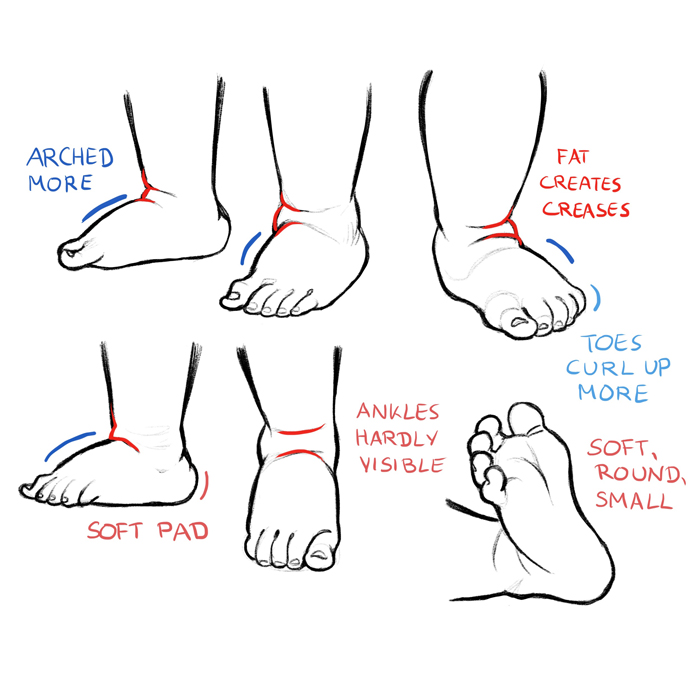
The inner ankle is higher than the outer ankle.
You can imagine it as the big toe pushing it up so it ends up higher on the big toe side.
The lower legs connect with the feet coming down as a curve, not a straight line.
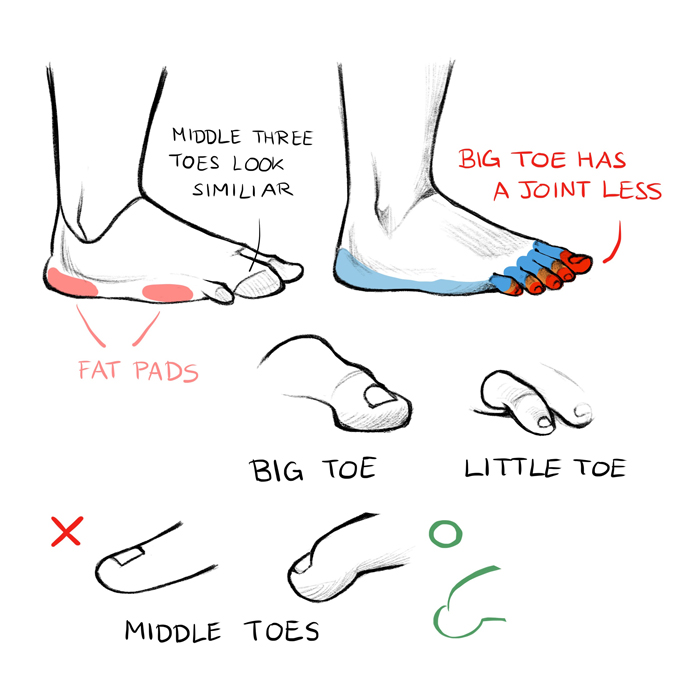
Toes
The big toe has one joint less so it does not curl up as much as the other toes.
The fat pads shaping the sole of the feet and the underside of the toes can also be prominently seen from a side view.
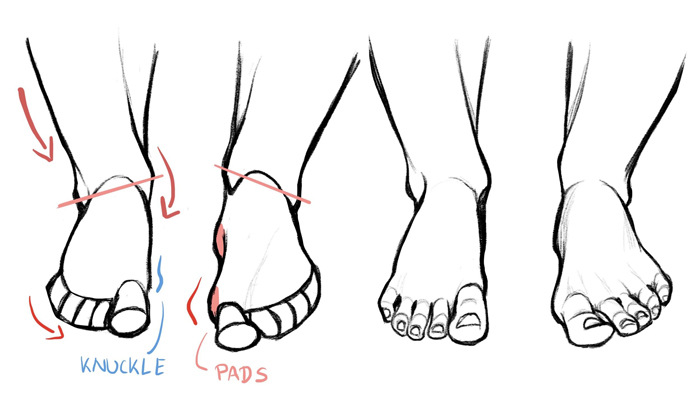
Bending
The lower leg and foot are not just piled on each other like cylinders but rather interlock with one another in a shape that goes down underneath the ankles in order to make movement easier.
The toes don’t bend as much as the fingers since they are much shorter.
They don’t touch the heel side of the foot because we typically don’t need them to grab things and they are usually planted on the ground most of the time.
Children’s Feet
Children’s feet are smaller and softer with more curves.
Especially baby feet have not been walked on much yet so the fat pads on the sole are softer and seem bigger.
Because of the fat covering them the ankles are hardly visible and create prominent creases.
Step by Step
Just like drawing hands, it is better to break down the feet into simpler forms.
The movement of the feet is more limited than the hands’ since they are mostly used for standing and walking.
The big toe can be looked at separately from the other toes to find the most dynamic pose. Drawing the sole might be a little difficult from certain angles.
The inner part is higher and barely touches the ground.
Keeping in mind how the lower leg and foot interlock helps to make the two body parts work in perspective.
Toes or fingers that line up can often be summarized in an arc that makes the gesture clearer and stronger.
Be sure to emphasize the gesture wherever possible.
I hope this tutorial was helpful.
Miyuli is a freelance illustrator and comic artist.
https://www.patreon.com/miyuli
https://twitter.com/miyuliart
https://www.instagram.com/miyuliart/