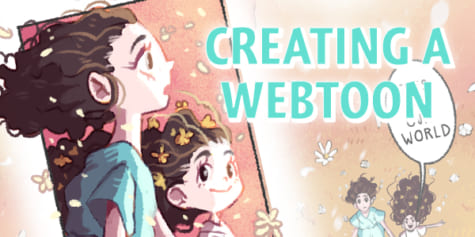
How to draw a comic strip on an iPad
Learn step-by-step how to make a comic strip on an iPad for Instagram & other social media. Going over everything from drafting and inking, to lettering.
Table of Contents
- What makes a good comic strip
- Drawing app: Clip Studio Paint for iPad
- A fundamental feature for digital artists: layers
- A second fundamental feature for artists: selection tools
- Steps to draw a comic strip
- Sketching out your comic strip
- Preparing the panels
- Drawing in the panels
- Inking your comic strip
- Lettering: choosing your tools
- Coloring your comic strip
- Publishing: export your comic strip
1. What makes a good comic strip
Nowadays, Instagram has become one of the most popular social media sites in the world. Many artists use it as their main platform to publish their work. If you’re reading this, you’re probably wondering: how can I make an easy comic strip to start posting, too? In this lesson, I will guide you step by step to produce your first comic strip with Clip Studio Paint and share it on social media.
To draw a strip, you must first prepare your comic ideas. A comic strip is a short sequence of drawings intended to make people laugh. A comic strip or strip can be defined as follows: a few panels that display a situation ending in a punchline. A comic strip must get straight to the point.
2. Drawing app: Clip Studio Paint for iPad
To draw a strip for Instagram, I will use the app Clip Studio Paint for iPad. This application allows the creation of a comic from start to finish. It is also possible to create animations up to 24 frames per second with the Clip Studio Paint PRO version and even more if you own the EX version.
This application has many functions that allow artists to save precious time when doing creative work. For this tutorial, I will show the functions of the EX version, the most complete version to date. If you wish to purchase this software to create comics, the PRO version is equally as good.
3. A fundamental feature for digital artists: layers
The rise of digital tools has allowed digital artists to use an important function to manage their work: layers. In short, they are superimposed “layers” in a digital drawing. Each layer is independent of the others and can be independently customized. Clip Studio Paint for iPad allows you to create, modify, merge or transform all the layers of a strip. It also allows you to create groups of layers as we will see below to work on several layers simultaneously.
What’s a layer?
A layer is like a transparent sheet of paper. It is possible to draw, write, use 3-dimensional objects on, etc. Layers are an essential element that should not be overlooked when working with software such as Clip Studio Paint for iPad.
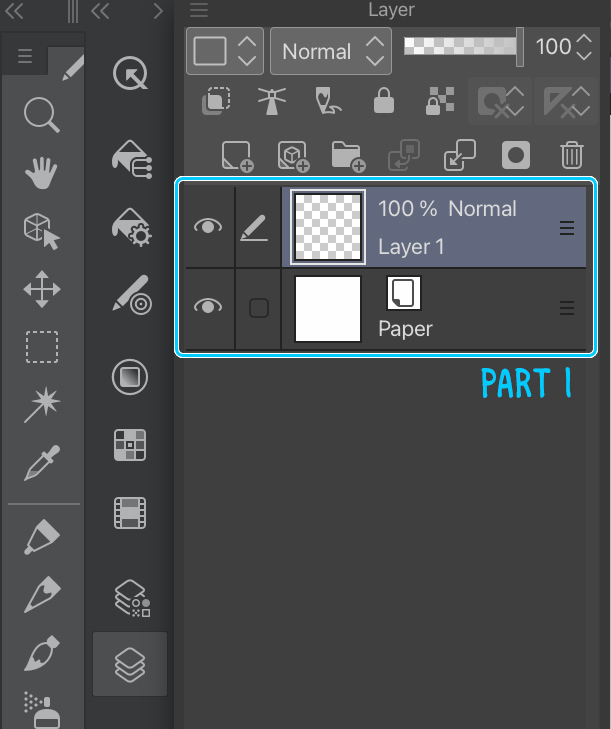
In Clip Studio Paint for iPad, layer management is done through the layers menu. You can open it by pressing the layers icon.
Opening this menu makes available many other options. Let’s take a look at this menu in depth below.
Part 1 is made up of all the layers you are going to create. In this window, you’ll manage the order in which you wish to place your layers. You can move a layer by pressing on the three small lines, also known as a hamburger icon, to the right of it.
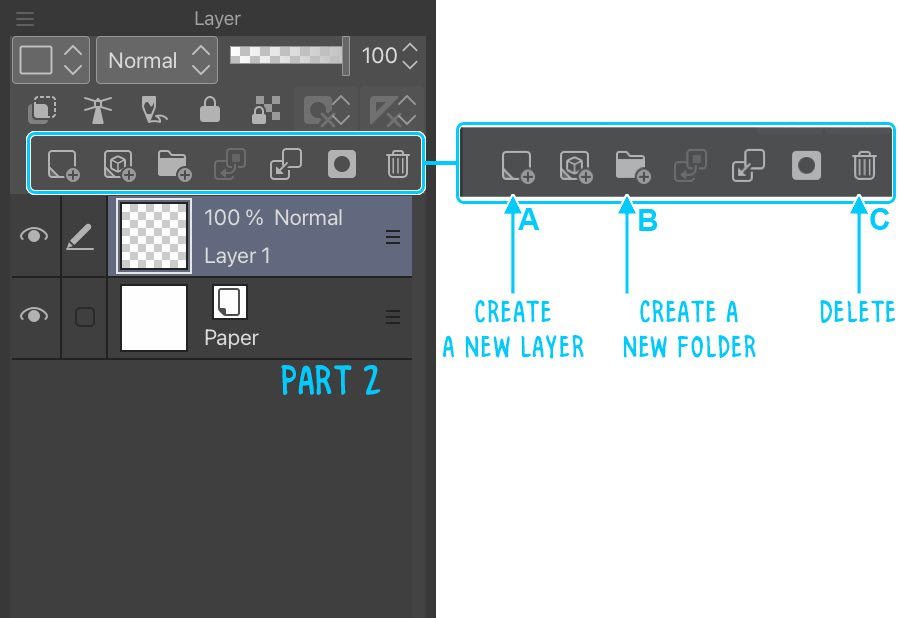
Basic layer management is done in part 2 (options include add, folder, delete, etc.). For the time being, the only options that interest us are those that will allow us to create a new layer, create a folder, and finally delete a layer.
To create a new layer, press A.
To create a new folder, press B.
To delete a layer, press C.
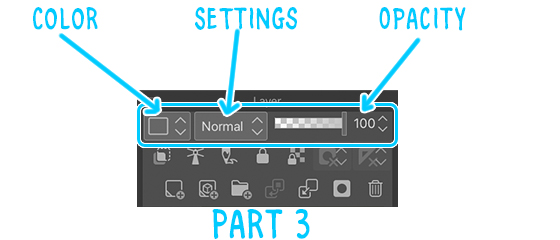
Part 3 allows you to change the color of the layer (note that this option is for organization purposes and not for changing the colors of the illustration), change the settings of the layer, and its opacity.
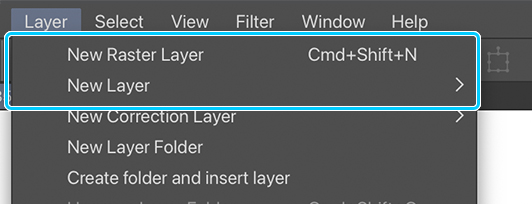
There are three possible ways to create a new layer. Either you click on the icon in the layers menu, or you use the drop-down menu at the top by selecting Layer > New Raster Layer. Or, if you want to create a different type of layer such as a tone layer, you have to select the drop-down menu Layer > New Layer > Tone.
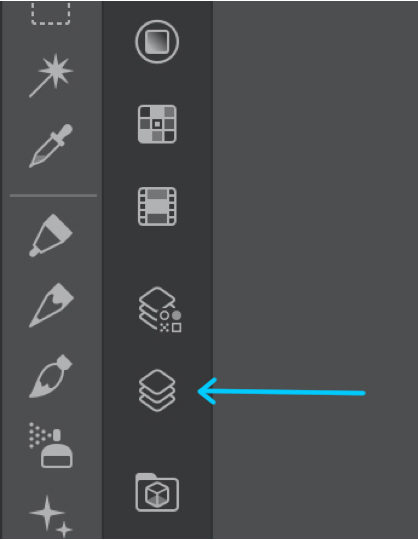
4. A second fundamental feature for digital artists: selection tools
Clip Studio Paint for iPad has many functions. One that is commonly used by artists is the selection tool. This tool is very handy for selecting specific areas, drawing shapes, selecting an entire layer, defining a drawing area, etc. In this tutorial, I will show you how the selection tool can help you draw a speech balloon quick and easy, but also how useful it can be when coloring.
To select the selection tool, touch its icon in the tool sidebar. By default, the tool is represented by a dotted square. When you choose this tool, several options are now available to you. The first two icons are those that help make comic strip drawing easier.
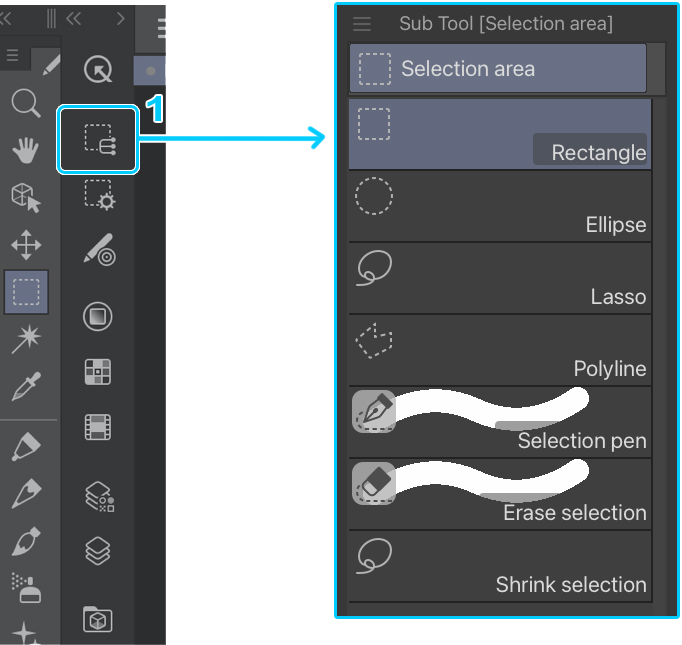
When pressing (1), you can access other selection tools. The default tool allows you to create a square or rectangular selection. You can also create ellipses (Ellipse), free-form (Lasso), polygons (Polyline) areas with the following tools. The other option (Selection pen) allows you to select areas by coloring in what you want to select. The next tool (Deselect) allows you to refine the selection by erasing any area colored/selected of the previous tools. Finally, the last tool (Shrink selection) allows you to select only the pixels of a single line within the drawn area. Be careful however, this tool will not select any pixel if you do not include the whole line or area to which the pixels belong.
5. Steps to draw a comic strip
- The basic steps for making a comic strip are: Preparatory sketches > Sketches of the panels > Drawing in those panels > Inking > Coloring > Lettering > Export. I will explain these steps in that order.
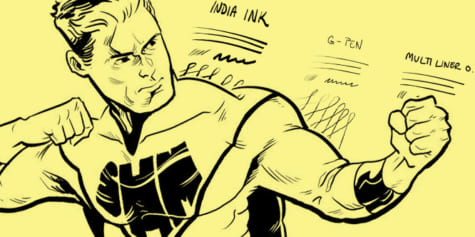
- Brushes and tools used
Brushes: Design pencil, Darker pencil, G-pen and Mapping pen.
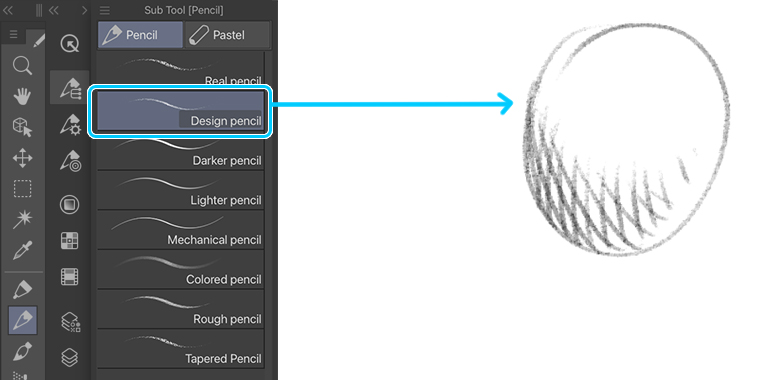
Design pencil
I use the Design pencil to draw some sketches in the panels. I choose a pencil size large enough to force me not to draw the details at first. I don’t touch the opacity; this pencil will only be used to draw the base lines of my drawings.
For an image with a dimension of 1080 x 1080 pixels with a resolution of 350 DPI, I set the brush size to 8.
Tool Location: Pencil Tool > Pencil > Design pencil
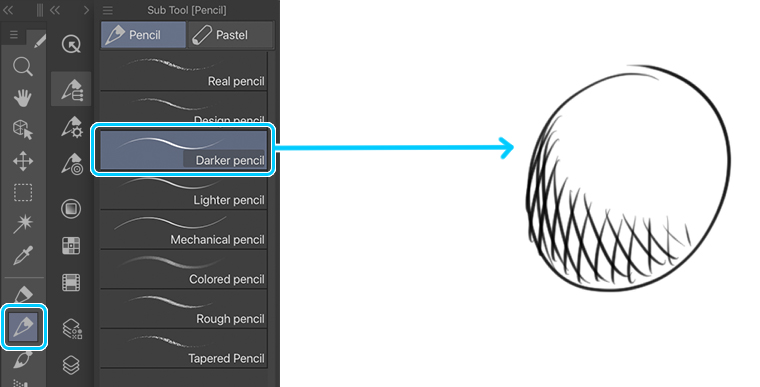
Darker pencil
I use this brush to draw the finer details of my drawing. Once again, I don’t touch the opacity and I set the brush size to 5.
Tool Location: Pencil Tool > Pencil > Darker pencil
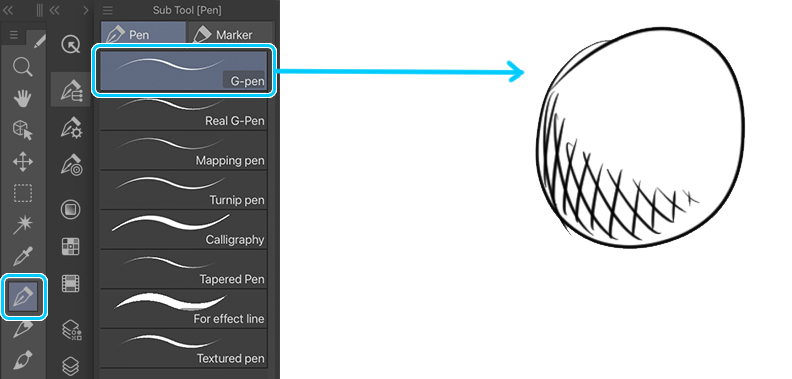
G-pen
I use this brush during inking to draw almost all the essential features. Here I set the opacity to the maximum and the size of the brush to 5. For a project of this size and resolution, I like the line to be thick enough. As I plan to publish this work on the internet and it will mainly be read on smartphones, the lines must be thick enough to be clear.
Tool Location: Pen Tool > Pen > G-pen
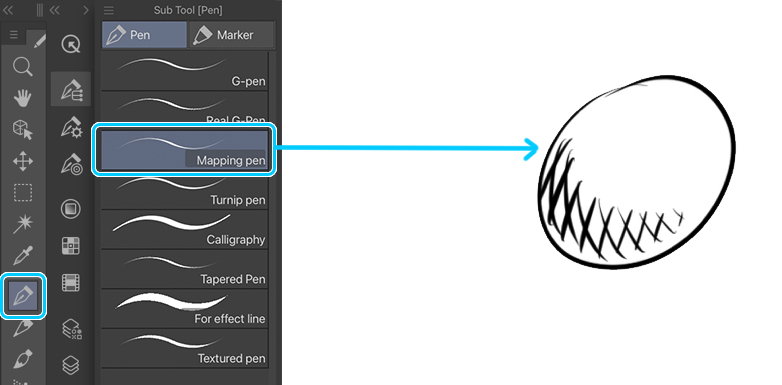
Mapping pen
Finally, the Mapping pen is very useful to me to draw the last details such as the folds of clothes, eyes, hair, and some details of the decor if there are any. The brush opacity is always set to maximum and the size remains at 5.
Tool Location: Pen Tool > Pen > Mapping pen
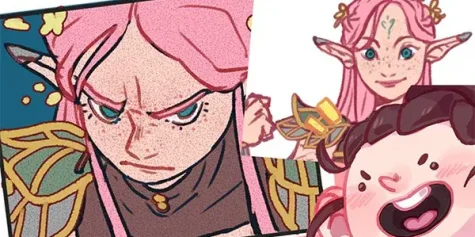
The comic strip that I used for this step-by-step tutorial can be found on my Instagram account:
6. Sketching out your comic strip
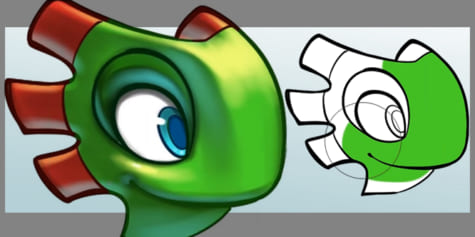
To create a high-quality digital comic strip, it is crucial to master the design of the characters you wish to show to your readers. To do this, you must first make some preliminary sketches. When I’m doing concepts, I use the Design pencil. To avoid that the drawings differ from one panel to another, you must practice drawing the characters several times.
One thing to remember is that Clip Studio Paint for iPad has been designed to be used on tablets. Tablet touch gestures have been implemented to make the application more comfortable to use. For example, when drawing a line, it is possible to undo it by tapping once on the screen with two fingers simultaneously. Thus, there is no need to press the backspace icon to cancel. Likewise, tapping with three fingers simultaneously restores the last undone action. Finally, for those who work with a keyboard, the commands usually used on a Mac (cmd + z; cmd + c; etc.) are fully functional via a compatible Bluetooth keyboard.
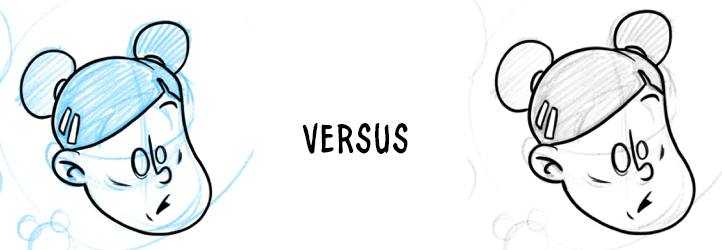
During this step, I change the default color of my brush. For the sake of organization, I always sketch in blue. Thus, when I ink my drawing, the blue of the pencil does not bother my eyes. The black lines are the final line art.
7. Preparing the panels for your comic strip
After practicing drawing the characters, I move on to drawing the panels. As I plan to publish my drawings on Instagram, I choose to make one picture per panel.
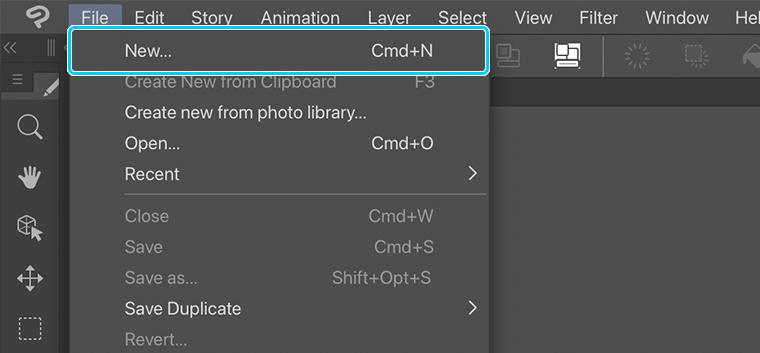
To start, you need to create a new document: File > New (or cmd + n). In the dialog box, I choose the settings for an illustration suggested by Clip Studio Paint. These settings allow me to have a white background (Paper layer) while still being able to draw on a transparent drawing layer.
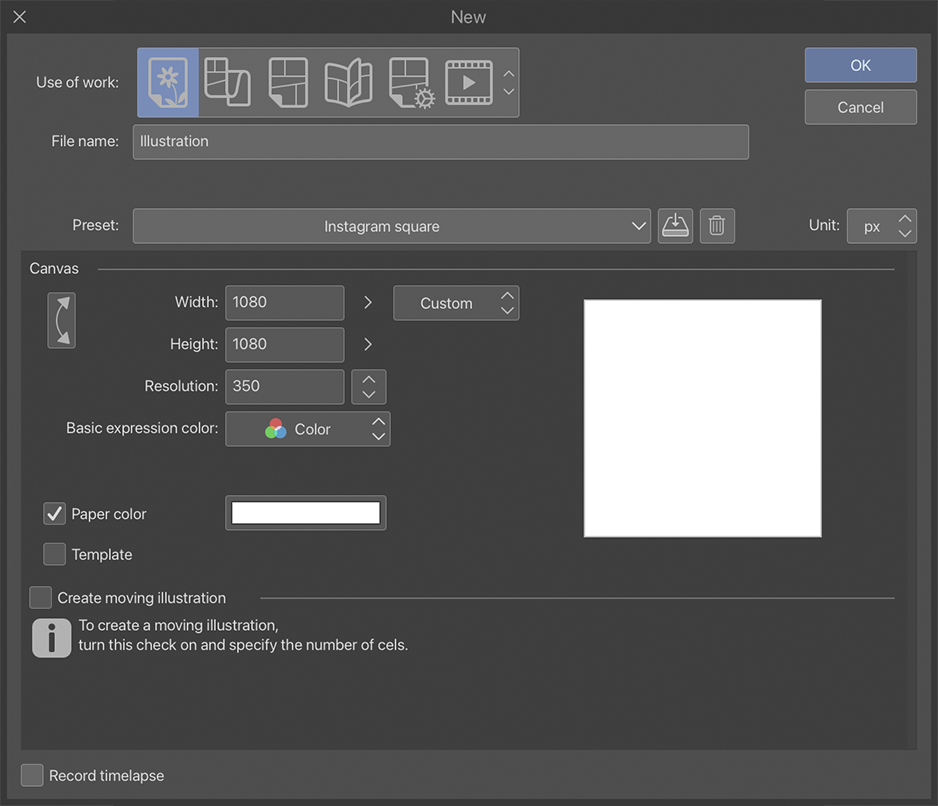
I set a resolution of 350 dpi and a canvas size of 1080 x 1080 pixels, which is more than enough for this type of canvas.
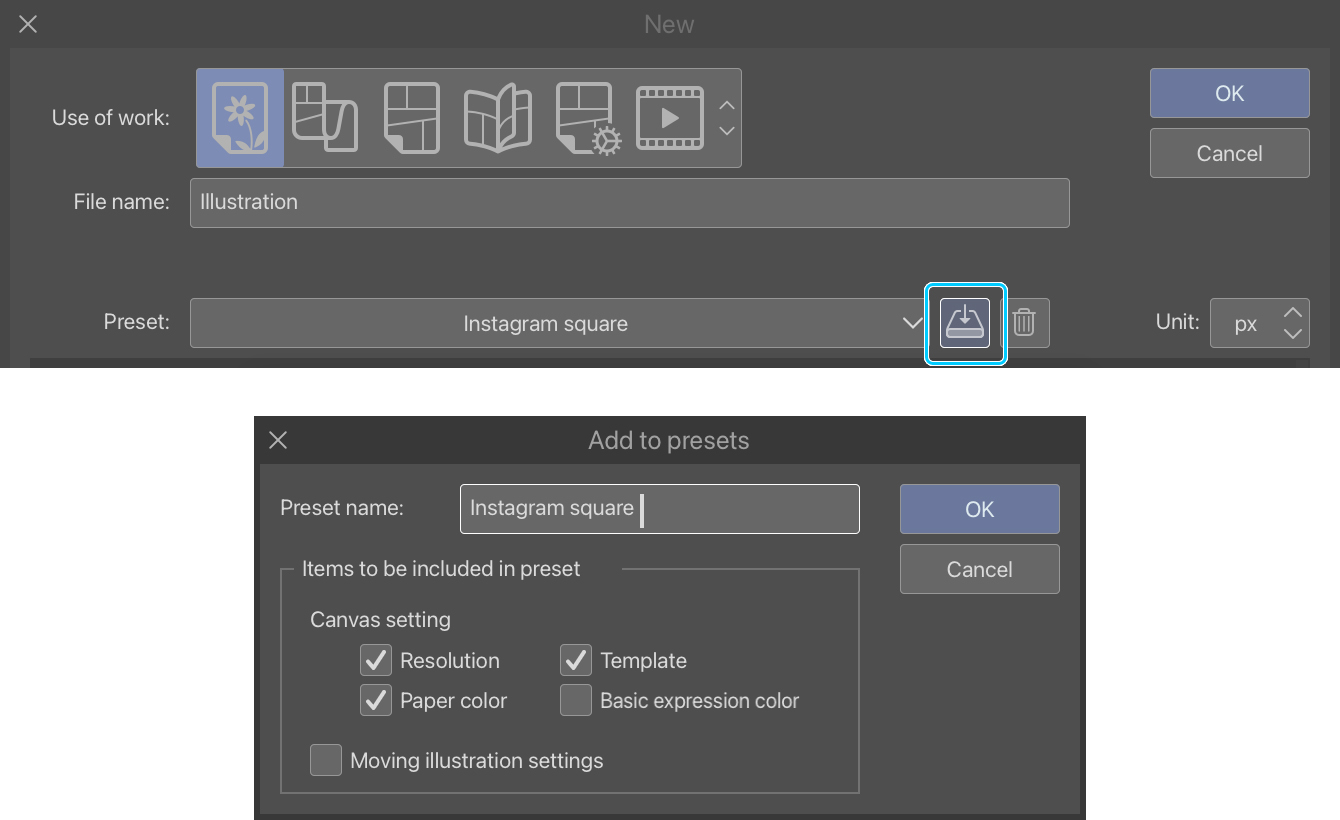
Before I start drawing my panel, I save the settings of my illustration so I don’t have to fill them in again. In the dialog box that appears, I name this setting Instagram Square, check Template and Paper color, and click OK. My setting now appears in the Preset drop-down menu.
To finish creating my blank canvas, I press OK.
8. Drawing in the panels
To draw my panels, I start by placing the general shapes of my characters and/or the scenery. In order to organize my work, I rename the layer on which I will draw the sketch of my board. For this kind of illustration, I will need five layers per image: the sketch, inking, coloring, lettering, and speech balloons. It is important to separate each of the layers of the drawing in order to organize your work. By doing so, you can work independently on each layer as necessary.
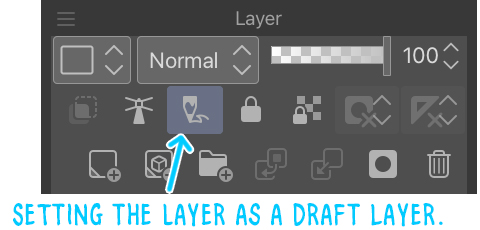
To finish setting up my layer, I specify that it is a draft layer. To do this, I press the layers icon in the sidebar. In the layers menu, I long press the layer then in the popup menu that appears, I select Layer Settings > Set as Draft Layer. A less tedious way to do this is to press the draft layer icon.
Similar to my character research phase, I use the Design pencil tool and select the color blue. I first place a rough shape of my characters and their expressions. I try to make them as dynamic as possible.
I also draw the speech balloon so that I can organize my drawing according to the space it will take in the final drawing. This step is crucial when you are drawing a comic book. It is called the storyboard. During this step, I place all the details that will be shown later in my panels. This step can be worked on as long as necessary to obtain a solid base for the rest of the creative process.
To add details to my sketch, I use the Darker Pencil tool. I draw the eyes, mouth, fingers, and details of clothes. At this stage, I try to make my characters as expressive as I can. To do so, I play with the eyebrows, the look in the eyes, the shape of the eyes as well as the direction of the face. The hands also have a big role in the expressions that the characters convey.
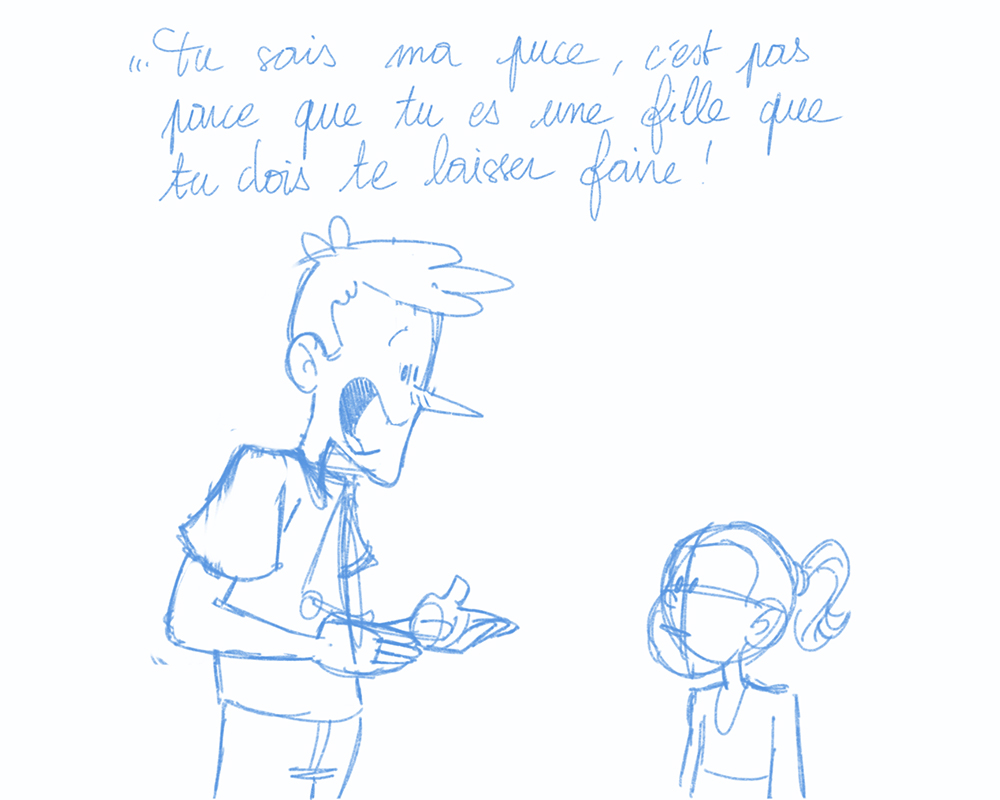
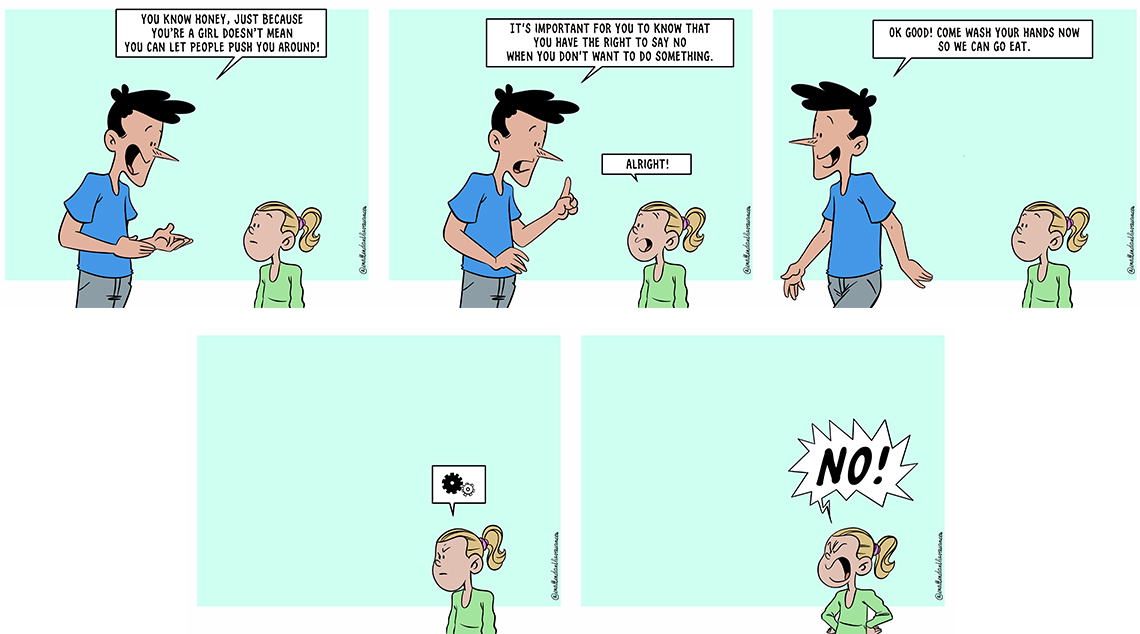
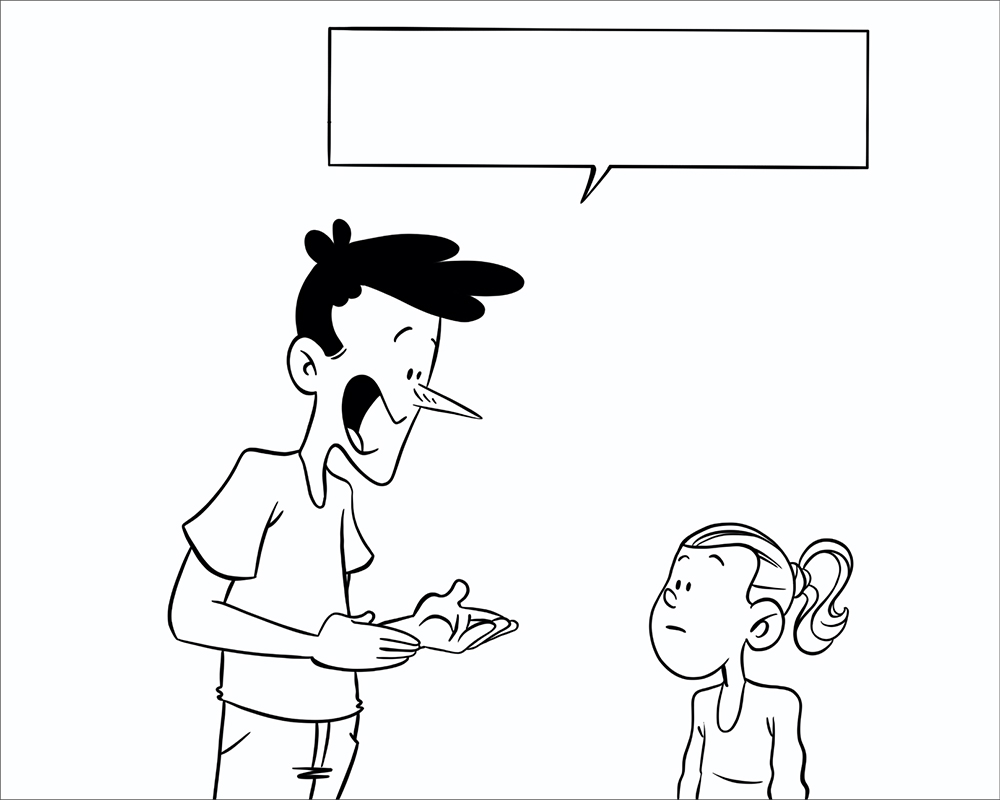
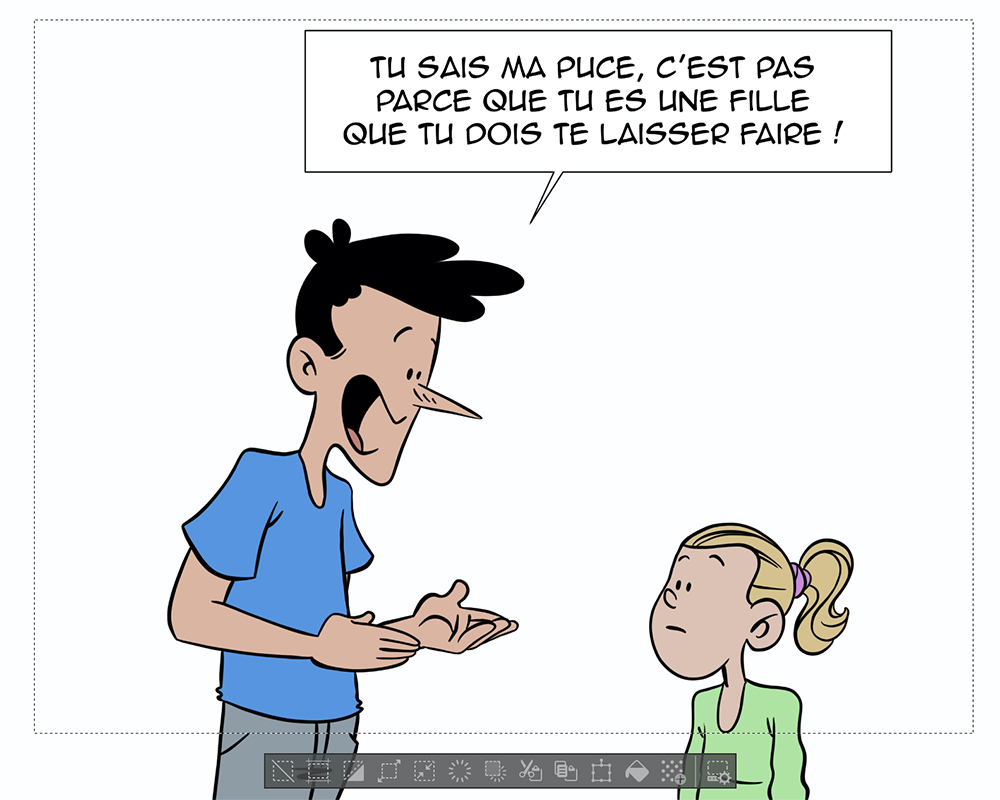
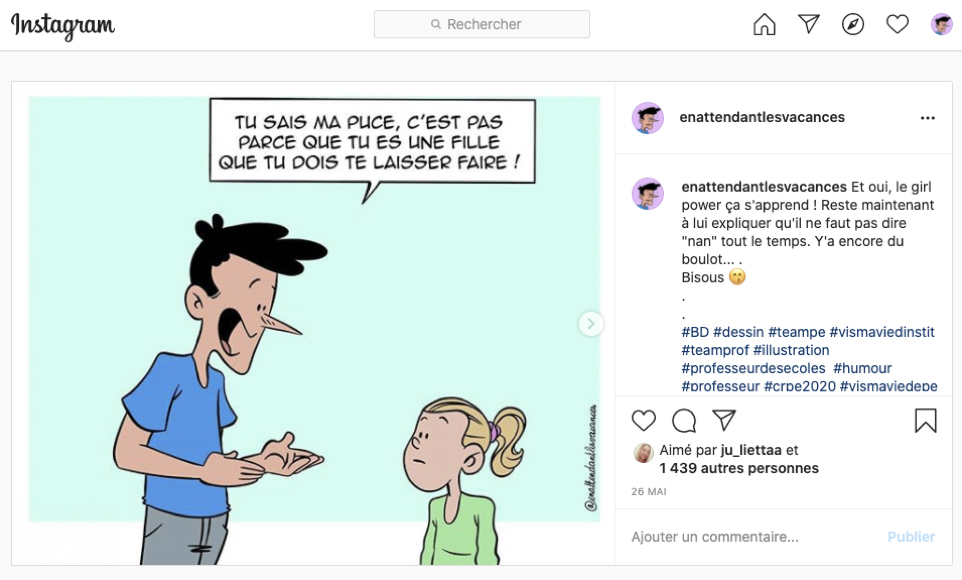
“You know honey, just because you’re a girl doesn’t mean you can let people push you around!”
9. Inking your comic strip
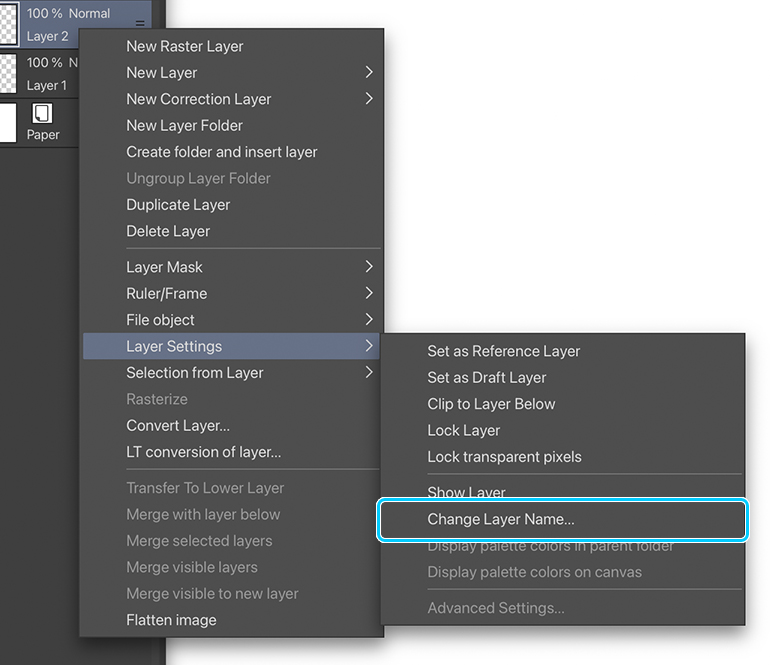
To ink my sketch, I create a new layer by pressing the button provided for this purpose in the palette mentioned above. I rename this layer. To do this, I long press the layer I just created and then select Layer Settings > Change Layer Name. I rename my layer to Inking.
I select the Draft layer again and lower its opacity to 25. This way, I can easily control the quality of my inked line. The inking step is very important and should not be overlooked. It allows me to place the final lineart.
I start inking by using the G-pen tool. At first, similar to the sketching step, I place the main shapes. To give as much liveliness as possible to my character, I draw my strokes from top to bottom. Just like a real G-pen, the G-pen tool tends to thicken at the end of the line. If necessary, I correct certain strokes to match what I have in mind.
Then I change tools to the Mapping pen. I use it to draw details. The line is finer and allows me to be more precise on details such as eyes or hair.
If necessary, I can change the settings of my brushes to match my style and the way I draw. To do this, I tweak the brush settings in the Tool Property window.

10. Lettering: choosing your tools
After inking, all I have to do now is to write in the speech balloons. First, I use the Text tool to write the dialog. I touch the icon of the tool then I double-tap with my stylus where I want to write. I resize my text whenever I need to. I also choose the font once I have written my text by touching the pencil icon under the text area I have just written. In the dialog box that opens, I select the font I’m interested in, its size, color, etc.
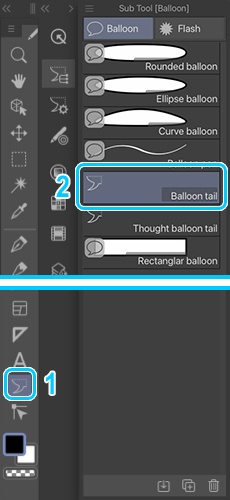
Then I select the Balloon sub tool and open the settings tab to change the design of my speech balloon. I then select the Ellipse balloon. I often use square or rectangular shaped balloons on Instagram. If you want to create a new shape, simply press the icon at the bottom of the tools window (1). Then change the name (2), press OK, and change the tool settings. You can now use your stylus to draw a speech balloon.

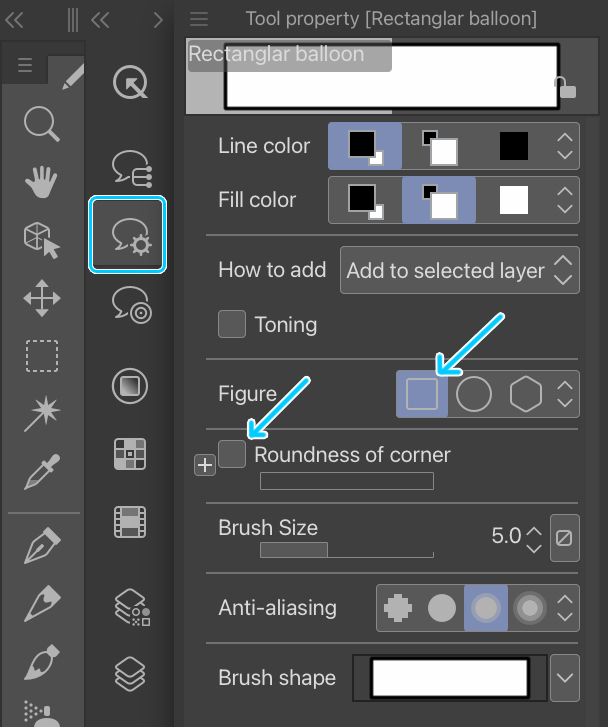
Uncheck the Roundness of corner setting if you wish to get a rectangular balloon.
Finally, I select in the settings of the Balloon tool, the secondary tool Balloon tail to create the tail that will show which character is talking. You have the possibility to select a classic balloon tail or a thought bubble tail. I personally draw my tail with the stylus.
Note: when you create a balloon, it is placed on a special layer called an Object Layer. These layers have a special setting which I won’t go into here.
11. Coloring your comic strip
During the concept phase of my drawing, I decided to go with a simple coloring style. This step can be much more complex but it would require another full tutorial to go into depth. For this strip, I will use a simple technique of flat colors.
To do this, I create a new layer that I call Color. Then, using the sub tool Fill-in-mono pen I start to color the different parts of my drawings.
For the background of the drawing, I decided to color part of it in blue. To do this, I use the Select tool and I choose the Rectangle sub tool. In a new layer that I name Background placed underneath all the other layers, I draw a rectangle with my stylus. Then I use the Fill tool and touch the selected area again with my stylus. Before touching the area, I select a color that suits me. Be careful to select a color that is not too saturated to not hinder the visuals.
12. Publishing: export your comic strip
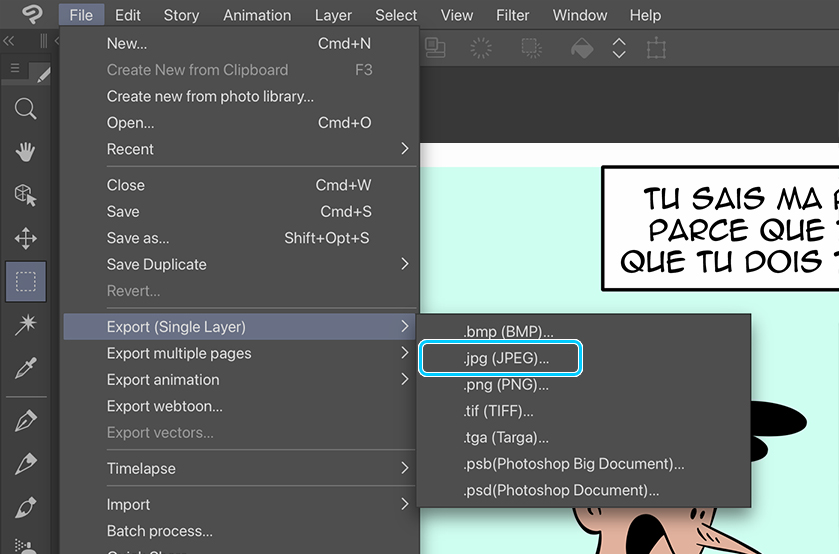
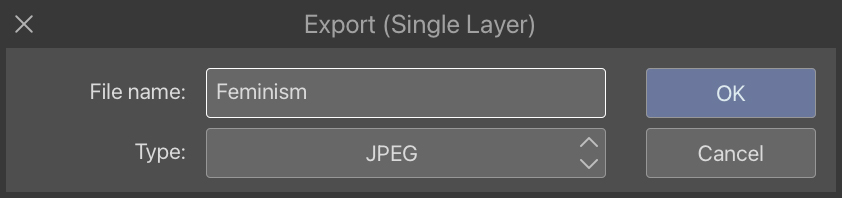
Finally, I export my drawing to publish it on the internet. To do this I choose: File > Export (Single Layer) > .jpg (JPEG).
I export my drawing to the image gallery of my iPad. I then save my work before exiting Clip Studio Paint.
All I have to do now is post my work on social media.
Click on the following link to view this comic strip on my Instagram:
https://www.instagram.com/enattendantlesvacances/
My name is Antoine and I have been drawing since forever. I started drawing comics on the Internet in 2012 and now I publish stories inspired by my daily life as a teacher. I also regularly work on manga-style comics that I publish on Mangadraft.
– Antoine
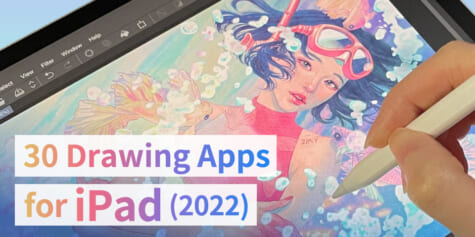
30 Drawing & Painting Apps for iPad 2022 Free/Paid