How to design comic characters
Carlos Nieto shows how to design comic characters, from anatomy sketching to coloring!
Introduction
I’m Carlos Nieto, a Spanish comic artist (although my commissions come mainly from the United States) and in this tutorial, I’ll show you how I create and design my comic characters.
Of course, you can adapt my character design steps to your likes and preferences.
I hope you find it useful!
Character design
To properly design a character, you must not only draw it, but also convey its personality through its clothing, accessories, and facial and body expressions. In some projects, especially in commissioned work, the character’s script may not be ready. In those cases, you will have to give it your best working with the information you have been given, whether it is a description of the character or simply a synopsis. There is also an important difference between designing a character for a comic and designing it for other kinds of works such as animation or videogames: since you will have to draw the character in plenty of panels throughout the comic, you shouldn’t add too much detail unless you want to spend a lot of time drawing the character every time they’re needed.
Generally, the character has to be drawn from several angles, front and back views being the most basic ones, although it depends on the situation. If, for example, the character is only going to wear jeans and a T-shirt with a design on the front, it may not be necessary to draw him from the back. In these cases, a front view, a couple of close-ups of the face with different facial expressions, another view with the character doing a typical pose of theirs and the gadgets or weapons that are relevant to the story would suffice. If, for example, the character uses a time-travel watch, you will not only have to draw its design, but also where the character wears it.
And last but not least, it is important that you like the character’s design, as you will have to draw it in many pages of the comic!
Anatomy sketch
I start sketching the character with the Pencil tool (keyboard shortcut: P). I’m going to draw him with my custom pencils, but you can use the default Clip Studio Paint pencils. To save time, I have already prepared the character base with some poses.
The first step is to draw his basic anatomy so we can put on the clothes, accessories, etc. If, for example, you are working on a sci-fi work and the character is wearing armor, you will have to fit it on top of the basic drawn anatomy. I always tell my students that drawing is like building: start by building the foundation with a good anatomy sketch, then dress the character and finally add the details. If the character is going to have their whole body covered by clothes, it is not necessary to draw the anatomy perfectly. It’s good enough to get the proportions right so you can integrate clothes and accessories coherently without worrying about anatomical errors.

Character sketch
The next step is to sketch the clothes and face. This character will be traveling through different eras of history and in each one he will wear the armor of the time, which means that his anatomy will remain hidden and only his face and neck will be visible. To properly draw armor, it is necessary to do some research by looking at reference images. Before starting to sketch the armor, I lower the opacity of the anatomy layer to around 30 from the Layer palette to hide it slightly. Then I create a new layer and sketch the armor on top of it while keeping an eye on the reference images.
Clean line art and shading
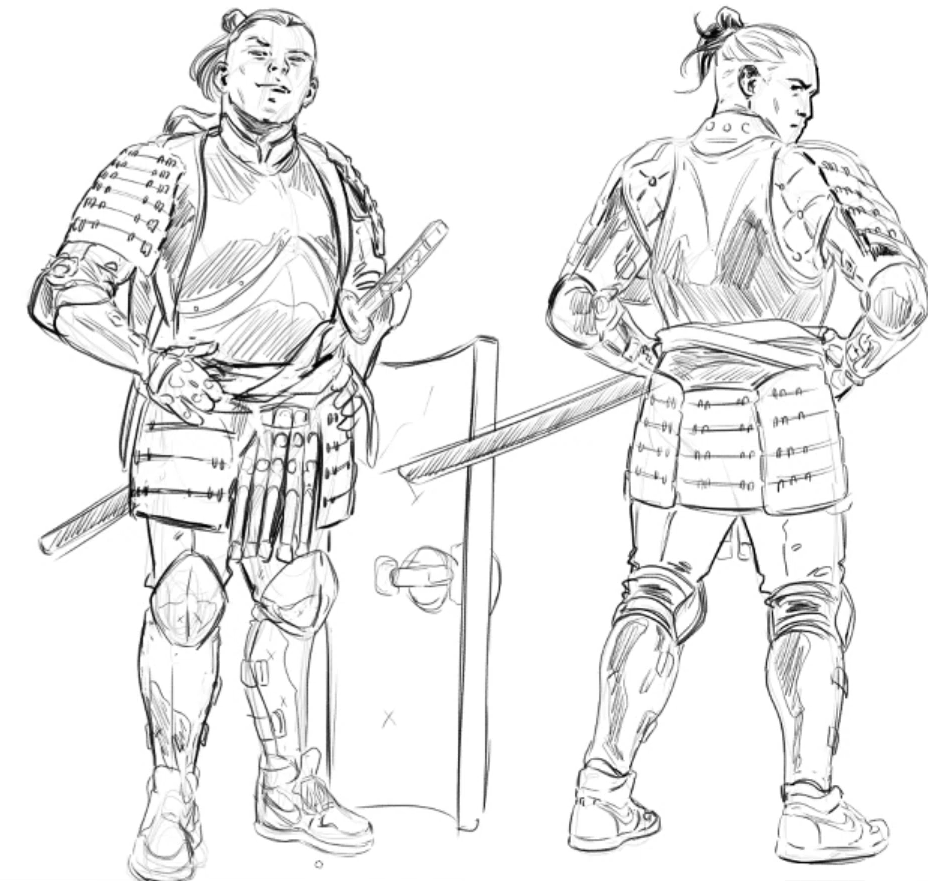
Now it’s time to flesh out the character and draw on the last details to get the final lines.
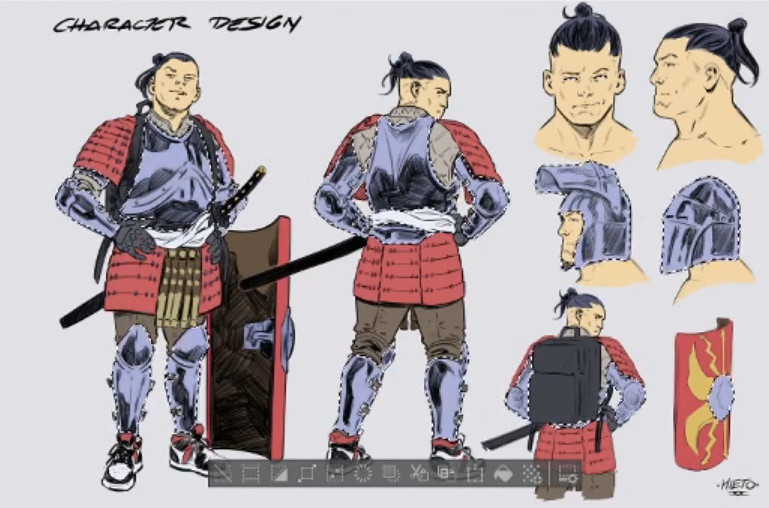
Let’s start with the front pose. Here I also lower the opacity of the clothing sketch layer to 30 and I rotate the canvas with the Rotate sub tool (keyboard shortcut: R) to keep myself in a comfortable position while I draw.
If you need to move a part of the drawing, select it with the Selection tool > Lasso subtool to move it. In my case, I want to move the hilt of the katana, so I copy and paste it into another layer and move it off this new layer.
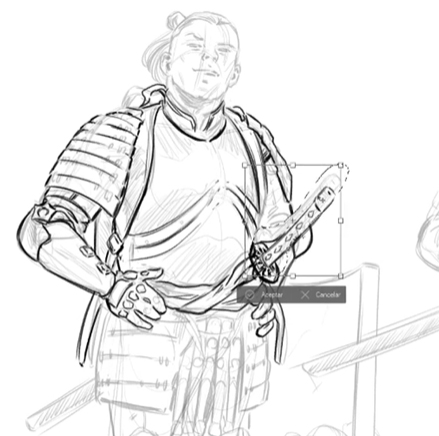
Try different types of designs to know what you find difficult to draw – it will help you identify your weak points and improve them.
The sketched head looks pretty good to me, so I copy it from the sketch folder, paste it into the clean lineart folder and create a new layer here to give it some extra attention.
Once you have your lines ready, apply shading to the design, balancing the lights and shadows to add depth to the character. Don’t forget to add highlights to objects like the metal armor and the shield to make them feel more real.
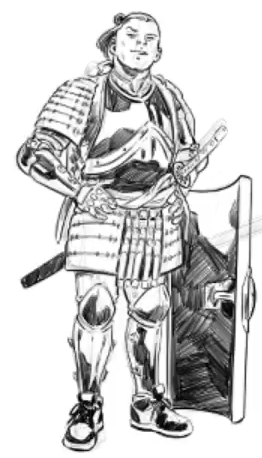
This view is now complete! Next, copy all the pose layers and paste them together in a new folder to keep them sorted. This way you can easily compare the final pose with your sketch by hiding and showing the eye icon on the left side of the folder.
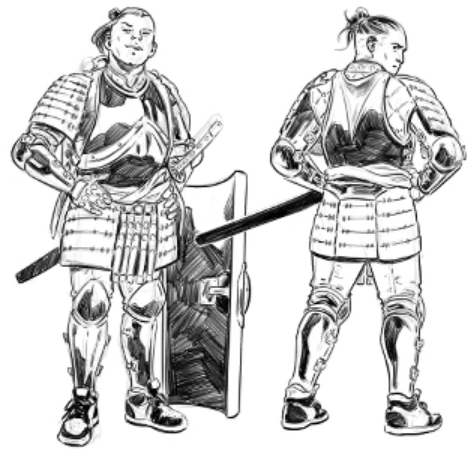
Let’s move onto the second view, this time from the back. I don’t think the head I sketch needs any changes made to it, so I copy it from the sketch folder and paste it in the clean lineart folder as we did with the front view. Then, I hide the front view using the eye icon to draw the katana.
Once I have the lines ready, I add shadows to the character.
In the image below, you can see both views with their lineart and shading complete.
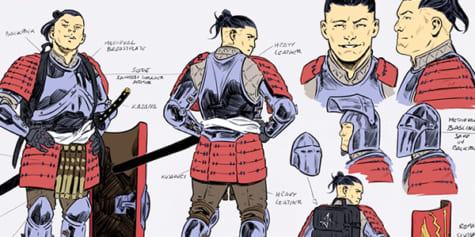
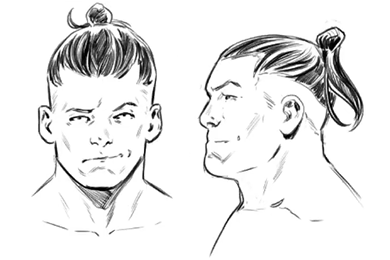
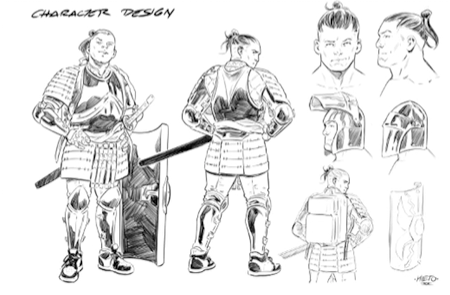
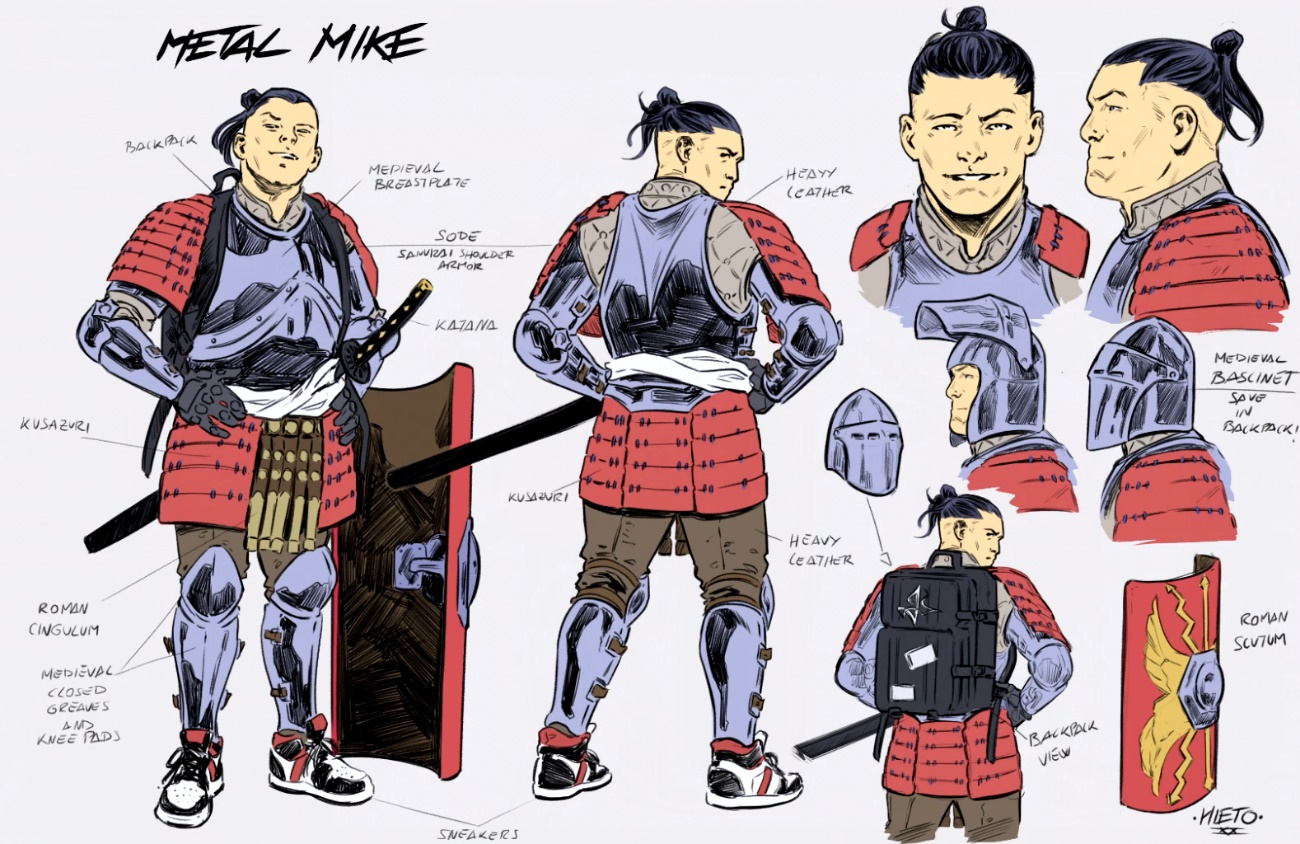
Throughout the comic, there will probably be close-up panels, so it is necessary to draw the character’s profile and front face views in more detail to get a better understanding of his facial expressions.
The character keeps a helmet in his backpack in case he needs extra protection, so I will include this detail in the design as well, plus a sketch of his Roman shield.

This is the final design. For the full-body view from behind, I have hidden the backpack so that the whole armor is visible, although I included the backpack straps in the front-on full-body view.
Coloring
First, we have to set out our color palette on the canvas. The chosen colors should be neutral and muted to make the colorist’s (or your own, if you decide to paint it yourself) work easier. Use only flat colors, so that they can be easily changed later if a color doesn’t work well.

Once the palette is ready, I select the Eyedropper tool and pick from the palette the colors I want to use. Then, with the Lasso sub tool, I circle the area I want to paint. Finally, I switch to the Fill tool to fill in the color. You can see the steps in the GIF below.
You can reduce selections by lassoing unnecessary areas while holding down the Alt key.
Repeat the process to paint the whole drawing. If you need to add more colors to the palette, select the color in the Color Wheel and add it to the palette.
If you want to change a color in the palette, create a selection of it with the Auto select tool (the magic wand) and choose another color in the color wheel to fill it in the selection.

Once you have the flats, hide the color palette layer and combine all the flat color layers. If you want to add extra details or effects, do it from this new combined layer.
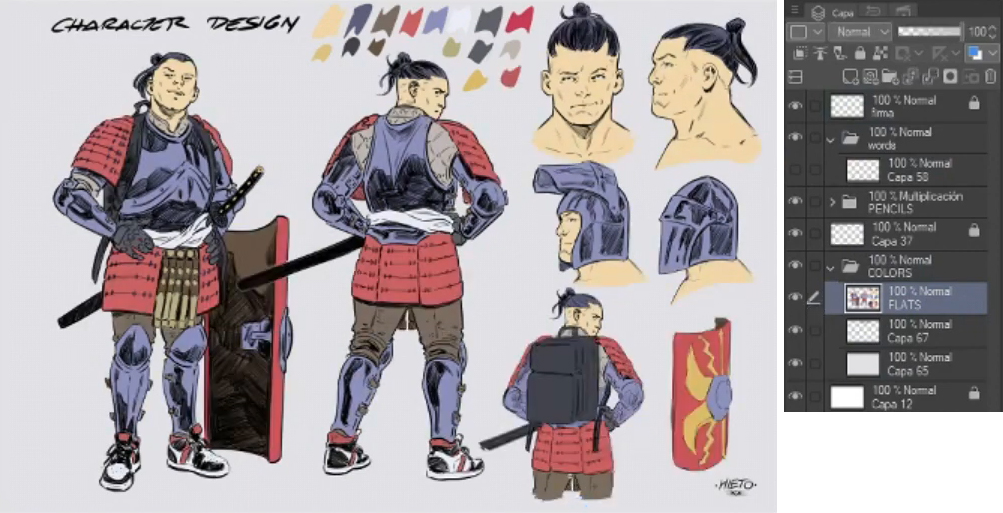
Finally, take a last look at the design. In my case, I noticed that the blue of the armor is extremely flat, so I created a selection of all the blue parts with the Auto select tool and change them to a lighter shade of blue.
And there you have it – the character design is done!
Showing personality through design
The next step is to ask yourself if your design conveys the character’s personality. Don’t hesitate to edit it if you see that it doesn’t fully reflect their personality or doesn’t represent the comic’s story properly. You can complement the design with annotations describing, for example, what each weapon or gadget is used for.
Also ask yourself questions such as: “Is it feasible to draw this character on multiple pages or will it take too much time?” In other words, avoid loading the character with too much detail. I know it sounds appealing to fill the sword with motifs or the armor with dragon-shaped engravings, but all that would take up a lot of your time – time that is better spent drawing other characters or the backgrounds. Our character has quite a lot of details, but we can simplify in the comic pages elements such as the joints of the armor.
Here is the final design:
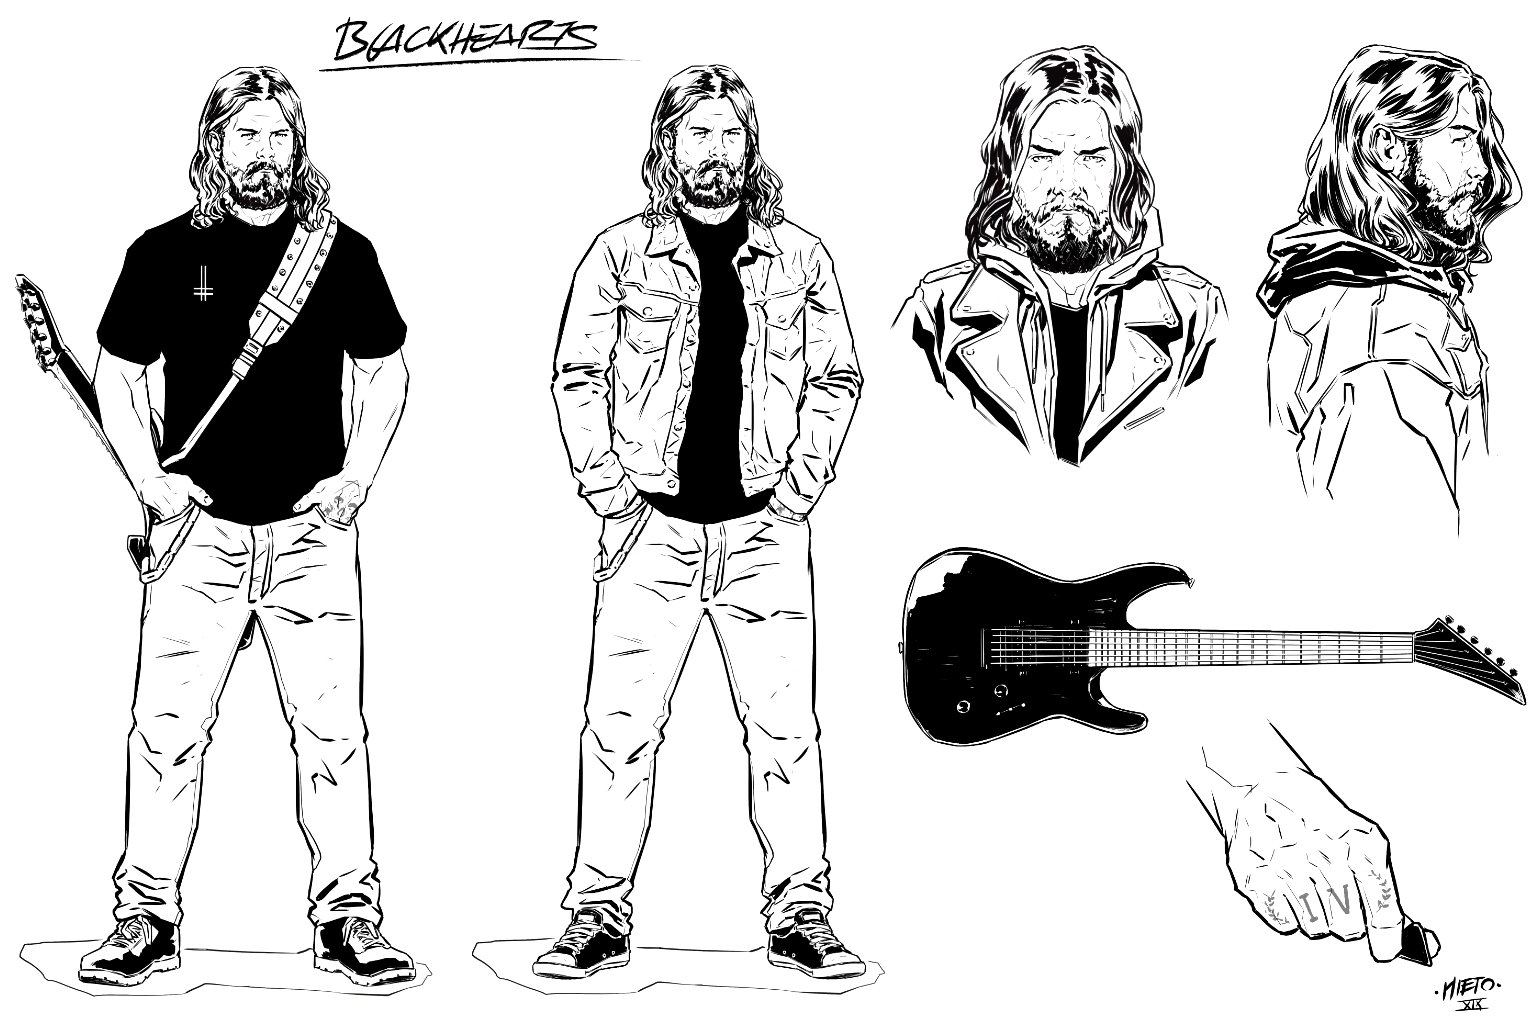
Before concluding the tutorial, I would like to show you other character design examples.
For this design I was only asked to do up to the inking, so I would need to send it to a colorist to color it afterwards.
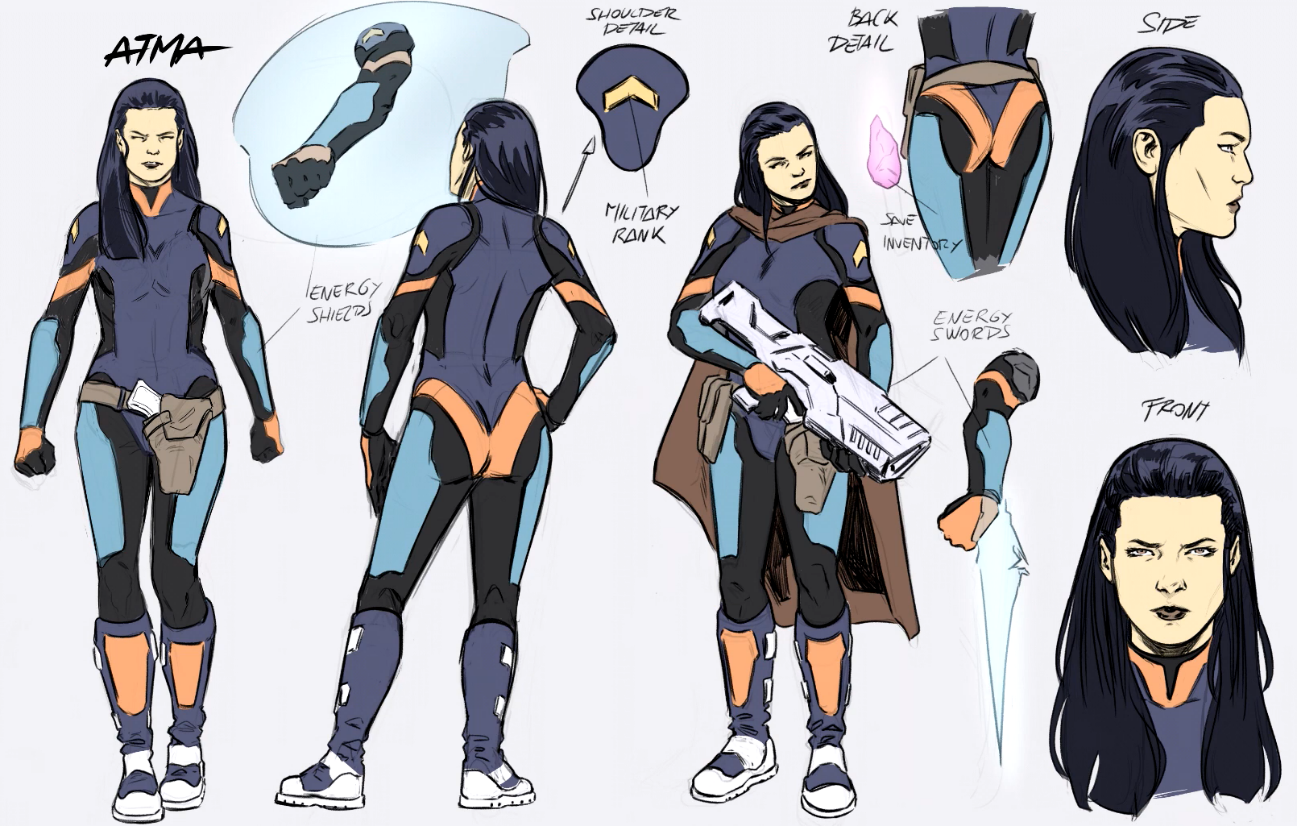
The next one shows the main character of a science fiction comic. As you can see, this design is much simpler than the one in this tutorial, so don’t be afraid to simplify your designs too. The character is wearing a cape, a rifle, a gun holster, and a skintight suit with different colors representing different suit features. These kinds of designs with fewer details are more suited for action comics, where the overall comic design is more important than the characters’ design.
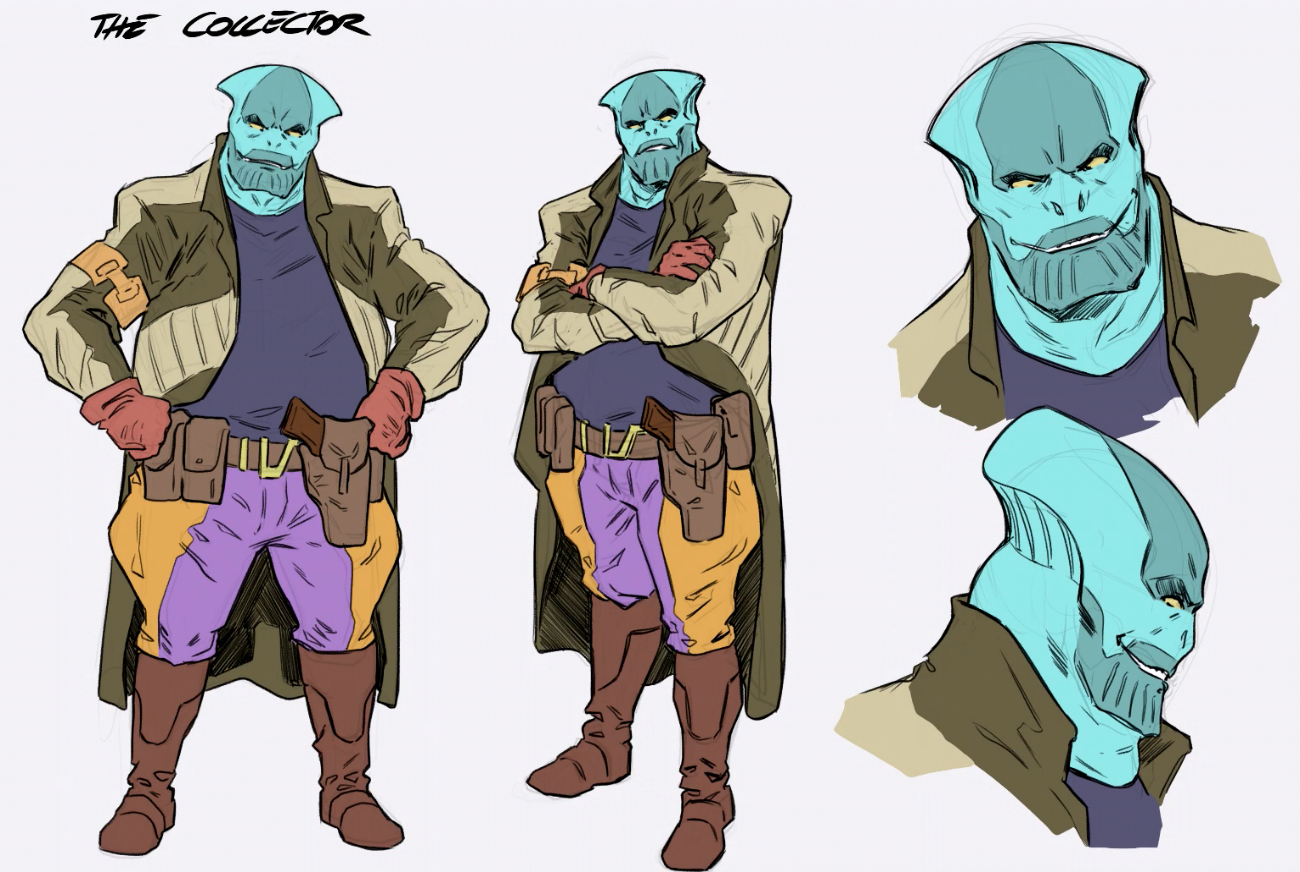
Finally, we have a villain whose design could perfectly fit into the previous character’s story. This one is even more sparse in details, wearing just a jacket, a gun holster and some characteristic facial features.
Conclusion
Thank you so much for reading my tutorial! If you’re still getting started in comic or character design, I hope you’ve learned something new and useful. If you’re interested, you can find more of my work on my website and social media accounts.
About the Artist:
Carlos Nieto
Professional illustrator.
- YouTube: https://www.youtube.com/channel/UCifnjqttCY146VszK466Rjg
- Instagram: https://www.instagram.com/carlosnietoart/
- Twitter: https://twitter.com/CarlosNietoArt
- Facebook: https://www.facebook.com/CarlosNietoArt/
- Patreon: https://www.patreon.com/CarlosNieto
Interested in character art & design or what it takes to become a character designer?
Check out the link below!