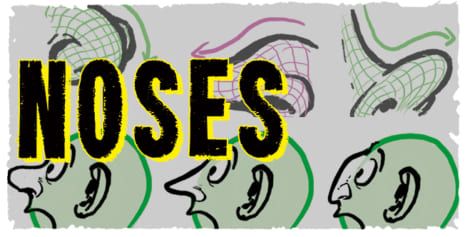
How to Draw a Nose

Learn how to draw a nose by illustrator Raquel Arellano. See how drawing noses in any style can be broken down into basic shapes, step by step with pictures.
In this tutorial, you will learn how to draw a nose easily using its simplest and most basic shapes. From there, you can see how to draw noses even more complex and in different shapes and sizes. One of the objectives is to be able to draw a unique, expressive, creative face that has personality.
For this tutorial, I mainly used Clip Studio Paint EX for iPad, although you can adapt all the explanations to other graphic apps such as Procreate, Photoshop, etc.
1. Understanding the nose: Basic structure
Before you start drawing noses in different styles and shapes, it’s best to secure your understanding of its basic structure. Once you grasp the basic foundation of something, it greatly helps when recreating it in another drawing style, from realistic to an anime nose. If you follow this order, it will be much easier to draw the nose you need even without a face drawing reference.
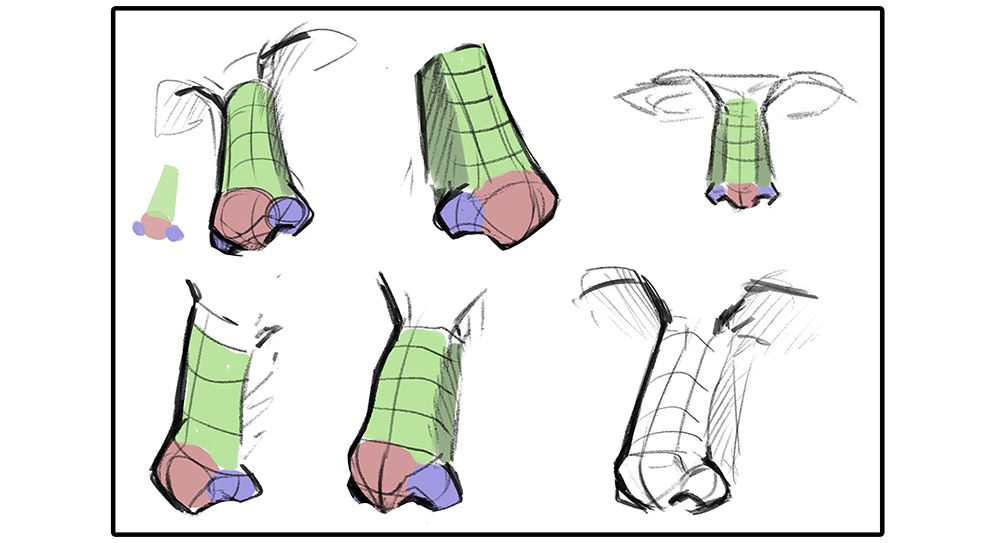
Try to imagine the different basic shapes that make up a nose and break it down. Using flat and rectangular shapes will help you understand it’s volume. Below, we have various simplifications of the nose, separated by color. For the main structure of the nose, imagine a rectangle that can be narrowed at will as it gets closer to the tip of the nose. Or try to enlarge it a bit more when you are looking for a nose with wider nostrils.

1.1 Understanding the nose: Round shapes
Once you understand the basic
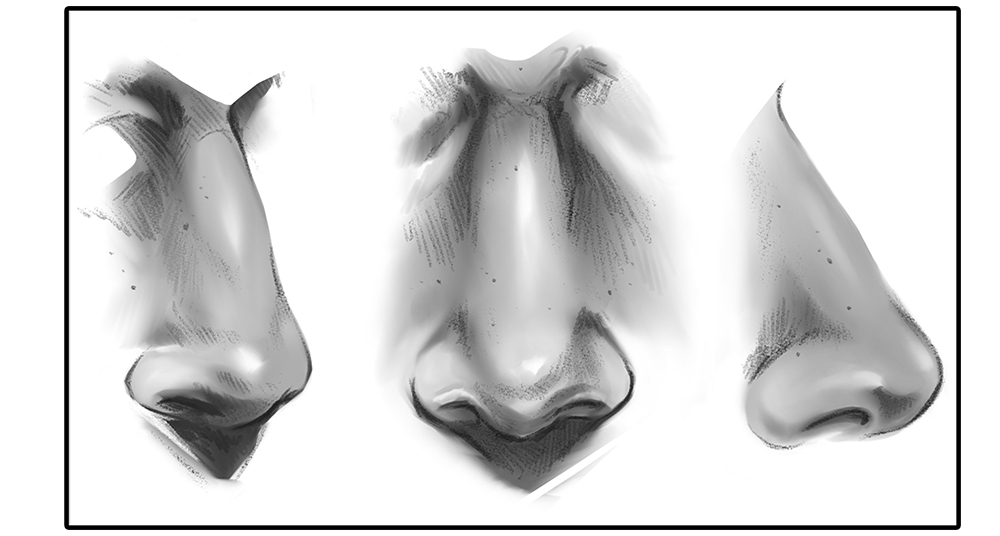
structure of the nose, translate those rectangular and flattened elements into curved and spherical shapes. This will gradually begin to resemble a realistic nose, your first steps to making an easy drawing of a nose.
Notice how a nose can be realistically represented. Taking into account the shaded areas helps to understand the volumes. Once you have analyzed these shapes, try to blend them together. Use face references, photographs, etc. for this. You can find tons of face reference images on sites like ArtStation or Pinterest.
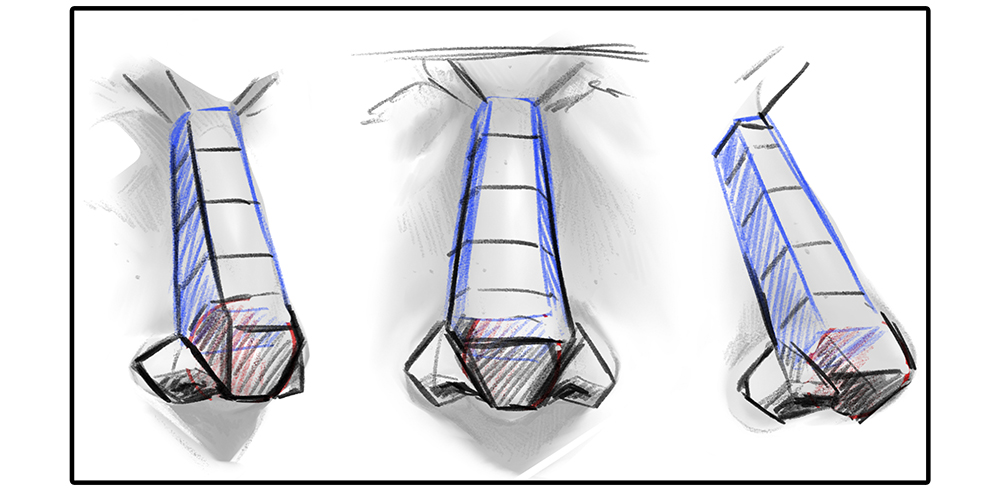
To easily represent the tip of the nose, draw a bigger sphere in the center, with two small ones on the sides. Sizes can vary depending on how you want the nose to look and feel free to add a rectangular structure to better understand each side of the nose.
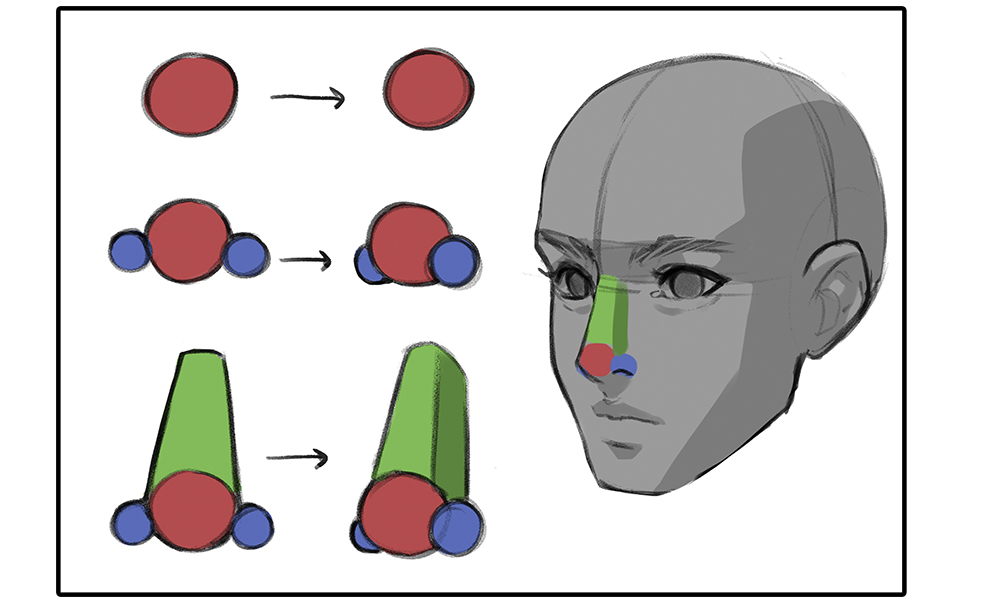
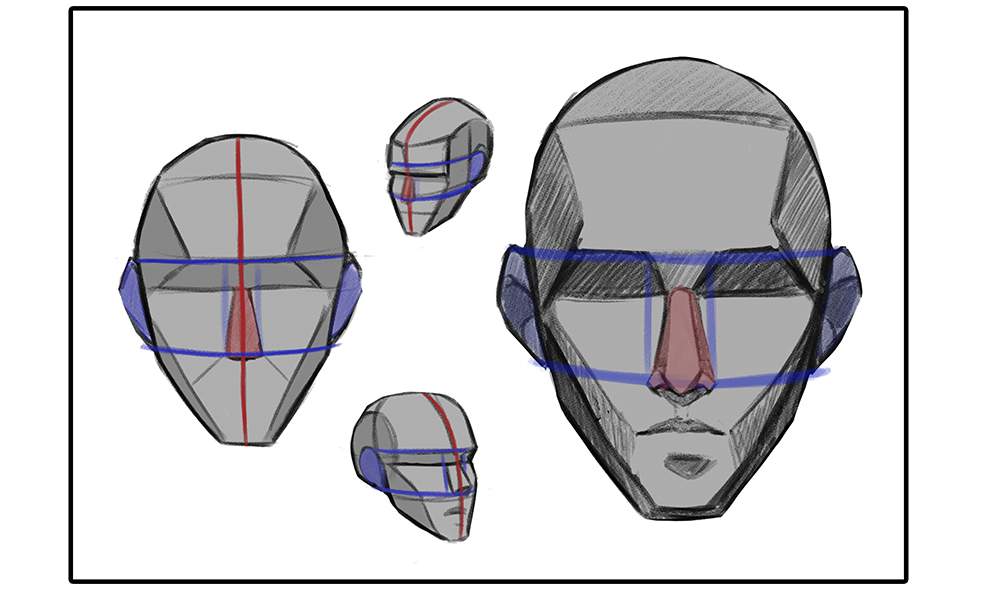
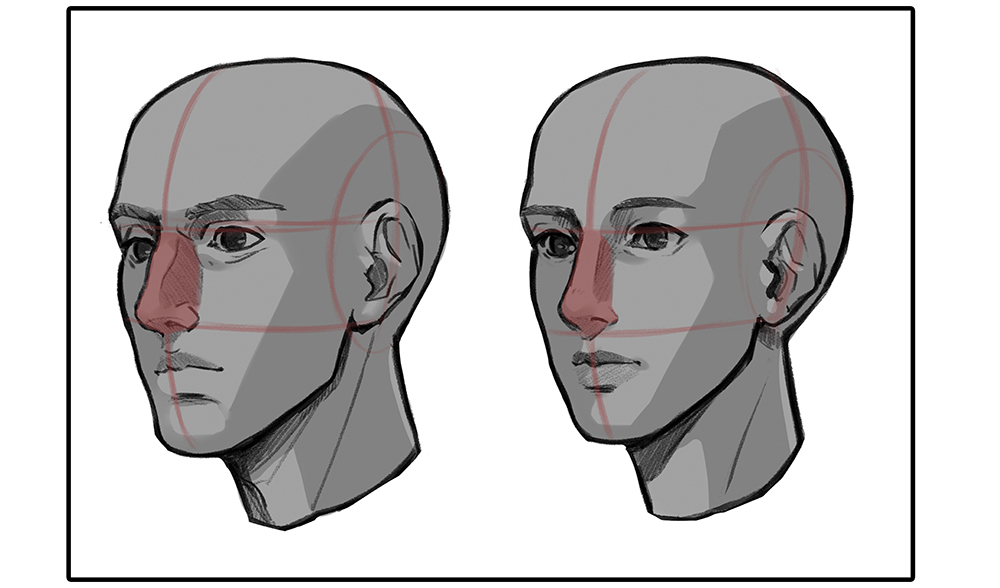
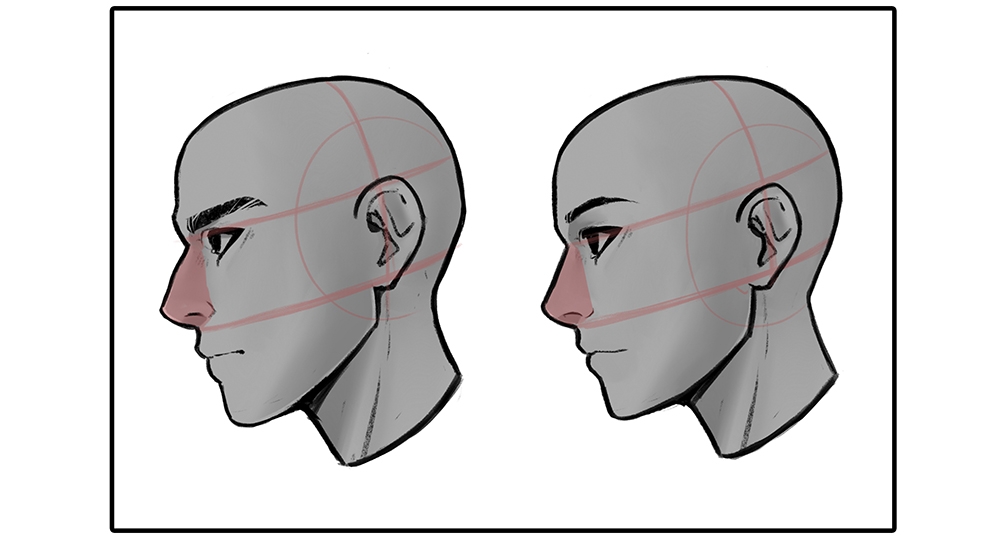
2. Placing the nose
Once we know the basic structure of the nose, let us look at how to fit it into the face. Several aspects and proportions must be taken into account. The size of the nose is in the same vertical guideline that divides the face in two (more or less in half). Its size can also be related to the ears. Many times, if the nose is big, the ears will also be big. To designate where the nostrils fall, we can use the tear duct.
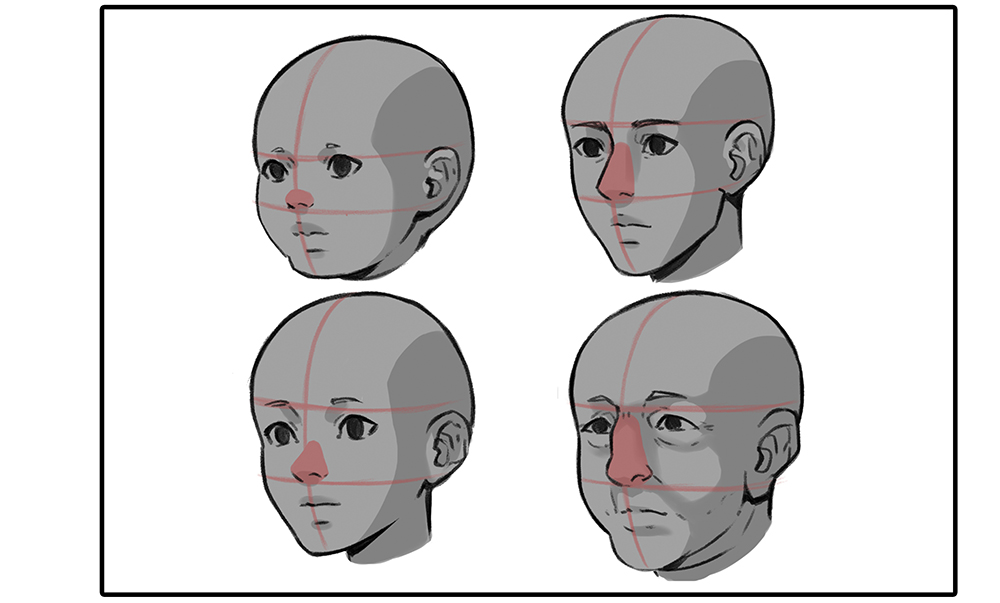
3. Proportions according to sex and age
Once the basic structure of the nose has been fully understood, let us concentrate on how to use the right type of nose for each character. Research and identify different individual features that allow you to see age or sex differences between characters. A typical male nose is different from a female nose in that it usually has a more noticeable septum and larger nostrils. A more feminine nose would have a thinner septum and smaller nostrils. You can also round or sharpen the tip of the nose to make it a little thinner.
Another aspect to consider is age. As their body is still growing, children’s noses are much smaller than those of adults. You can see the same pattern when comparing the nose of an adult to that of an older adult. Look at how an older man’s nose is larger and drops down further compared to that of a middle-aged adult.
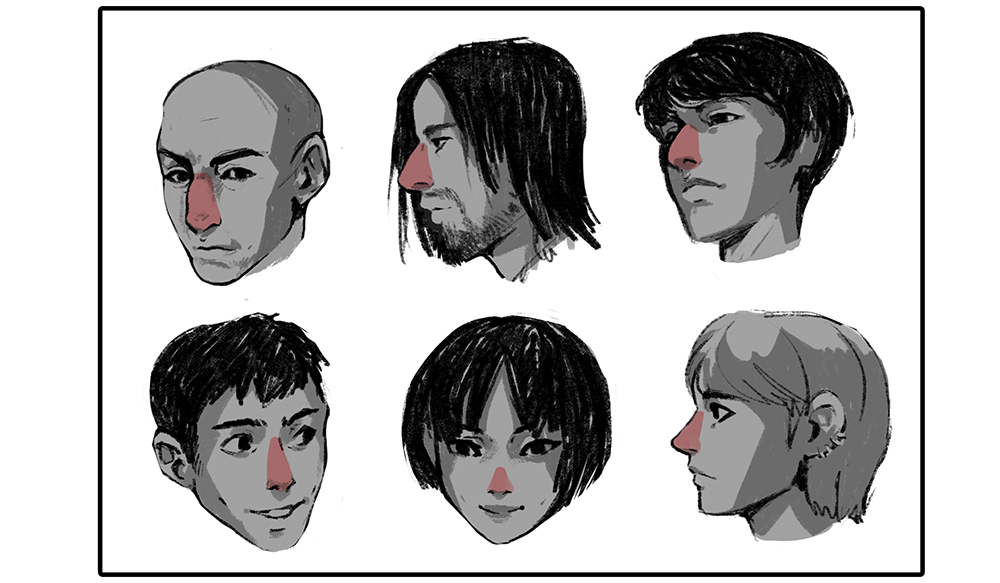
4. Nose types
Depending on the shape of nose, the character acquires specific facial features. You can create a diverse cast of characters using different structures to make different nose types, thicker or thinner, with a high bridge or low bridge, and different sized nostrils. In the example below, I decided to draw a prominent nose on the three characters on top, and a smaller, sharper nose on the three on the bottom. Just by changing something as humble as the nose the impression of the character will change.
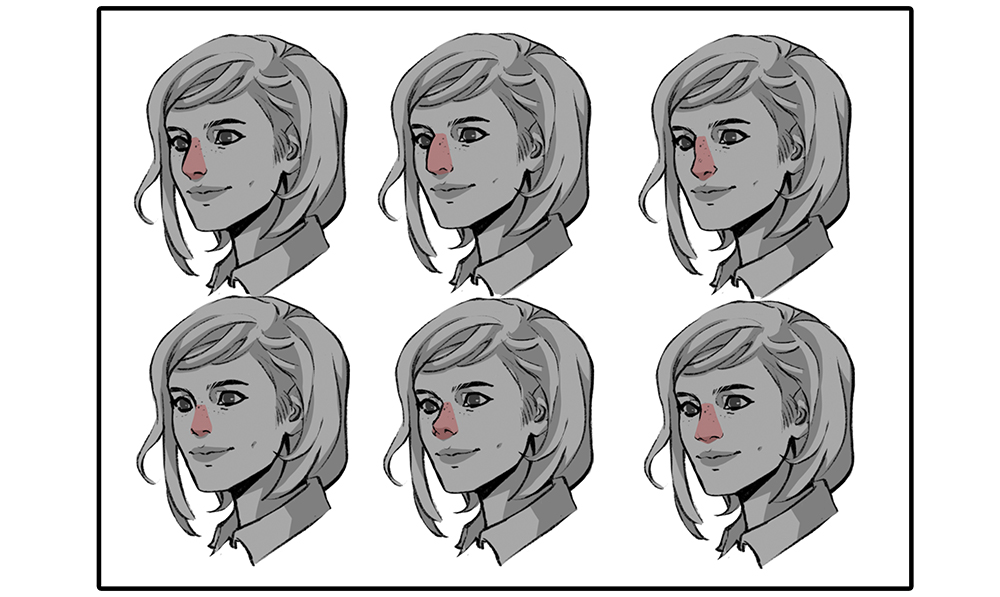
5. Same face, different nose!
When designing a character, it is interesting to make some last-minute changes when deciding the final design. In this case, let me show you an example of how different types of noses work on the same female face drawing.
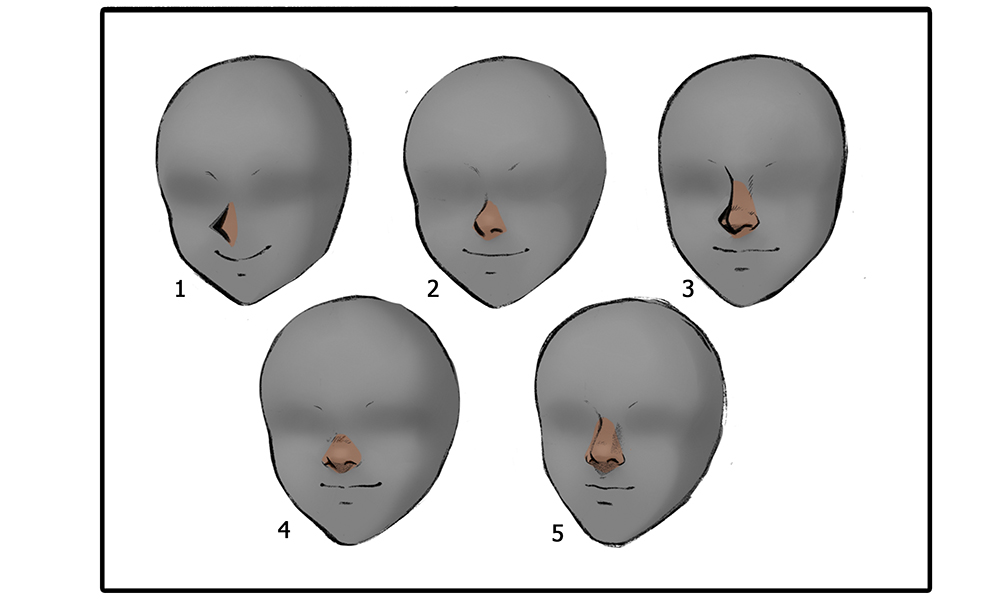
6. Drawing a nose using different styles
Depending on their styles, artists have different takes on noses and represent them in various ways when doing face line drawings. Here is an example of five different interpretations of a nose. The first one is a simple anime nose, the second is done using a Disney style, the third with an American comic book style, the fourth is my own style (I call it Stylish), and the fifth a more realistic/semi-realistic take on my Stylish nose.
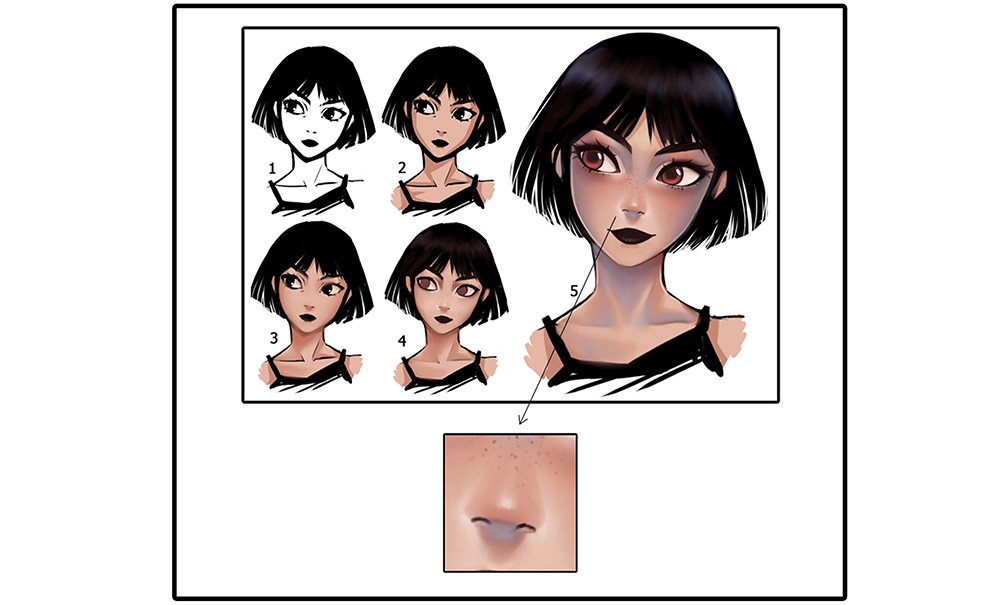
7. Appling noses to an illustration
To finish up the tutorial, let’s take a look at this step-by-step nose drawing so you can see how it is put together with the other elements that make up the face. I have drawn a small freckled nose to create some texture to the skin in the nose area. Note how important it is to know where highlights and shades must be placed in order to achieve depth and volume. I always add some shine to the sides of the nostrils and at the tip, while using a darker shadow under the nose. The color of your illustration depends greatly on lighting, in addition to the character themselves. In my image, I used a neutral light source.
About the artist
Raquel Arellano is a digital and traditional illustrator and concept artist from Barcelona. She has a background in teaching videogames and currently works at a university as an art teacher for the subject. She works for indie role-playing companies, creates commissions for individuals, and also writes tutorials for various companies. She shows her art processes on Twitch, and you can see more of her illustrations on Instagram, Twitter, or ArtStation.
https://www.instagram.com/rarellano_art/
https://www.artstation.com/rarellano
Interested in character art & design or what it takes to become a character designer?
Check out the link below!