Introduction
If you want to get started with comics, cartoons, and webtoons, you’ll need to be familiar with digital art tools. This article gives tips for mastering pen tools as well as advice on light and coloring techniques, so you can start your comic process with confidence.
Master your pens and brushes
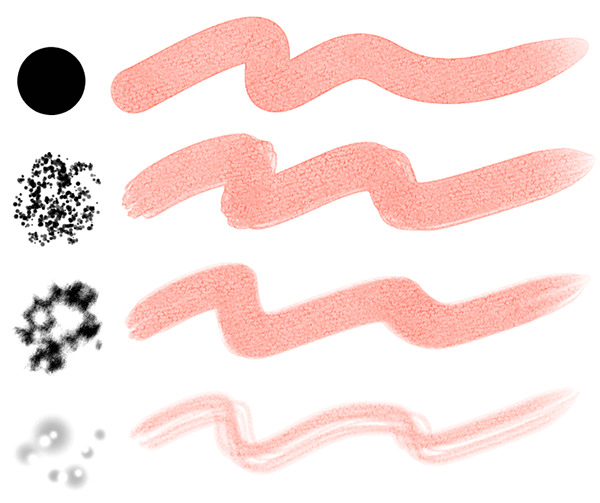
Clip Studio Paint includes a wide variety of brushes for digital drawing, including pencils for rough sketches, pens for smooth line art, watercolor brushes for soft color blends, and oil paints for strong colors with intense textures.
Pencil
Pencils are ideal for rough sketches, as they are less precise and allow you to work with rough shapes and shading. If your pen tablet and digital pen support tilt detection, the lines become thicker when the pen is tilted to a lower angle, like a traditional pencil.
Pen
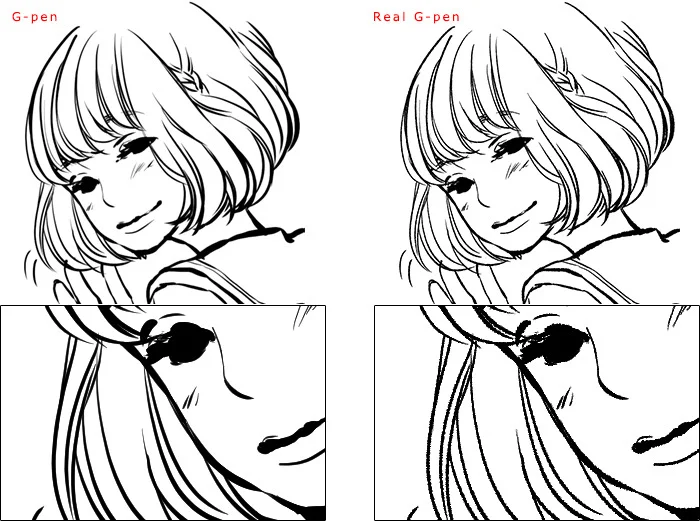
Pen tools are typically used for line art in comics, manga, and webtoons.The default G-pen in Clip Studio Paint is a popular choice, as it mimics dip-pens and their slightly rougher lines. Many traditional comic artists use this type of pen when inking on paper. The G-Pen responds to pen pressure in terms of line thickness, but maintains its opacity for a variety of expressive lines, as well as textured details and the option for cross hatching by hand.
The alternate Real G-pen has a rougher brush tip for an even more rugged effect.
Brush
Brush tools have a large range of settings for colors, opacity and texture, so they are great for painting backgrounds or adding details to your shading.
Watercolor brushes create soft color blends which can be suitable for stories in the romance genre or slow-paced stories, as watercolor techniques work best for larger panels and simple backgrounds in webtoons.
Brushes that imitate thick paints like oil or acrylics are often more suitable for bold and high-contrast paintings such as covers for comics and manga.
Airbrush
Airbrushes are ideal for lightly layering colors or creating gradients with very smooth color variations. They are suitable for simple shading in webtoons and other color comics.

Explore inking techniques for comics and manga
Comics, manga, and webtoons are often drawn with clear pen lines. For this, you need good control of your pen tools and pen pressure.
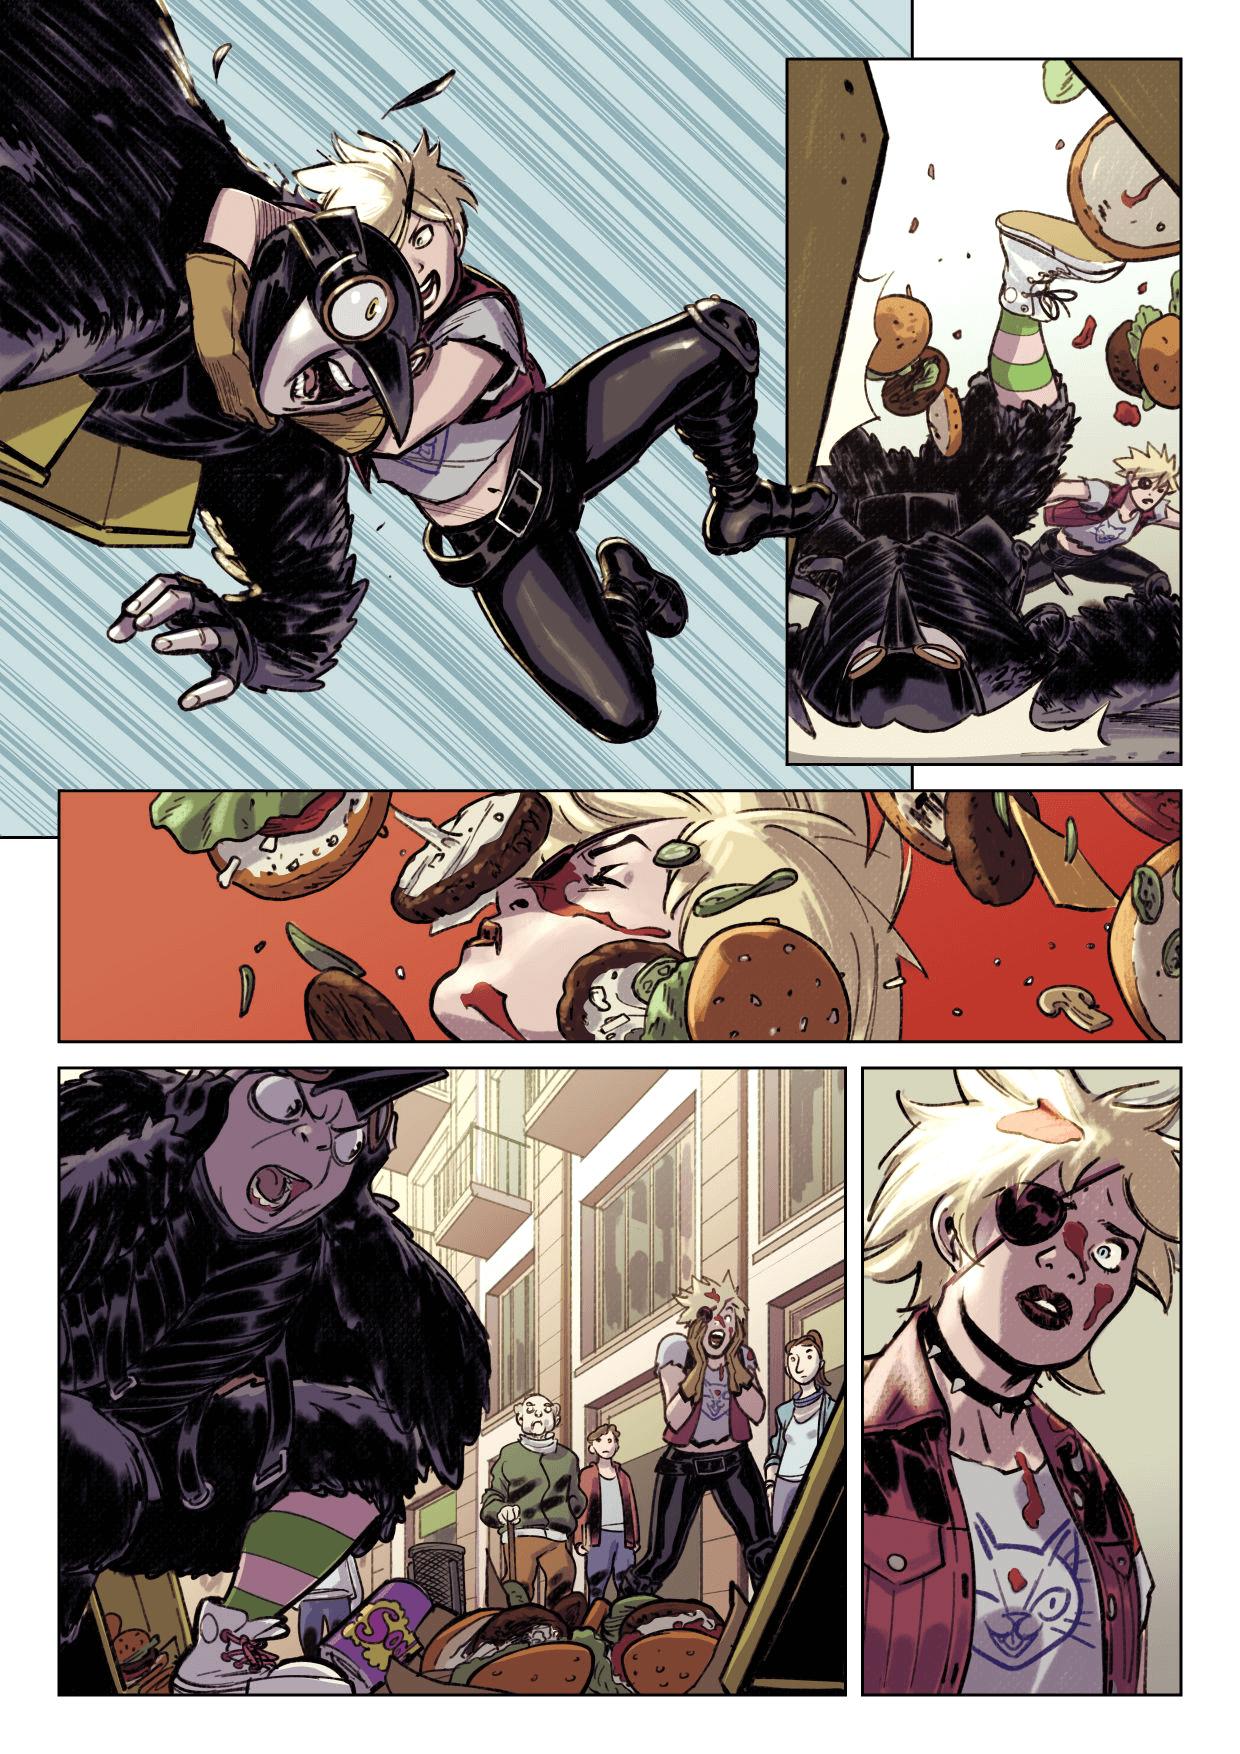
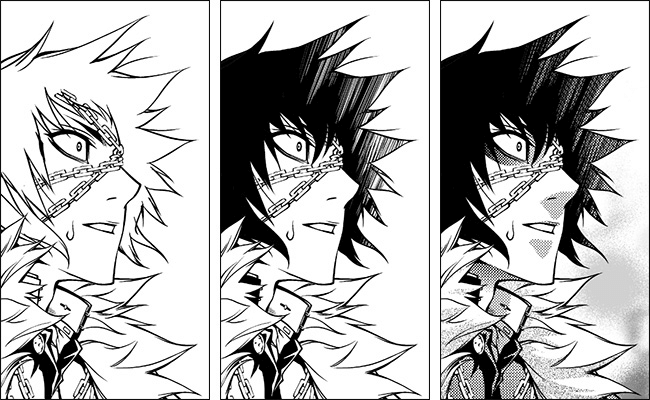
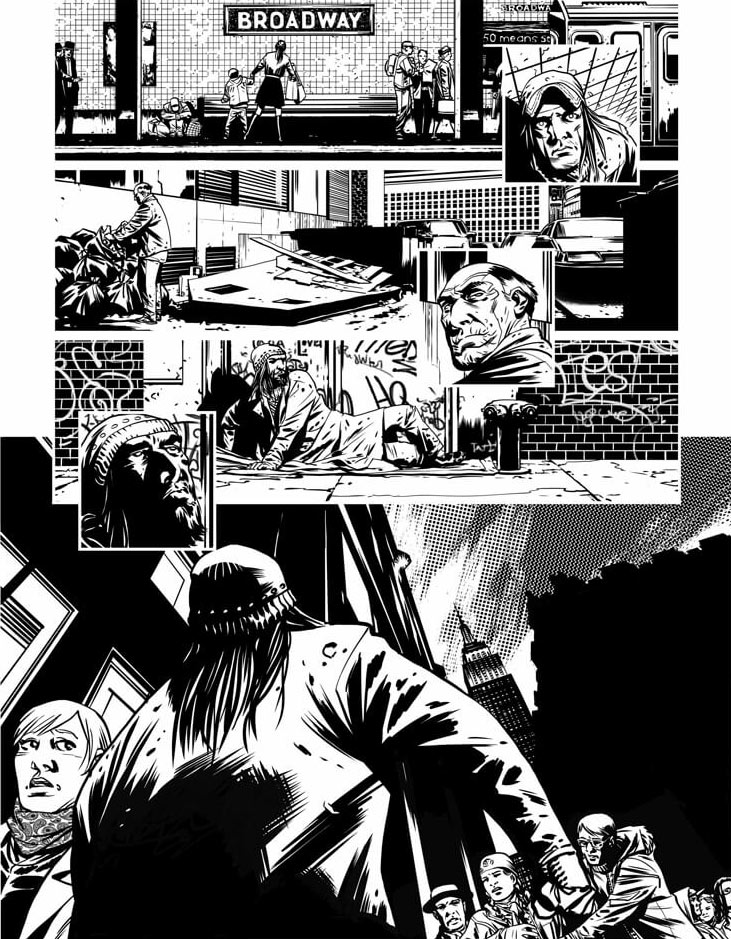
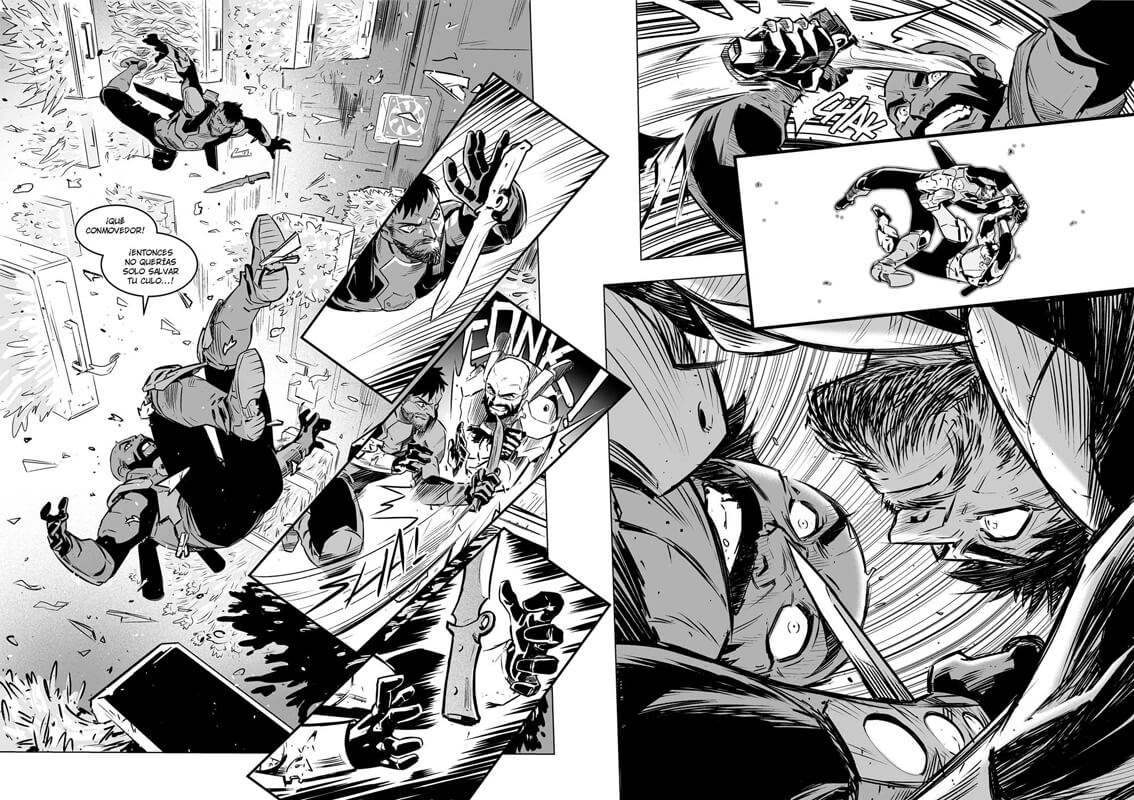
In traditional American comics, the direction of the light source and texture are often expressed through line thickness, also called line weight. In the example below, the left side of the character’s head has thicker lines, implying a light source from the right. Lines are also used to draw basic shading around the character’s muscles with short hatched lines.
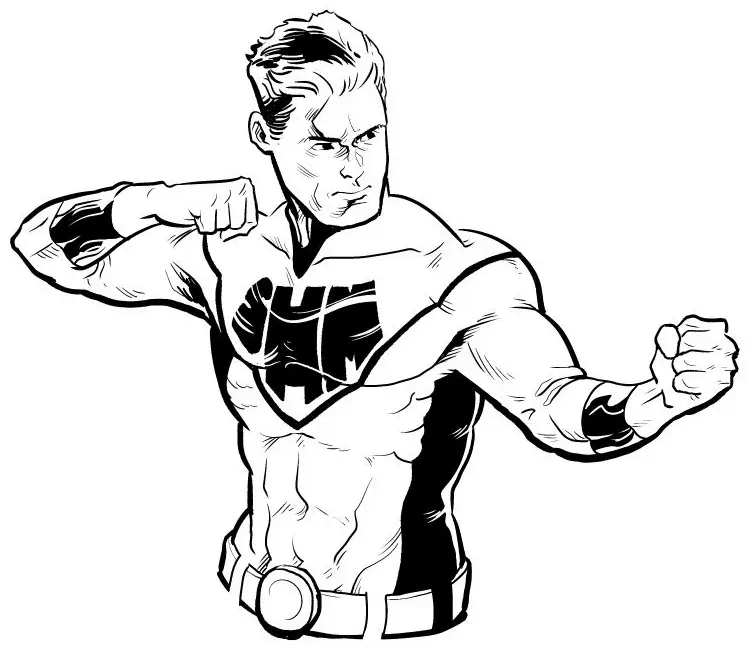
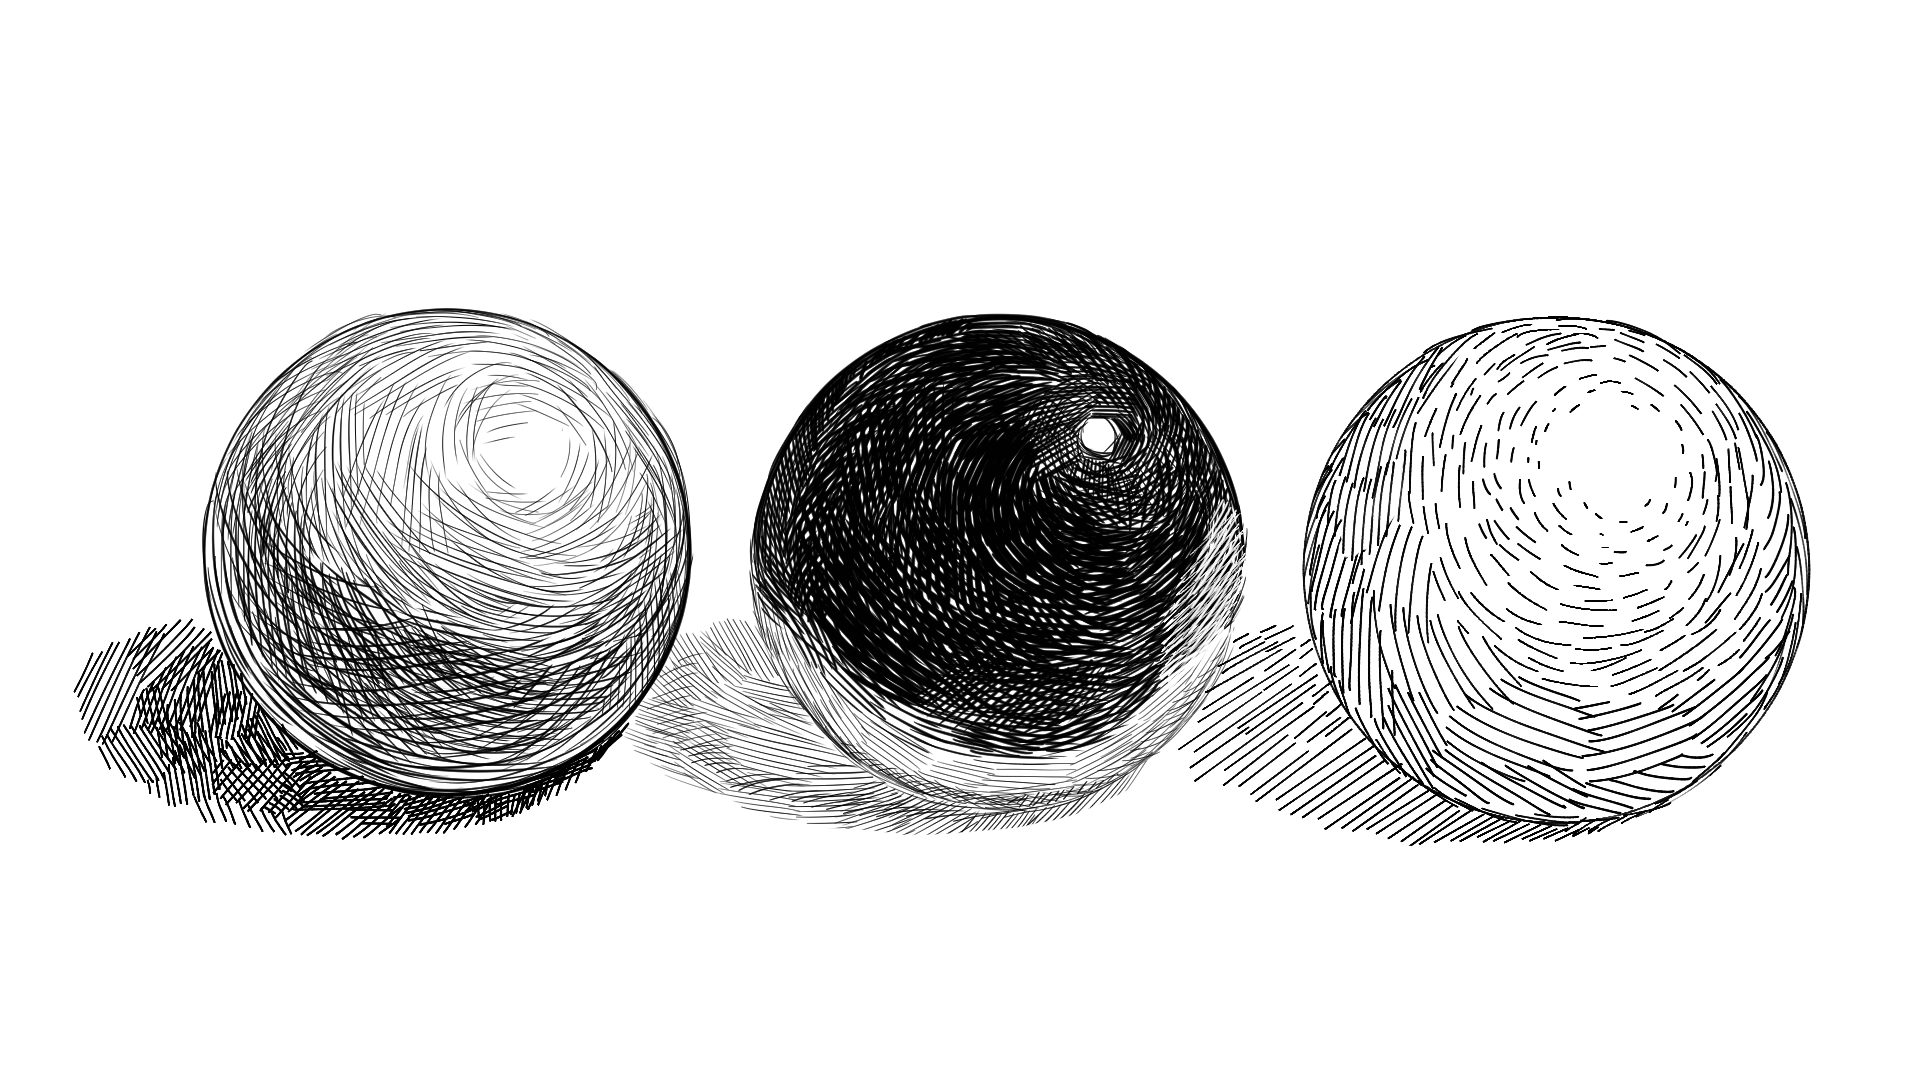
There are numerous ways of hatching with a pen, which is a technique of expressing shadows with short lines placed next to each other in various patterns. The intensity of a shadow can be expressed by the density of the lines. Cross hatching involves hatching in multiple directions, to create a deeper shadow. Different styles of hatching can be created by varying the thickness of the lines, their direction and their placement.
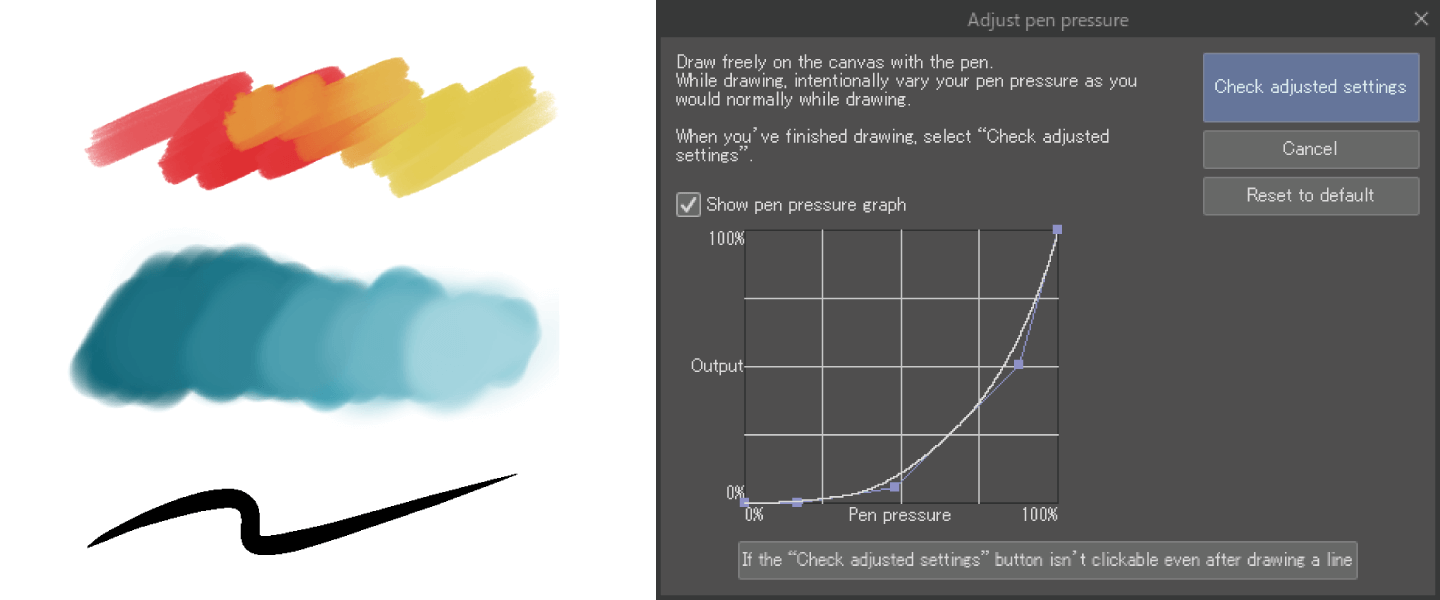
Customizing brush settings
Customizing your brush settings will help you create smoother lines more comfortably
With Clip Studio Paint, the pressure sensitivity can be adjusted after connecting your digital pen or pen tablet, then opening the pen pressure wizard. You can also set different pen pressure graphs for each individual brush.
If you feel you are too heavy-handed with a certain brush, you can adjust the curve so that the brush needs less pressure to apply the amount of color at the size you are looking for. This will put less strain on your hand and your tablet.
See here for more information on how to adjust pen pressure in Clip Studio Paint.
Clip Studio Paint’s pen and brush tools allow you to customize the pen pressure dynamics, texture, brush stroke shape, and more.
A brush stroke can be significantly changed just by changing a single setting.
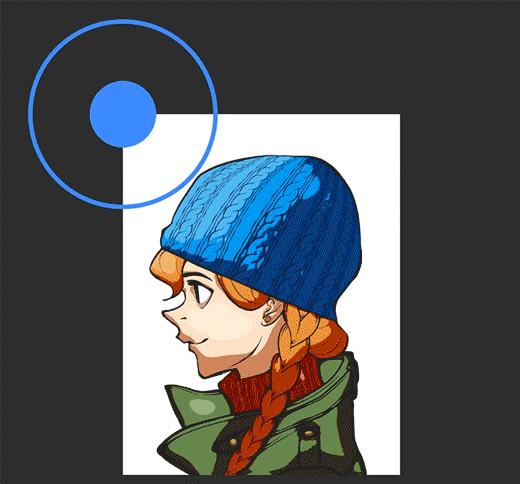
The following figure shows an example of changing the shape of the Round watercolor brush brush in the Brush tool. Changing just the brush shape will change the look of the stroke.
Changing the brush texture is another easy way to change the quality of the brush.
If you’re not confident about customizing your own brushes, check out the Assets library for user-made brushes. Here are some of the most popular community pens for comics and manga in Clip Studio Paint.

Use realistic lighting for depth and dimension
Light and shadows play an important role in giving life to your story on the page. As well as adding dimension and realism, light and shadow also serve to express the character’s feelings in the story. Consider how the following examples of lighting convey a different mood.
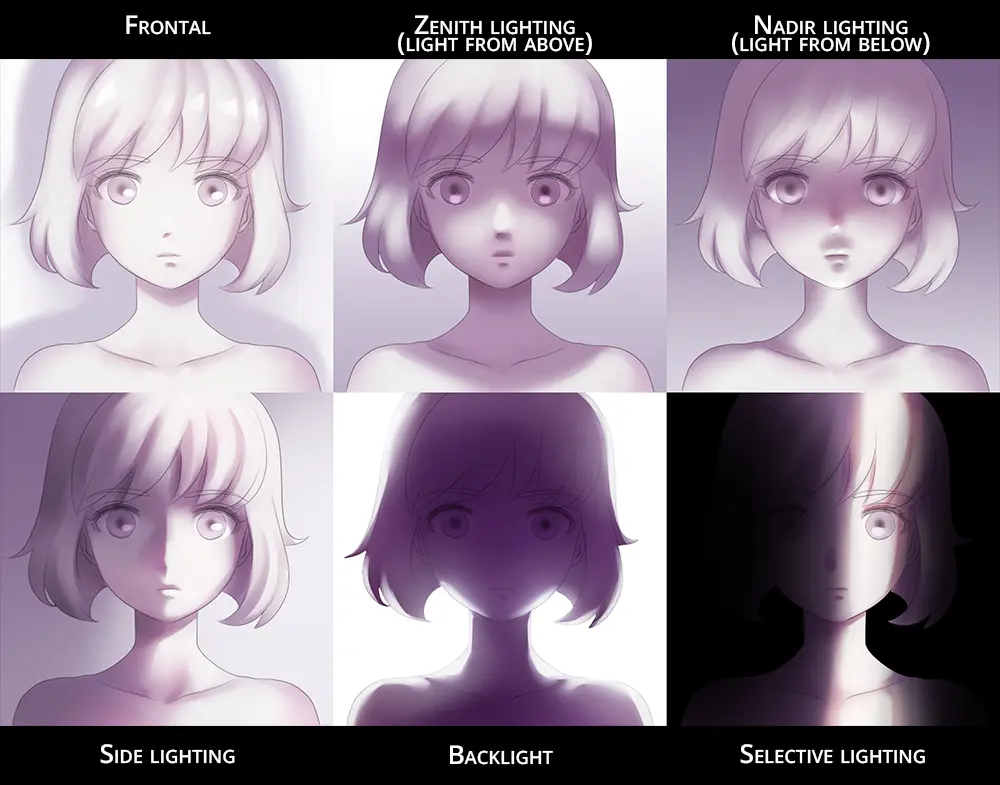
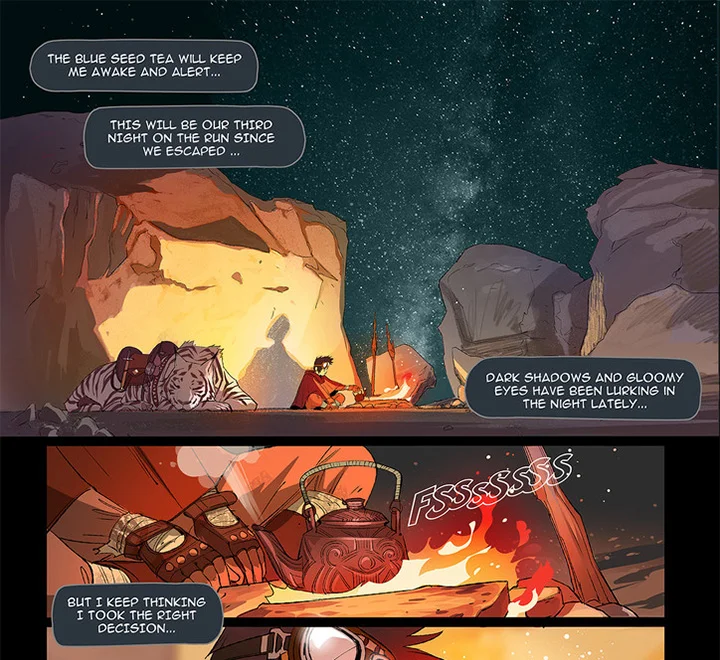
Unlike full illustrations or paintings, comic panels don’t need highly detailed shadows. The following page is drawn with simple shadows and highlights, corresponding to the flame of the campfire as the light source. Although not necessarily realistic, this is an example of consistent and atmospheric lighting that not only conveys the scenery, but also sets the mood of the story.
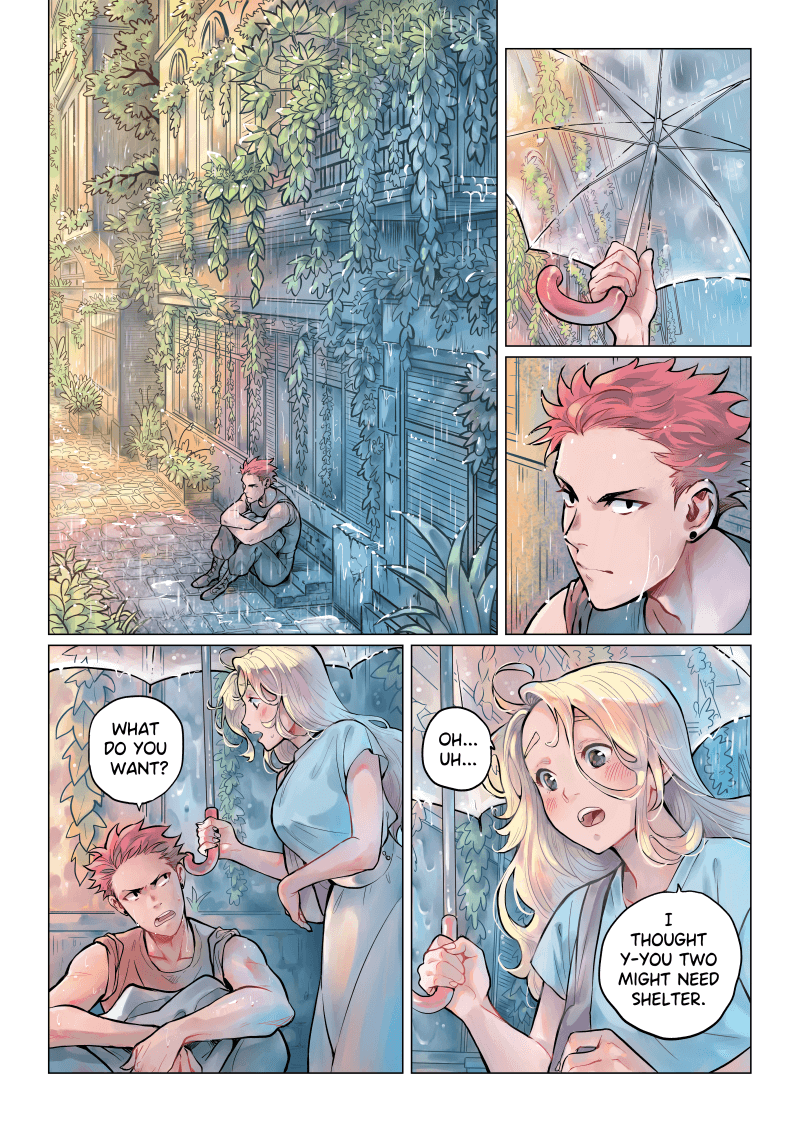
For more realism, it is important to consider the light source when adding light and shadow. Think about how the light interacts with different elements in the scene to add dimension and clarity to your compositions. In some cases, you may exaggerate the light or shadow to create a more dramatic or emotional scene. However, be sure to pay attention to the fundamentals of lighting so that your panels remain believable. Shifts in lighting need to be purposeful to not confuse the reader.
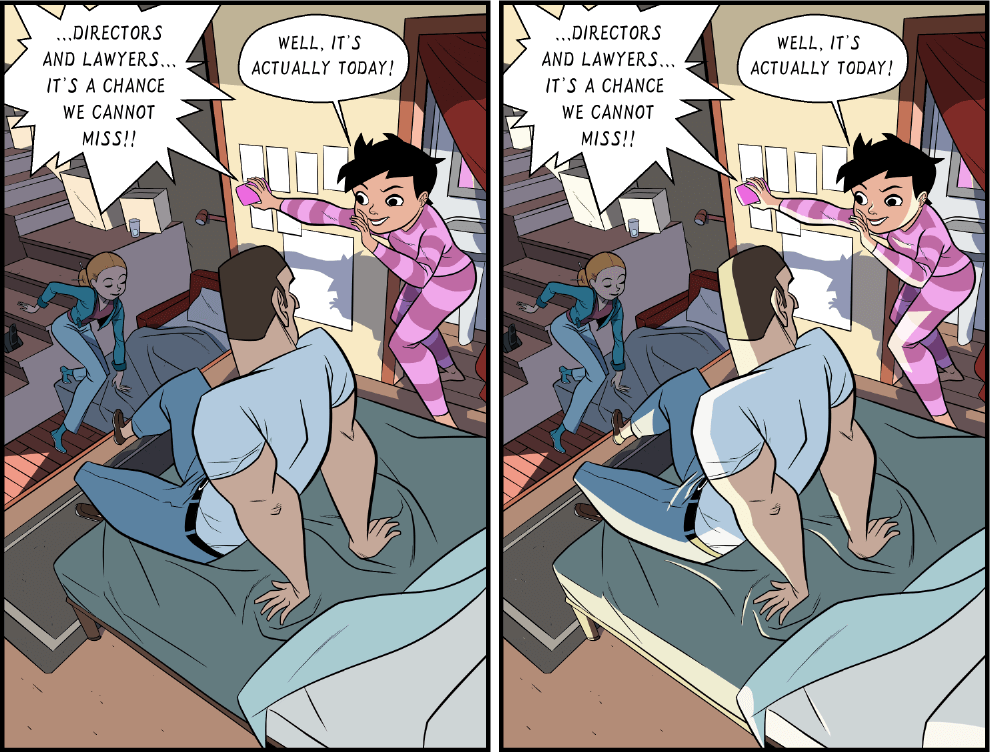
Here is another example of how to use lighting and shadows to add depth.
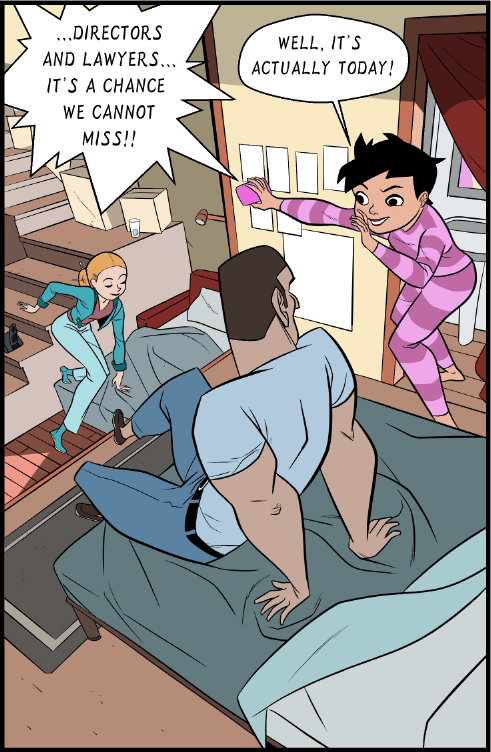
To separate the different sections of the room, shadows were added to the staircase and the character on the left. Shadows were also added behind the character in pink. The shadows add dimension and make it easier to see where the characters are positioned relative to their surroundings.
A light source on the left is indicated by the highlights that were added to the characters. This could imply the existence of a window or a lamp out of frame and gives more context to the scene.
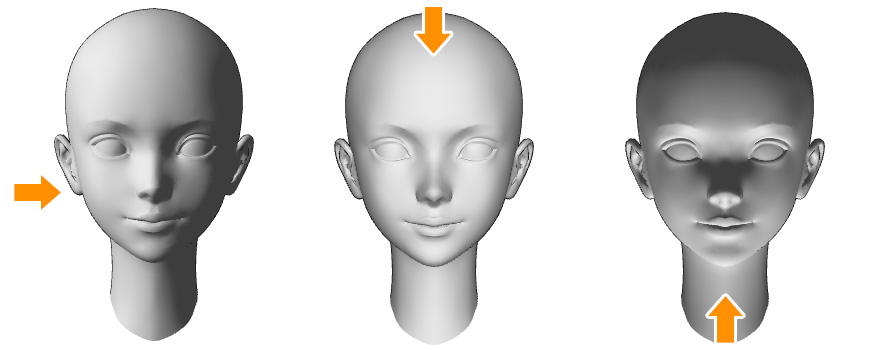
Photos are always great references to understand light and shadow. Another way to get a reference for shadows is to use 3D models. You can add 3D character models or other 3D objects to your canvas and adjust the position of the light source to see how it affects different parts of the models. When the models are on a single layer, the same light source will apply to all models.
In Clip Studio Paint, you can also try out the Shading Assist function, which automatically generates shadows by referencing your line art and projecting these onto your flat colors. This is helpful for creating a base for cel shading typical of comics.
Use digital coloring techniques effectively
Coloring techniques and tools
Apart from markers and brush tools, you can use color fill and gradient tools to quickly add color to larger areas of your comic.
Fill
One technique that digital coloring excels at is filling areas with flat colors quickly without affecting the existing lineart. By simply tapping within enclosed line art with the Fill tool, you can block in the colors uniformly and evenly. Do this on a layer below your lineart and reference your lines and you can easily apply colors that you can shade and add detail to later.
You can also use Lasso Fill to create a selection for specific color shapes simply by drawing the outline of the area you want to fill.
Gradients
Another useful tool is the Gradient tool in Clip Studio Paint. You can create even and smooth gradients by simply dragging the tool across the area where you want to apply the gradient. The gradient can apply to the entire canvas or a selection, and the direction is designated by the direction of the tool.
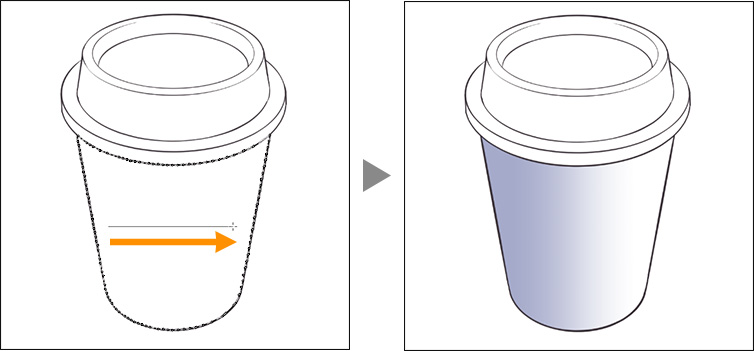
Vertical gradients over a long stretch of the canvas are often used in scrolling webtoons to express scene transitions.
Add texture images to your comic panels
Texture and pattern can add dimension and visual interest to your comic panels without requiring a lot of time to draw. You can use textures and patterns for effects, fabrics, and backgrounds.
In the following examples, different texture images have been added to the character’s hair, the clothes, and to the background. When adding image materials, make sure to blend them with your own drawings so they don’t look out of place. You can use them as a reference and draw over them in your own style, or erase and add details as needed.
Thousands of texture assets for comics and manga are available on Clip Studio Assets, which can also be used in commercial projects.

Use perspective in backgrounds
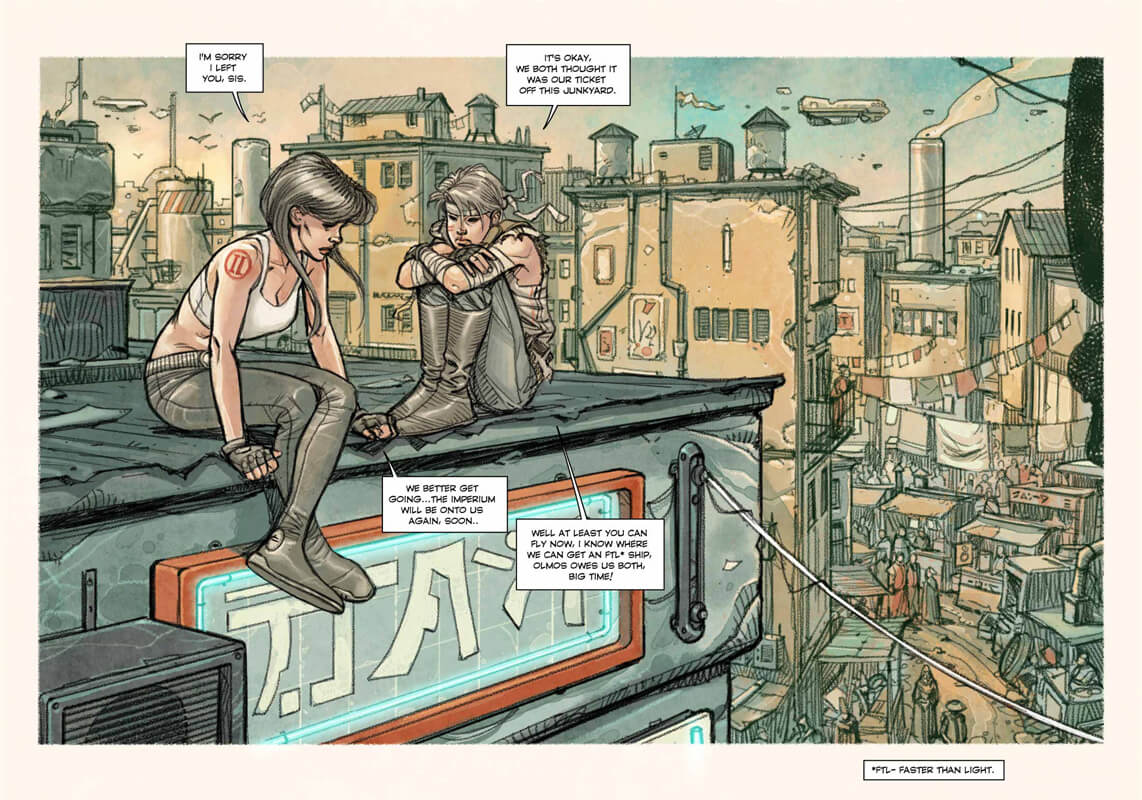
In comics, manga, and webtoons, it is important to draw establishing panels to indicate the setting, time of day, and other relevant story elements.
In these cases, you need to understand the basics of perspective to create a more believable scene. The angle of the perspective can also affect the mood.
In the below comic page, perspective is used to express the scale of the building and accentuate the character’s sense of loneliness with the camera placed slightly above the character.
In this second example, the perspective matches the character’s eye level, creating a point-of-view effect, showing the reader what the character is seeing. This helps them to understand the situation better, not just visually, but also emotionally.
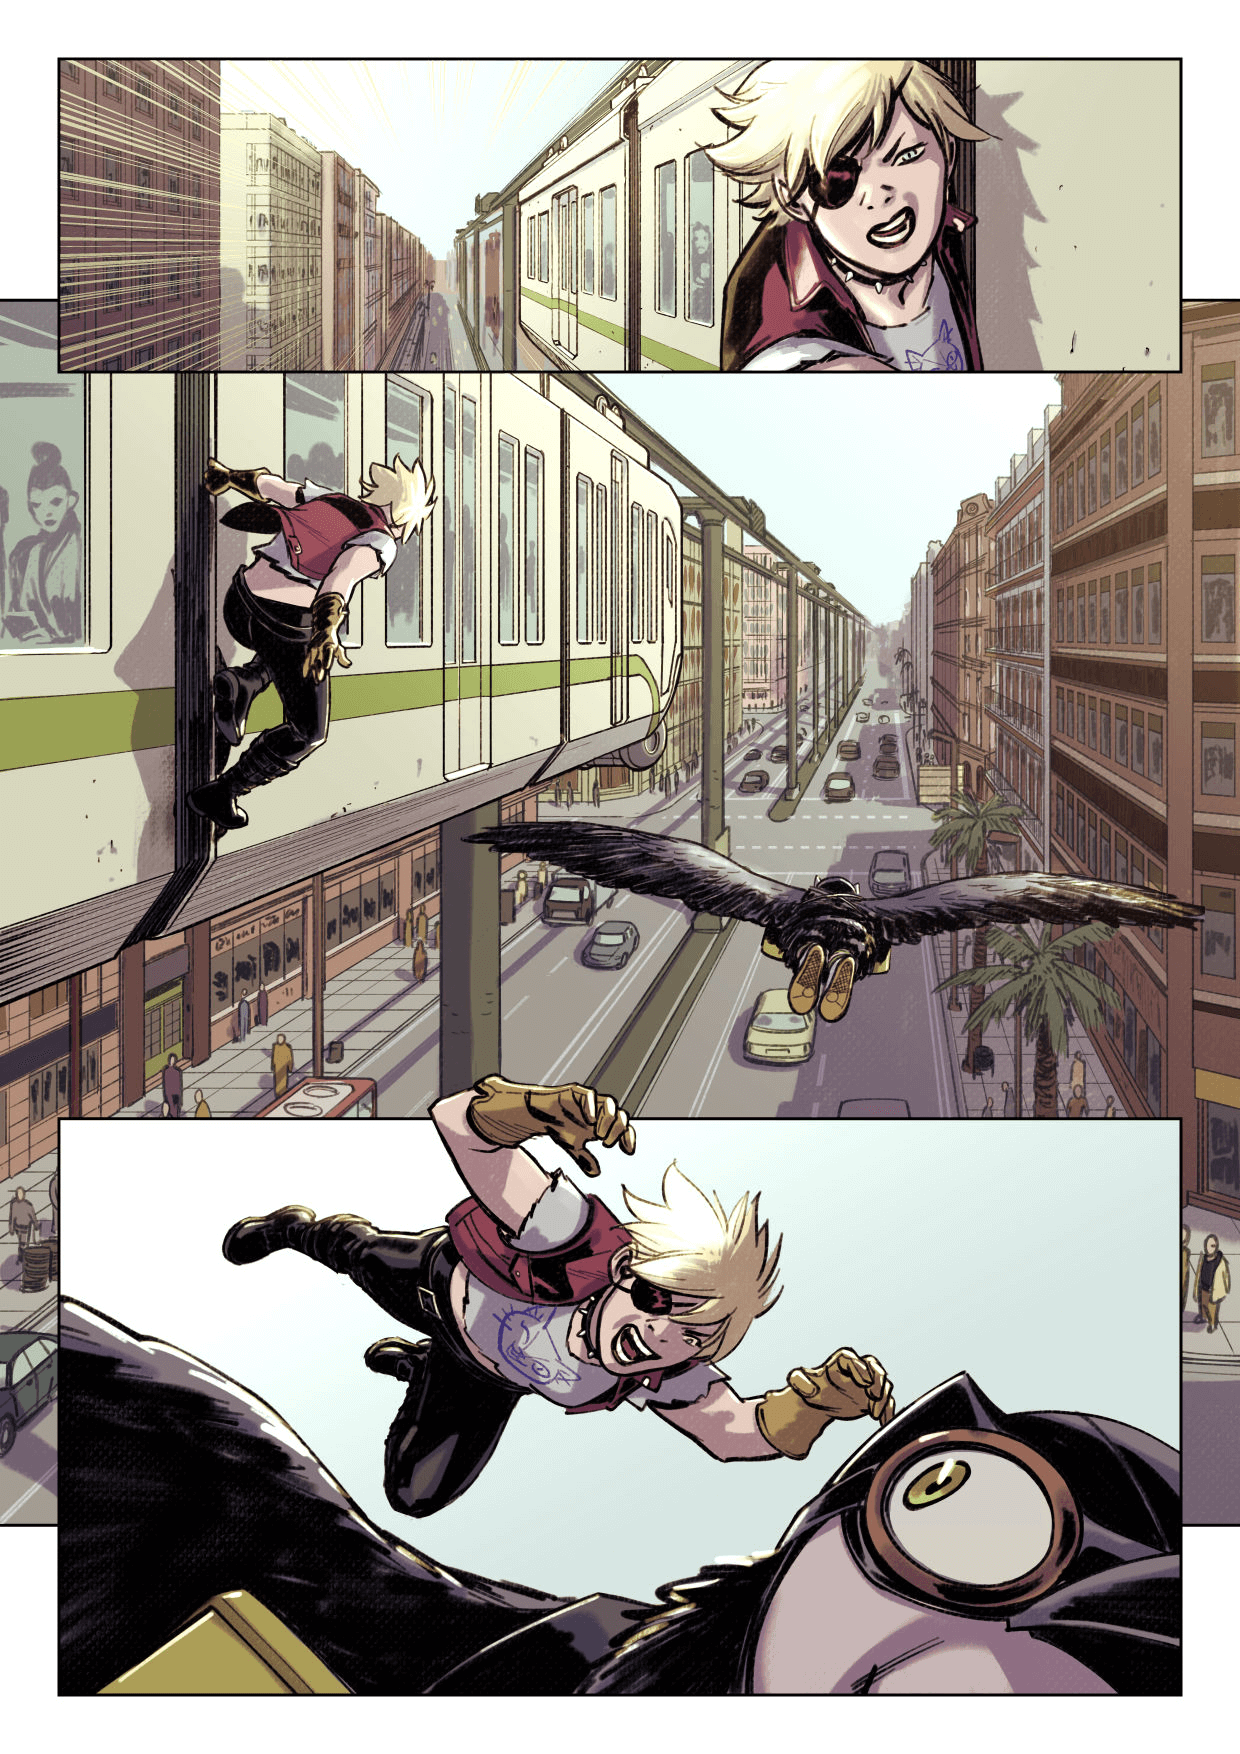
Photo references and 3D models can help you understand how to draw scenes with accurate perspectives. You can also use tools like the perspective ruler in Clip Studio Paint to add a vanishing point and guidelines to help you draw more accurately. When a perspective ruler is set up, brushes and figure tools will snap to the perspective automatically, which makes it ideal for drawing buildings and windows.
More useful tools for creating comics
There’s no limit to the tools and techniques that you can learn in the process of drawing your own comic. Here are some more handy tools you can try in Clip Studio Paint to make your process more fun and efficient.
3D Materials
Try using 3D character models and backgrounds to help you arrange complex scenes or difficult poses. In Clip Studio Paint, you can arrange and pose models directly on the canvas.
Effect Lines
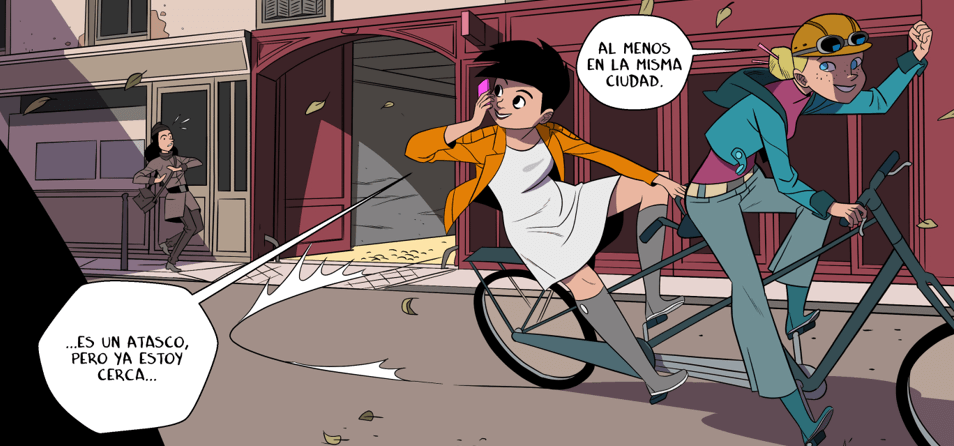
Use action and speed lines to add dynamism to your panels, especially for scenes that need to convey speed and impact.
Vector Layers
Try using vector layers to preserve your line quality when scaling and to more easily adjust it later on. You can even use the vector eraser to erase lines precisely from the point where they intersect with one another.
Speech Bubbles
Drag and drop speech materials onto your canvas, or use the Bubble Pen to draw custom balloons and balloon tails.
Make the most of community created materials
The Clip Studio Assets material community offers more than 180,000 downloadable materials, including brushes, images, screen tones, speech balloons, backgrounds, and 3D materials, most of which are suitable for commercial use.
What Artists Are Saying About Clip Studio
-
 ArechanWebtoon ArtistUSA
 - ...there is no better software for making comics than Clip Studio Paint
-
-
 Charlie AdlardComic ArtistUK
 - I can literally do everything I want to do on this single app
-
-
 Dylan TeagueComic ArtistUK
 - The brushes are just amazing… and feel extremely life‑like.
-
-
 Kenny RuizComic ArtistSpain
 - I can express myself freely in Clip Studio Paint without any restrictions.
-
-
 LaovaanComic Artist & IllustratorGermany
 - The app invites you to be more creative and try new things
-
CLIP STUDIO PAINT PRO
for character art, concept art, illustration
CLIP STUDIO PAINT EX
for comics, manga, webtoons & animations
Clip Studio Paint PRO/EX Comparison
| Feature | PRO For professional illustration |
EX All PRO features + animation and comic features |
|---|---|---|
Illustration (Character art, concept art, etc.) |
||
Import/Use 3D models |
||
Extract lines from images and 3D models |
||
Save layer comps |
||
Single-page comic tools |
||
Multi-page projects |
||
Webtoon tools |
* | |
PDF/Ebook export |
||
Simple animation/movie creation |
||
Full-length animation tools |