Guide to Drawing Shadows
Level up with this guide on light and shade! By changing the type and direction of your light source, you can transform the feeling of your artwork. Artist Eridey explains all about the different types of light and shading that affect an object.
Light allows us to see colors and everything surrounding us; thanks to light, we can distinguish the shapes and volumes of different objects. Today, I want to share some points to help us improve how we interpret light and shadow in our drawings.
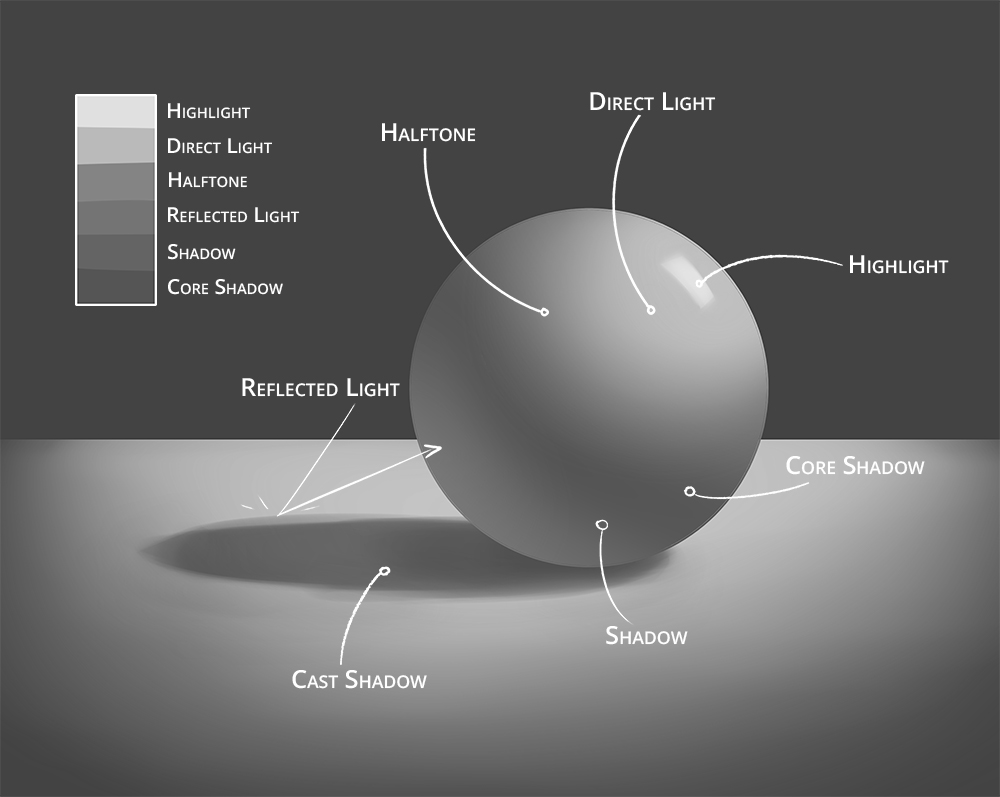
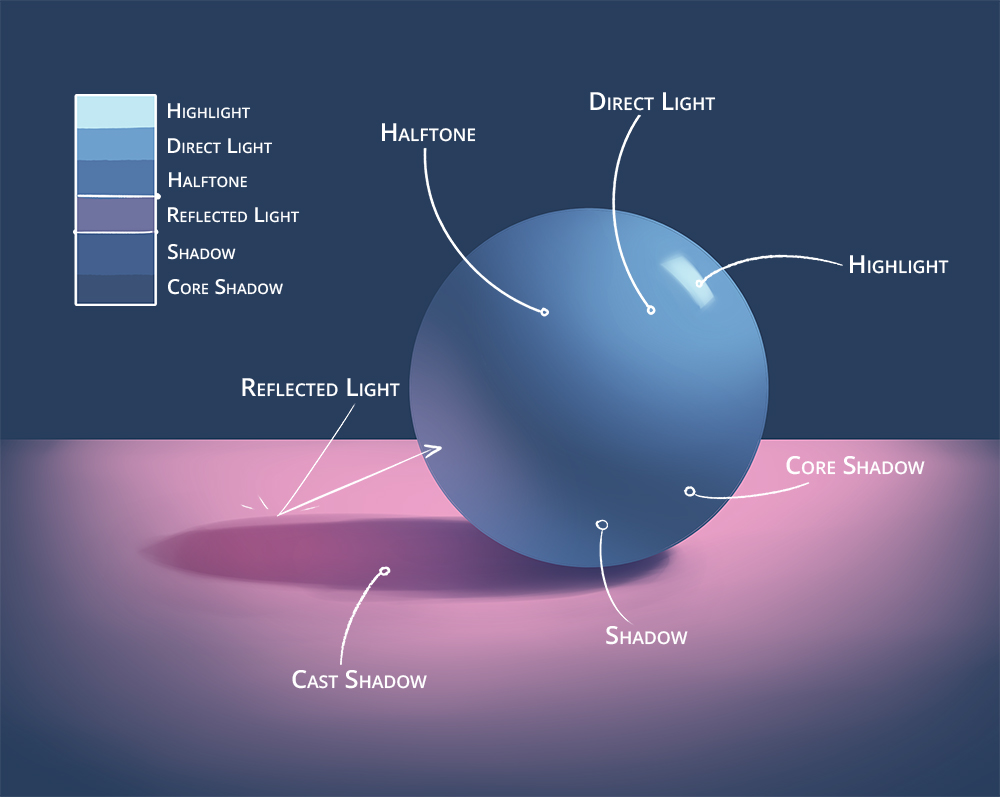
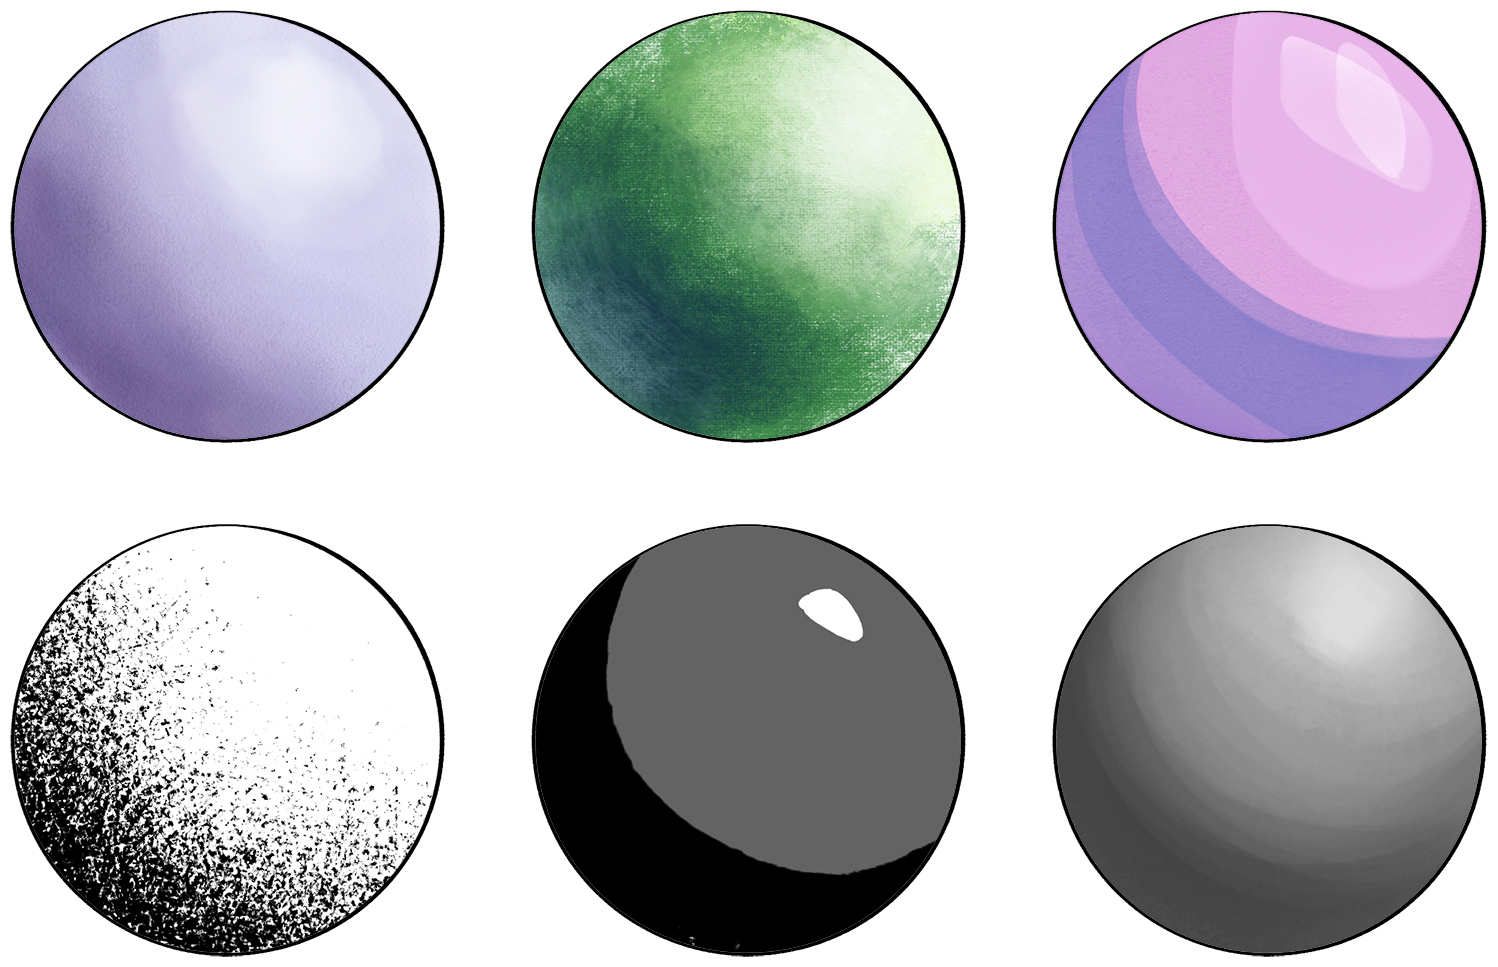
This classic example of a sphere on a table shows the fundamental interactions between light and shadow.
Light Area
- Direct light: This is the area of the object facing the light, and where you see the lightest light on the form.
- Halftone: This is where the values start darkening to a neutral point between light and shadow. It is also known as the base color (flat color) of the object.
Dark Side
- Core shadow: This is the contour of the shadow. In the case of a sphere, we can observe a ring-like shape following the shape of the object’s surface. This area is usually darker because neither the direct light nor the reflected light bouncing off the table can touch this part of the object.
- Middle dark tone: This is a neutral tone between the lightest and darkest tones of the shadow.
- Cast shadow: The silhouette that our object projects on the surface where it is standing. Its shape can grow or shrink depending on the angle of the light.
Don’t forget about reflection!
Reflection occurs when the light hits a surface and changes its direction. Any surface can reflect light (some more than others); that is why you don’t tend to find 100% dark shadows in the real world (unless there is no light at all!).
- Highlight: This is the reflection of the light source on the object. Its position depends on your point of view – if you move, the highlight will also change its position. On the value scale, it has a lighter tone than the direct light, but remember that its intensity depends on the material of the object – metals can have a more visible shine than wood, for example.

- Reflected light: This is the light that, after bouncing on the table, changes its direction and is then projected on the sphere. You can see this better on the colored-in example:
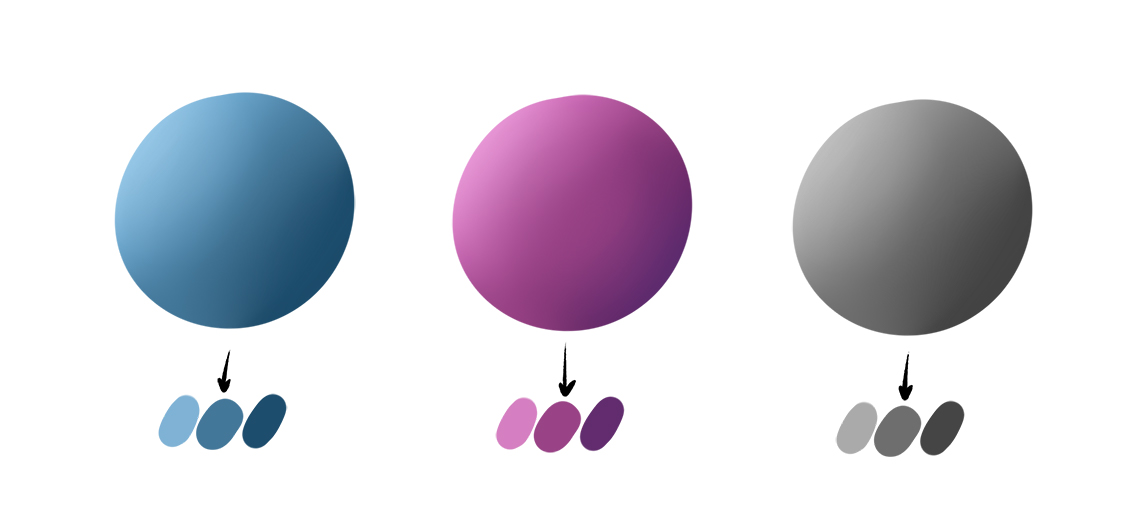
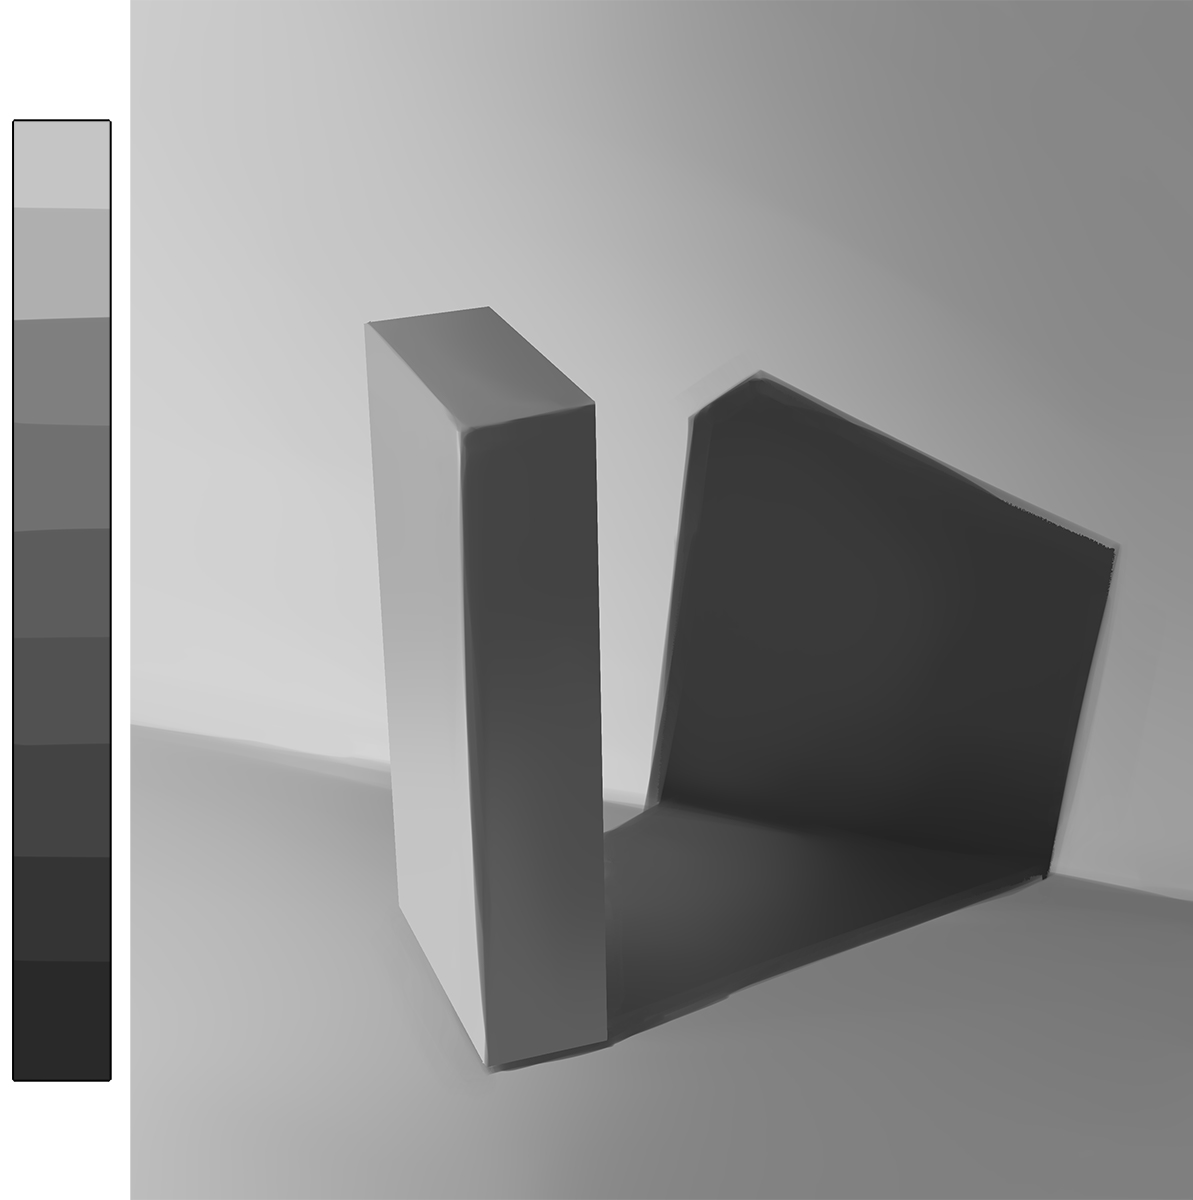
When drawing, you add values to the shapes defining both lights and shadows. If you imagine these values on a scale, you can easily figure out the brightness and darkness of each gray tone.
The key is to keep the right balance between light and dark tones to detail the image successfully. They work as a team – the light defines the shadow, and the shadow defines the light.
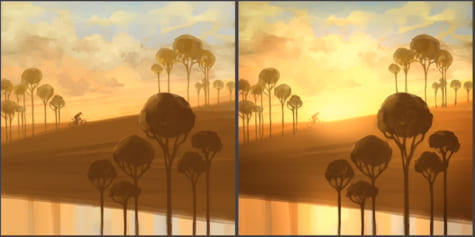
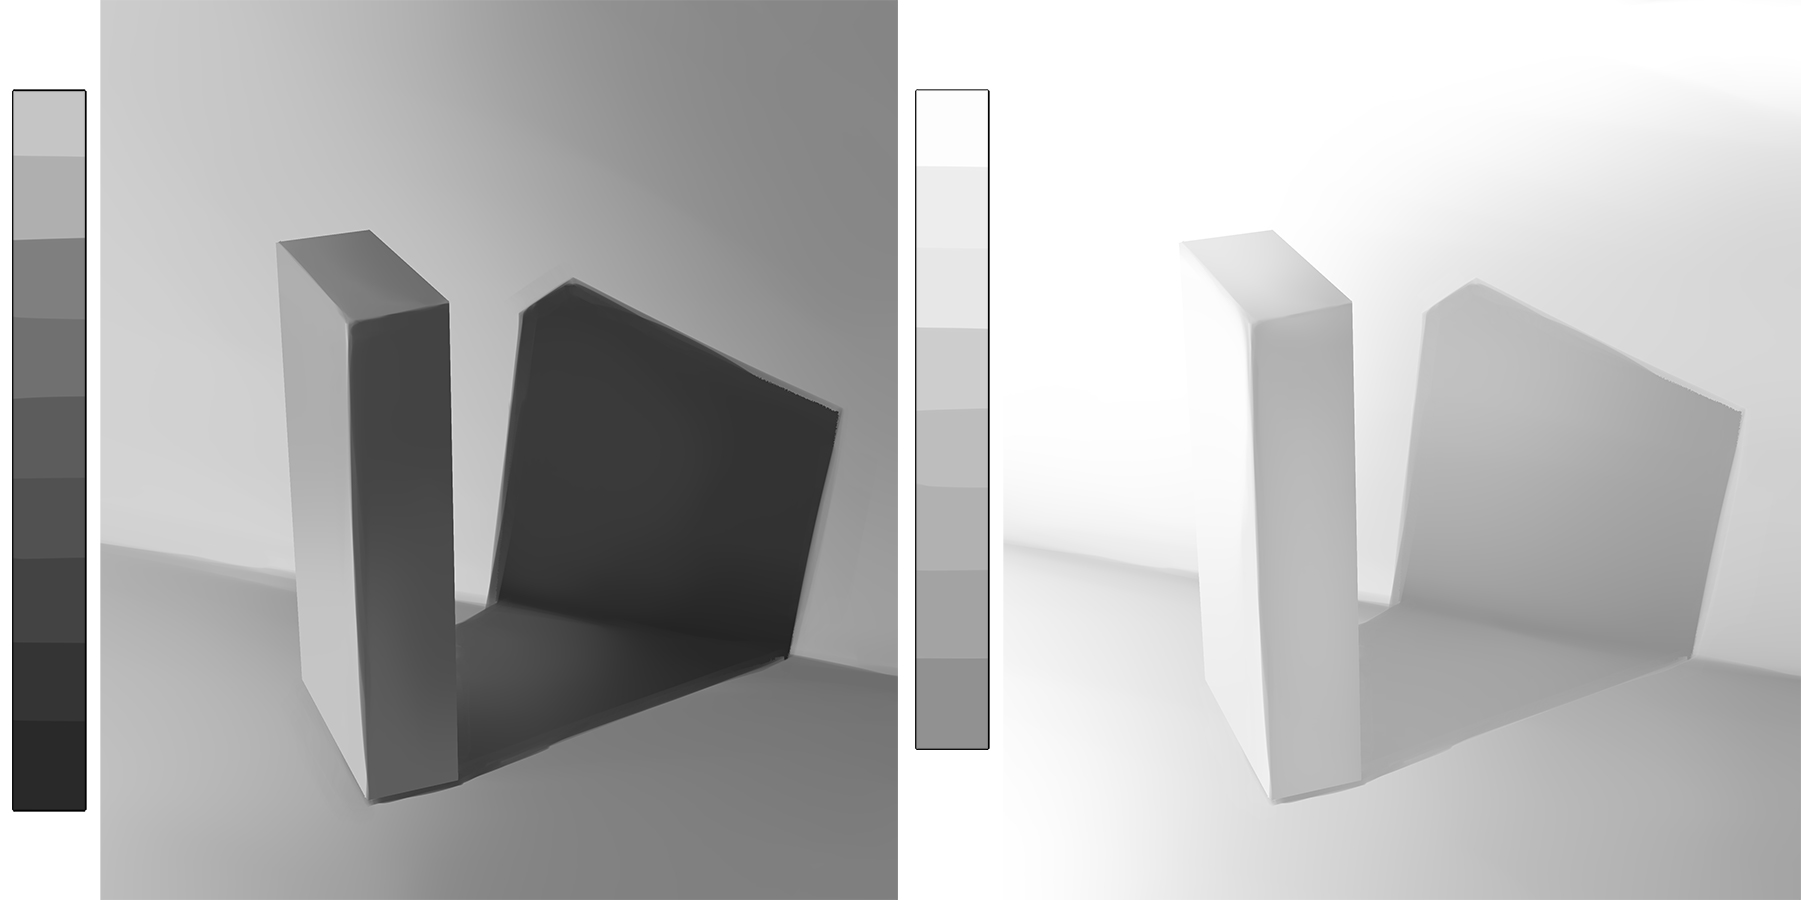
The left image is underexposed, tones are very dark and resemble one another, details are lost, and the shape flattens.
On the right, it is the opposite, the image is overexposed, the amount of light is blinding, and there is almost no distinction between the figure and the background. The transition of tones is very subtle, the darkest ones are still very light.
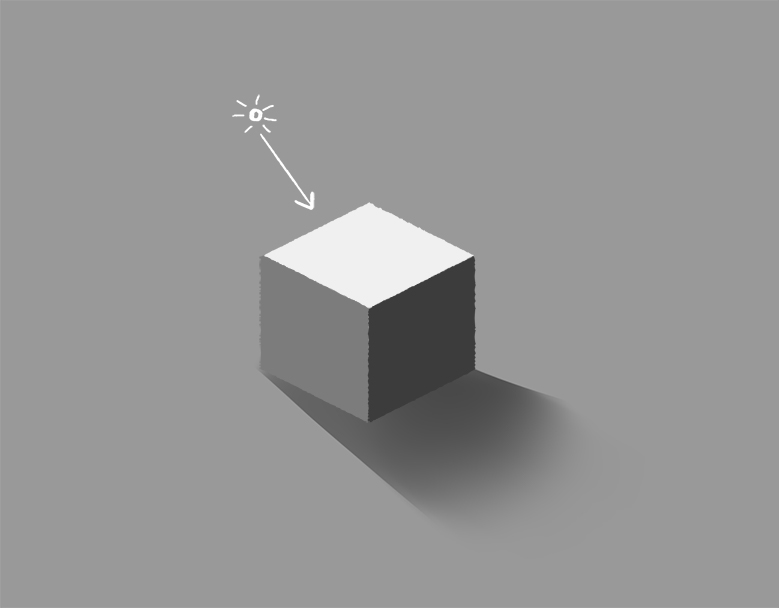
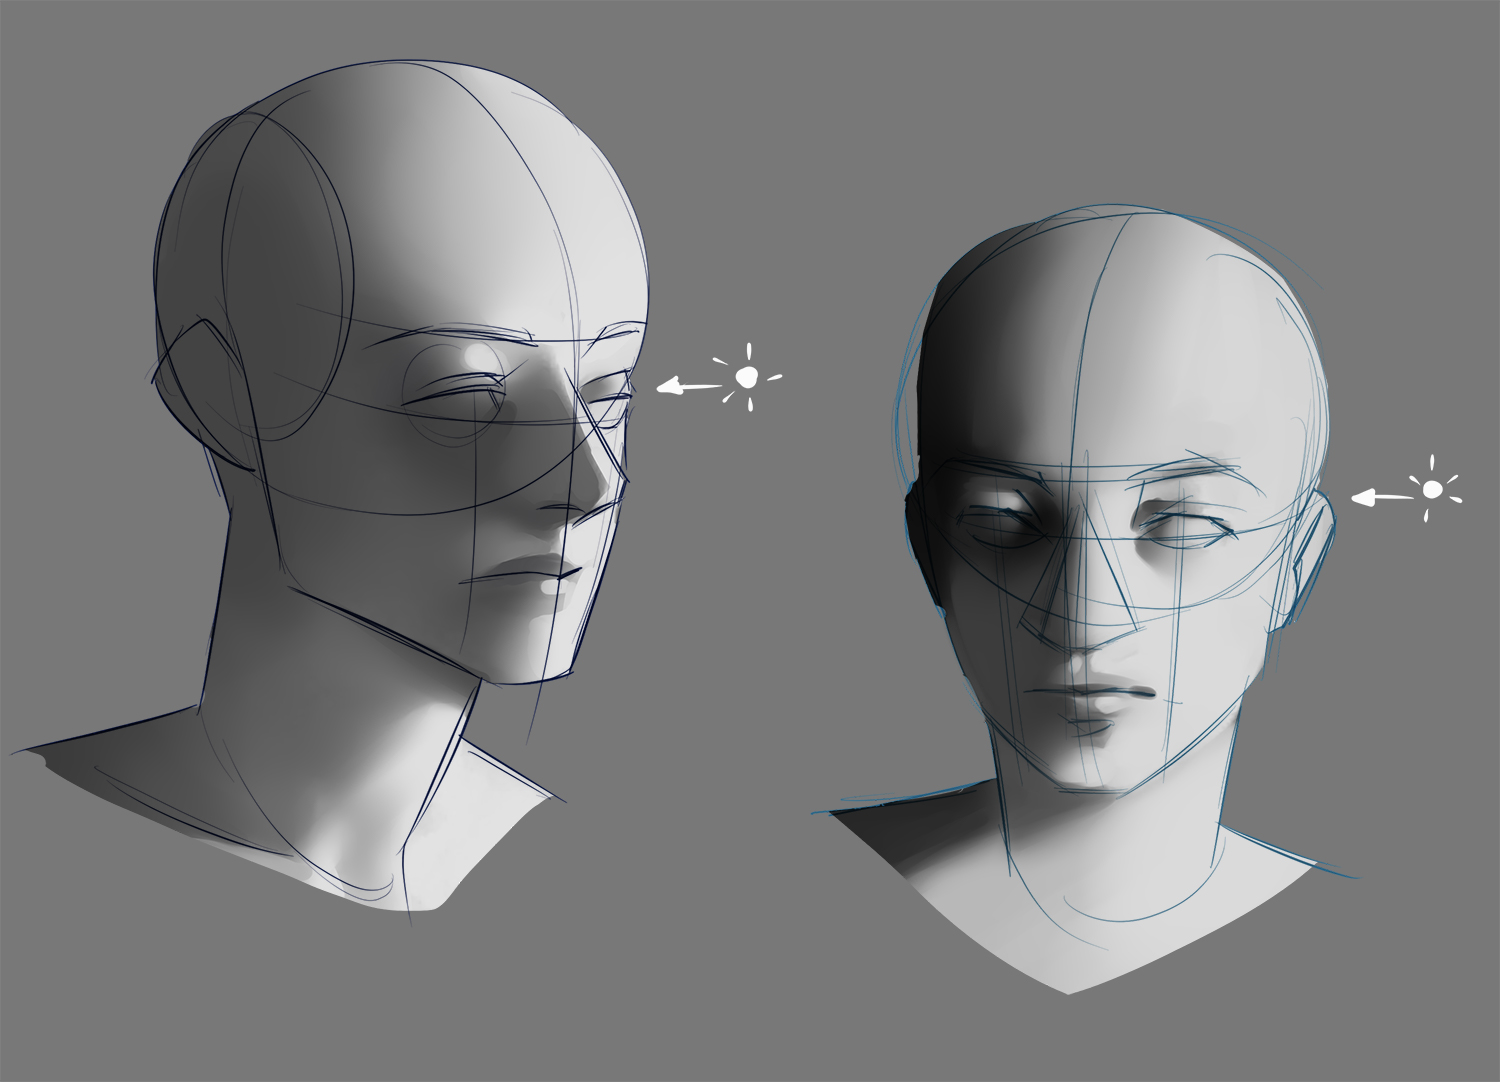
Identify the Surfaces!
Many young artists tend to create “shadow effects” that do not represent the volume of objects correctly.
To apply shadow to, for example, a human face, it is useful to know something about its anatomy, observe its structure, and build up the face based on simple geometric shapes (cubes, cylinders, spheres…) that allow us to identify, without too much difficulty, the surfaces facing light areas, dark areas, and those areas affected by the light bouncing off another surface.
Propagation of Light
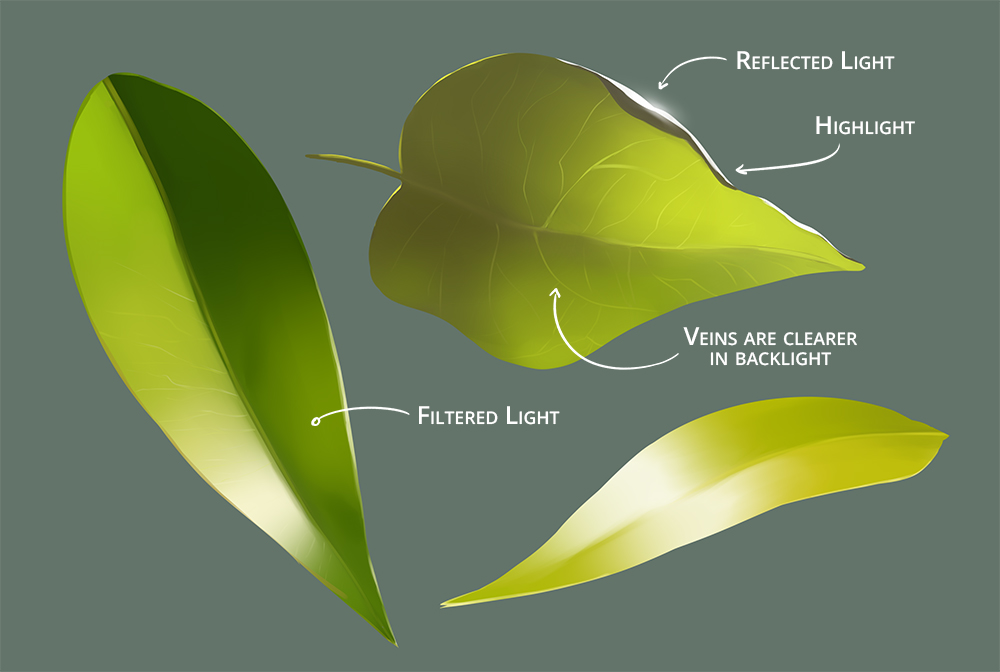
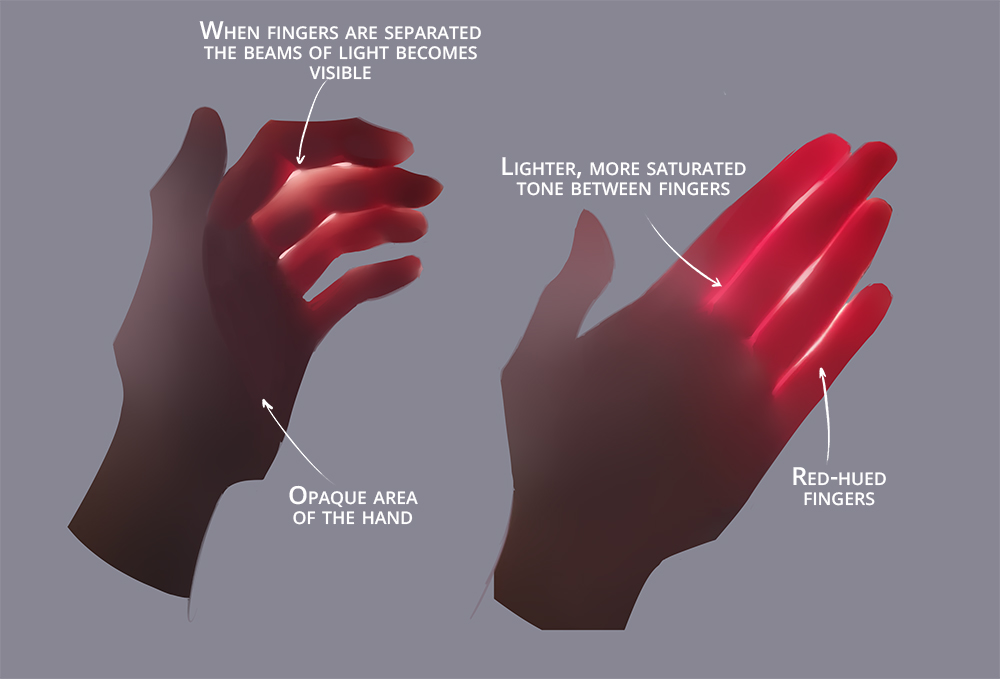
Opaque objects do not allow light to pass through them and cast an even shadow. The challenge, however, comes when we deal with translucent or transparent objects!
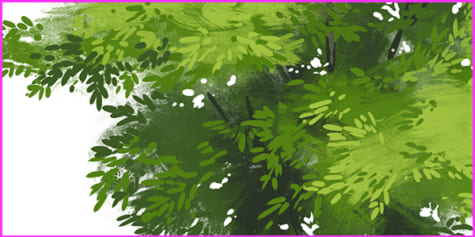
Light passes through translucent materials only partially. The colors of the object can become more saturated due to the light traveling through them, as in these leaves and hands:
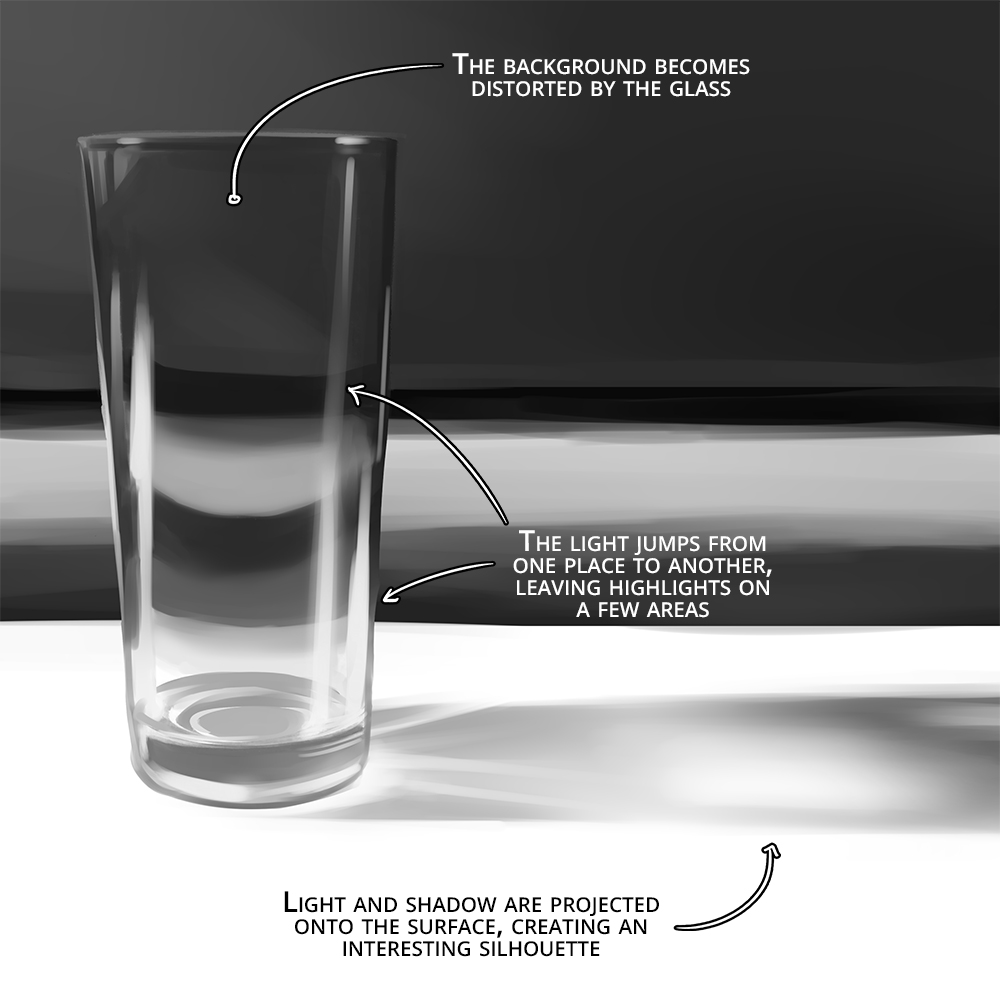
Transparent objects allow more light to pass through. Drawing these types of objects is usually more complicated; you need to pay close attention to details! For example, in a glass:
Types of Light
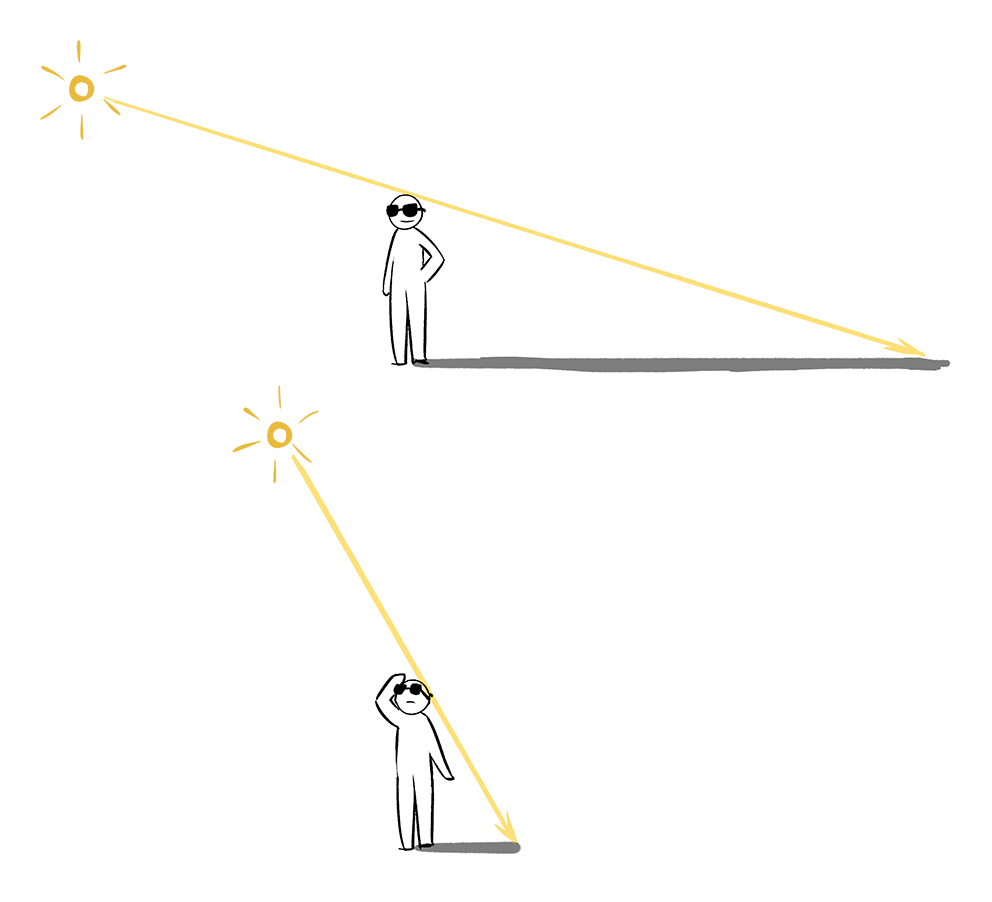
The sun is our primary source of natural light; we can observe how its intensity, colors, and shadows change throughout the day.
Light from artificial sources (spotlights, bulbs, cellphone screens) is more constant and allows us to control its direction, vividness, and color.
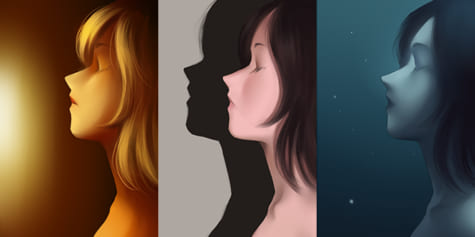
In the following example, I tried to emulate different light sources using the same drawing as a base. You can also see the values in grayscale:

Another good idea is to play with the light direction to create unique compositions:
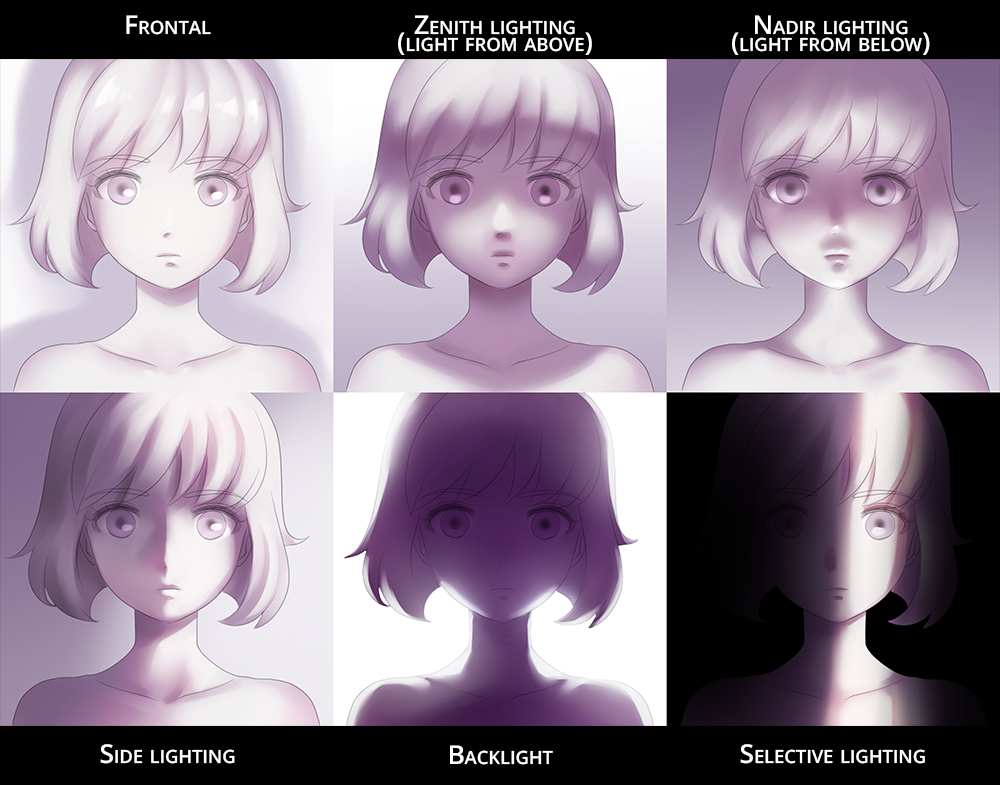
Each scene tells a different story!
Brushing Up
In traditional media, we have an endless range of materials: ink, graphite, charcoal, watercolors, acrylic, oil, etc. The medium also provides different textures and colors. All of these traditional techniques can be recreated in digital media, by adjusting brush settings, texture, opacity, strokes, etc. It is also possible to explore new trends and experiment with different finishes.
The options are endless, but mastering a technique is easier once you have fundamentals mastered; the next thing you have to do is to practice, practice, practice!
I hope this guide can help and inspire you to experiment with light and try new things in your drawings.
If you like, you can check out my social media and portfolio to see some of my work.
https://www.instagram.com/eri_duh/
https://twitter.com/eri_duh
https://www.artstation.com/eridey
Thank you for reading!
– Eridey
Interested in concept art or what it takes to become a concept artist?
Check out the link below!