Brushstroke Exercises to Improve Your Digital Art
Control over your brushstrokes is essential for creating an independent style, whether traditional or digital art. In this tutorial, Ricardo Guimaraes teaches us some drawing exercises to improve your techniques!
It is said that there are as many styles as there are painters. What’s more, the techniques of painters can evolve or change over the course of a career, therefore changing the style. In the end, it all comes down to the way the painters apply the paint on their chosen surfaces, meaning, the brushstroke techniques they use. In this tutorial, we will explore some ways to apply our marks on a (digital) canvas, exploring not only Clip Studio Paint’s excellent default brushes, but also how to customize some of the settings to create unique brushstrokes.
Every Brushstroke Counts
Whatever you set out to paint, make sure every brushstroke counts. Think very well before applying each mark on the canvas. Every decision you make will be a decision of the proportion, shape (design), and position of your brushstrokes. Even if you have to use 50 strokes to paint something at the beginning, bear in mind that if you keep practicing, after a while it will take you only five strokes to paint the same subject.
For the exercises presented, I suggest you try the simple brushstroke squares (fig. 02, 05, 09 and 13) before attempting to paint something more complex. The goal of these exercises is to make the stroke direction and behavior a second nature to you.
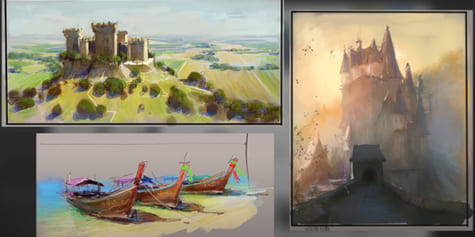
Example 01: The Graphic Thumbnail
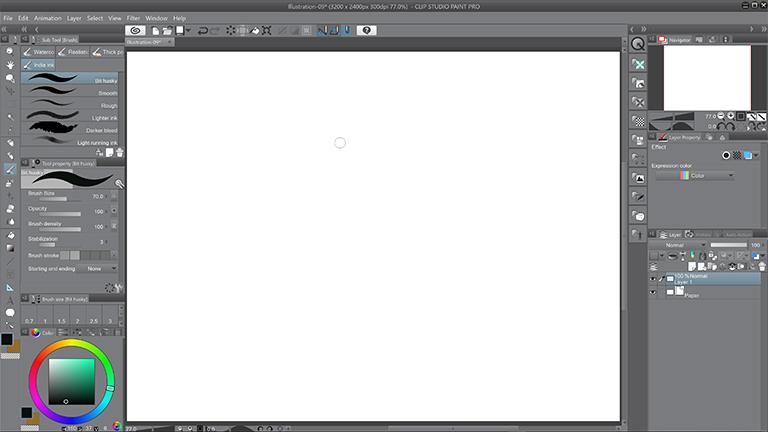
For the first example, let’s create a graphic thumbnail. Graphic thumbnails are essential for understanding composition and how forms will impact the final reading of the scene. Usually, this type of work is done with a hard brush and in pure black and white. For this sketch, I chose the “Oil Paint Flat Brush”, from the Thick Paint category (shortcut “b”) with standard settings. This brush yields a firm, solid stroke with width variation based on the tablet’s pressure sensitivity, perfect for this type of thumbnail.
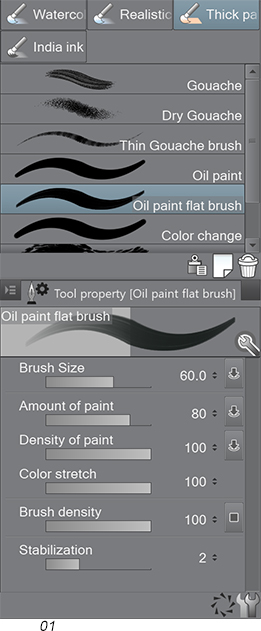
Fig. 01: This is the Oil Paint Flat Brush used for this exercise, with standard settings.
What you should practice:
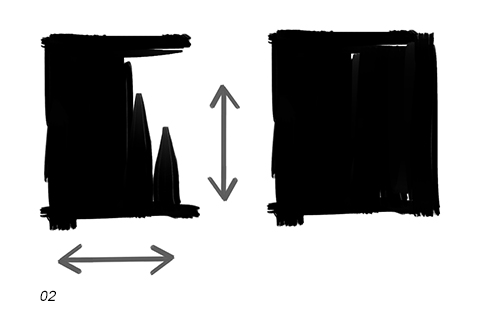
Fig. 02: The type of brushstroke used for the first exercise. Practice making the boundaries of a square and filling it with black and white brushstrokes following vertical and horizontal overlapping brushstrokes. Try to stay inside the boundaries you established. The more you practice this, the easier it will become.
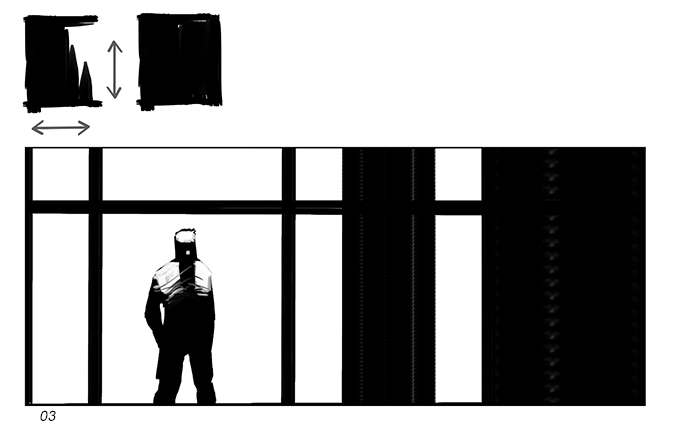
The Graphic Thumbnail (Fig. 03). In this composition, I tried to focus the attention on the figure by using a resource called “framing”, on which you place one or more subjects inside frames on the scene. This is a common technique used in movies and works just as well for still images. The geometric patterns help create rhythm and focus the attention on the human figure (organic shape).
Example 02: Introducing the Grey
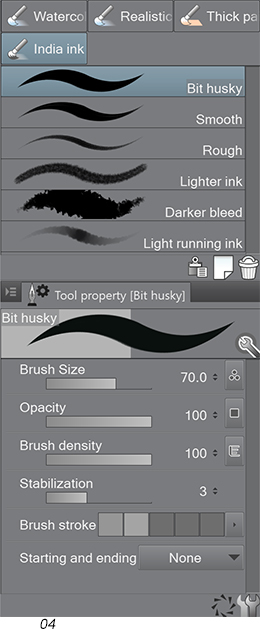
If you want more depth and more options for representing light and volumes, it is a good idea to introduce one or two tones of grey to the composition. This eases the contrast between the pure black and white and creates a resting area for the eyes. For this composition, we will use from the India Ink category (shortcut “b”) a brush called “Bit Husky” with the standard settings (Fig. 04). The goal of this exercise is to begin covering areas with tones, but not entirely flat. It is nice to bring some movement to your brushstrokes because this adds movement and visual interest to the entire composition.
What you should practice:
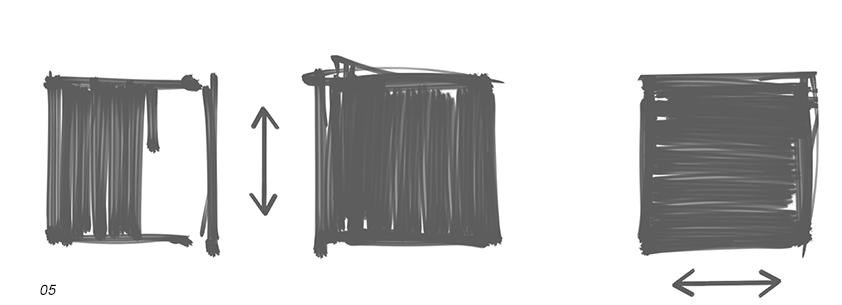
This time we will fill our squares with a non-uniform tone, by making the brushstrokes visible. Try making one with vertical strokes and one with horizontal strokes. The “Bit Husky” brush is perfect for this kind of exercise. Use a mid-to-dark grey instead of pure black for this one.
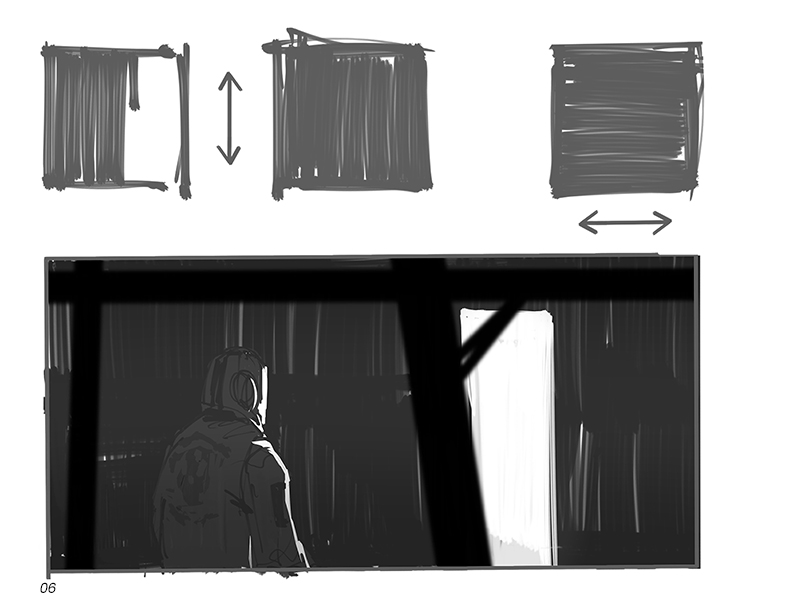
Notice how, in this composition (Fig. 06) there’s much more mood and the character seems to merge a lot with the background, creating a feeling of mystery in the scene. This is all due to the introduction of greys in the scene. By creating the proximity between the tones, we are able to introduce subtleties in the scene. Also, notice the brushstrokes in the background. Even though this is not the main focus of the scene, it doesn’t mean it should be an uninteresting area.
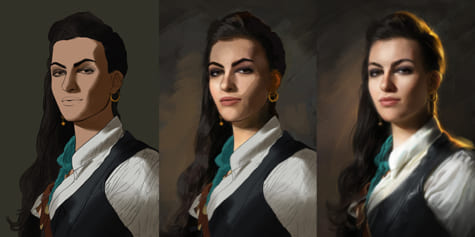
Example 03: Let’s Paint a Head
Few exercises are more challenging than painting a head. Not only because of its complex forms, but also because even the uninitiated in the arts know what a head looks like. Luckily, the goal of this exercise is not to paint a portrait or a realistic head. We are going to make a study on brushwork economy. We will try to break down the shapes of the head into simpler shapes, trying not to render detail, but to understand the bare minimum that helps us understand what the head looks like. For this exercise, we will select the Pen category (shortcut “p”) and we will choose a Marker (Fig. 07). But we will make some changes and customize it to achieve better results.
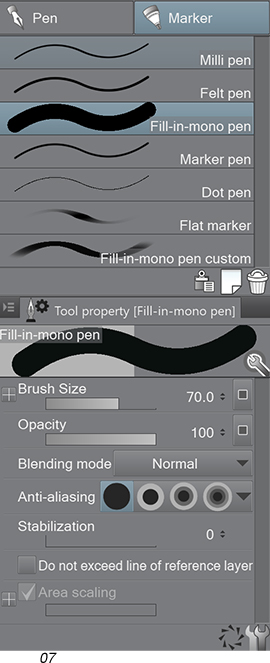
We will begin with the “Fill-In-Mono Pen.” Right-click on it and on “Duplicate Sub-Tool,” then rename it (I renamed mine “Fill-In-Mono Pen Custom”). Click on the settings icon (lower right) and customize the Marker at the “Brush Tip” menu with the following settings (Fig. 08):
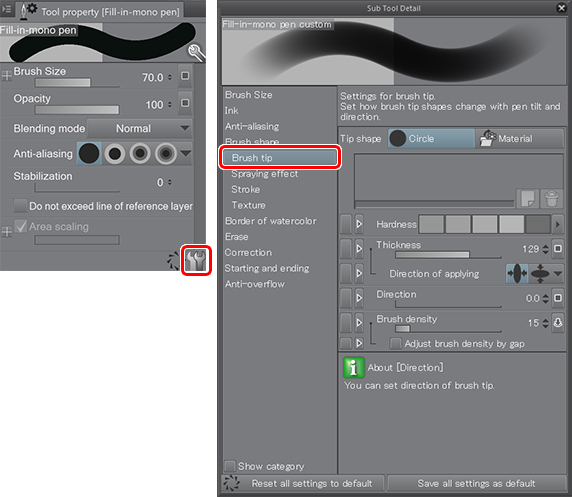
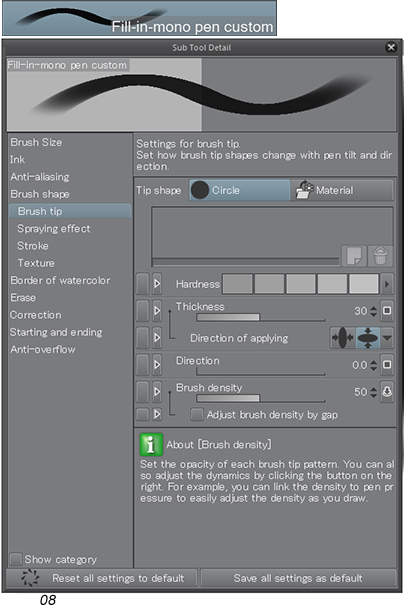
Notice that I’ve made changes to the “Hardness,” “Thickness,” “Direction of applying,” and “Brush Density”. Try to replicate that but also, feel free to play with the settings and tweak it to your liking. The brush I created has an angle to the stroke and a slight softness (by decreasing the “Hardness”), is oval, not round and not entirely opaque. These settings will help us create much more dynamic brushstrokes, which can be overlapped, in a technique called “building up”.
https://assets.clip-studio.com/en-us/detail?id=1751676
What you should practice:
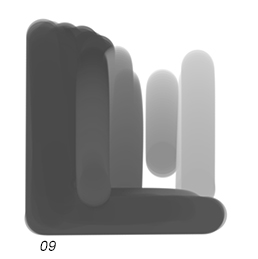
The build-up technique is nothing more than overlapping your brushstrokes in an apparent manner in order to create (or to “build up”) denser tones. Practice several squares like this, sometimes trying to fill it with a flat tone with several “coats” of brushstrokes, sometimes leaving the brushwork apparent.
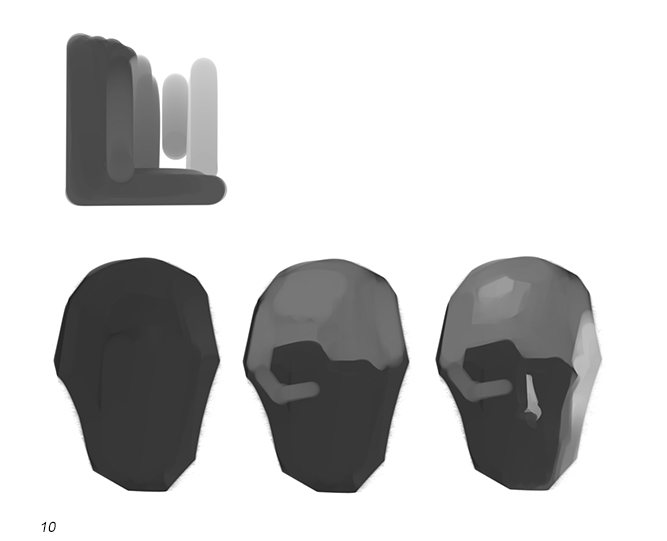
I begin painting a flat shape for the head. My main goal here is to find a good proportion and the dark tone will help me to judge and creating the lights on top of it. Next, I lay the midtones for the forehead and around the eye sockets. I then establish the light tones on the side of the head and nose, defining the light direction (Fig. 10).
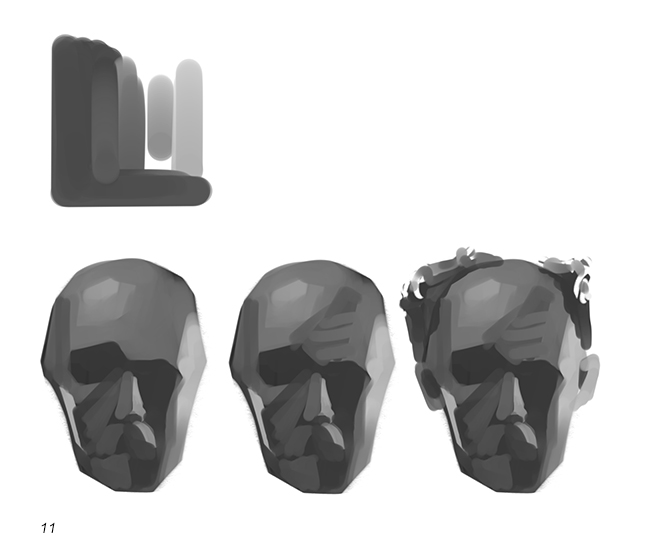
I continue to establish more shapes, but this time inside the shadow areas, using very similar tones so I don’t create confusion with the light direction. Notice how you can see practically every brushstroke and that is caused precisely by the economy on the brushstrokes. Any merging or softness will be created by the proximity of tones, and not my smudging or by the use of soft brushes. I then add the hair and ears and the head is almost done, and it is already very recognizable, not as a portrait, but just as a head. (Fig. 11)
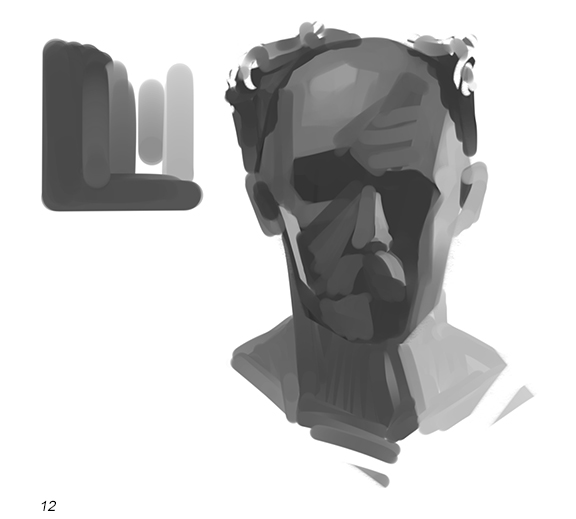
Following the same technique, I add the neck and the head is finished (Fig. 12). Again, the goal was not to create an uber rendered head, but to try to work with fewer strokes to represent the planes and shapes of a head. This technique delivers very beautiful and expressive works when well used and requires some practice to avoid a haphazard final result. Practice this technique with different subjects and you will master it in no time!
Example 04: Color Keyframe
In this example, we will use the same brush created on the last exercise (please, refer to Figs. 07 and 08, and their respective explanations) to create a Keyframe Illustration in color. This time we will establish a color scheme and we will gradually establish a simple composition. All the brushstrokes explained above will be used. We will gradually build up the colors and light, on top of a neutral, dark base that we will establish right at the beginning.
What you should practice:
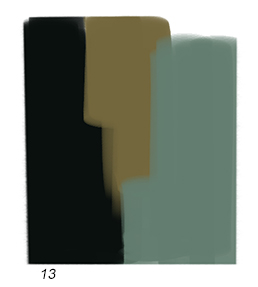
We will use a warm color scheme with a cool color (desaturated greenish-blue) as an accent (Fig. 13). Practice creating small color schemes such as these and use them as a starting point to your compositions. Color pick from them a lot and of course, feel free to introduce a new note of color here and there, but be careful not to introduce too many colors so as not to disrupt the original color scheme.

This is the base color for our scene (Fig. 14). Notice the movement of the brushstrokes created by the vertical, up and down, movements. This neutral base will be great for us to judge colors and lights on top of it.
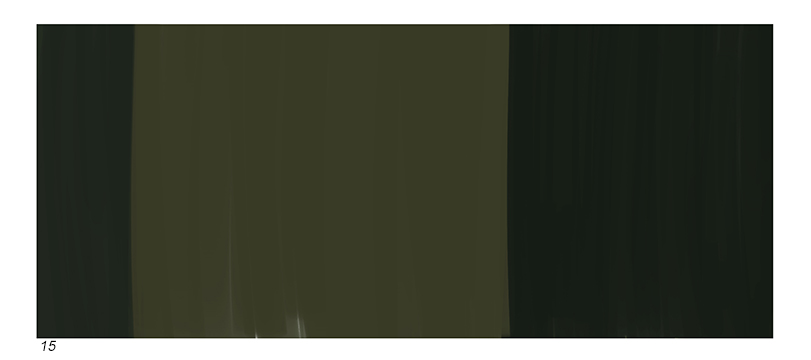
I begin placing some dark geometric shapes on top of it, to create the focus of the composition at the middle (but not the center) of the scene (Fig. 15). In this part I use the same up and down strokes I used before.
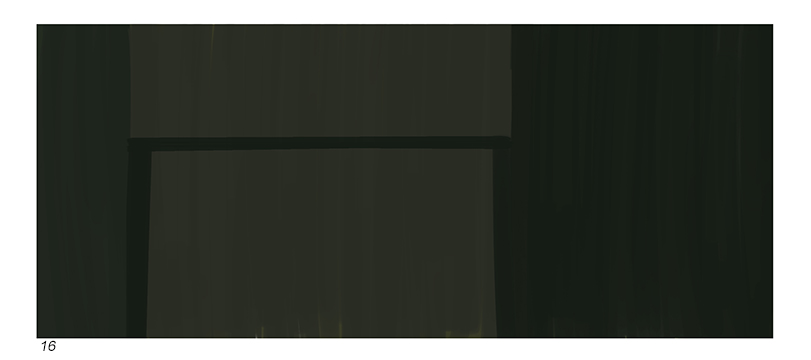
I add a couple more shapes on what I now envision to be a window behind the character (Fig. 16). This helps establish a rhythm to the composition.
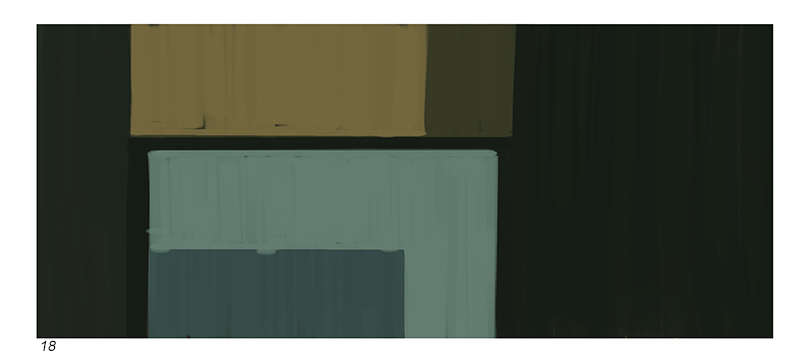
At this step I introduce the accent of color (Fig. 17). This acts as a strong focal point (or support to the main focal point) since it is a contrasting element. Notice the movement in the brushstrokes creating interest in an otherwise boring area.
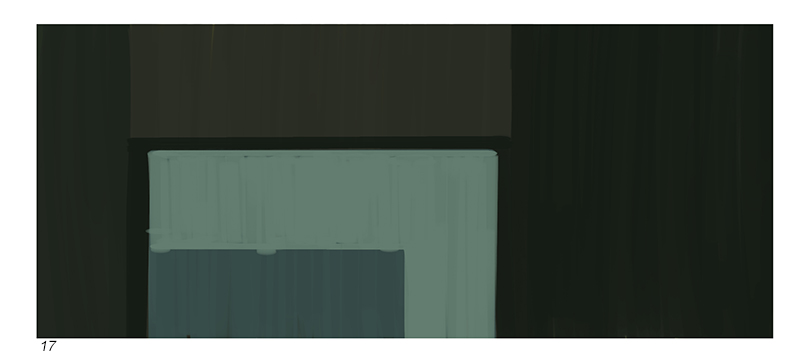
I now begin to build up the lights. On top of the dark base previously established, I paint in the lightest note of the composition, taking care not to hide the lower layers of paint (Fig. 18). This keeps the work more interesting and dynamic.
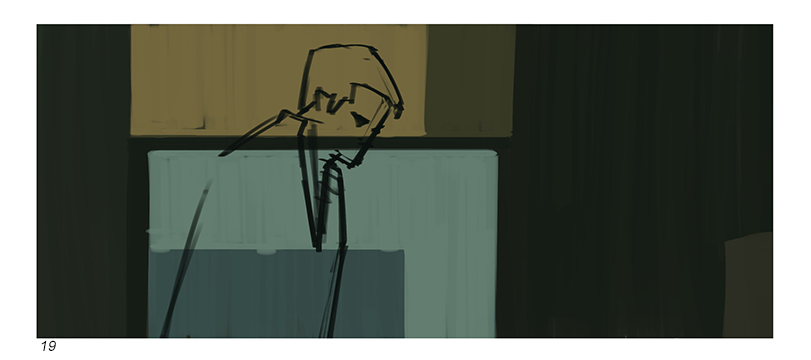
On a new layer I create a sketch of the character, being mindful of his placement in the frame (Fig. 19). As we did before, details are not necessary, the composition and the brushwork will be the most important elements.
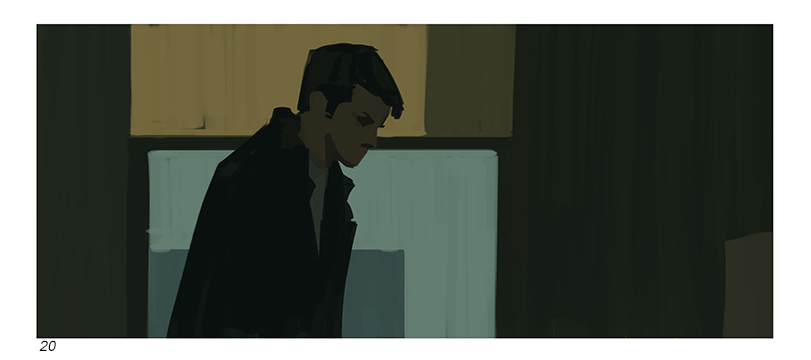
Using the same brushwork technique, basic palette and surrounding colors I establish the colors for the jacket, shirt skin and hair of the character (Fig. 20). This makes the whole much more harmonic and integrated and it is usually much easier to introduce new elements by using the surrounding colors, and this concludes this demonstration.
Brushstrokes can make or break your image, but as with any technique, they can be mastered through practice. Try studying and applying the techniques presented here in other subjects and in your own creative work. Customize brushes, try using textures and combining with papers, take full advantage of Clip Studio Paint’s incredible brush engine and you will see, the sky is the limit. Thanks for reading through and I hope you enjoyed this tutorial as much as I enjoyed creating it!
About Ricardo Guimaraes
Ricardo Guimaraes is a freelance Visual Development Artist and Keyframe Illustrator, as well as a professor at Michigan State University.
Website: https://www.artstation.com/ricguimm
Interested in concept art or what it takes to become a concept artist?
Check out the link below!