How to draw wings and winged creatures
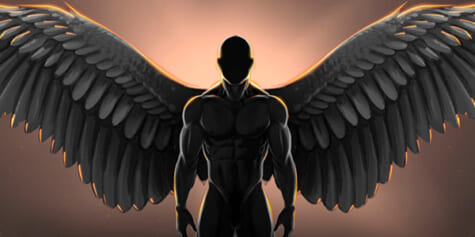
Learn everything you need to know about the structure of wings, how they move, and the differences to human arms from the artist Dani Puente. Get a deep understanding of wing anatomy and and learn how to draw your winged creatures perfectly.
Index
00. Introduction
Restless and creative minds have always fantasized about imaginary worlds, underwater cities, extraordinary people, dreamlike creatures, and ingenious machines, about becoming invisible, gigantic, breathing fire, or even shooting beams from their eyes… However, one of man’s greatest desires has always been the ability to fly. Creatures such as Pegasus, griffins, fairies, demons, Valkyries, harpies, gargoyles, dragons, and angels have been depicted by artists in their works consistently for centuries. One of the most common traits among all these beings is that they are flying creatures – they all have at least one pair of wings.
We are aware that, for many of us, a real and credible representation of these limbs can complicate the final result of our illustration, so let’s tackle this subject head-on today.
In this tutorial, we will see how to draw wings correctly from scratch and convincingly integrate them into human and animal characters.
All you’ll need is a couple of blank sheets of paper and a sharp pencil. Are you ready? Let’s get started!
01. Mechanics and structure
Before we start drawing the linework, we must be clear about how wings work and what kind of movements they can make, and what their limitations are. This will help us make the wings in our drawings believable and realistic.
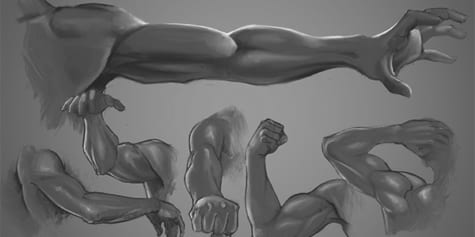
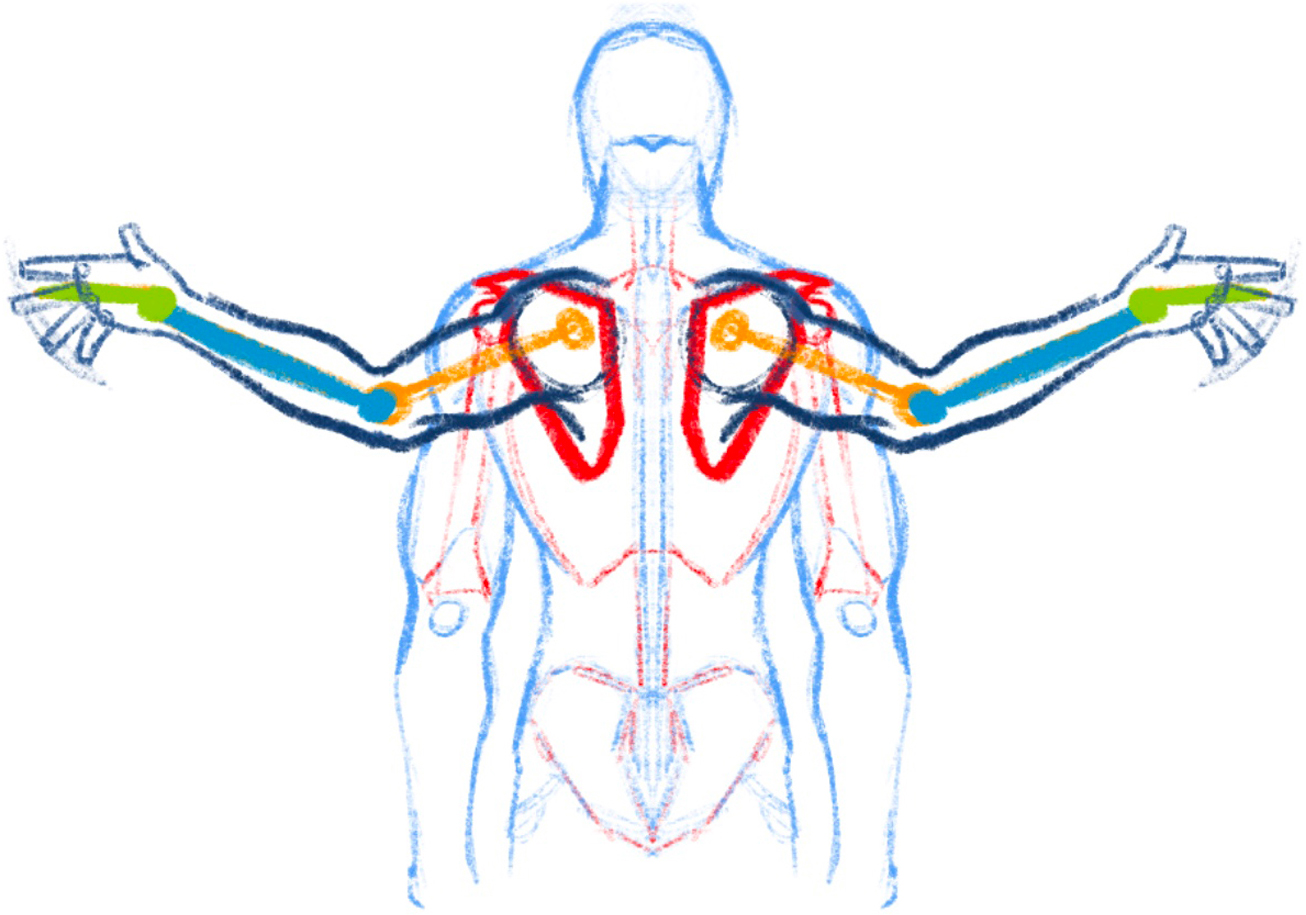
To start us off, let’s take a look at the human arm.
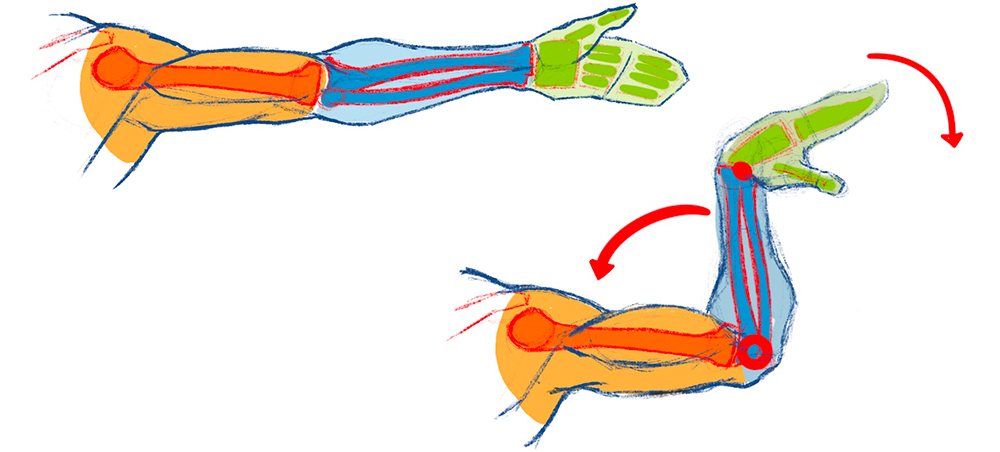
As we can see, human arms have three joints: the shoulder, elbow, and wrist. Wings have the same number of joints with a very similar range of motion. Take a look at the image below:
Here you can see in wing A, the middle section is the longest, while the outermost section is the shortest. This last joint is a stand-in for a human hand. Notice how the movement in figure C resembles that of figure B.
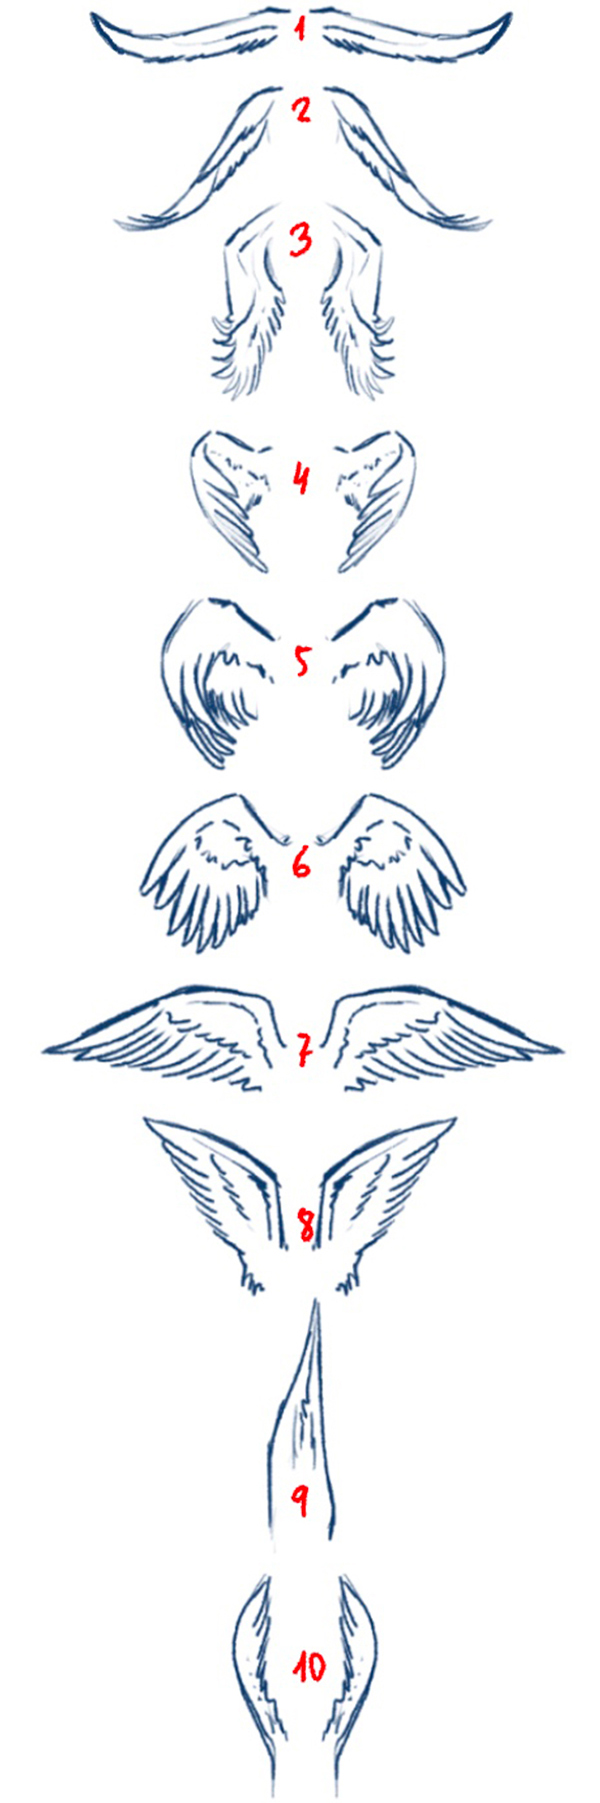
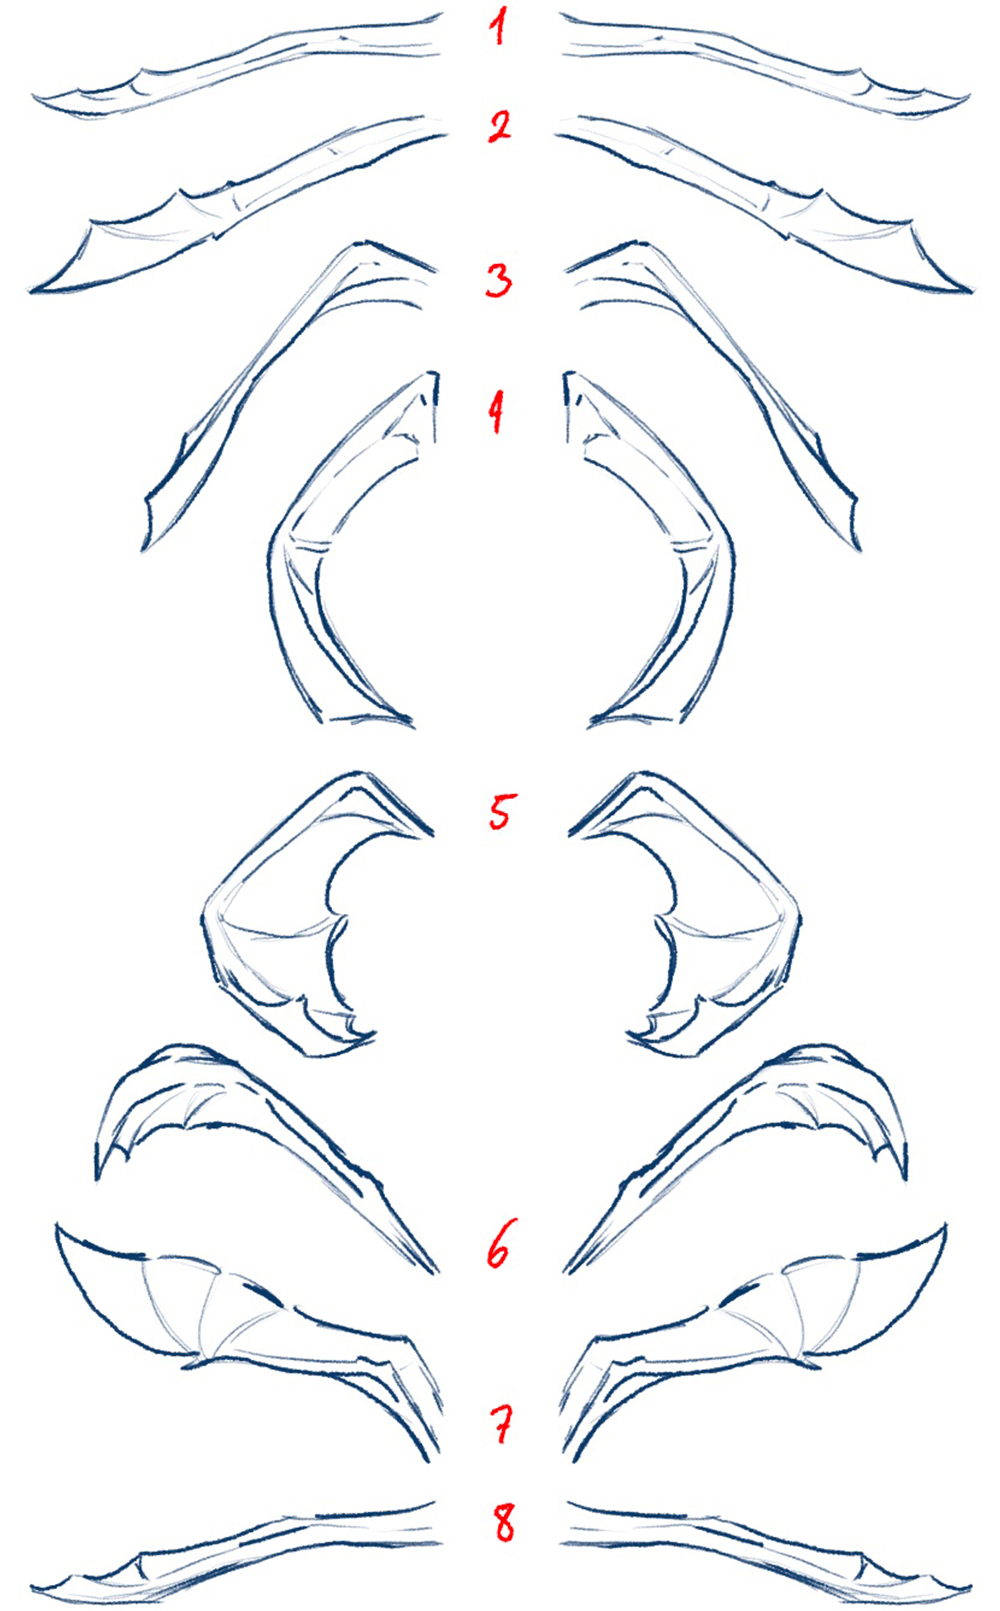
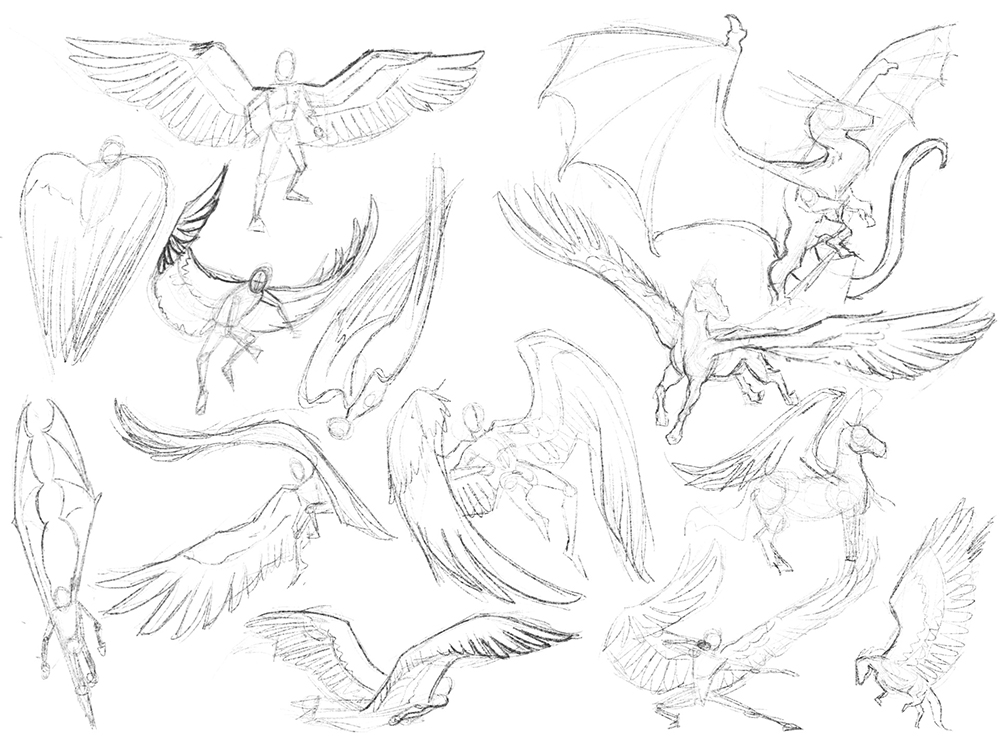
Below, you can see a sequence of movements for some common types of wings in flight.
Next, we will work on the two most frequent types of wings: feathered wings (for creatures like angels, griffins, or Pegasus) and wings with membranes (like those of bats, dragons, or demons).
1.1 Feathered wings
Now that we know how wings work and how they move, we will go on to differentiate the type of feathering for each section of the wing.
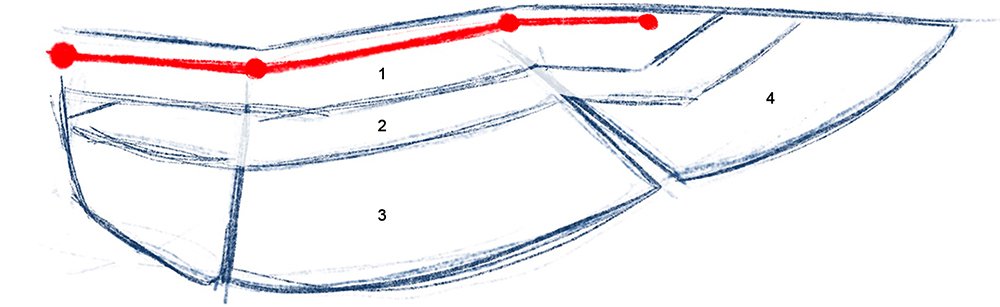
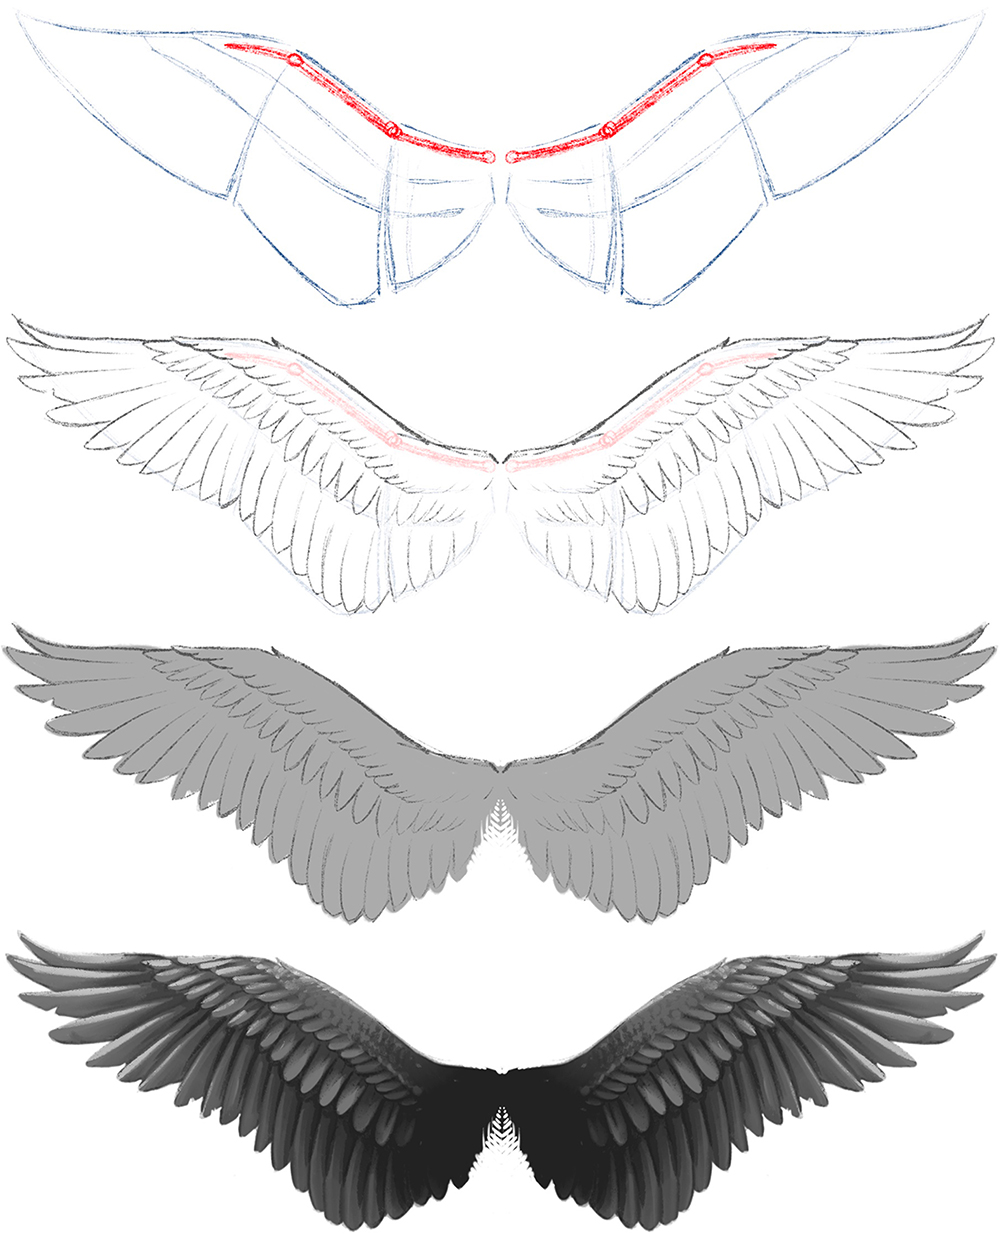
To draw a wing, we should start with the basic shapes that make up the overall shape.
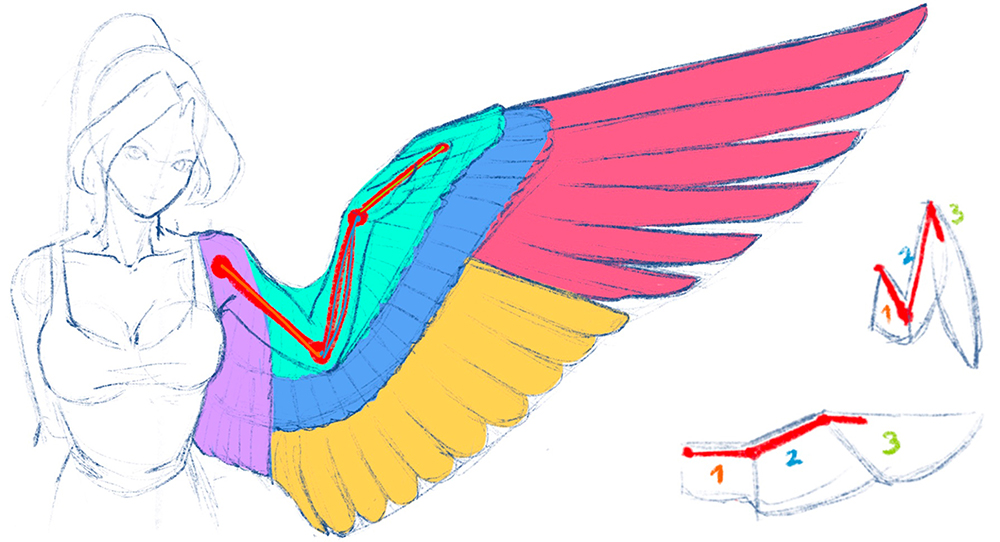
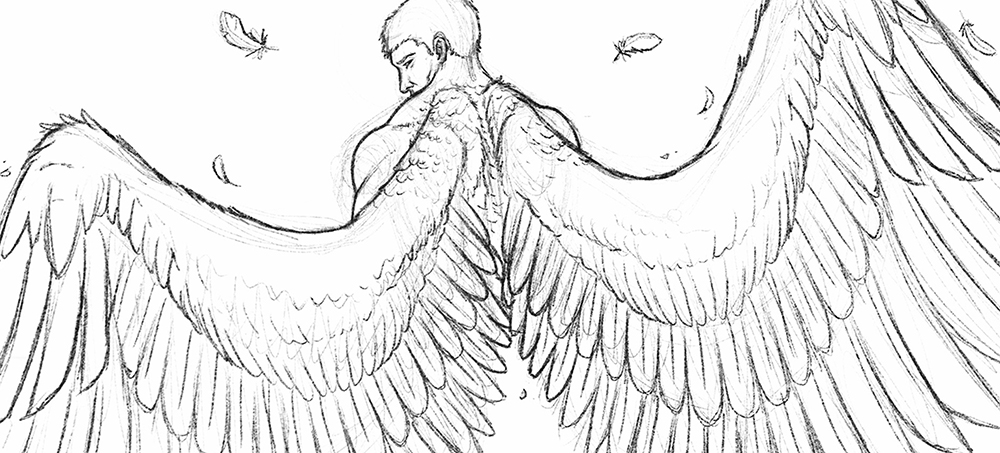
As I mentioned earlier, we have to differentiate between the main sections. In this case, we have the two rows of covert feathers (1 and 2) and then the two most important sections, the secondary (3) and primary feathers (4).
(Inside view of the wing)
Once you’re done with the overall structure, just integrate each section with the corresponding feather type. Make sure you pay attention to the direction of the feathers. For this, I recommend you always do your own research by using pictures of actual birds to reference.

Take a look at the following diagrams:
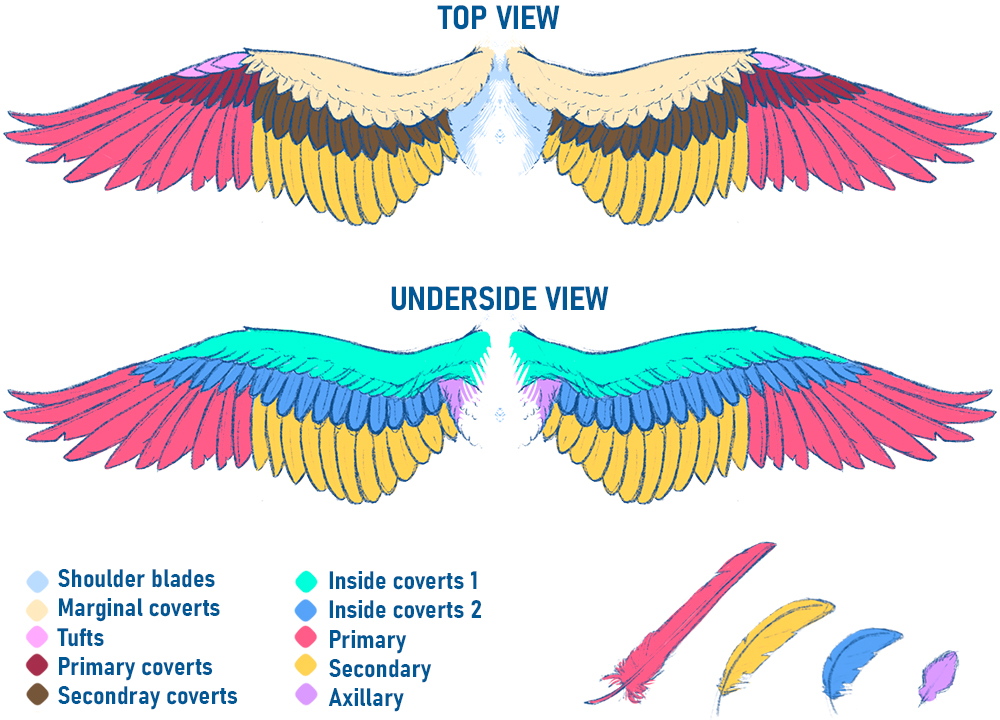
As you can see, the feathers are distributed in such a way that the larger ones, the red primary, and yellow secondary feathers, are at the ends to aid flight, while the smaller ones, the covert feathers, give balance.
You don’t have to go into detail on each feather, but I do recommend differentiating each section to add realism, shape, and sense to the wings.
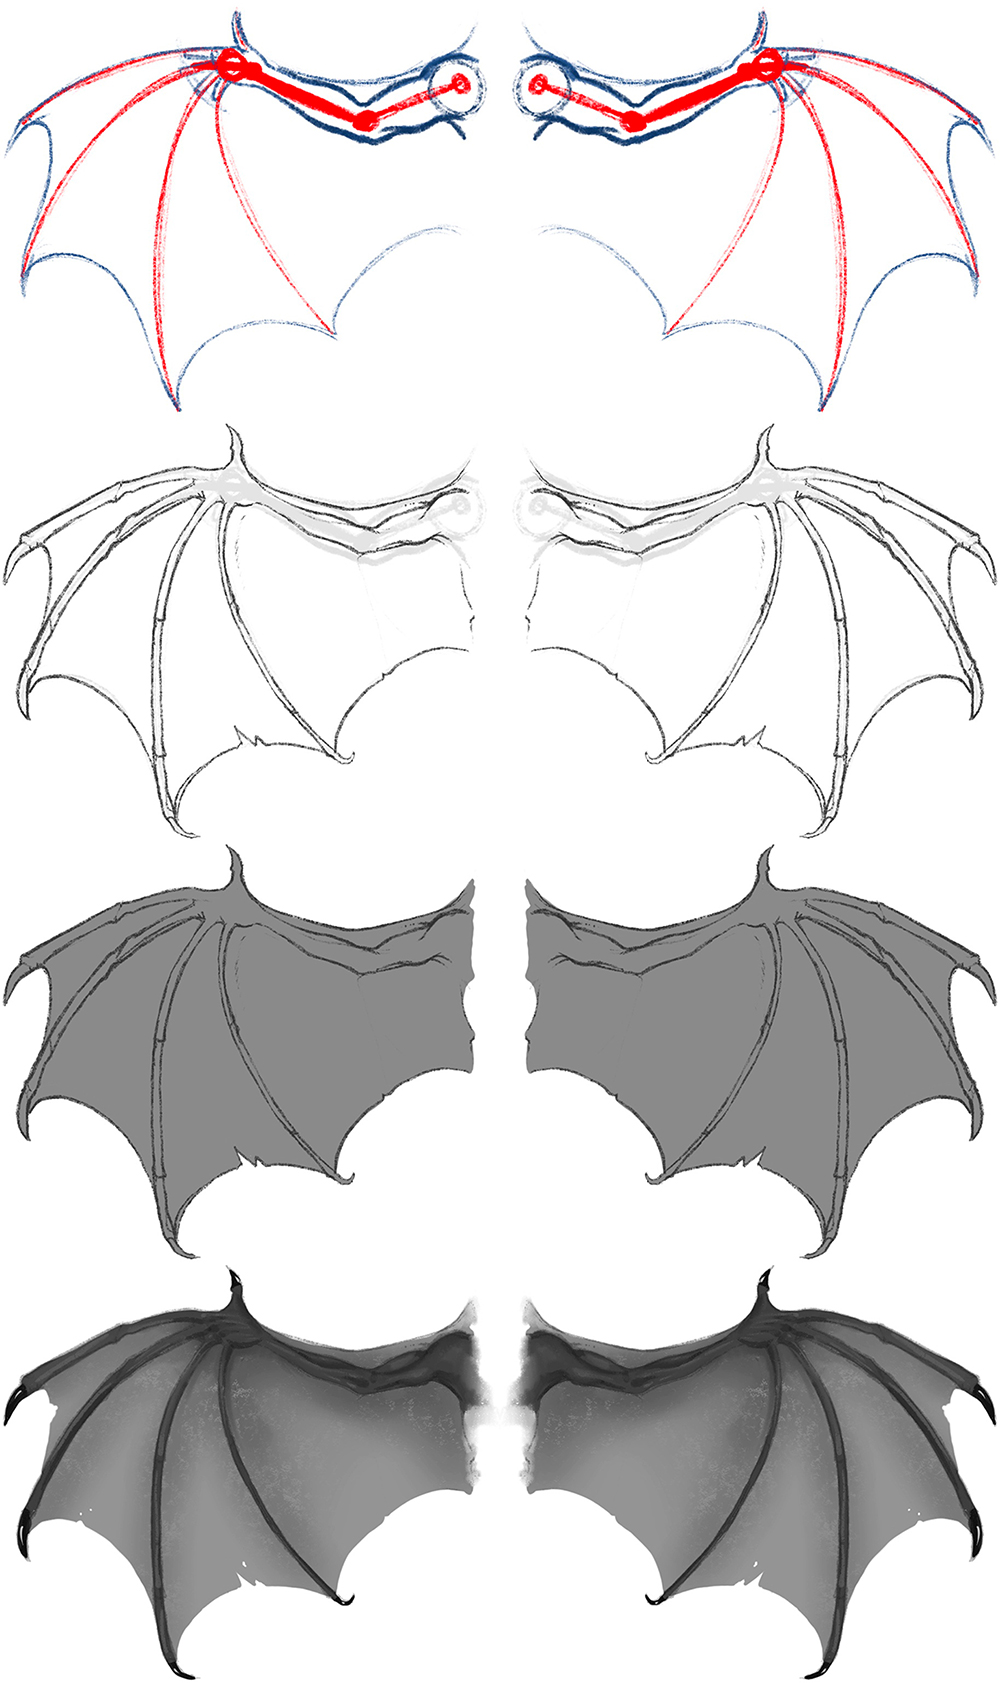
1.2 Wings with membranes
This second type of wing is simpler than the previous one as there is no plumage to draw. So, let’s tackle their shape directly:
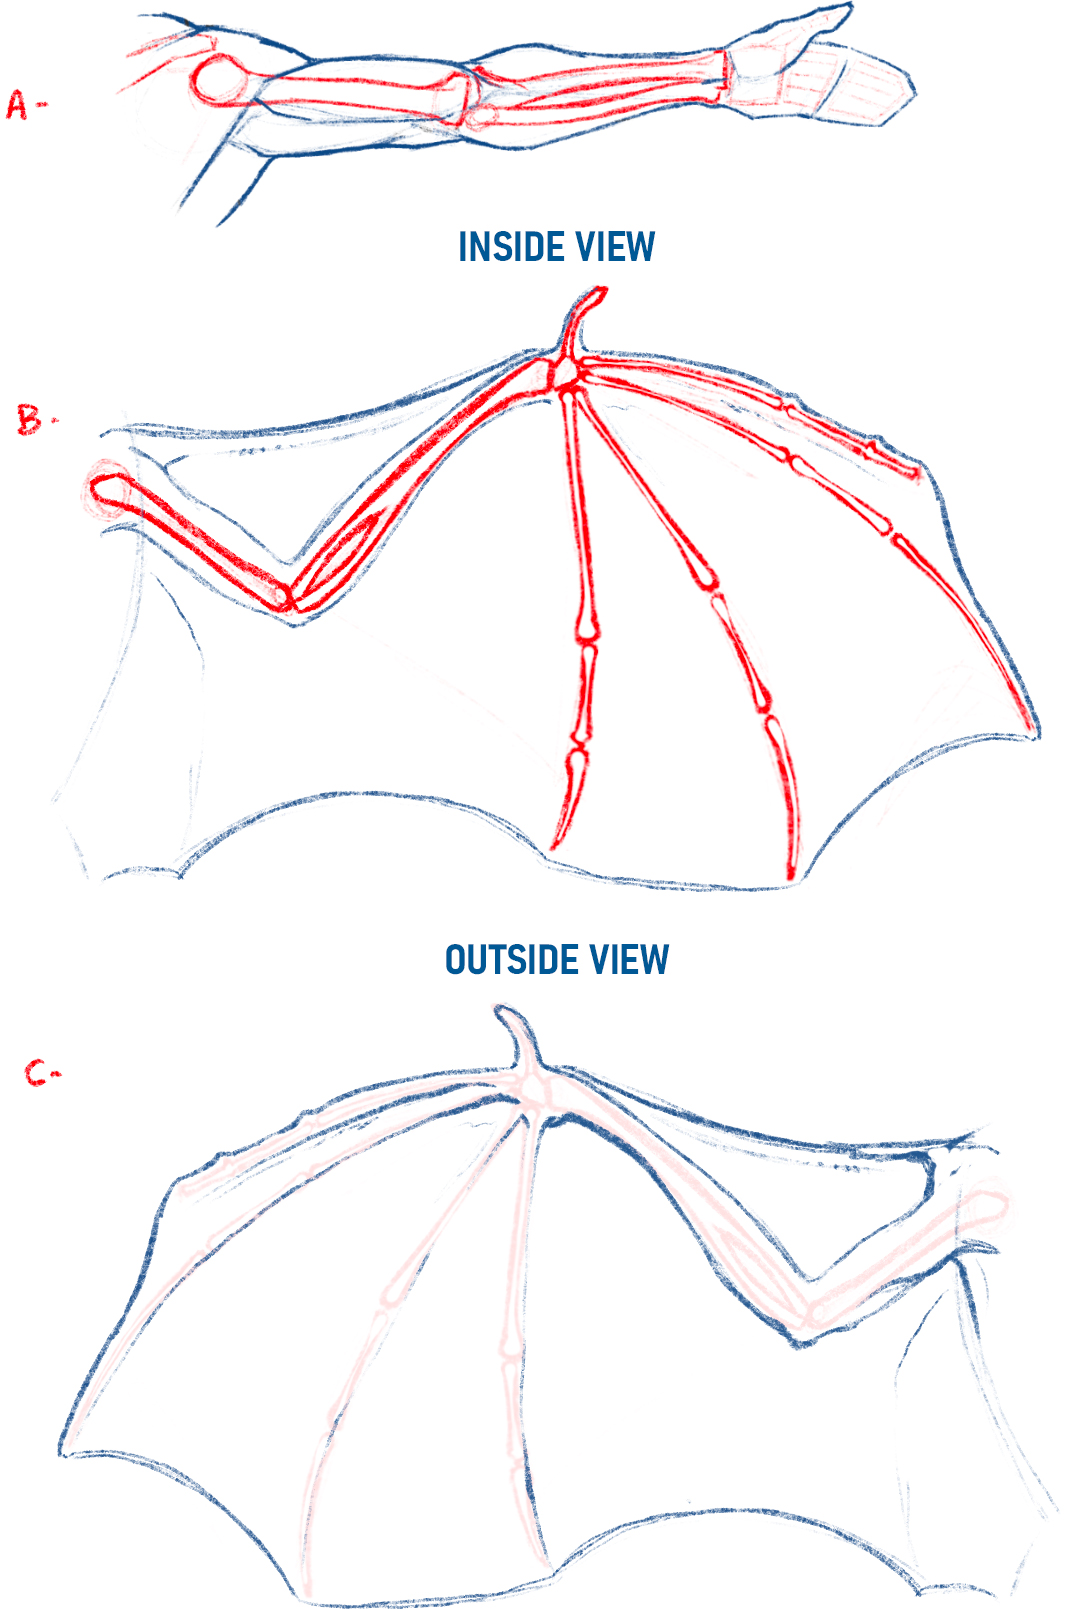
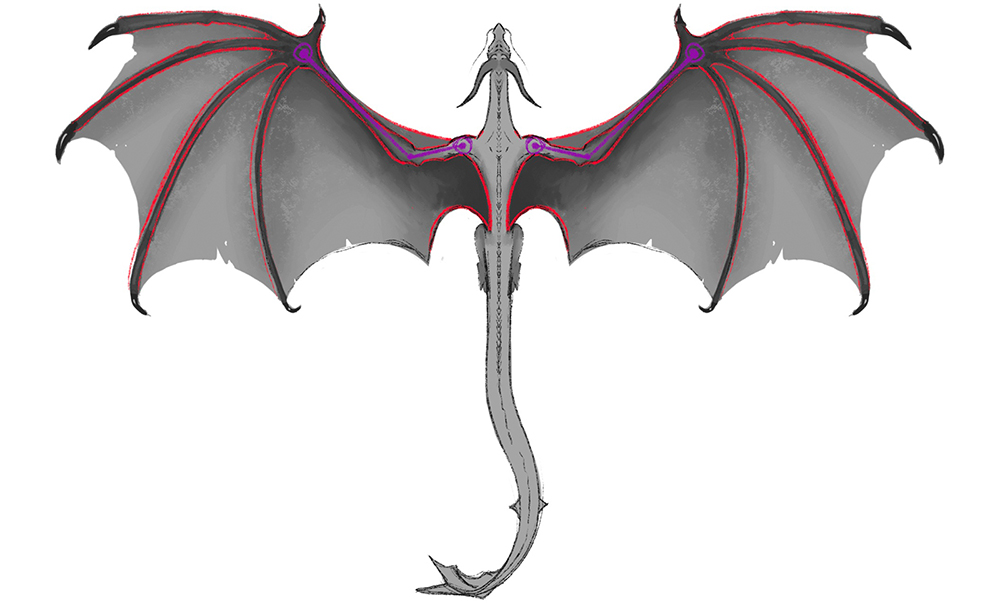
In this case, you can see how the different size of the middle bone makes it more noticeable compared to the previous wing we studied. You can also see that the third bony part of these wings is divided into five parts, just like our fingers. This divides the wing into several membranous sections. These membranes replace the feathers.
I have broken down the flight sequence of this kind of wing below.
When it comes to drawing these, I recommend you start out by drawing a human arm. The musculature depends on your design.
Then, draw long, curved lines coming out of each finger, except for the thumb, which will turn into a talon. Now, all you have to do is form the membrane by joining the bones with curved lines, coming together at the character’s back at the end.
02. Integrating wings into your character designs
Now that you understand the structure, shape, and types of wings that exist, now you must learn how to integrate them into your characters. You could waste a lot of time and potentially ruin your work if, even after drawing perfectly-formed wings, you make a mistake in how they are positioned or proportioned.
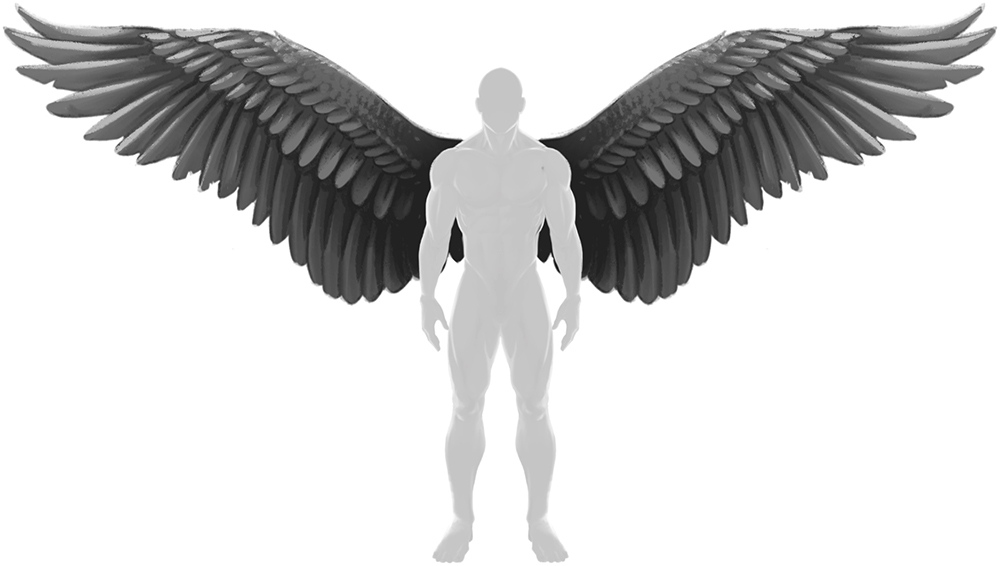
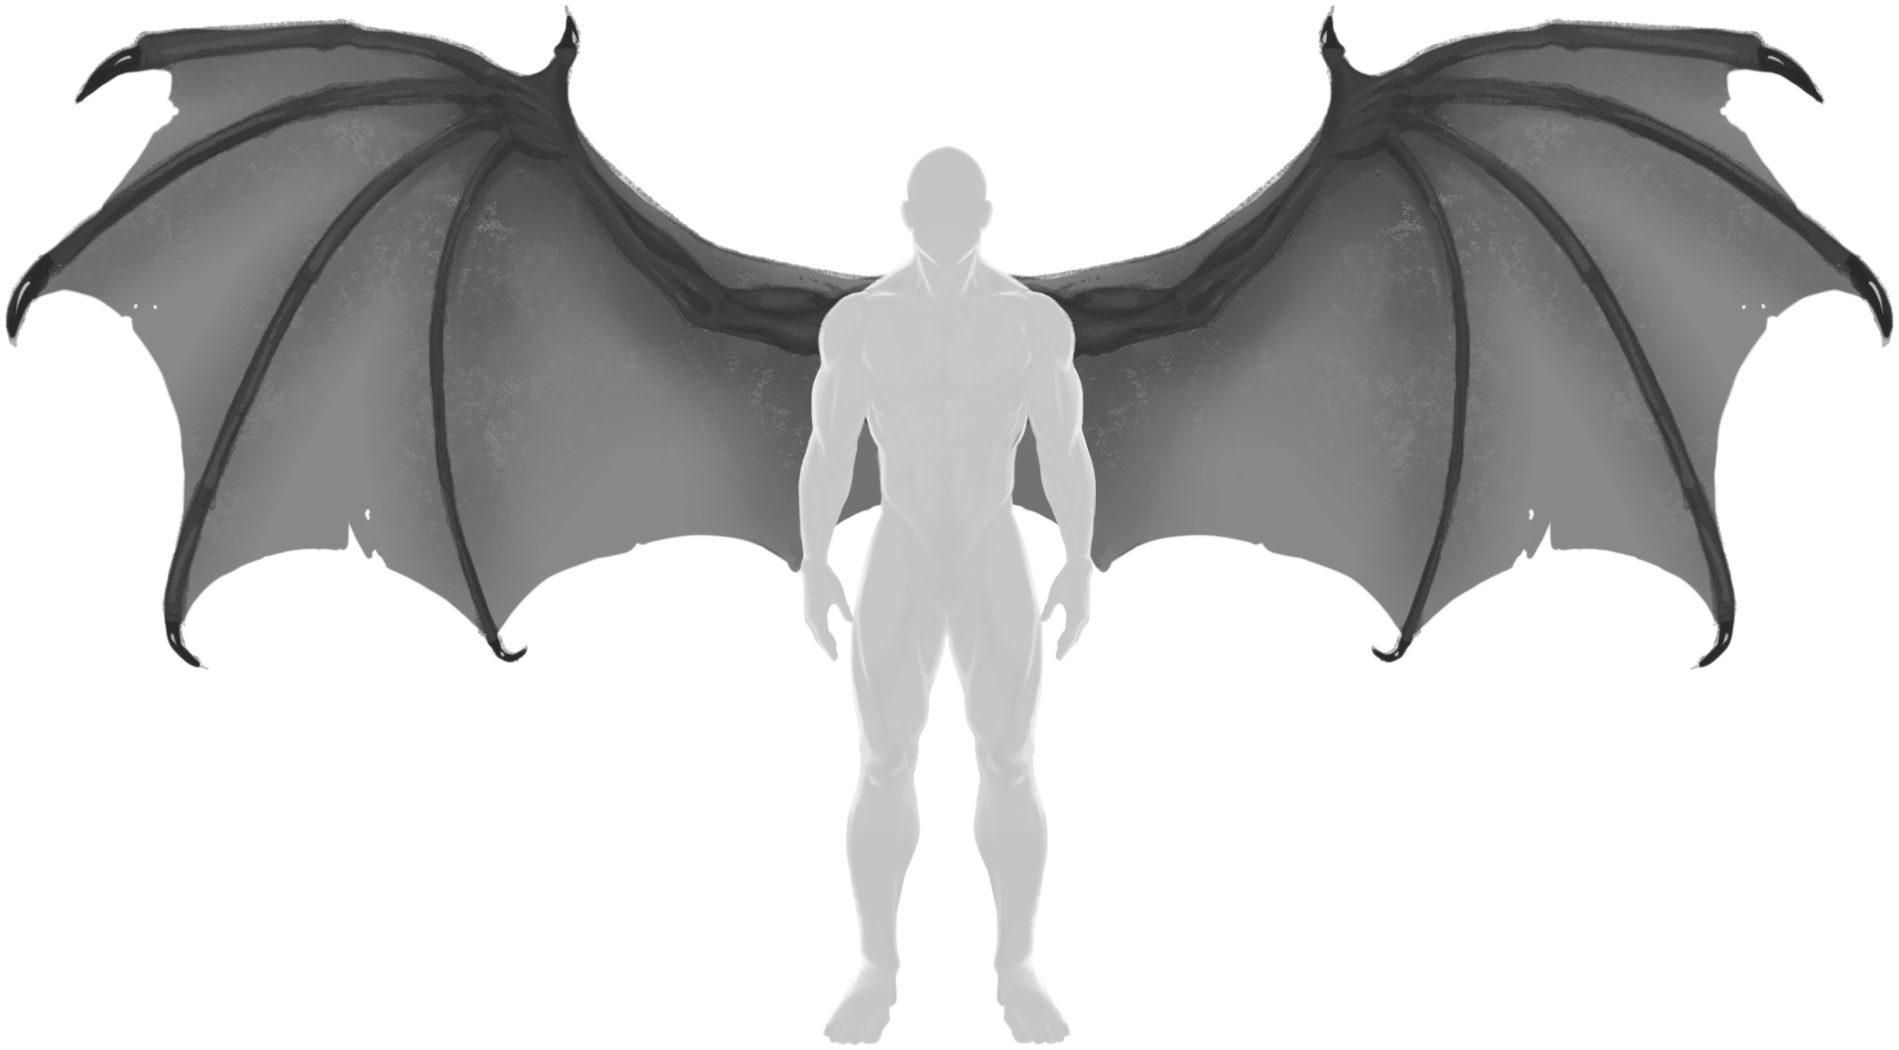
2.1 Wings on humanoids
For humanoid figures, we must keep in mind that this is fiction, and it would never be possible for a human to fly with the musculature and bone density that we have. So, let’s move slightly away from science and give free rein to our imaginations, focusing on creativity and the aesthetics of our characters.
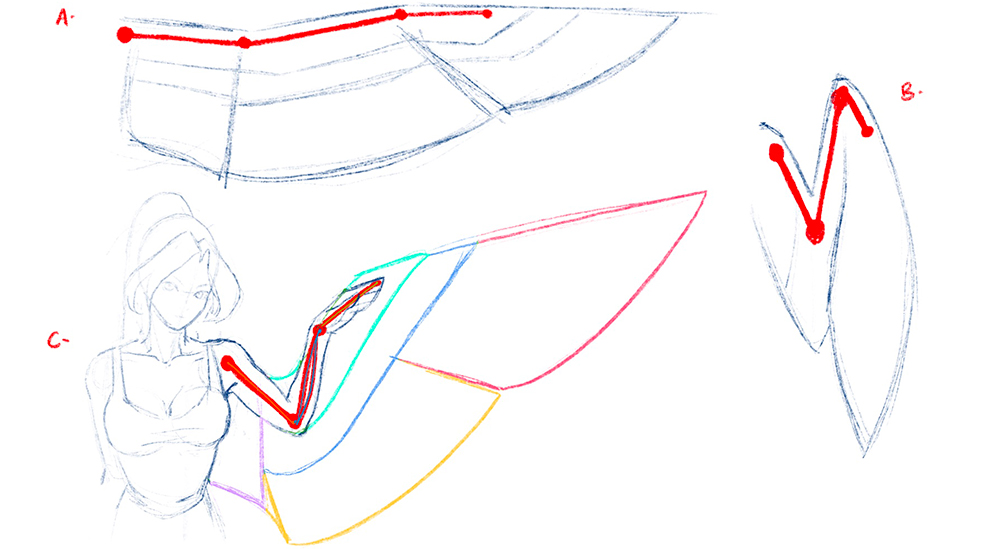
For starters, you will need to know one key point of the human anatomy: the position of the shoulder blades.

As you can imagine, these would be the natural starting point of our wings, since they must be placed in the upper half of the torso, like with any real bird.
Following the steps that we took from the beginning of this guide, to start integrating the wings, let’s imagine that the basis of the wing is a human arm. For now, let’s place two arms starting from the shoulder blades.
Now add the main sections corresponding to the wing plumage, as we did in section 1.1.
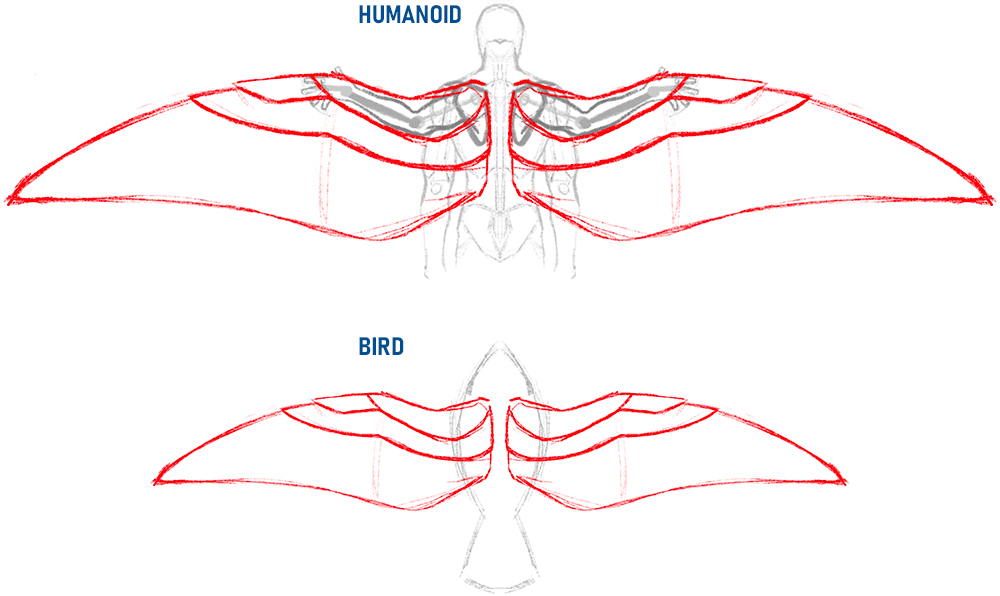
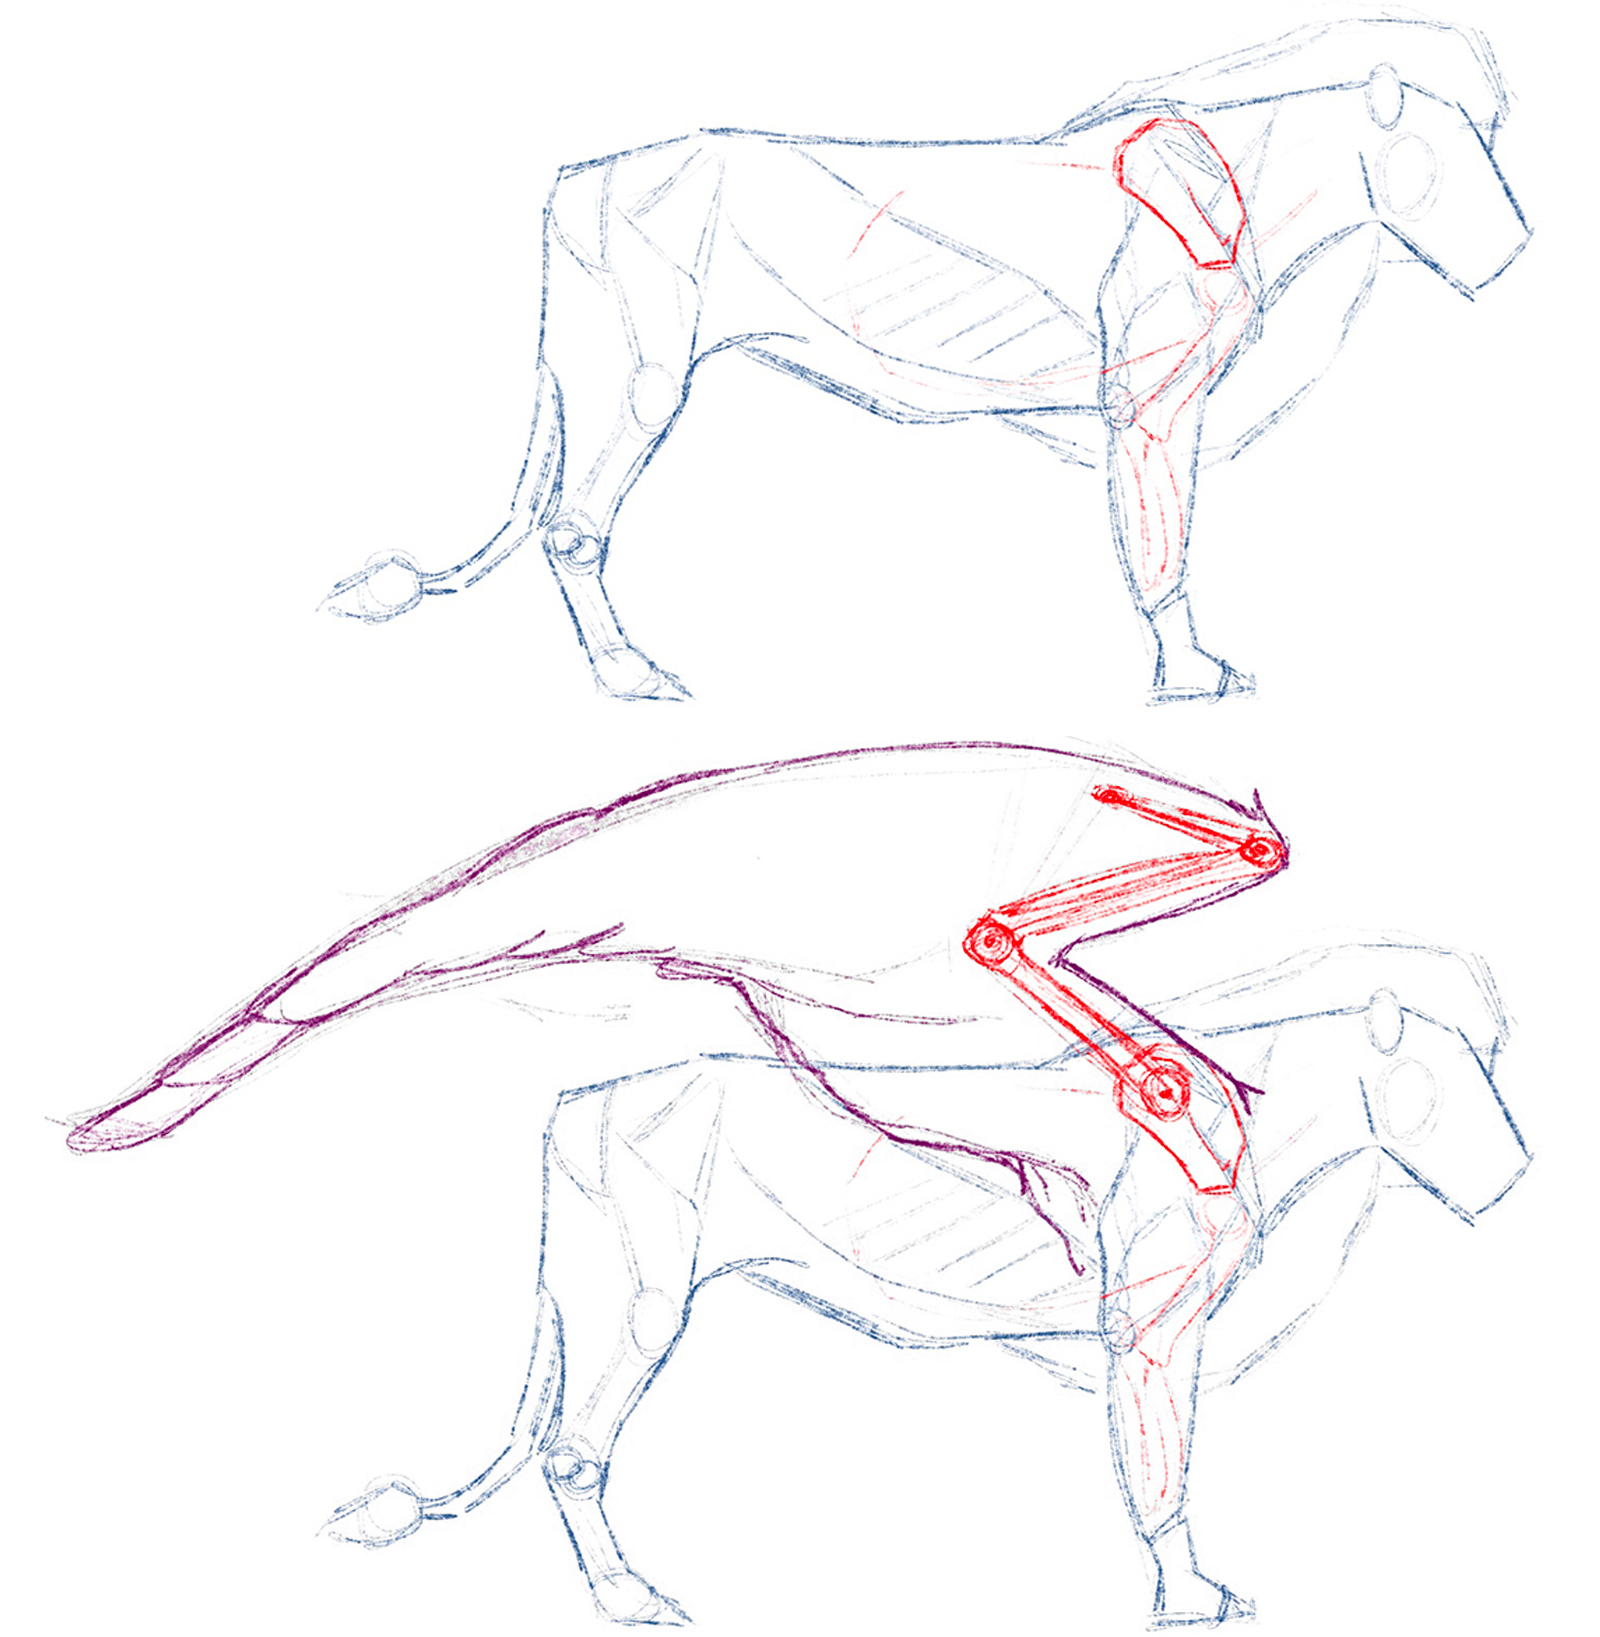
2.2 Wings on animals
As with our humanoid figures, for animals, you will also have to find a point to use as the skeletal origin of the wing. Find the scapulae (shoulder blades) and build out your fabulous wings from those joints.
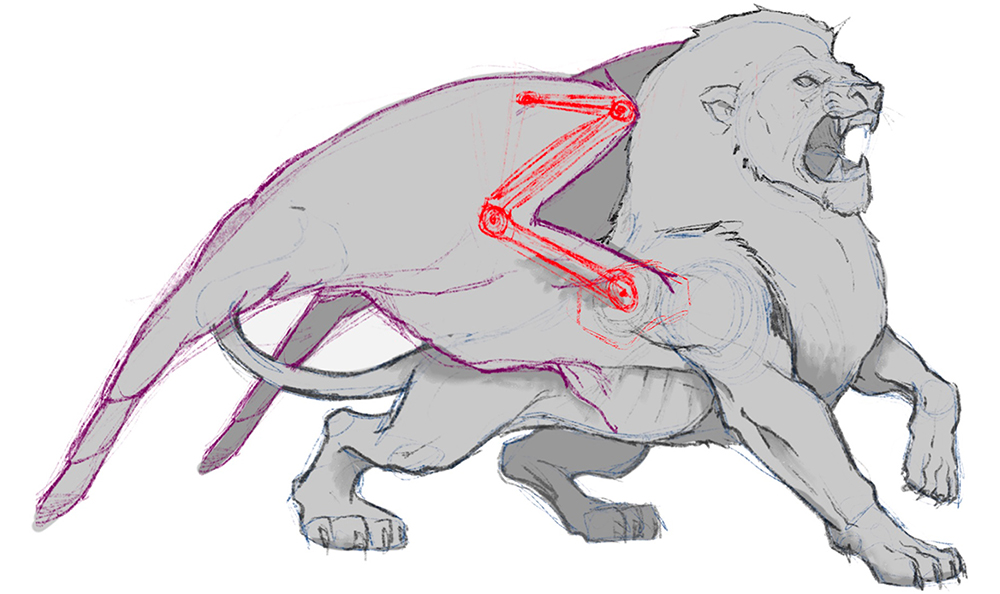
You can do the same with any other type of wing, like with this dragon:
03. Practice!
As the third and final point, you will have to take the time to learn how to give your wings a sense of movement, as well as how to draw them in any position and from any angle. Start from an initial sketch marking the key parts of each wing and then complete them by adding the amount of detail you want.
In this tutorial, I have shown you a simple method to draw wings, which can seem quite complicated at first. As you can see, you just have to find a method that works and repeat it. I am proud to have had the opportunity to share my method with you. As always, I encourage you to investigate and try new ways to enrich your illustrations. Until then, I hope my tips will be of great help to you!
Right, that’s all for today. Don’t hesitate to share notes and illustrations you made with this tutorial with me on social media.
If you have any questions, feel free to contact me via email: danielpuentemorales@gmail.com.
As always, it’s a pleasure to draw for all of you!
Interested in concept art or what it takes to become a concept artist?
Check out the link below!