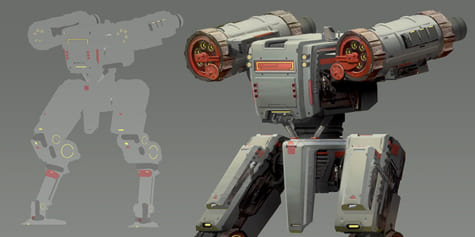
Speedy Mecha Design: A Step-by-Step Breakdown
Environment artist Scott Zenteno shares how they use photo collages as a base to efficiently design a mecha! Learn how you can create outstanding and believable artwork by taking a deeper look into concepts such as the center of balance and lighting.
INTRO
In this tutorial, I’ll be showcasing my mecha design process that focuses on getting to a polished stage relatively quickly. By manipulating photos into shapes, a design can quickly attain a level of detail and believability comparable to a 3d model.
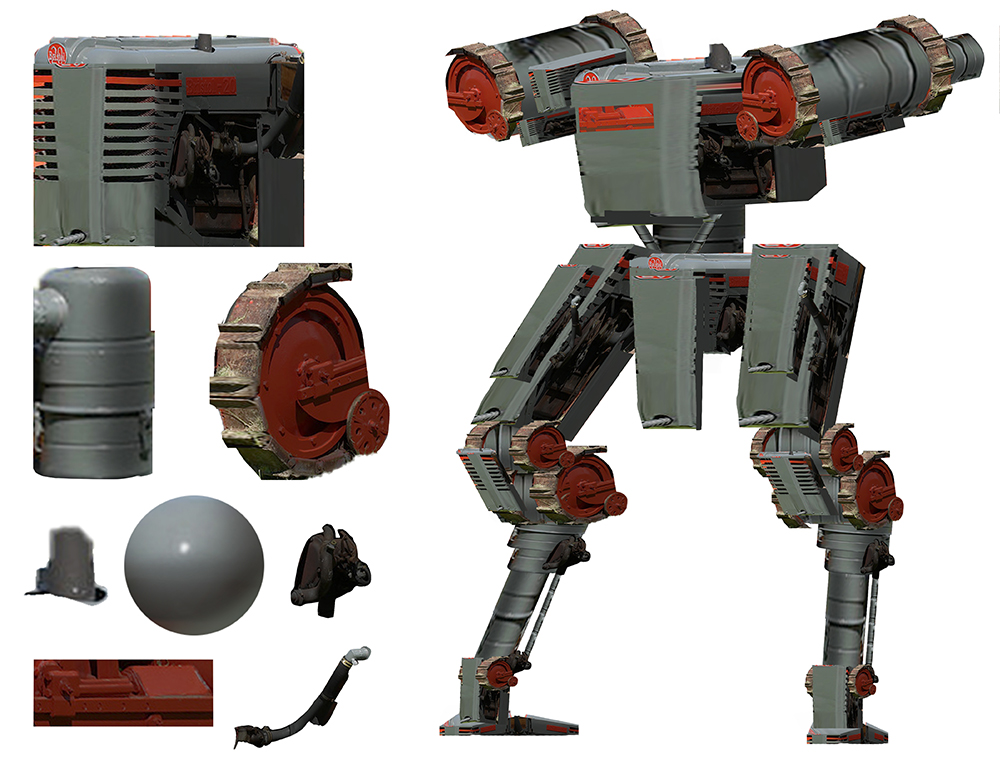
PULLING OUT PIECES
I start by taking photos and searching for images, especially of objects that have distinct light and shadow sides. After that, I select individual parts of the images that have solid forms. Breaking the object apart helps me understand how an object is put together. For example, hardware will usually have an external surface that protects the functioning bits, with a chassis underneath it that contains the parts themselves.
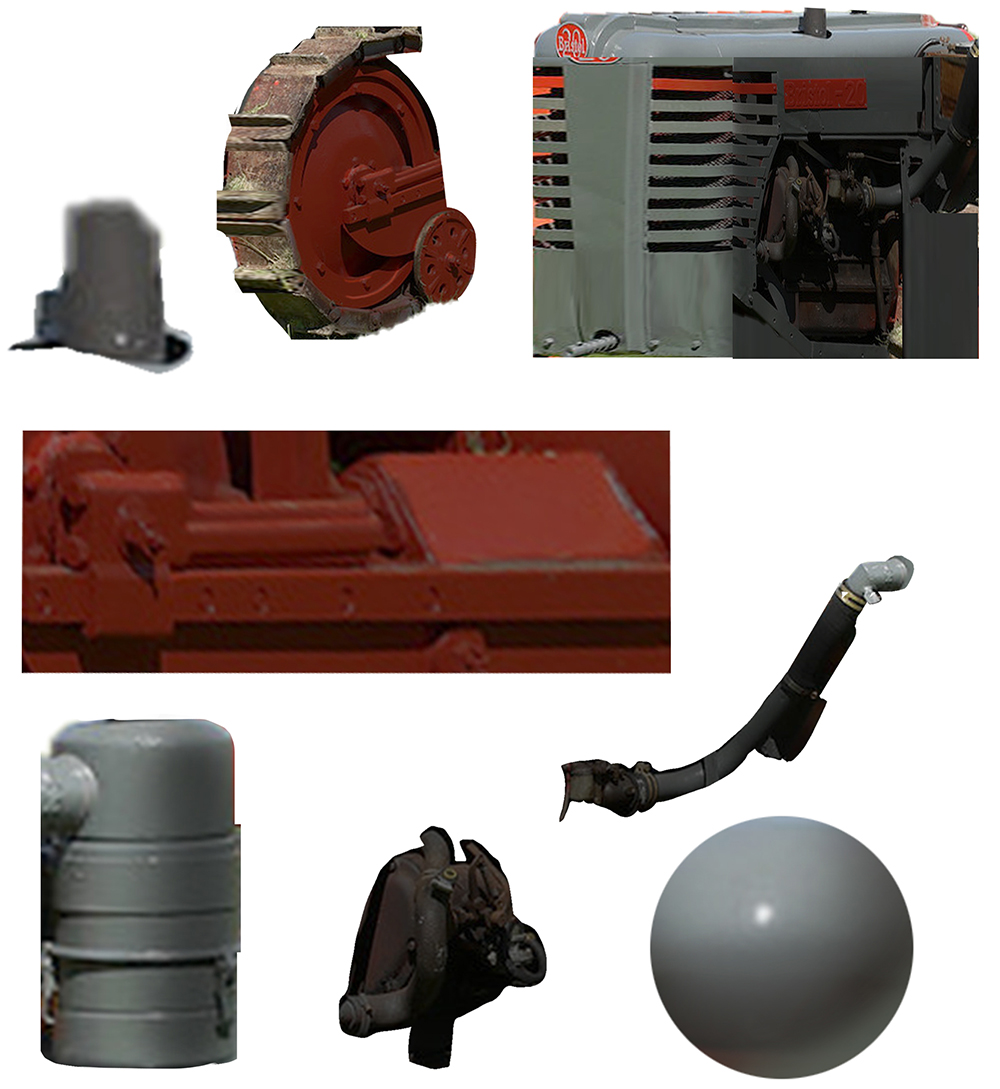
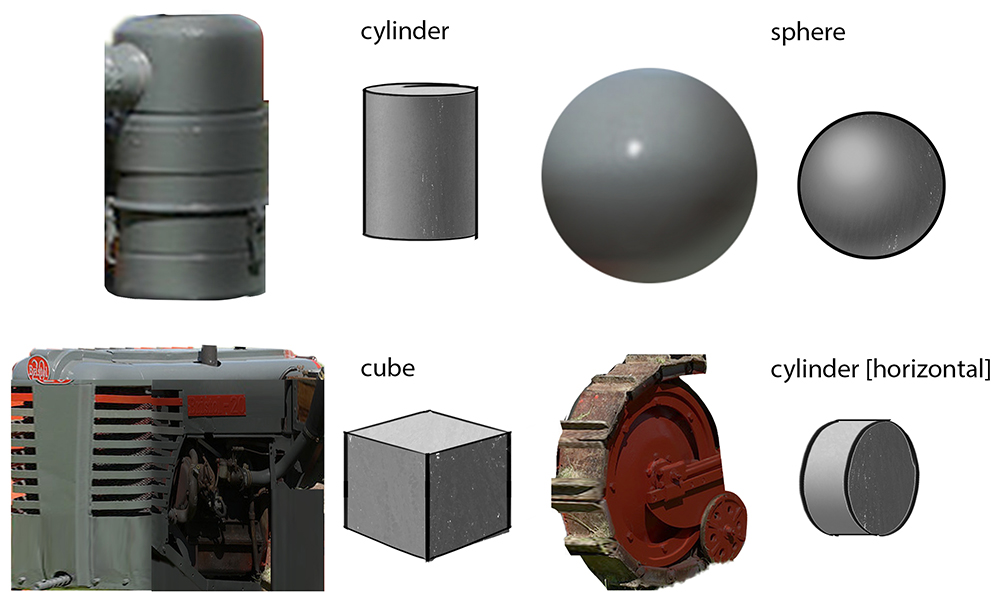
CREATING PRIMITIVES
I then manipulate the light and shadow sides to create basic 3d primitives (cube, cylinder, sphere.) Any object can be broken down into these core forms, be it mecha, human, car; you name it! These primitives will be the building blocks of our bipedal mecha. This step can be simple or complex depending on the photo you use, which is why it’s important to take photos with strong light and shadow.
EXPERIMENTING WITH YOUR SHAPES
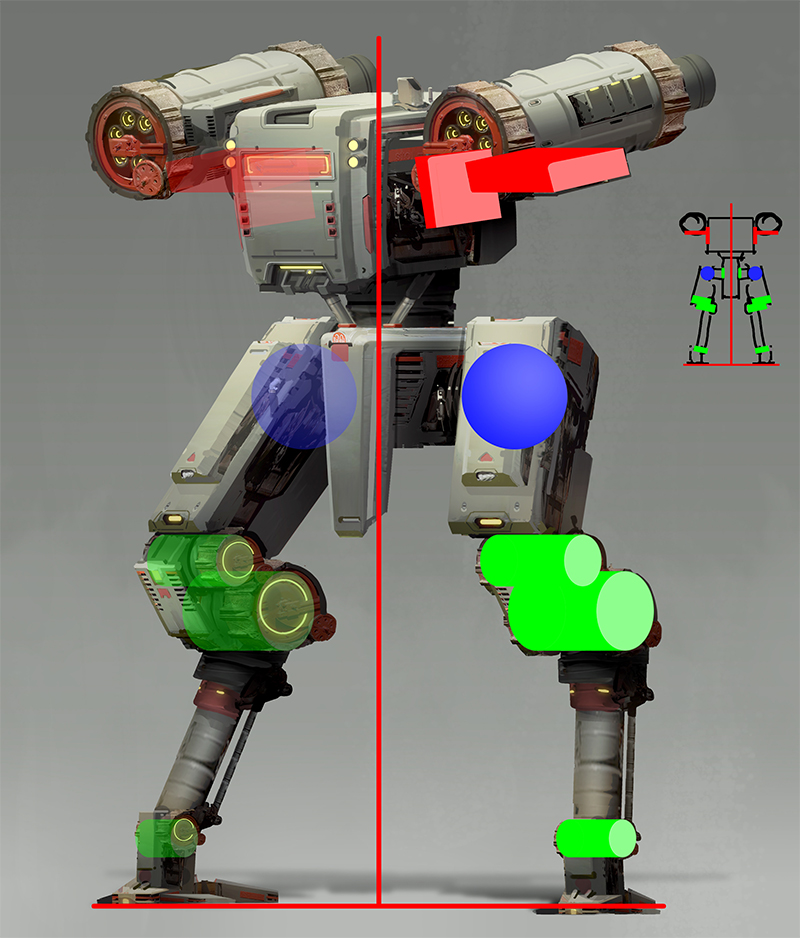
With the canvas set up, I take the primitive shapes and begin joining, rotating, squashing, and stretching them like lego pieces to create complex shapes. Using the same four parts to create these concepts, I first created several variations on what my mecha’s leg could look like. When designing bipedal mecha, it is important to think about how you can balance the joints properly. For example, you can have a wide-based “foot,” or balance the leg with the “heel” of the design, much like a velociraptor.
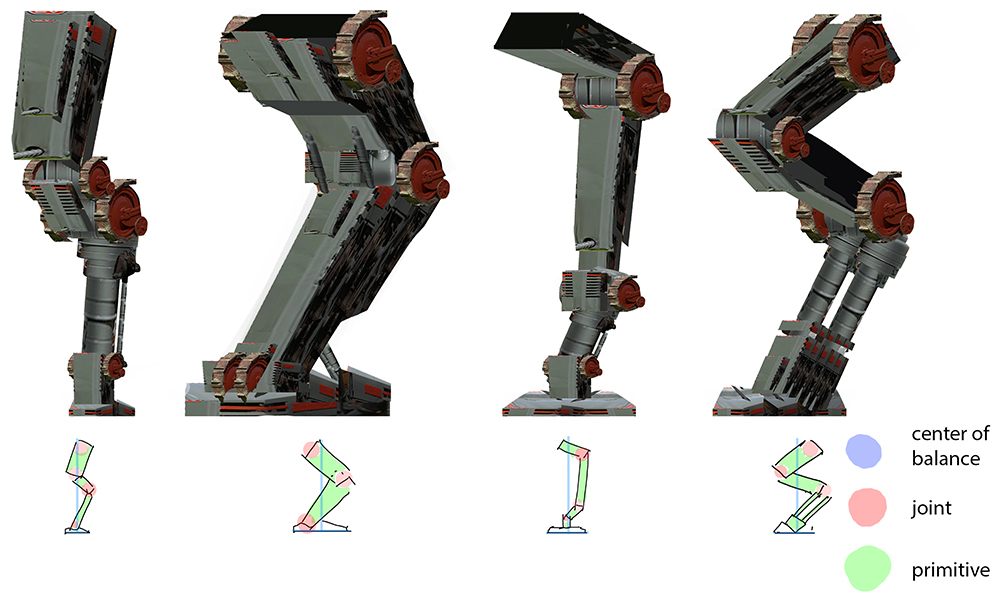
COLLAGING THE MECHA
Building out from the legs, I collage the rest of the mecha. Using the same method I used to distribute weight and center of balance for the legs, I build out the rest of the form, making sure I don’t make the design too asymmetrical or front/back heavy so that it couldn’t stand without falling over. Going back to velociraptors, you can probably see why they have a tail; it’s there to counterbalance their heads, which lean forward.
At this point, the design starts to read as a textured volume, even though we haven’t put down a single stroke of paint. This is the strength of this process; you can quickly visualize the design without having to paint all the details. Keep in mind that simple silhouettes allow the viewer’s eye to better take in the design.
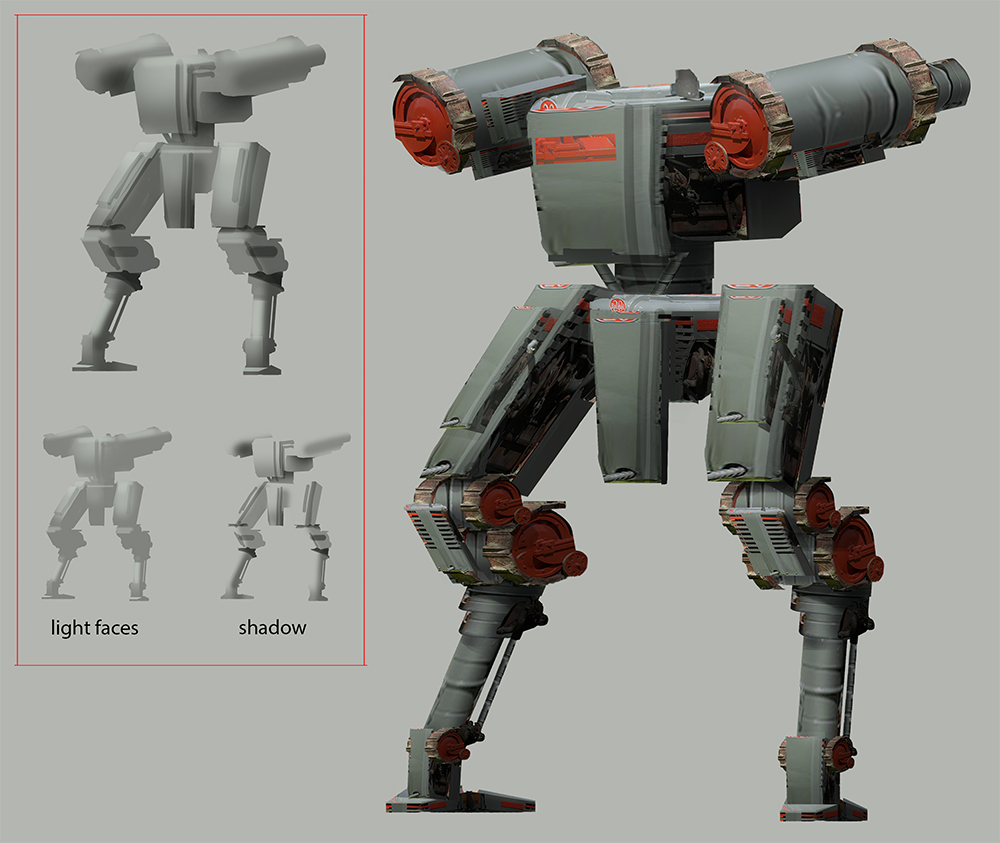
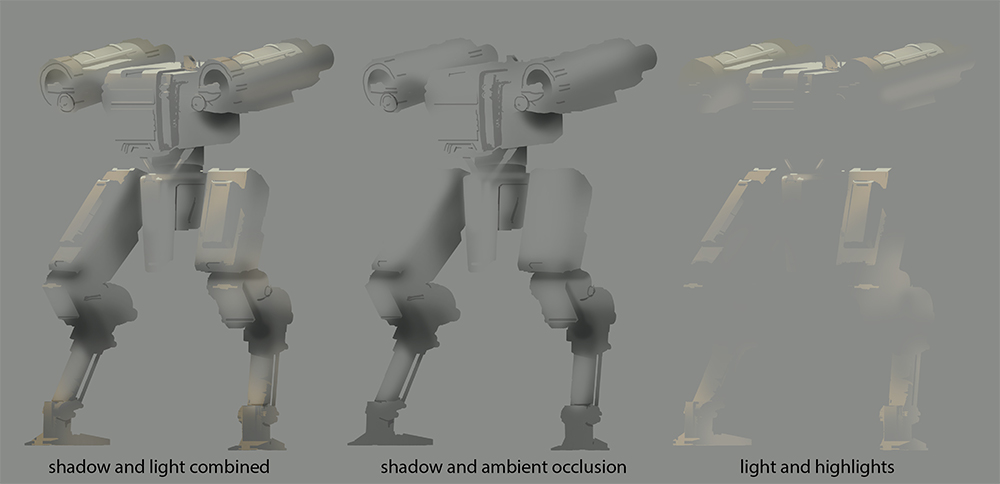
BASIC LIGHTING
With the base completed, I make a quick lighting pass with a brush to better mesh the textures together. The goal in this step is to remove the “stitched together” look that photo manipulation produces. I use the shadows to correct any photo textures that don’t match the final lighting scheme. They also knock back some of the detail and noise that clutter the design. Additionally, the light layers bring out the volume of the forms, showing how light travels over each primitive shape. The implied lighting from the previous phase is now locked in, and shows the mecha better.
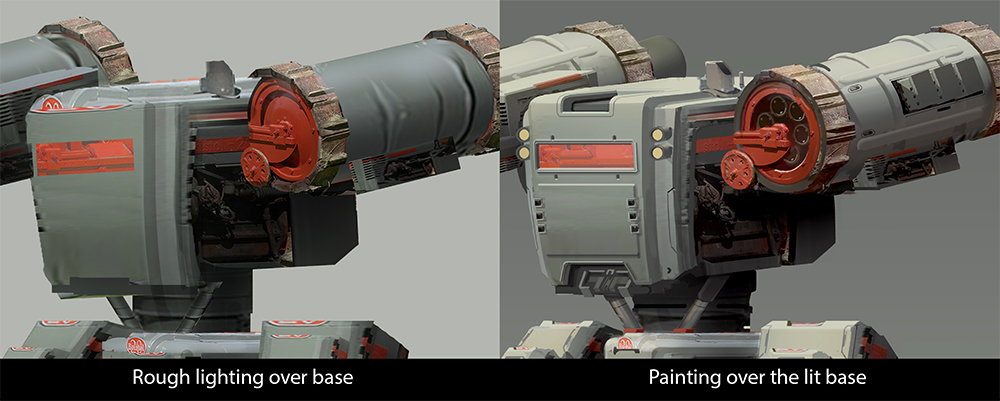
PAINTING OVER THE LIT BASE
Now the painting can begin! When I paint, my goal is to refine the shapes and give them specific characteristics. I think about each edge and if it should be beveled (a flat 45-degree cut) or a radius (a smooth rounded edge) Thanks to the lighting pass I painted earlier, I can now color pick from my base and build out the subtle form changes. I also start painting in unique details that are not from the original photo textures. During this phase, I start to bring in warm light to better convey the light temperature.
BREAKING DOWN LIGHT AND SHADOW.
After refining the design, I paint another light and shadow pass to unify the new elements. This time, I pay more attention to Ambient Occlusion (AO) when working on the shadows. AO can be described as shadows in the areas of an object that don’t receive any light. For light, I paint with a toned color, instead of a neutral white. Every light source is slightly colorized, and in this case, I chose a warm yellow light to make the blue-green palette I established earlier in the painting process pop. Even with just the light and shadow combined, you can see that the design’s forms still read correctly. The photo provides the texture and the light, and primitive shapes provide the form.
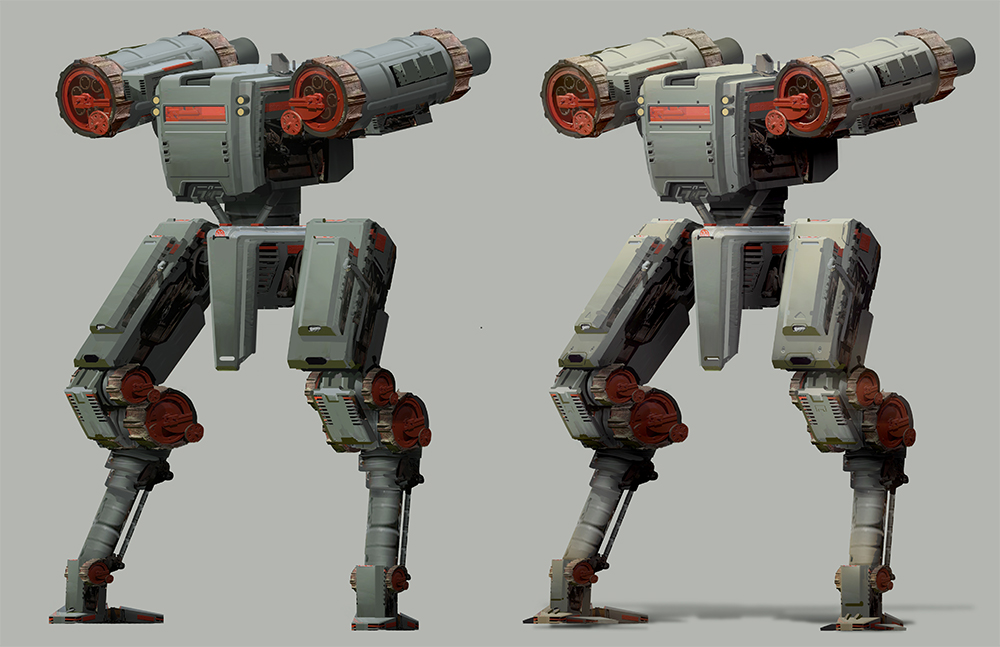
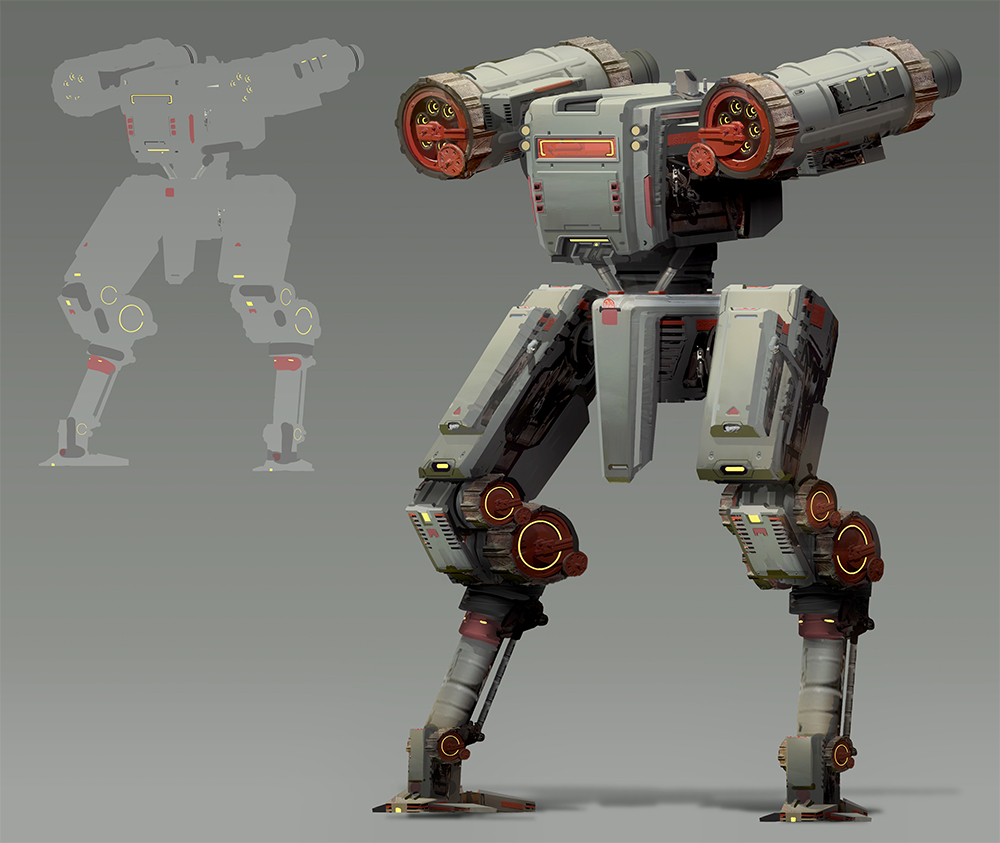
ADDING LIGHTS
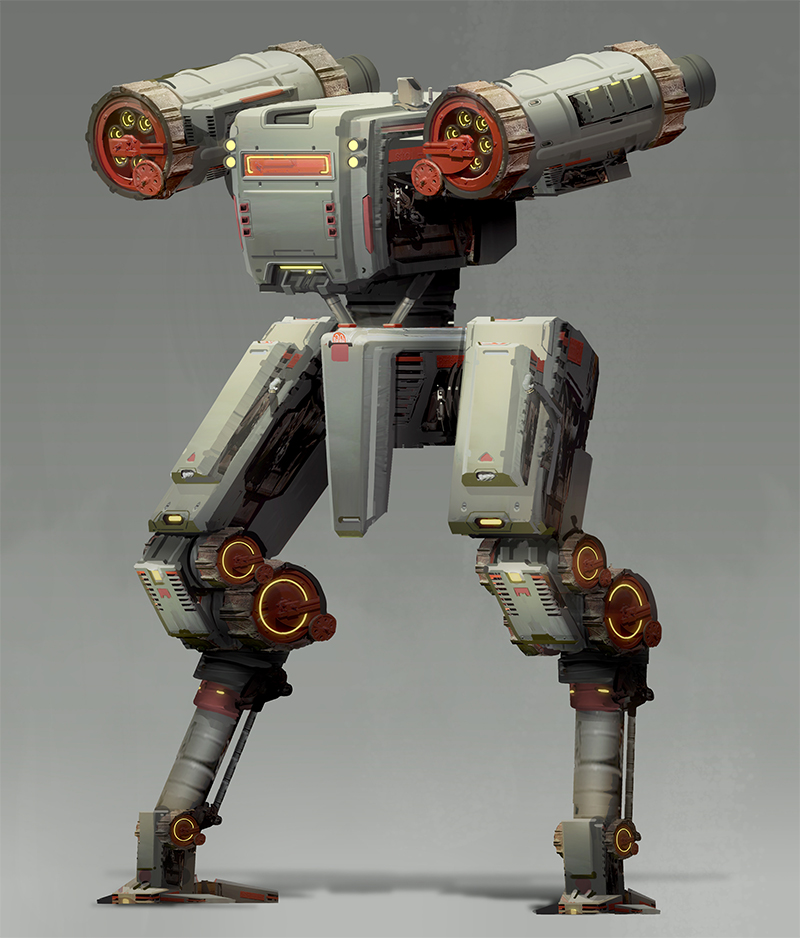
To best display the mecha, I want to show it “activated,” so I add lights to the design to show that it is currently on. I place my lights in areas I want to draw attention to. For example, the lights around the cockpit area are larger and less hidden than the lights around the rest of the design. The smaller lights around joints and detailed areas are there to make motion easier to read.
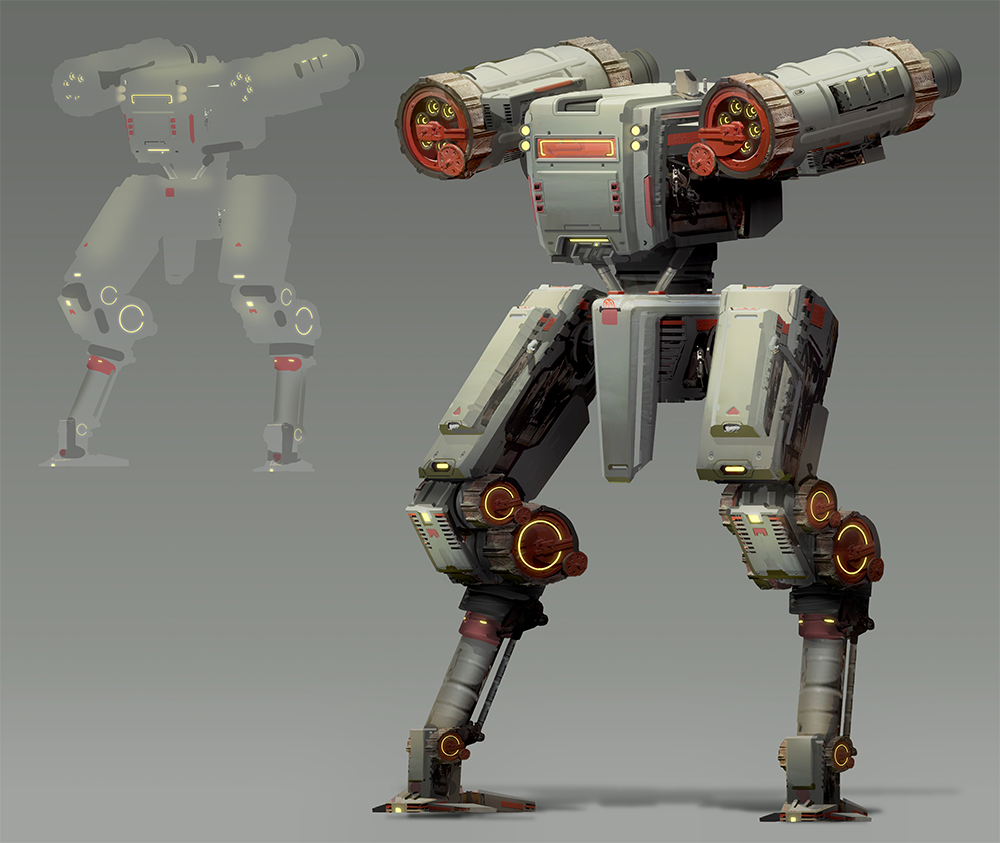
POLISHING
At this point, my goal is to decide how I can best polish and “sell” the design. I decide to add a layer of sheen that adds more brightness, saturation, and vibrancy to the rendering. This makes all the lights added in the previous step glow, causing the design to pop and look even more “activated.”
FINISHING TOUCHES
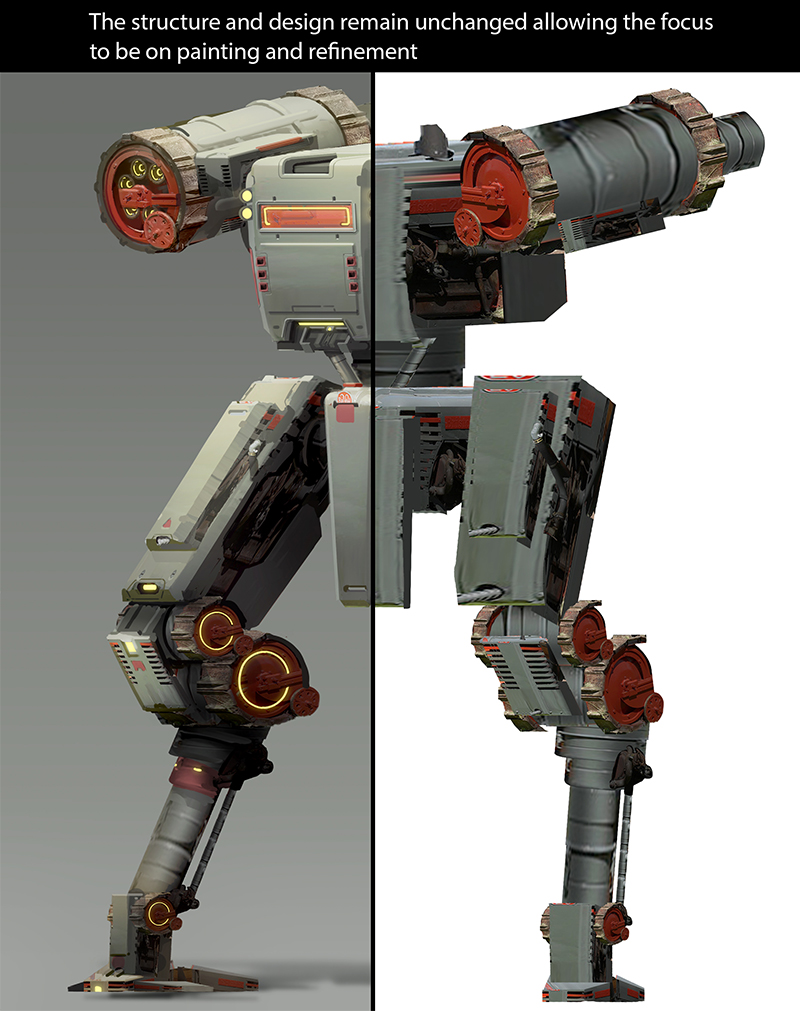
To finish the image, I shift the weight of the cockpit forward and slant out the leg on the viewer’s right to better counterbalance the mecha, as the original stance looked like it was leaning back and didn’t correctly sell its weight. I also implied an environment by adding stage-like lighting hitting the ground and some ambient shadows towards the top of the canvas. This ambient shadow creates a higher contrast and adds a focal point at the top of the design. Lastly, I dropped a shadow on the ground to unify the mecha and the space it’s in. To create this shadow, I took the silhouette of the design and squished it down to match the stance of the feet while blurring the edges, which suggests the height of the mecha.
This tutorial took an image of a tractor and worked it into a solid design that could easily be passed to a modeler. This process gives me the ability to use the pieces I created to make new designs with entirely different silhouettes(such as vehicles) while maintaining a consistent shape language.
Scott Zenteno works in the animation and video game industry as a hardware and environment artist. They enjoy working on anime-inspired projects, especially ones that involve robots.
Portfolio: https://scottzenteno.artstation.com/
Instagram: https://www.instagram.com/scottzenteno_art/
Twitter: https://twitter.com/scottzenteno
Interested in concept art or what it takes to become a concept artist?
Check out the link below!