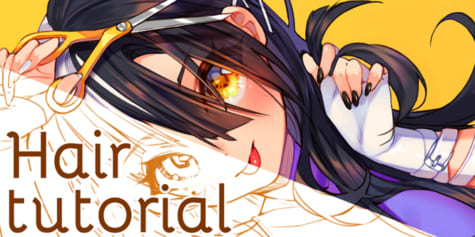
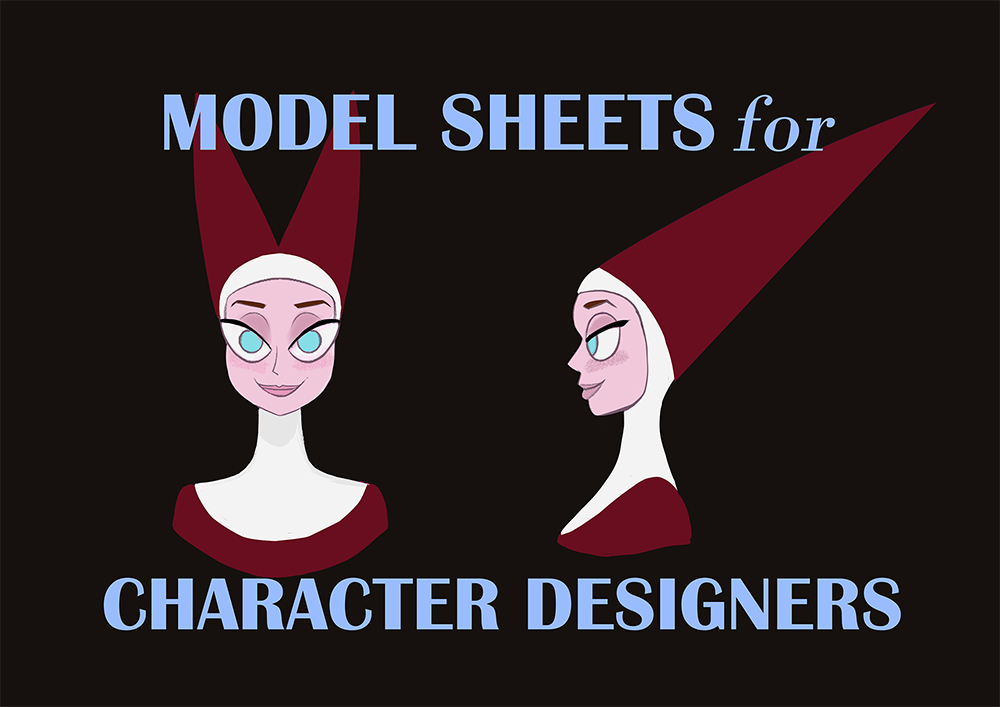
Model Sheets for Character Designers
Illustrator Julio Robledo explains how to create a model sheet for a character design. You'll use ideas formed when creating the character concept to flesh your character out & learn how to design the side, ¾ view, and back views from the front view.
Introduction
Designers of things like chairs, new car models or rockets, always seek to represent the dimensions of the object perfectly, and show how to build and assemble it.
The job of a character designer is exactly the same, but for characters. The designer tries to explain to another draughtsman, modeler, or animator how to build a character; their dimensions and how to keep them, their expressions and basic poses, colors, etc.
Knowing the tools of this profession can be useful to help you advance professionally in that direction, or simply to help you better define your characters, and develop them until you get a prototype that works best for them.
The rules of professional character design are not very strict, the aim is just to explain the models in the best possible way. But they do tend to use a series of model sheets, listed in the index below, which are used especially in animation production.
Contents
- Character construction sheets
- Full head turnaround
- Full character turnaround
- Color sheet
- Expression sheet
- Pose Sheet
Model Sheets for Character Designers
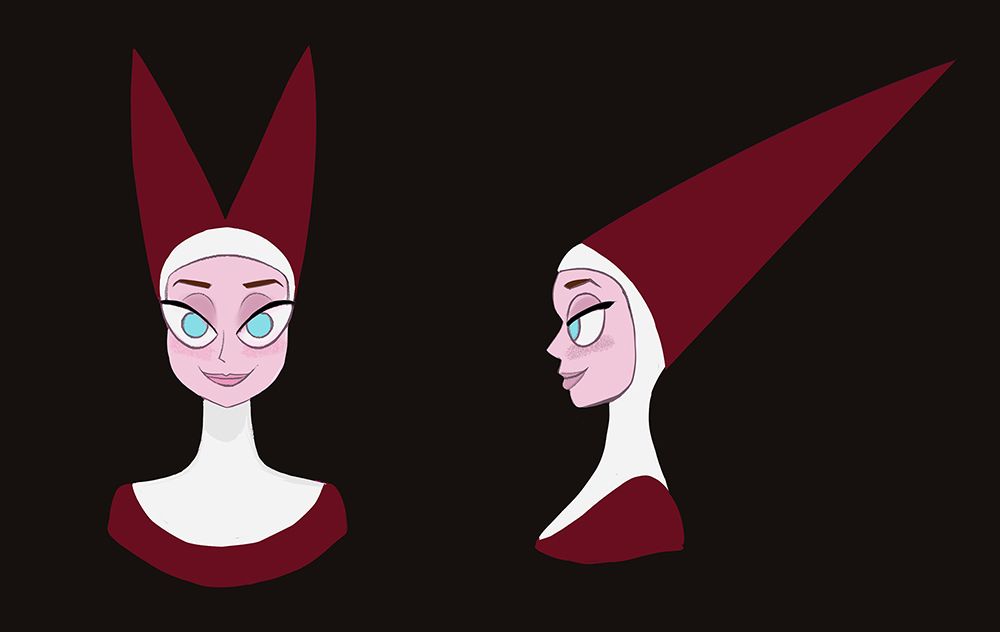
The character I’ve chosen as an example is a witch. This witch does not fit in the contemporary version of the archetype. She is neither good nor nice, and definitely not naïve in any way. She is your classic fairy tale witch – she is evil personified, possessive, selfish, manipulative, scheming, sensual and seductive if it fits her purpose. Her beautiful and youthful appearance hides a horrible old woman, blind and bald. You will have to design those two physical aspects and all her psychological attributes: irritable, cruel, immature …, but disciplined and contained in appearance.
She dresses like medieval nun, an abbess.
Her double pointed hat gives her a “double” look; sinister and satanic, like the forked tongue of a snake.
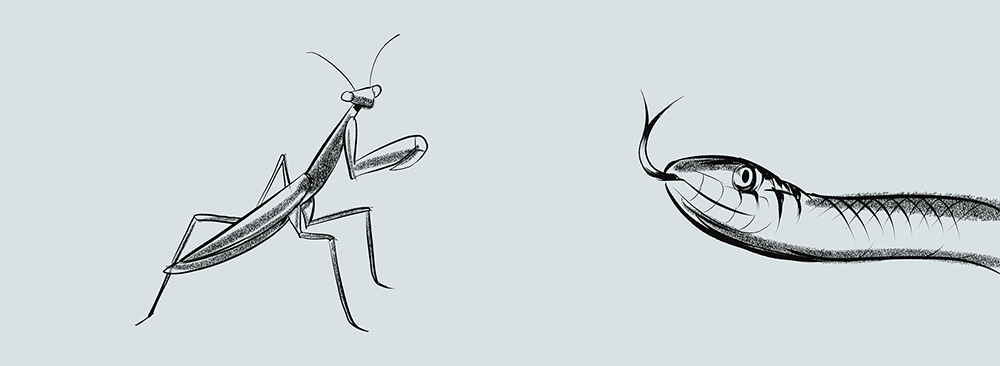
With her large eyes, wide sleeves, and slim silhouette, she reminds the viewer of a praying mantis. This needs to be reinforced in the poses.
It is necessary to understand the characters psychologically to be able to represent them and get into their skin. Freud said that we are all the characters that appear in our dreams. All the characters and all the archetypes live within our soul. To represent them, you just need to connect with them, like actors following the Stanislavski method.
1. Character Construction Sheets
The purpose of the construction sheet is to specify the general proportions of the character, and the instructions for other artists to build it.
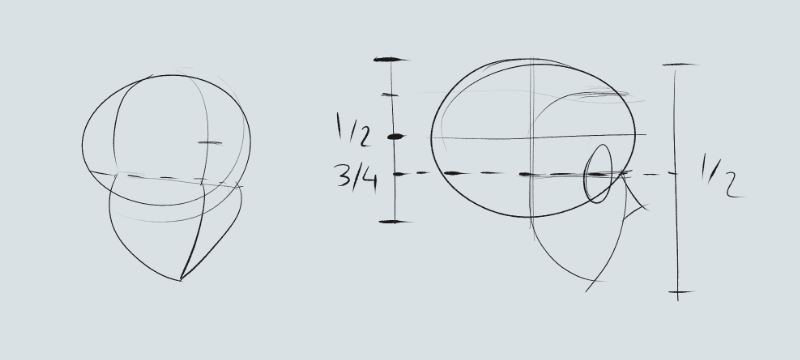
To build the head, start with the profile. Use the [Figure ruler] to help you draw a square, and the [Linear ruler] to divide it into four equal parts. Find the lower half of the right square. The right half of the large square will give you the dimensions of the face. The eye and the pupil are in the horizontal half of the square. The nose protrudes from the large square. The half point of the lower right square marks the upper lip. If you draw a line from the nose to the lower lip, you can place the lips. The ear is at the same level as the nose and the upper end of the pupil.
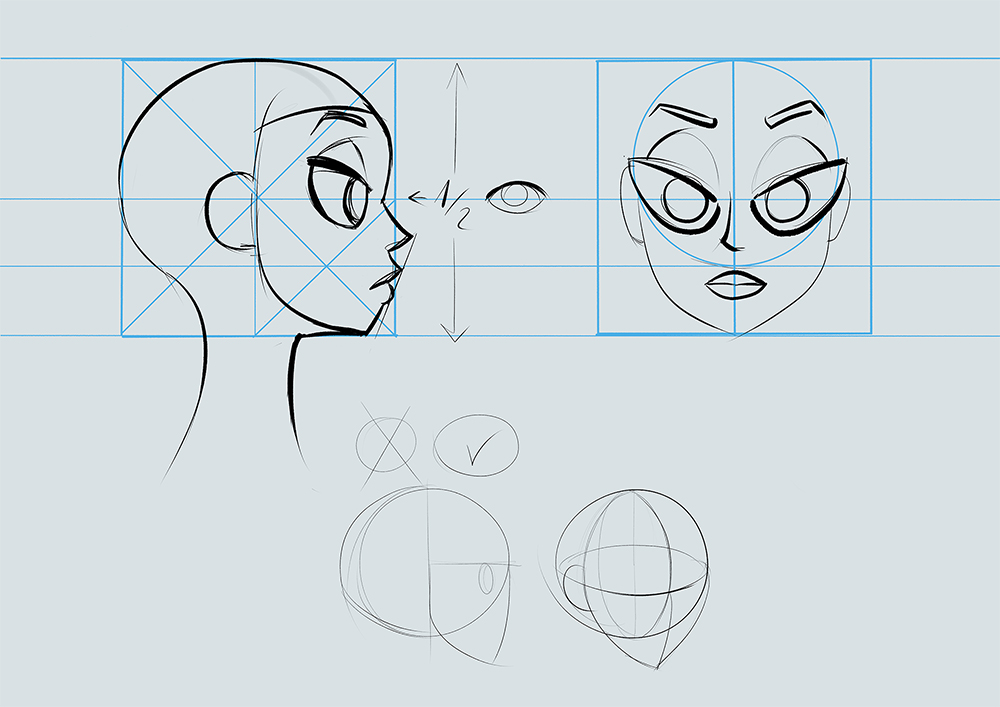
Let us start the construction of the figure.
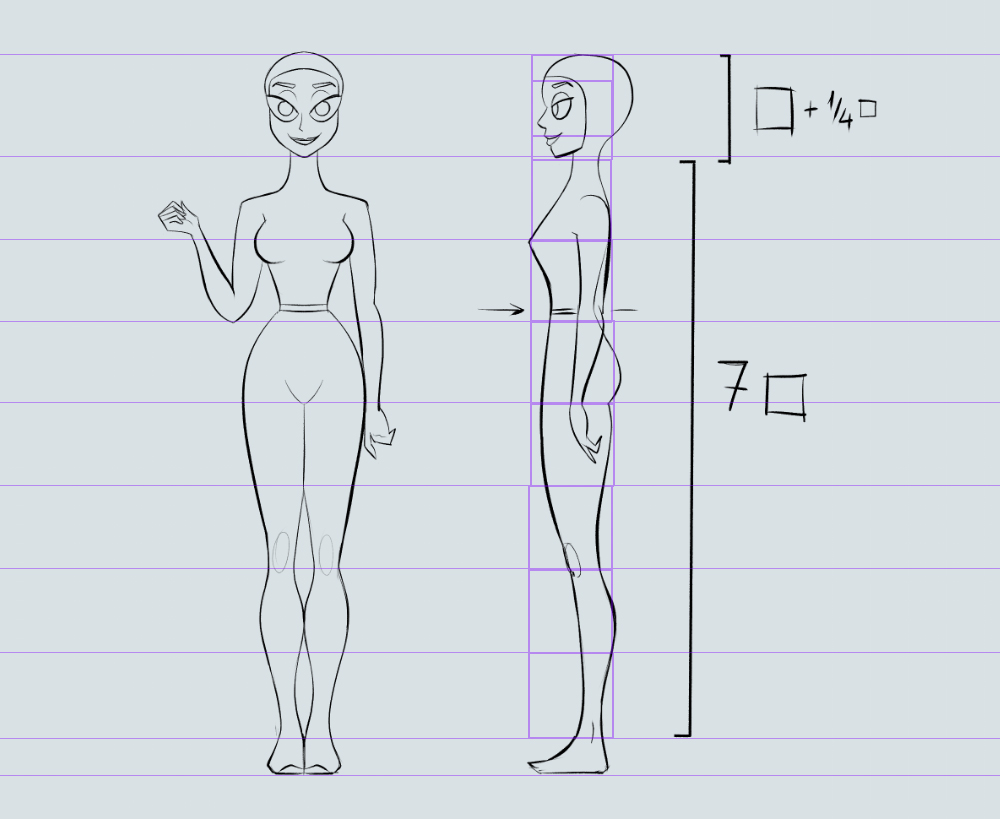
The proportions are usually established in units of “numbers of heads”. A popular model for a human figure is the “8¾-head” proportion.
(Check out recommendations from John Buscema and Stan Lee’s in their book How to draw comics the Marvel way).
I have used this model as a base, but I enlarged her head and made her neck longer. Then I reduced the size of her torso, reducing the character to about 6¾, or almost 7 heads.
I kept the modules from the model, though, since many cartoonists are familiar with it. The second module marks the chest, the waist or the belly button is a little over the end of the third module, the middle of the figure is marked by the groin or the fourth module, and the sixth is marked by the knees and the eighth by the ankles.
This makes up the seven modules of this character’s body, with the head taking up an additional module and a quarter at the top.
You can use the [Symmetric rule] to help you draw the front view.
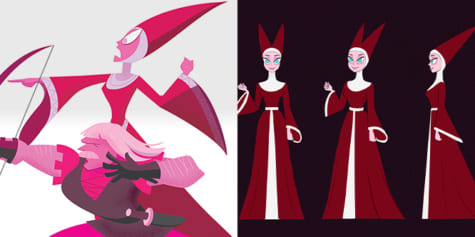
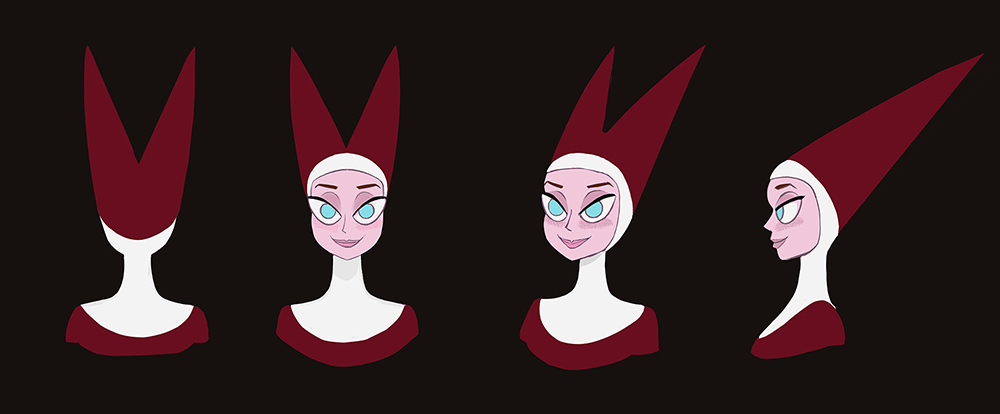
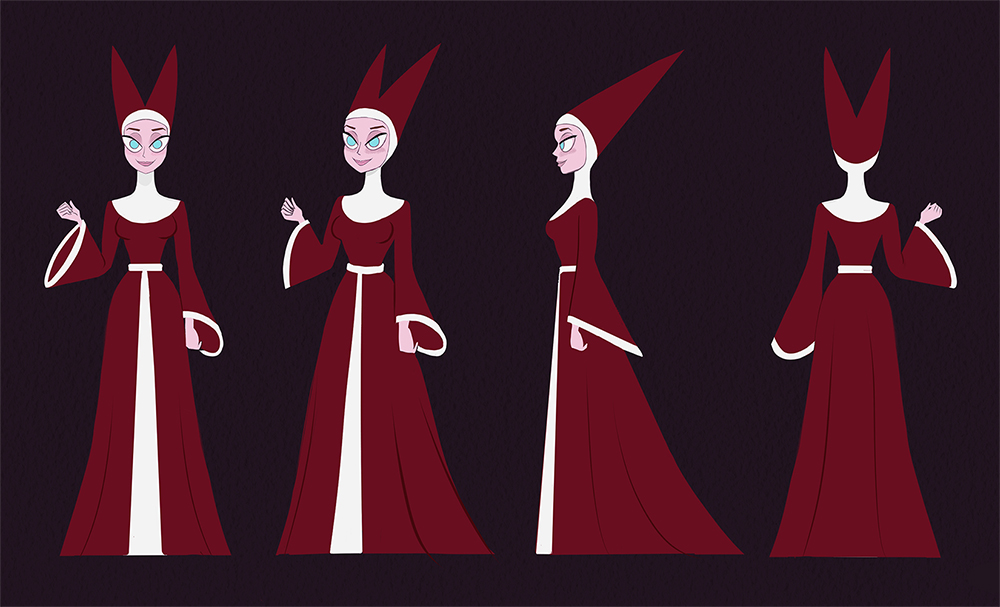
2. Full Head Turnaround
A turn or turnaround must include at least a front view of the character, a rear view, a profile, and a three-quarter view.
I am going to show it in color, because it will help me build and define the different views.
First make the profile and the front view reusing the previous drawing.
Then, using the [Ruler/Guide] draw the lines where the most important elements should go: the center of the eyes, the chin, the eyebrows, shoulders etc.
Between the front and the profile views, sketch the three-quarter view and define it so that the three views match.
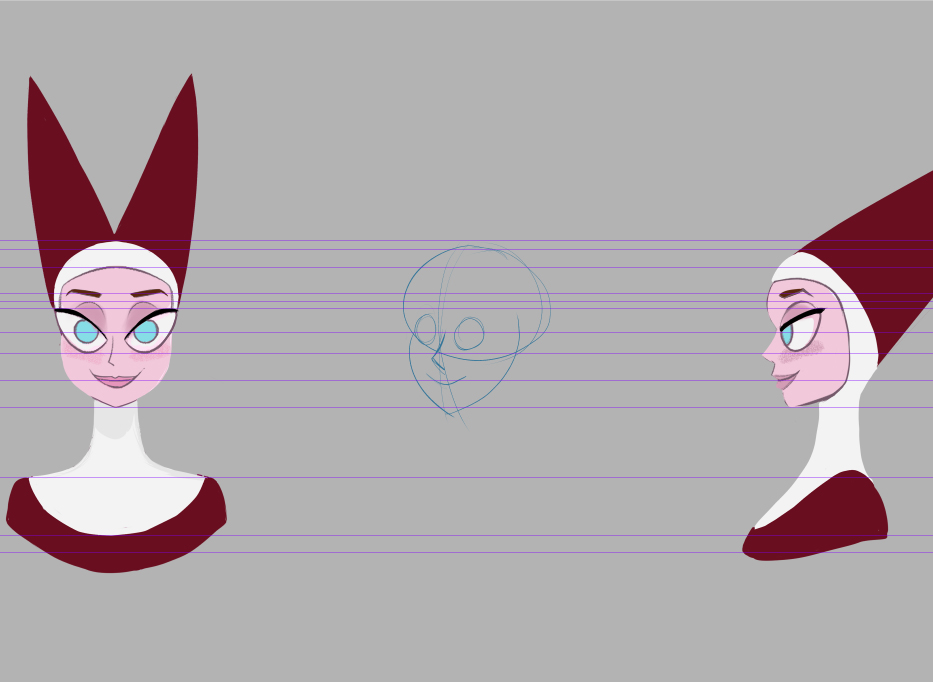
So here you have the three quarter view.
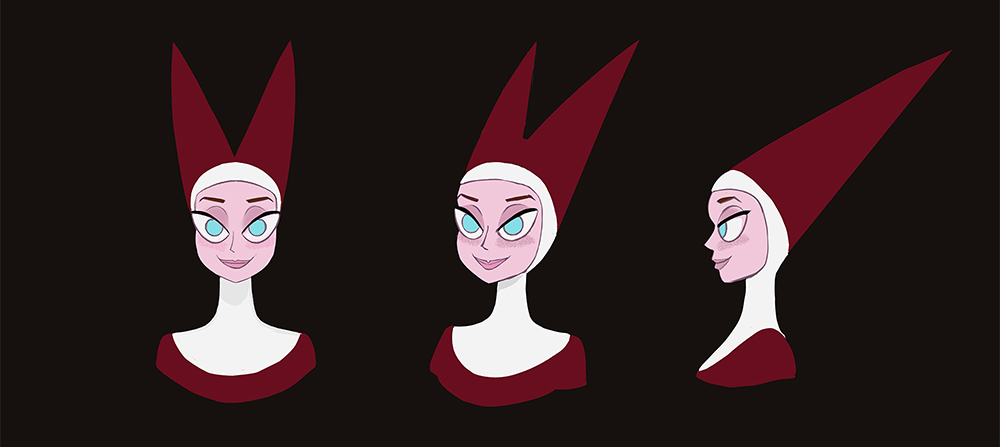
Then to get the rear view, use the front view as a guide.
3. Full Character (Body) Turnaround
Make sure you reuse your construction drawings and head turnarounds as guides to draw the body turnaround. In the example, I used the construction as a base, in one layer. And in another layer on top, I adjusted the head turnaround until it matched. From there, you’ve just got to “dress the mannequin.”
The guides, marked in blue, will help you to keep the elements matching across all the different views.
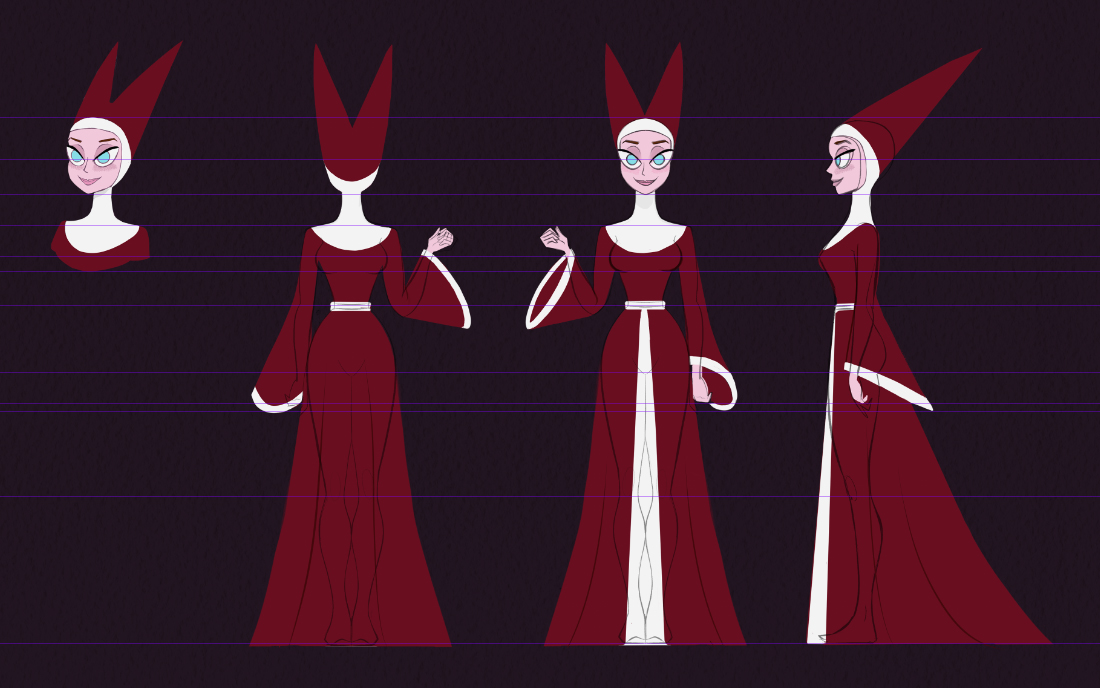
Here is the result: The lower half of the character can be stylized even more, since she still does not have shoes, nor is her skirt shown in perspective:
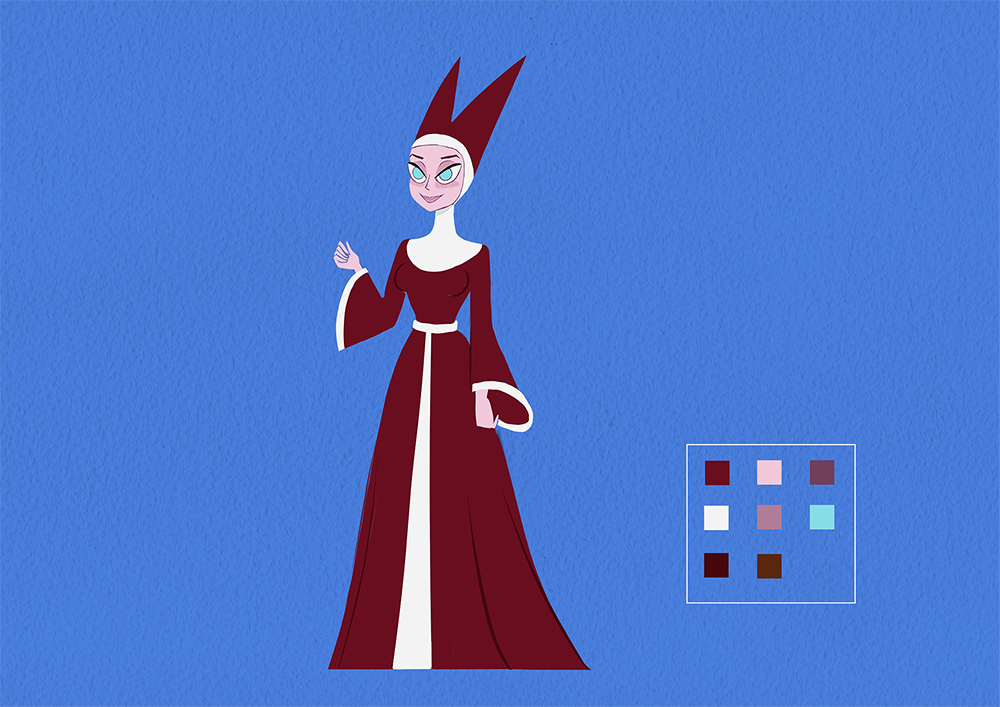
4. Color Sheet
The purpose of the color sheet is to set all the colors that will be used for the character.
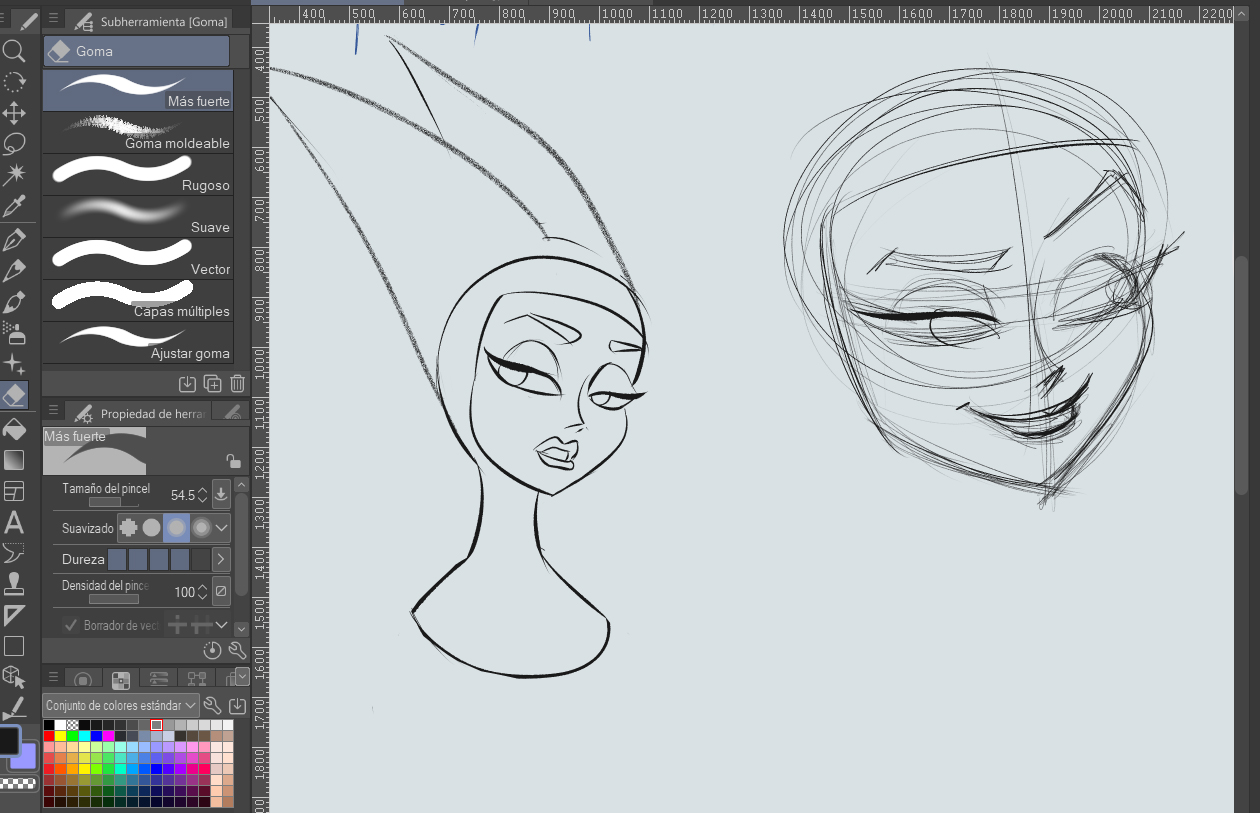
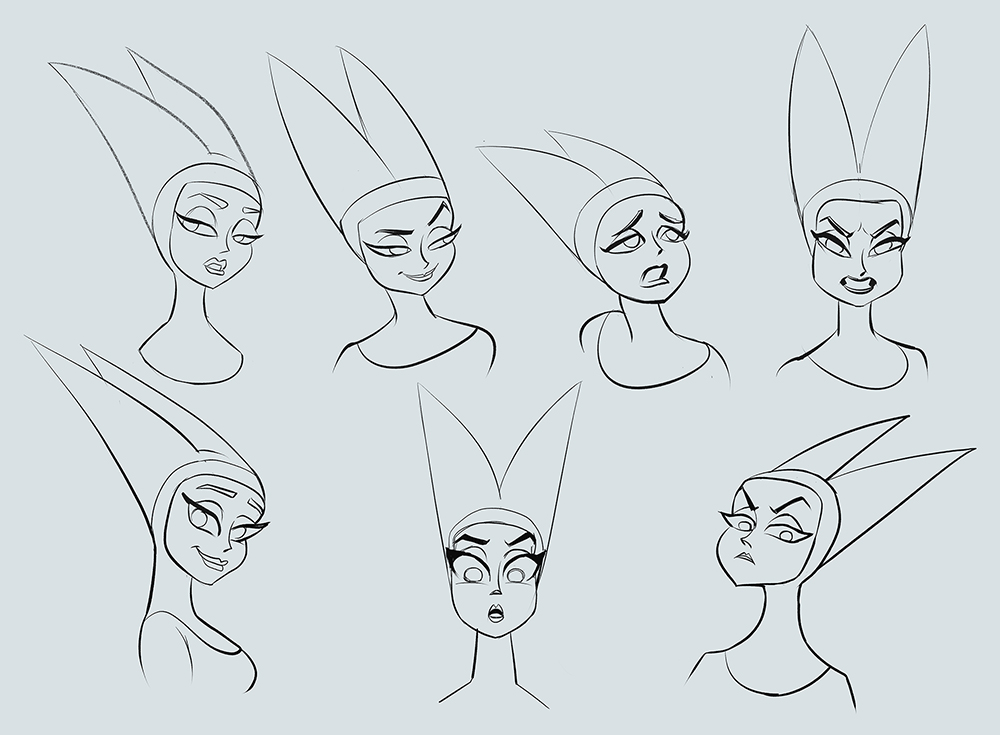
5. Expression Sheet
Our character still looks a bit stiff, like a sculpture. Now is the time to play with her, move her, give her emotions, see what she is capable of.
A character expression sheet covers at least the basic range of emotions and reactions: joy, sadness, anger, surprise, suspicion, boredom, etc.
In a broader sense, the designer looks here to get deeper into the psychology of the character to helps define their character and the way they act.
Now that the dimensions and structure of the character are set, it is convenient to use a very basic structure to sketch (like in the following sketch).
Let yourself go and have fun trying expressions, focus on the expressiveness of the eyes, mouth, and eyebrows. Sketch, and, in another layer, go over the line art.
Once you’ve got about six samples, your expression sheet is ready!
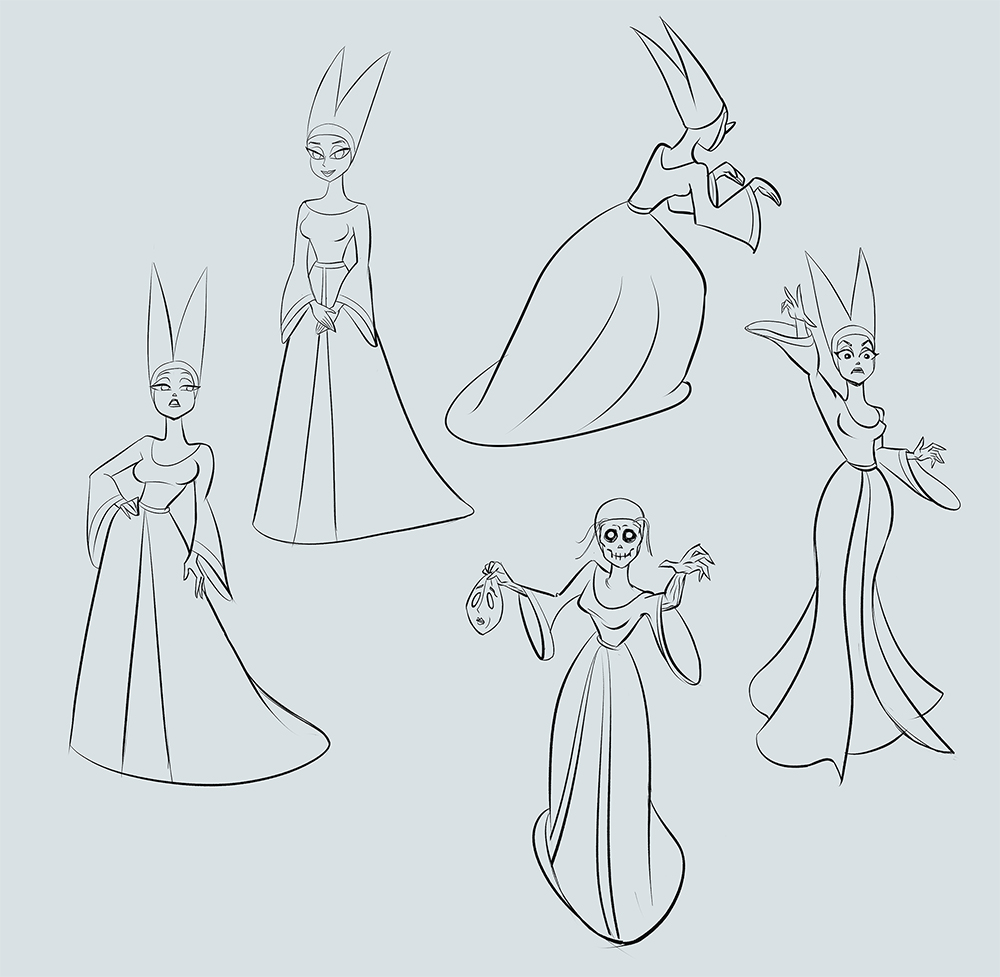
6. Pose Sheet
While the expression sheet focuses on the face, the pose sheet defines the character’s typical postures, and shows a full-length view of the character.
As in the previous sheet, look for expressiveness in the sketch. In the cleaning and inking phase, try to stick to the dimensions you gave the model in the construction.
Remember that we wanted to remind the viewer of a praying mantis with the design of this character? This subconscious identification will make our character more interesting and threatening.
Draw 4 or 5 poses at least, and the work is done.
To sum up, the model sheets used by character designers help develop all facets of the character and find that final model which sometimes is so difficult to find. These sheets are essential in animation production, but they can also be useful for whatever medium you choose to develop your character.
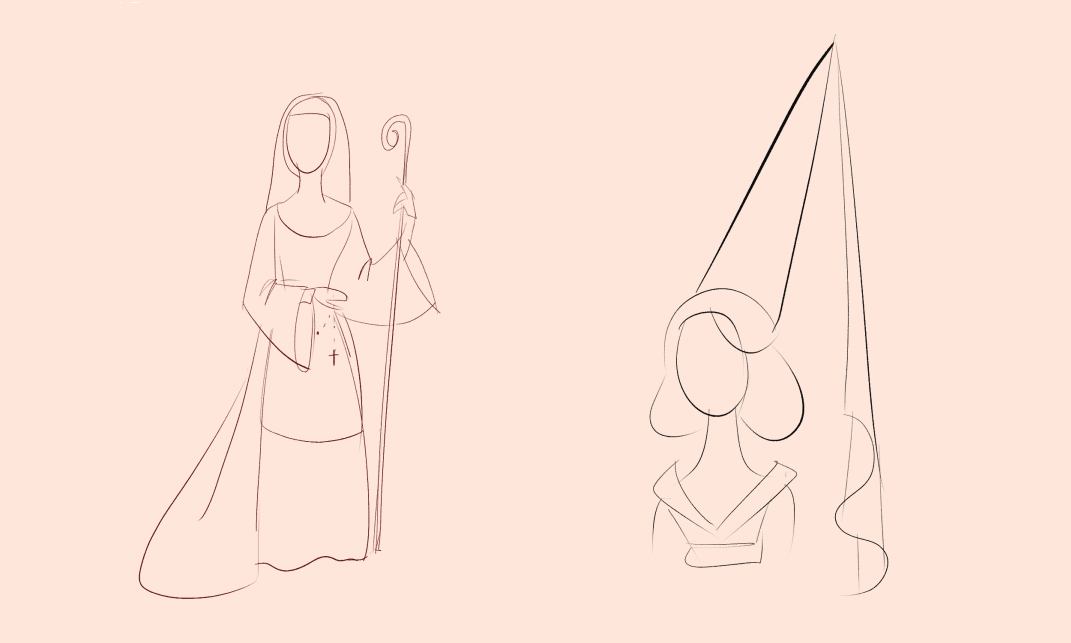
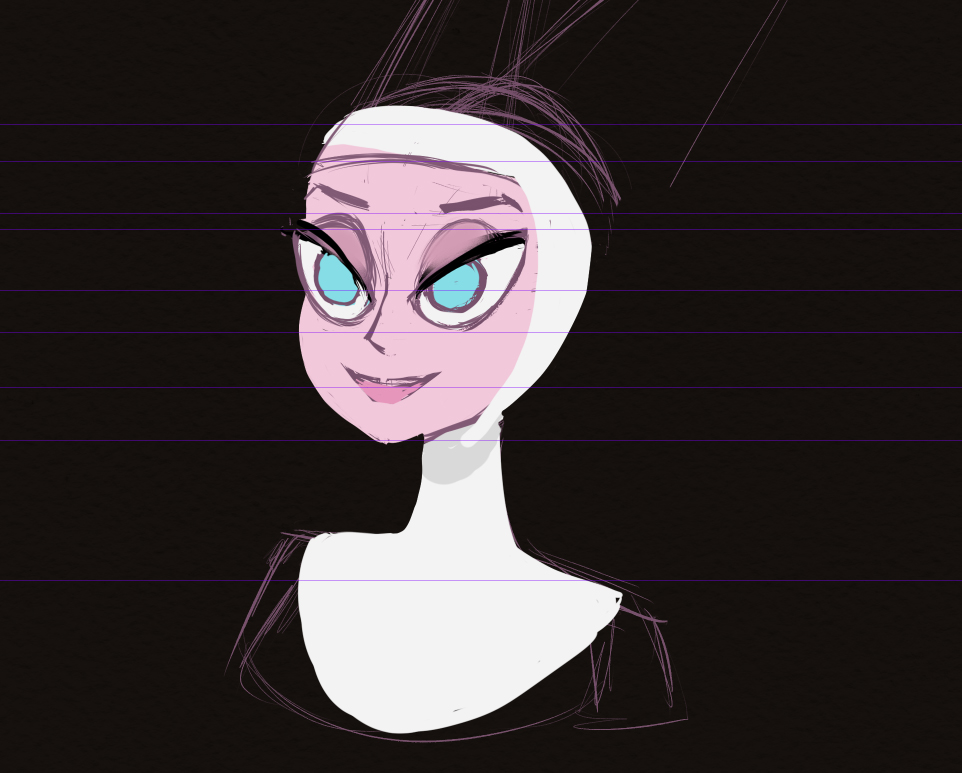
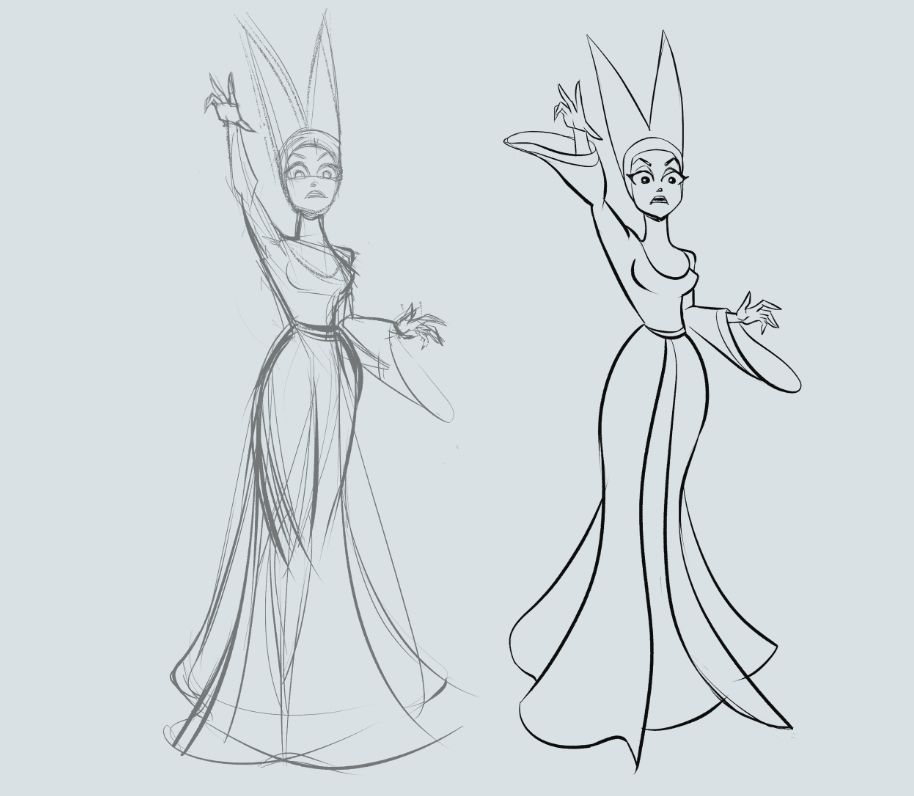
As a contrast, I’ve added the illustration below, which was from an early concept stage, before the character design process. You can see how its design has changed considerably.
Thanks for following this guide.
Interested in character art & design or what it takes to become a character designer?
Check out the link below!